
ASP.NET MVC Core的ViewComponent
轉:https://www.cnblogs.com/shenba/p/6629212.html
MVC Core新增了ViewComponent的概念,直接強行理解為檢視元件,用於在頁面上顯示可重用的內容,這部分內容包括邏輯和展示內容,而且定義為元件那麼其必定是可以獨立存在並且是高度可重用的。
其實從概念上講,在ASP.NET的歷史版本中早已有實現,從最開始的WebForm版本就提供了ascx作為使用者的自定義控制元件,以控制元件的方式將獨立的功能封裝起來。到了後來的MVC框架,提供了partial view,但是partial view就是提供檢視的重用,業務資料還是依賴於action提供。
MVC還要一個更加獨立的實現方式就是用Child Action,所謂Child Action就是一個Action定義在Controller裡面,然後標記一個[ChildAction]屬性標記。我在早期做MVC專案的時候,感覺到Child Action的功能很不錯,將一些每個頁面(但不是所有頁面)需要用到的小部件都做成Child Action,比如登入資訊,左側選單欄等。一開始覺得不錯,後來發現了嚴重效能問題結果被吊打。問題的元凶是Child Action執行的時候會把Controller的那一套生命週期的環節再執行一遍,比如OnActionExecuting,OneActionExecuted等,也就是說導致了很多無用的重複操作(因為當時OnActionExecuting也被用得很氾濫)。之後覆盤分析,Child Action執行動作的時候就好比在當前ActionExcuted之後再開出一個分支去執行其他任務,導致了Controller執行過程又嵌套了一個Controller執行過程,嚴重違背了扁平化的思想(當時公司的主流設計思想),所以後來都沒用Child Action。
簡單回顧了過去版本的實現,我們來看看MVC Core的ViewComponenet。從名稱定義來看,是要真的把功能資料和頁面都獨立出來,要不然配不上元件二字。ViewComponent獨立於其所在的View頁面和Action,更不會跟當前的Controller有任何的瓜葛,也就是說不是Child Action了。當然ViewComponent也可以重用父頁面的資料或者從然後用自己的View。當然ViewComponent是不能獨立使用的,必須在一個頁面內被呼叫。
接下來看看ViewComponent的幾種建立方式
首先準備一個專案,這裡使用基於Starter kit專案專案模板建立一個用於練習的專案
(該專案模板可以在這裡下載https://marketplace.visualstudio.com/items?itemName=junwenluo.ASPNETMVCCoreStarterKit)
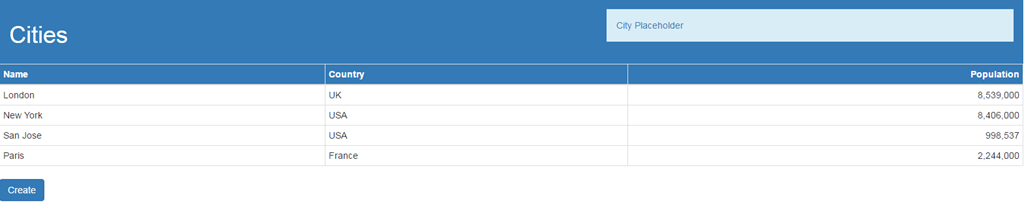
執行後的初始介面是這樣的
方式一 建立POCO View Component
POCO估計寫過程式的都知道是什麼東西,可以簡單理解為一個比較純粹的類,不依賴於任何外部框架或者包含附加的行為,純粹的只用CLR的語言建立。
用POCO方式建立的ViewComponent類必須用ViewComponent結尾,這個類能定義在任何地方(只要能被引用到),這裡我們新建一個ViewComponents目錄,然後新建如下類
public class PocoViewComponent
    {
        private readonly IRepository _repository;

        public PocoViewComponent(IRepository repository)
        {
            _repository = repository;
        }

        public string Invoke()
        {
            return $"{_repository.Cities.Count()} cities, "
                   + $"{_repository.Cities.Sum(c => c.Population)} people";
        }
    }
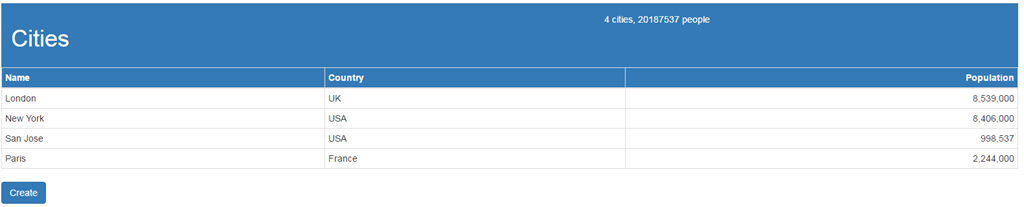
這個類很簡單,就是提供一個Invoke方法,然後返回城市的數量和總人口資訊。
然後在頁面中應用,我們把呼叫語句放在_Layout.cshtml頁面中
@await Component.InvokeAsync("Poco")
將右上角的City Placeholder替換掉,那麼執行之後可以看到右上角的內容輸出了我們預期的內容
那麼這個就是最簡單的實現ViewComponent的方式,從這個簡單的例子可以看到我們只需要提供一個約定的Invoke方法即可。
從這個簡單的Component可以看到有以下3個優勢
1 ViewComponent支援通過建構函式注入引數,也就是支援常規的依賴注入。有了依賴注入的支援,那麼Component就有了自己
獨立的資料來源
2 支援依賴注入意味著可以進行獨立的單元測試
3 由於Component的實現的高度獨立性,其可以被應用於多處,當然不會跟任何一個Controller繫結(也就不會有ChildAction帶來的麻煩)
方式二 基於ViewComponentBase建立
基於POCO方式建立的ViewComponent的好處是簡單,不依賴於其他類。如果基於ViewComponentBase建立,那麼就有了一個上下文,畢竟也是一個基礎類,總會提供一些幫助方法吧,就跟Controller一個道理。
下面是基於ViewComponent作為基類建立一個ViewComponent
public class CitySummary : ViewComponent
    {
        private readonly IRepository _repository;

        public CitySummary(IRepository repository)
        {
            _repository = repository;
        }

        public string Invoke()
        {
            return $"{_repository.Cities.Count()} cities, "
                   + $"{_repository.Cities.Sum(c => c.Population)} people";
        }
    }
咋一看跟用POCO的方式沒有什麼區別,程式碼拷貝過來就能用,當然輸出的內容也是一致的。
當然這個例子只是證明這種實現方式,還沒體現出繼承了ViewComponentBase的好處。下面來了解一下這種方式的優勢
1.實際專案中使用deViewComponent哪有這麼簡單,僅僅輸出一行字串。如果遇到需要輸出很複雜的頁面,那豈不是要拼湊很複雜的字串,這樣不優雅,更不用說單元測試,前後端分離這樣的高大上的想法。所以ViewComponentBase就提供了一個類似Controller那樣的解決方法,提供了幾個內建的ResultType,然你返回到結果符合面向物件的思想,一次過滿足上述的要求,主要有以下三種結果型別
a.ViewVIewComponentResult
可以理解為Controller的ViewResult,就是結果是通過一個VIew檢視來展示
b.ContentViewComponentResult
類似於Controller的ContentResult,返回的是Encode之後的文字結果
c.HtmlContentViewComponentResult
這個用於返回包含Html字串的內容,也就是說這些Html內容需要直接顯示,而不是Encode之後再顯示。
有了上述的理解,藉助ViewComponentBase提供的一些基類方法就可以輕鬆實現顯示一個複雜的檢視,跟Controller類似。
下面我們改進一下CitySummary,改成輸出一個ViewModel,並通過獨立的View去定義Html內容。
public class CitySummary : ViewComponent
    {
        private readonly IRepository _repository;

        public CitySummary(IRepository repository)
        {
            _repository = repository;
        }

        public IViewComponentResult Invoke()
        {
            return View(new CityViewModel
            {
                Cities = _repository.Cities.Count(),
                Population = _repository.Cities.Sum(c => c.Population)
            });
        }
    }
注意Invoke的實現程式碼,其中使用了View的方法。
這個View方法的實現邏輯類似Controller的View,但是尋找View頁面的方式不同,其尋找頁面檔案的路徑規則如下
/Views/{CurrentControllerName}/Components/{ComponentName}/Default.cshtml
/Views/Shared/Components/{ComponentName}/Default.cshtml
根據這規則,在View/Shared/目錄下建立一個Components目錄,然後再建立CitySummary目錄,接著新建一個Default.cshtml頁面
@model CityViewModel
<table class="table table-condensed table-bordered">
<tr>
<td>Cities:</td>
<td class="text-right">
@Model.Cities
</td>
</tr>
<tr>
<td>Population:</td>
<td class="text-right">
@Model.Population.ToString("#,###")
</td>
</tr>
</table>
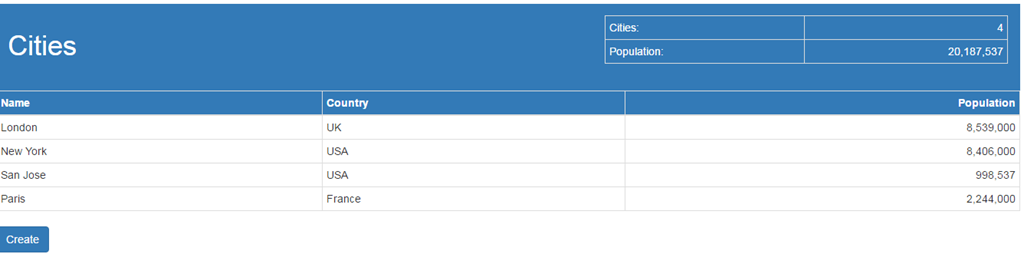
儘管頁面比較簡單,但是比起之前拼字串的方式更加強大了,下面是應用後右上角的變化效果
這就是使用View的方式,其他兩種結果型別的使用方式跟Controller的類似。
除了呼叫View方法之外,通過ViewComponentBase還可以獲得當前請求的上下文資訊,比如路由引數。
比如讀取請求id,然後載入對應Country的資料
public IViewComponentResult Invoke()
        {
            var target = RouteData.Values["id"] as string;
            var cities =
                _repository.Cities.Where(
                    city => target == null || Compare(city.Country, target, StringComparison.OrdinalIgnoreCase) == 0).ToArray();
            return View(new CityViewModel
            {
                Cities = cities.Count(),
                Population = cities.Sum(c => c.Population)
            });
        }
當然也可以通過方法引數的形式傳入id,比如我們可以在頁面呼叫的時候傳入id引數,那麼Invoke方法可以改成如下
public IViewComponentResult Invoke(string target)
        {
            target = target ?? RouteData.Values["id"] as string;
            var cities =
                _repository.Cities.Where(
                    city => target == null || Compare(city.Country, target, StringComparison.OrdinalIgnoreCase) == 0).ToArray();
            return View(new CityViewModel
            {
                Cities = cities.Count(),
                Population = cities.Sum(c => c.Population)
            });
        }
然後在介面呼叫的時候
@await Component.InvokeAsync("CitySummary", new { target = "USA" }),傳入target引數。
上面介紹的都是同步執行的ViewComponent,接下來我們來看看支援非同步操作的ViewComponent。
下面我們建立一個WeatherViewComponent,獲取城市的天氣,這獲取天氣通過非同步的方式從外部獲取。
在Components資料夾建立一個CityWeather資料夾,然後建立一個Default.cshtml檔案,內容如下
@model string
<img src="http://@Model"/>
這個頁面只是顯示一個天氣的圖片,具體的值通過服務端返回。
然後在ViewComponents目錄新建一個CityWeather類,如下
public class CityWeather : ViewComponent
{
    private static readonly Regex WeatherRegex = new Regex(@"<img id=cur-weather class="mtt" title="".+?"" src=""//(.+?.png)"" width=80 height=80>");

    public async Task<IViewComponentResult> InvokeAsync(string country, string city)
    {
        city = city.Replace(" ", string.Empty);
        using (var client = new HttpClient())
        {
            var response = await client.GetAsync($"https://www.timeanddate.com/weather/{country}/{city}");
            var content = await response.Content.ReadAsStringAsync();
            var match = WeatherRegex.Match(content);
            var imageUrl = match.Groups[1].Value;
            return View("Default", imageUrl);
        }
    }
}
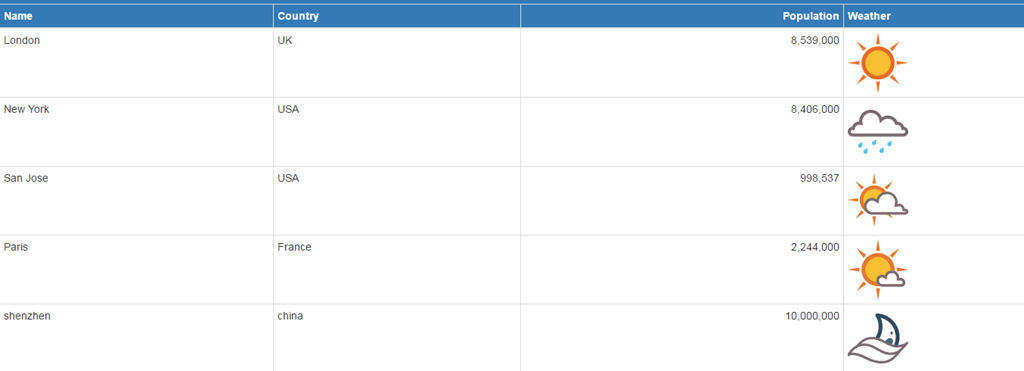
這個ViewComponent最大的特別之處是,它從外部獲取城市的天氣資訊,這個過程使用的async的方法,非同步從http下載得到內容後,解析返回當前天氣的圖片。
對於每一個城市我們都可以呼叫這個ViewComponent,在城市列表中增加一列顯示當前的天氣圖片
最後一種建立方式:混雜在Controller中
聽名字就覺得不對勁了,難道又回到ChildAction的老路。其實不是,先看看定義。
就是說將ViewComponent的Invoke方法定義在Controller中,Invoke的方法簽名跟之前兩種方式相同。
那麼這麼做的目的實際上是為了某些程式碼的共用,不多說先看看程式碼如何實現。
在HomeController加入如下方法
public IViewComponentResult Invoke() => new ViewViewComponentResult
        {
            ViewData = new ViewDataDictionary<IEnumerable<City>>(ViewData,
        _repository.Cities)
        };
這個Invoke方法就是普通的ViewComponent必須的方法,最關鍵是重用了這個Controller裡面的_repository,當然實際程式碼會更有意義些。
然後給HomeController加入如下屬性標記
[ViewComponent(Name = "ComboComponent")]
這裡使用了ViewComponent這個屬性標記在Controller上,一看就知道這是用來標記識別ViewComponent的。
接著建立檢視,在Views/Shared/Components/下建立一個ComboComponent目錄,並建立一個Default.cshtml檔案
@model IEnumerable<City>
<table class="table table-condensed table-bordered">
    <tr>
        <td>Biggest City:</td>
        <td>
            @Model.OrderByDescending(c => c.Population).First().Name
        </td>
    </tr>
</table>
然後呼叫跟其他方式一樣,按名稱去Invoke
@await Component.InvokeAsync("ComboComponent")
小結
OK,以上就是ViewComponent的三種建立方式,都比較簡單易懂,推薦使用方式二。
示例程式碼:https://github.com/shenba2014/AspDotNetCoreMvcExamples/tree/master/CustomViewComponent