
用caffe訓練自己的資料集(二)
阿新 • • 發佈:2018-11-06
本文主要參考了:https://blog.csdn.net/heimu24/article/details/53581362
https://blog.csdn.net/gaohuazhao/article/details/69568267
五、構建網路
在myfile4下建立一個.prototxt檔案,來搭建網路。檔名為:myfile4_train_test.prototxt 構建的網路內容如下:
name: "myfile4"
layer {
name: "data"
type: "Data"
top: "data"
top: "label"
include {
phase: TRAIN
}
transform_param{
mean_file:"examples/myfile4/mean.binaryproto"
}
data_param {
source: "examples/myfile4/img_train_lmdb"
batch_size: 50
backend: LMDB
}
}
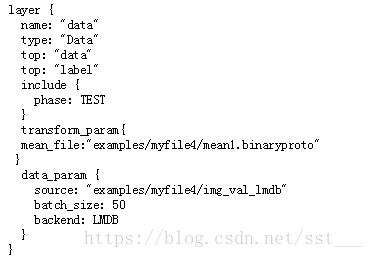
layer {
name: "data"
type: "Data"
top: "data"
top: "label"
include {
phase: TEST
}
transform_param{
mean_file:"examples/myfile4/mean1.binaryproto"
}
data_param {
source: "examples/myfile4/img_val_lmdb"
batch_size: 50
backend: LMDB
}
}
layer {
name: "conv1"
type: "Convolution"
bottom: "data"
top: "conv1"
param {
lr_mult: 1
}
param {
lr_mult: 2
}
convolution_param {
num_output: 32
pad:2
kernel_size: 5
stride: 1
weight_filler {
type:"gaussian"
std:0.0001
}
bias_filler {
type: "constant"
}
}
}
layer {
name: "pool1"
type: "Pooling"
bottom: "conv1"
top: "pool1"
pooling_param {
pool: MAX
kernel_size: 3
stride: 2
}
}
layer {
name:"relu1"
type:"ReLU"
bottom:"pool1"
top:"pool1"
}
layer {
name: "conv2"
type: "Convolution"
bottom: "pool1"
top: "conv2"
param {
lr_mult: 1
}
param {
lr_mult: 2
}
convolution_param {
num_output: 32
pad:2
kernel_size: 5
stride: 1
weight_filler {
type: "gaussian"
std:0.01
}
bias_filler {
type: "constant"
}
}
}
layer {
name:"relu2"
type:"ReLU"
bottom:"conv2"
top:"conv2"
}
layer {
name: "pool2"
type: "Pooling"
bottom: "conv2"
top: "pool2"
pooling_param {
pool: AVE
kernel_size: 3
stride: 2
}
}
layer {
name:"conv3"
type:"Convolution"
bottom:"pool2"
top:"conv3"
param{
lr_mult:1
}
param{
lr_mult:2
}
convolution_param {
num_output:64
pad:2
kernel_size:5
stride:1
weight_filler {
type:"gaussian"
std:0.01
}
bias_filler{
type:"constant"
}
}
}
layer {
name:"relu3"
type:"ReLU"
bottom:"conv3"
top:"conv3"
}
layer {
name:"pool3"
type:"Pooling"
bottom:"conv3"
top:"pool3"
pooling_param {
pool:AVE
kernel_size:3
stride:2
}
}
layer {
name: "ip1"
type: "InnerProduct"
bottom: "pool3"
top: "ip1"
param {
lr_mult: 1
}
param {
lr_mult: 2
}
inner_product_param {
num_output: 64
weight_filler {
type: "gaussian"
std:0.1
}
bias_filler {
type: "constant"
}
}
}
layer {
name: "ip2"
type: "InnerProduct"
bottom: "ip1"
top: "ip2"
param {
lr_mult: 1
}
param {
lr_mult: 2
}
inner_product_param {
num_output: 10
weight_filler {
type: "gaussian"
std:0.1
}
bias_filler {
type: "constant"
}
}
}
layer {
name:"accuracy"
type:"Accuracy"
bottom:"ip2"
bottom:"label"
top:"accuracy"
include {
phase:TEST
}
}
layer {
name: "loss"
type: "SoftmaxWithLoss"
bottom: "ip2"
bottom: "label"
}接下來要設定網路的訓練形式,也是建立一個.prototxt檔案。檔名為myfile4_solver.prototxt,內容如下:
net: "examples/myfile4/myfile4_train_test.prototxt"
test_iter: 2
test_interval: 50
base_lr: 0.001
lr_policy: "step"
gamma: 0.1
stepsize:400
momentum:0.9
weight_decay:0.004
display:10
max_iter: 2000
snapshot: 2000
snapshot_prefix: "examples/myfile4"
solver_mode: CPU
在caffe的根目錄下執行 build/tools/caffe train -solver examples/myfile4/myfile4_solver.prototxt
就會得到想要的模型
注意:有的訓練網路TEST,有的訓練網路不帶測試,就是加不加下面這段
如果不加這段的網路,需要在solver檔案中把有關測試的設定去掉否則會出錯。需要去掉的語句是test_iter還有test_interval等語句。
至此訓練也已經完成,接下來需要做的就是用已經訓練好的模型去識別想要識別的資料。