
.NET Core中使用EF Core連線MySQL
阿新 • • 發佈:2018-11-06
最近一直在搗鼓.NET Core方面的東西,順便寫下點東西記錄下
1、開啟vs2017,新建一個專案
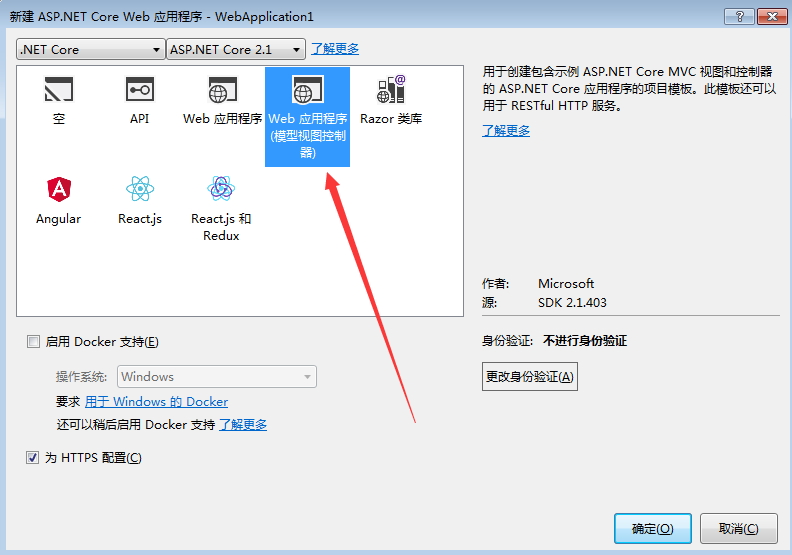
2、vs會自動生成一個專案,然後開啟NuGet搜尋MySql.Data.EntityFrameworkCore下載

3、然後在Models下面新建一個Student類,然後再新建一個類繼承DbContext類
using System; using System.Collections.Generic; using System.ComponentModel.DataAnnotations; using System.Linq; using System.Threading.Tasks;namespace MySql.Test.Models { public class Student { [Key] public int ID { get; set; } [Display(Name="姓名")] public string Name { get; set; } [Display(Name="年齡")] public int Age { get; set; } } }
public class MysqlDbContext : DbContext {public MysqlDbContext(DbContextOptions<MysqlDbContext> options):base(options) { } //protected override void OnConfiguring(DbContextOptionsBuilder optionsBuilder) //{ // optionsBuilder.UseMySQL("server=.;database=TestDb;user=root;password=123456;");//} //protected override void OnModelCreating(ModelBuilder modelBuilder) //{ // base.OnModelCreating(modelBuilder); //} public DbSet<Student> students { get; set; } }
這裡說明下MySQL連線也可以寫在這裡,但我們後面會注入到services中
4、然後我們在appsettings.json裡新增一個連線字串(.NET Core使用在appsettings.json裡讀取配置,類似於webconfig)
{
  "Logging": {
    "LogLevel": {
      "Default": "Warning"
    }
  },
  "AllowedHosts": "*",
  "ConnectionStrings": { "MysqlConnection": "Data Source=.;Database=TestDb;User ID=root;Password=123456;pooling=true;port=3306;sslmode=none;CharSet=utf8;" }
}
5、然後開啟Startup,將MySQL連線注入services,具體Startup使用可以去看相關部落格
public void ConfigureServices(IServiceCollection services)
        {
            services.Configure<CookiePolicyOptions>(options =>
            {
                // This lambda determines whether user consent for non-essential cookies is needed for a given request.
                options.CheckConsentNeeded = context => true;
                options.MinimumSameSitePolicy = SameSiteMode.None;
            });


            services.AddMvc().SetCompatibilityVersion(CompatibilityVersion.Version_2_1);

            var connection = Configuration.GetConnectionString("MysqlConnection");
            services.AddDbContext<MysqlDbContext>(options => options.UseMySQL(connection));
        }
6、然後我們就可以開始資料遷移了
在vs中的“程式包管理器控制檯”中輸入如下兩個命令
Add-Migration init(執行此命令專案生成一個目錄(Migration))
Update-Database init
然後我們就可以在資料庫看到生成的資料庫以及資料表了
注意:如果出現錯誤提示xxxx.__EFMigrationsHistory doesn't exist
我們需要手動建立
CREATE TABLE `__EFMigrationsHistory` ( `MigrationId` nvarchar(150) NOT NULL, `ProductVersion` nvarchar(32) NOT NULL, PRIMARY KEY (`MigrationId`) );
然後再開始遷移就好了
最後還遇到一個問題是:如果已經資料遷移後,又在Models新增一個類再次更新時需要指定到具體的表名,不然好像會出錯。