
區塊鏈入門(5)Truffle 專案實戰,Solidity IDE, 智慧合約部署
在上一張我們學習了Truffle專案的建立,部署等相關內容,今天我們就來實戰一下.

今天我們要做3件事:
        1) 學習搭建一個Solidity IDE(Remix).
        2) 使用這個Solidity Ide編寫一份智慧合約.
        3) 在我們前面第1,2,3章中部署的私有網路節點叢集中部署這個合約,並能夠在不同的節點中呼叫這個合約.

Remix,是一個Solidity開發語言的Ide, 它是一款執行在瀏覽器端的solidity ide,也是官方推薦使用的ide.

另外還有其它的solidiy ide,比如:Ethereum Studio, IntelliJ IDEA Plugin, Vistual studio extension...等這些ide的詳細情況請參考官方文件:
https://solidity.readthedocs.io/en/latest/index.html

我們主要講解Remix.
官方推薦的Solidity基於瀏覽器端的Ide(Remix)
執行Remix有兩種方式,一種是直接用瀏覽器開啟網址: https://remix.ethereum.org/
直接開啟官方部署的編輯器,進行開發.

另外一種方式就是在本地部署Remix服務, 順序執行下面的命令:
| 1 2 3 4 |
|
Remix服務就部署好了,然後在瀏覽器中開啟:http://127.0.0.1:8080
就可以直接使用本地部署Remix進行開發了.

本地搭建Rmix 編輯器的好處,是可以隨意修改編輯器中,原始碼的字型.
| 1 2 3 4 5 6 7 8 9 10 11 12 13 14 15 16 17 18 19 20 21 |
'Monaco', 'Menlo', 'Consolas', 'source-code-pro', monospace;\
|
在font這這一行,把字型修改成自己喜歡的大小和樣式.

然後重新執行命令:
| 1 2 |
|
重新開啟網頁,即可看到效果:
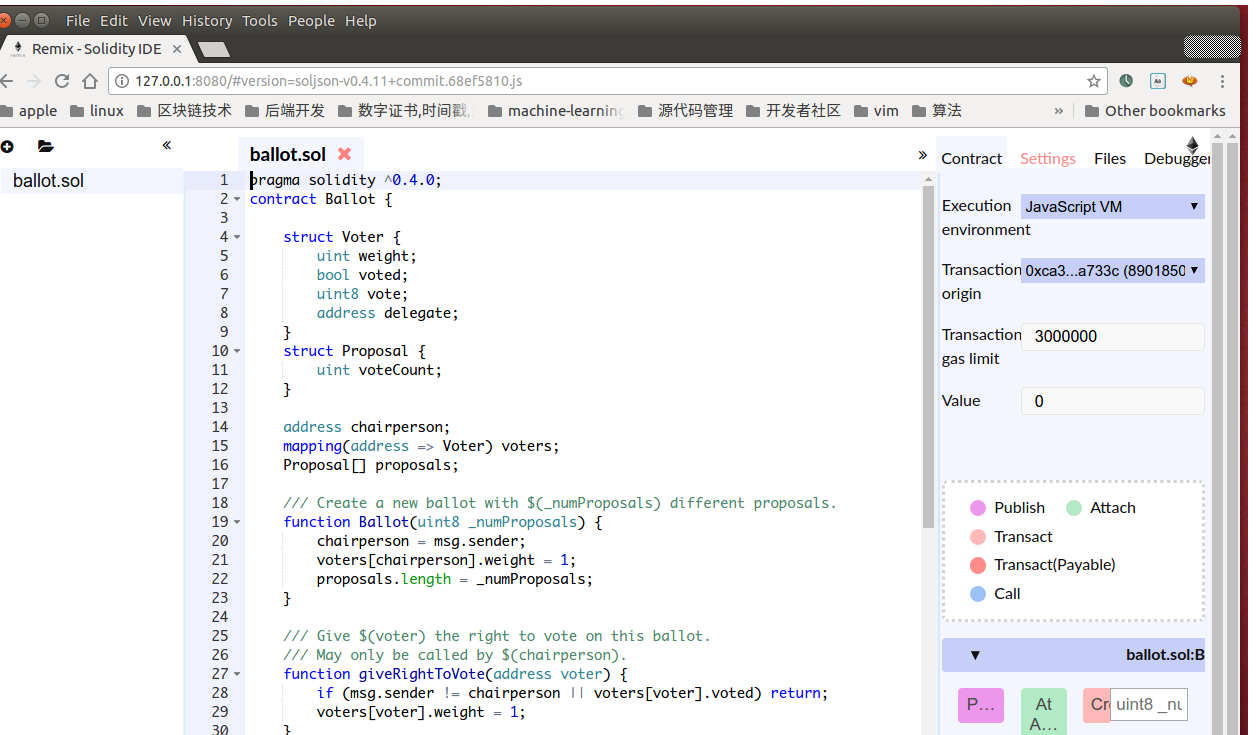
在Remix上編寫第一份智慧合約
開啟瀏覽器,訪問http://127.0.0.1:8080, 新建檔案'SimpleStorage.sol'
| 1 2 3 4 5 6 7 8 9 10 11 12 13 |
|
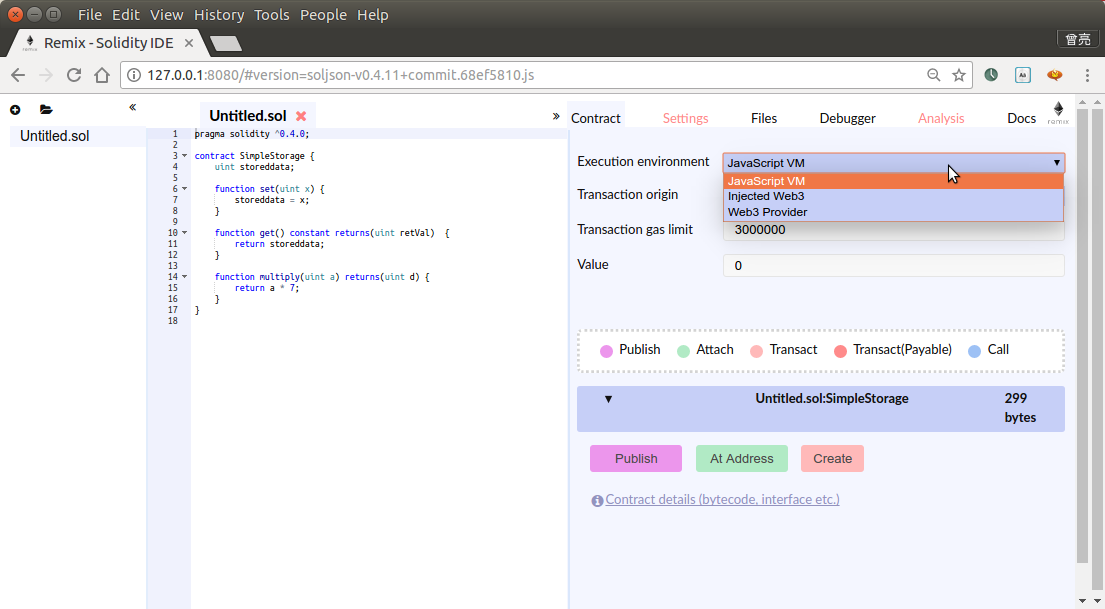
這個SimpleStorage功能很簡單,把一個數乘以7並儲存起來,提供獲取和設定它的介面.

大家最好手動輸入以上內容體驗一下Remix的效果.也可以故意輸錯,看看Remix是如何提醒錯誤的.
Remix除錯模式
第一種是預設模式:javascript vm
第二種,是通過本地私有網路的rpc埠,連結到本地私有網路進行除錯
還記得我們第2章中建立的以太坊私有網路節點叢集嗎? 進入之前的私有網路目錄,並使用我們講過的方法啟動節點:
| 1 2 |
|
回到Remix瀏覽器Ide中,選中右側邊欄的'Contact'選項卡.在'Execution environment'選項中,選擇:'web3 provider', ide會彈出提示,讓你輸入之前我們啟動的私有網路的rpc地址和埠, 輸入:
http://localhost:8200

確定, 可以看到ide彈出提示:
| 1 |
|
我們按照官方提供的方法,增加幾個選項,啟動命令修改之後如下:
| 1 2 3 |
|
然後Remix重新連結私有網路的RPC地址, Idea沒有了錯誤提示. 回到剛才啟動的網路節點,在命令列輸入命令檢視賬號:
| 1 |
|
觀察Remix中, 有側邊欄'Contract' tab頁中的'Transaction origin',這裡顯示的就是這個賬號地址.
點選下方的'create'按鈕.錯誤又來了:

    callback contain no result Error: authentication needed: password or unlock

提示賬號被鎖定,需要'Transaction origin'中指定的賬號的密碼,或者解鎖賬戶.
回到geth命令列,執行下面的命令解鎖賬戶:
| 1 2 |
|
再次點選'Create', 出現提示:

並且在geth命令列中,看到了一個提示:
    > INFO [06-19|00:21:11] Submitted contract creation              fullhash=0x5aaf0021c94f52e37eda6c17cfbea2995c1ad1935816e7cac84c73448bd6ab2d contract=0xa7fdc326fa65a15665e3637ff33a120ff3758cdb
    >

就像之前我們在第三章中,從一個賬戶傳送以太幣到另一個賬戶,需要呼叫miner.start(),挖礦來確認我們的交易一樣.
這裡我們呼叫一下:
    > miner.start(3); admin.sleepBlocks(1); miner.stop();
    INFO [06-19|00:22:31] Updated mining threads                   threads=3
    INFO [06-19|00:27:08] Successfully sealed new block            number=38 hash=b7fdac…eb3c3f
    INFO [06-19|00:27:08]