
序列化模組json,pickle,shelve
序列化模組
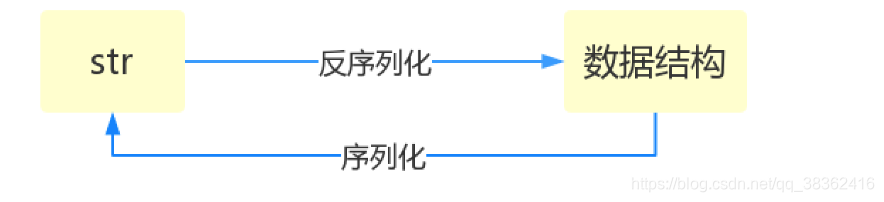
序列化——將原本的字典、列表等內容轉換成一個字串的過程就叫做序列化。
說明:
(1) 能儲存在檔案中的一定是字串 或者是 位元組
(2)能在網路上傳輸的 只有位元組
由字典 dic --> 字串的這個過程是序列化
由 字串 --> dic的這個過程是反序列化
序列化 == 創造一個序列 ==》創造一個字串
例項化 == 創造一個例項
序列化的目的
1、以某種儲存形式使自定義物件持久化;
2、將物件從一個地方傳遞到另一個地方。
3、使程式更具維護性。
python中的序列化模組
(1)json 所有的程式語言都通用的序列化格式
# 它支援的資料型別非常有限 數字 字串 列表 字典
(2)pickle
# pickle支援python中所有的資料型別
(3)shelve python3.* 之後才有的
json
Json模組提供了四個功能:dumps、dump、loads、load
loads和dumps
import json
#dumps序列化 loads反序列化  只在記憶體中操作資料 主要用於網路傳輸 和多個數據與檔案打交道
#一個字典進行序列化
dic = {'happy': ('開心', 666)}
#序列化
ret = json.dumps(dic, ensure_ascii=False)
print(type(dic), dic)
print(type(ret), ret)
#反序列化
res = json.loads(ret)
print(type(res), res)
load和dump
#dump序列化  load反序列化   主要用於一個數據直接存在檔案裡—— 直接和檔案打交道
import json
dic1 = {'happy': ('開心', 666)}
f = open('happy', 'w', encoding='utf-8')
json.dump(dic1, f, ensure_ascii=False)    # 先接收要序列化的物件 再接受檔案控制代碼
f.close()
#loads讀取檔案
f = open('happy', 'r', encoding='utf-8')
ret = json.load(f)
print(type(ret), ret)
帶引數
#dumps帶引數的使用
data = {'username': ['李華', '聰明的孩子'], 'sex': 'male', 'age': 16}
json_dic2 = json.dumps(data,sort_keys=True,indent=4,separators=(',',':'),ensure_ascii=False)
print(json_dic2)
引數說明:
Serialize obj to a JSON formatted str.(字串表示的json物件)
Skipkeys:預設值是False,如果dict的keys內的資料不是python的基本型別(str,unicode,int,long,float,bool,None),設定為False時,就會報TypeError的錯誤。此時設定成True,則會跳過這類key
ensure_ascii:,當它為True的時候,所有非ASCII碼字元顯示為\uXXXX序列,只需在dump時將ensure_ascii設定為False即可,此時存入json的中文即可正常顯示。)
If check_circular is false, then the circular reference check for container types will be skipped and a circular reference will result in an OverflowError (or worse).
If allow_nan is false, then it will be a ValueError to serialize out of range float values (nan, inf, -inf) in strict compliance of the JSON specification, instead of using the JavaScript equivalents (NaN, Infinity, -Infinity).
indent:應該是一個非負的整型,如果是0就是頂格分行顯示,如果為空就是一行最緊湊顯示,否則會換行且按照indent的數值顯示前面的空白分行顯示,這樣打印出來的json資料也叫pretty-printed json
separators:分隔符,實際上是(item_separator, dict_separator)的一個元組,預設的就是(‘,’,’:’);這表示dictionary內keys之間用“,”隔開,而KEY和value之間用“:”隔開。
default(obj) is a function that should return a serializable version of obj or raise TypeError. The default simply raises TypeError.
sort_keys:將資料根據keys的值進行排序。
To use a custom JSONEncoder subclass (e.g. one that overrides the .default() method to serialize additional types), specify it with the cls kwarg; otherwise JSONEncoder is used.
多個字典進行序列化
import json
dic1 = {'happy': ('開心', 666)}
dic2 = {'miaomiao': ('cat', 123)}
dic3 = {'love': ('愛', 521)}
dic4 = {'heart': ('初心', 999)}
ret1 = json.dumps(dic1)
f = open('happy', 'w', encoding='utf-8')
f.write(ret1 + '\n')
ret2 = json.dumps(dic2)
f .write(ret2 + '\n')
ret3 = json.dumps(dic3)
f.write(ret3 + '\n')
ret4 = json.dumps(dic4)
f.write(ret4 + '\n')
f.close()

#從檔案中讀出多行序列化的內容
f = open('happy', 'r', encoding='utf-8')
for line in f:
    print(json.loads(line.strip()))
f.close()
json 中的注意事項
json不支援元組 不支援除了str資料型別之外的key
import json
dic = {(190,90,'哈哈'):"luck"}    # json不支援元組 不支援除了str資料型別之外的key
 print(json.dumps(dic))
#報錯
pickle
pickle模組提供了四個功能:dumps、dump(序列化,存)、loads(反序列化,讀)、load (不僅可以序列化字典,列表…可以把python中任意的資料型別序列化)
dump 和 load
import pickle
dic2 = {'miaomiao': ('cat', 123)}
f = open('happy', 'wb' )    # 使用pickle dump必須以+b的形式開啟檔案
pickle.dump(dic2, f)
f.close()

f = open('happy', 'rb')
print(pickle.load(f))
f.close()
dumps 和 loads
import pickle
dic1 = {'happy': ('開心', 666)}
ret1 = pickle.dumps(dic1)   # 序列化結果 不是一個可讀的字串 而是一個bytes型別
print(ret1)
print(pickle.loads(ret1))
關於寫多行
import pickle
dic1 = {'happy': ('開心', 666)}
dic2 = {'miaomiao': ('cat', 123)}
dic3 = {'love': ('愛', 521)}
dic4 = {'heart': ('初心', 999)}
f = open('happy', 'wb')
pickle.dump(dic1, f)
pickle.dump(dic2, f)
pickle.dump(dic3, f)
pickle.dump(dic4, f)
f.close()
# 讀寫入的多行
f = open('happy', 'rb')
while True:
    try:
        print(pickle.load(f))
    except EOFError:
        break
json 與 pickle的區別
json,用於字串 和 python資料型別間進行轉換pickle,用於python特有的型別 和 python的資料型別間進行轉換
json 在寫入多次dump的時候 不能對應執行多次load來取出資料,pickle可以
json 如果要寫入多個元素 可以先將元素dumps序列化,f.write(序列化+'\n')寫入檔案
讀出元素的時候,應該先按行讀檔案,在使用loads將讀出來的字串轉換成對應的資料型別
shelve
python 專有的序列化模組 只針對檔案, 用來持久化任意的Python物件
感覺比pickle用起來更簡單一些,它也是一個用來持久化Python物件的簡單工具。當我們寫程式的時候如果不想用關係資料庫那麼重量級的東東去儲存資料,不妨可以試試用shelve。shelf也是用key來訪問的,使用起來和字典類似。shelve其實用anydbm去建立DB並且管理持久化物件的。shelve只有一個open方法。
建立一個新的shelve,直接使用shelve.open()就可以建立了,可以直接存入資料。
import shelve
s = shelve.open('test_shelve.db') #開啟檔案
try:
    s['key'] = {'int': 9, 'float': 10.0, 'string': 'happy'}#直接對檔案控制代碼操作,就可以存入資料
finally:
    s.close()
如果要再次訪問
import shelve
s = shelve.open('test_shelve.db')
try:
    existing = s['key']#取出資料的時候也只需要直接用key獲取即可,但是如果key不存在會報錯
finally:
    s.close()
print(existing)
dbm這個模組有個限制,它不支援多個應用同一時間往同一個DB進行寫操作。所以當我們知道我們的應用如果只進行讀操作,我們可以讓shelve通過只讀方式開啟DB:
import shelve
s = shelve.open('test_shelve.db', flag='r')
try:
    existing = s['key']
finally:
    s.close()
print(existing)
當我們的程式試圖去修改一個以只讀方式開啟的DB時,將會拋一個訪問錯誤的異常。異常的具體型別取決於anydbm這個模組在建立DB時所選用的DB。
寫回(Write-back)
由於shelve在預設情況下是不會記錄待持久化物件的任何修改的,所以我們在shelve.open()時候需要修改預設引數,否則物件的修改不會儲存。
import shelve
s = shelve.open('test_shelve.db')
try:
    print(s['key'])
    s['key']['new_value'] = 'this was not here before'
finally:
    s.close()

s = shelve.open('test_shelve.db', writeback=True)
try:
    print(s['key'])
finally:
    s.close()
上面這個例子中,由於一開始我們使用了預設引數shelve.open()了,因此第6行修改的值即使我們s.close()也不會被儲存。
所以當我們試圖讓shelve去自動捕獲物件的變化,我們應該在開啟shelf的時候將writeback設定為True。當我們將writeback這個flag設定為True以後,shelf將會將所有從DB中讀取的物件存放到一個記憶體快取。當我們close()開啟的shelf的時候,快取中所有的物件會被重新寫入DB。
下面這個例子就能實現寫入了
import shelve
s = shelve.open('test_shelve.db', writeback=True)
try:
    print(s['key'])
    s['key']['new_value'] = 'this was not here before'
finally:
    s.close()
s = shelve.open('test_shelve.db', writeback=True)
try:
    print(s['key'])
finally:
    s.close()
writeback方式有優點也有缺點。優點是減少了我們出錯的概率,並且讓物件的持久化對使用者更加的透明瞭;但這種方式並不是所有的情況下都需要,首先,使用writeback以後,shelf在open()的時候會增加額外的記憶體消耗,並且當DB在close()的時候會將快取中的每一個物件都寫入到DB,這也會帶來額外的等待時間。因為shelve沒有辦法知道快取中哪些物件修改了,哪些物件沒有修改,因此所有的物件都會被寫入。
在shelve中,不能修改原有的資料結構型別,只能去覆蓋原來的
import shelve
f = shelve.open('shelve_file', flag='r')
#f['key']['int'] = 50    # 不能修改已有結構中的值
# f['key']['new'] = 'new' # 不能在已有的結構中新增新的項
f['key'] = 'new'         # 但是可以覆蓋原來的結構
f.close()
複雜的例子來一個
import time
import datetime
import shelve
import hashlib

LOGIN_TIME_OUT = 60
db = shelve.open('user_shelve.db', writeback=True)

def newuser():
    global db
    prompt = "login desired: "
    while True:
        name = input(prompt)
        if name in db:
            prompt = "name taken, try another: "
            continue
        elif len(name) == 0:
            prompt = "name should not be empty, try another: "
            continue
        else:
            break
    pwd = input("password: ")
    db[name] = {"password": hashlib.md5(pwd), "last_login_time": time.time()}
    #print '-->', db

def olduser():
    global db
    name = input("login: ")
    pwd = input("password: ")
    try:
        password = db.get(name).get('password')
    except AttributeError:
        print("\033[1;31;40mUsername '%s' doesn't existed\033[0m" % name)
        return
    if md5_digest(pwd) == password:
        login_time = time.time()
        last_login_time = db.get(name).get('last_login_time')
        if login_time - last_login_time < LOGIN_TIME_OUT:
            print("\033[1;31;40mYou already logged in at: <%s>\033[0m"
                   % datetime.datetime.fromtimestamp(last_login_time).isoformat())

        db[name]['last_login_time'] = login_time
        print("\033[1;32;40mwelcome back\033[0m", name)
    else:
        print("\033[1;31;40mlogin incorrect\033[0m")

def md5_digest(plain_pass):
   return hashlib.md5(plain_pass).hexdigest()

def showmenu():
    #print '>>>', db
    global db
    prompt = """
(N)ew User Login
(E)xisting User Login
(Q)uit
Enter choice: """
    done = False
    while not done:
        chosen = False
        while not chosen:
            try:
                choice = input(prompt).strip()[0].lower()
            except (EOFError, KeyboardInterrupt):
                choice = "q"
            print ("\nYou picked: [%s]" % choice)
            if choice not in "neq":
                print ("invalid option, try again")
            else:
                chosen = True

        if choice == "q":  done = True
        if choice == "n": newuser()
        if choice == "e": olduser()
    db.close()

if __name__ == "__main__":
    showmenu()