opencv--簡單影象繪製函式
阿新 • • 發佈:2018-11-19
-
繪製直線:line()
-
繪製圓:circle()
-
繪製矩形:rectangle()
-
繪製橢圓:ellipse()
-
繪製多邊形:
- 填充多邊形:fillPoly()
- 非填充多邊形:polylines()
-
新增文字:putText()


畫直線
- 函式宣告
void line(InputOutputArray img, Point pt1, Point pt2, const Scalar& color,
int - 引數
img :輸出影象
pt1 :開始點
pt2 :結束點
color:線條顏色
thickness :線條粗細
lineType :線型
矩形
- 函式宣告
CV_EXPORTS void rectangle(CV_IN_OUT Mat& img, Rect rec, const Scalar& color, int thickness = 1, intlineType = LINE_8, int shift = 0); Rect_<_Tp>::Rect_(_Tp _x, _Tp _y, _Tp _width, _Tp _height) : x(_x), y(_y), width(_width), height(_height) {}
橢圓
-
函式宣告
CV_EXPORTS_W void ellipse(InputOutputArray img, Point center, Size axes, double angle, doublestartAngle, double endAngle, const Scalar& color, int thickness = 1, int lineType = LINE_8, int shift = 0); -
引數
img :畫布容器
center:橢圓中心
axes :大小位於該矩形中,長軸長度,短軸長度
angle:橢圓的旋轉角度
startangle:開始弧度
endAngle:結束弧度
color :圖形顏色
thickness :線寬
lineType :線型
shift :圓心座標點和數軸的精度
圓形
-
函式宣告
CV_EXPORTS_W void circle(InputOutputArray img, Point center, int radius, const Scalar& color, int thickness = 1, int lineType = LINE_8, int shift = 0); -
引數
img: 將要畫圓的影象;
center: 圓心;
radius: 半徑;
color: 圓的顏色;
thickness: 如果值是正,圓外輪廓的厚度,如果值是負,表示要繪製一個填充圓;
lineType:線型別;
多邊形
-
函式宣告
CV_EXPORTS void fillPoly(Mat& img, const Point** pts, const int* npts, int ncontours, const Scalar& color, int lineType = LINE_8, int shift = 0, Point offset = Point() ); -
引數
img:影象名稱,
pts:頂點列表(這個多邊形在array中有四個頂點)為什麼pts要被定義成二級指標?那是因為cvFillPoint函式能夠一次繪製多個多邊形,所以它用一維陣列(一個行指標)儲存一個多邊形的點,用另一個一位陣列(另一個行指標)儲存另一個多邊形的點,這樣就可以實現用一個二維陣列來儲存多個多邊形的點啦。
True表示閉合,npts: 每一個多邊形包含了多少個點
ncontours: 設定你要畫的多邊形的個數當然如果你定義的Point陣列的行數(也就是多邊形的個數,因為一個行指標對應一個多邊形)為n,那麼contours就應該小於等於n.
color : 線條顏色
隨機數
RNG::uniform
int RNG::(int a,int b)
float RNG::uniform(float a,float b)
double RNG::uniform(double a,double b)
隨機類RNG:計算機的偽隨機數是由隨機種子根據一定的計算方法計算出來的數值,所以只要計算方法一定,隨機種子一定,那麼產生的隨機數就是固定的。
RNG rng(12345)
opencv 裡RNG類建構函式初始化為固定值後,隨機種子也是固定的,所以在相同的平臺環境下,編譯後每次執行它,顯示的隨機數是一樣的。

例如:
RNG rng(12345);
int main(void)
{
	for (int i = 0; i < 10; i++) {
		int a = rng.uniform(1, 100);
		cout << a << endl;
	}
return 0;
}
只要平臺不變,每次生成的都是:
6
33
12
54
71
65
94
11
64
76

如果想改變成隨機生成的數,使用下面的方法:
RNG rng((unsigned)time(NULL));
int main(void)
{
	for (int i = 0; i < 10; i++) {
		int a = rng.uniform(1, 100);
		cout << a << endl;
   }
   return 0;
}
第一次結果:
76
79
3
3
83
2
34
65
97
9
第二次結果:
35
46
76
52
32
68
69
42
49
91
舉例
Mat src;
void myLines() {
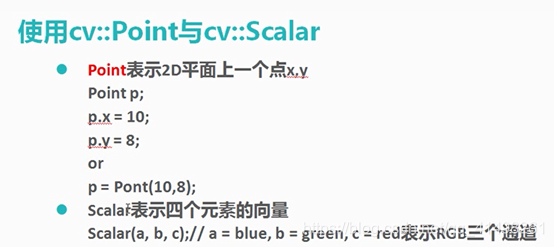
	Point p1 = Point(20, 30);
	Point p2;
	p2.x = 300;
	p2.y = 300;
	Scalar color = Scalar(0, 0, 255);
	line(src, p1, p2, color,1,LINE_8);
	line(src, p1, Point(200, 400), 1, LINE_AA);
}
void myRectangle() {
	Rect rect = Rect(200, 100, 300, 300);
	Scalar color = Scalar(0, 0, 255);
	rectangle(src, rect, color, 2, LINE_8, 0);
}
void myEllipse() {
	Scalar color = Scalar(0, 255, 255);
	ellipse(src, Point(src.cols / 2, src.rows / 2), Size(src.cols / 4, src.rows / 8), 45, 0, 360, color, 2);
}
void myCircle() {
	Scalar color = Scalar(255, 255, 0);
	circle(src, Point(src.cols / 2, src.rows / 2), 100, color, 2);
}
void myPolygon() {
	Point p[1][5];
	p[0][0] = Point(100, 100);
	p[0][1] = Point(100, 200);
	p[0][2] = Point(200, 200);
	p[0][3] = Point(200, 100);
	p[0][4] = Point(100, 100);
	const Point *ppts[] = { p[0] };
	int npt[] = { 5 };
	Scalar color = Scalar(120, 130, 130);
	fillPoly(src, ppts, npt, 1, color);
}
void randomLineDemo() {
	Mat src1 = Mat::zeros(src.size(), src.type());
	RNG rng(12345);
	Point p1, p2;
	for (size_t i = 0; i < 1000; i++)
	{
		p1.x = rng.uniform(0, src1.cols);
		p1.y = rng.uniform(0, src1.rows);
		p2.x = rng.uniform(0, src1.cols);
		p2.y = rng.uniform(0, src1.rows);
		Scalar color = Scalar(rng.uniform(0, 255), rng.uniform(0, 255), rng.uniform(0, 255));
		if (waitKey(50)) {
			line(src1, p1, p2, color);
			imshow("demo", src1);
		}
	}

}
int main() {
	src = imread("D:/test/first.png",1);
	if (!src.data) {
		cerr << "open error" << endl;
		return -1;
	}
	myLines();
	myRectangle();
	myEllipse();
	myCircle();
	myPolygon();
	putText(src, "hello world!", Point(300, 300), CV_FONT_HERSHEY_COMPLEX, 1.0, Scalar(0, 144, 223));
	imshow("yuantu", src);
	randomLineDemo();
	//imshow("new", dst);
	waitKey(0);
	return 0;
}

