
Spring aop配置需要配置在springmvc的配置檔案上,不然會失效
簡單的記錄一下spring aop的一個示例
轉自 https://www.cnblogs.com/cndota/p/6129244.html
基於兩種配置方式:
基於xml配置
基於註解配置
這個例子是模擬對資料庫的更改操作新增事物
其實並沒有新增,只是簡單的輸出了一下記錄
首先看下整個例子的目錄圖
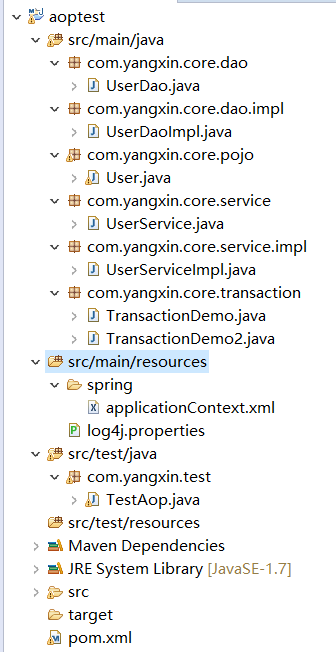
全部程式碼就不貼了,數目有點多,不過很簡單,看一部分就能夠明白
第一種配置方式
基於xml方式配置
首先將service,dao註冊到spring容器
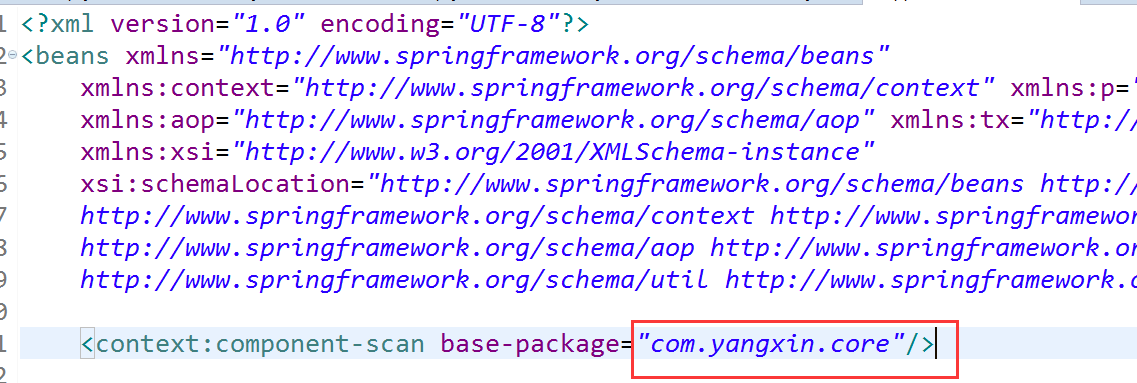
配置一下掃描包還是很方便的
接下來看下service

 1 package com.yangxin.core.service.impl;
 2
 3 import org.springframework.beans.factory.annotation.Autowired;
 4 import org.springframework.stereotype.Service;
 5
 6 import com.yangxin.core.dao.UserDao;
 7 import com.yangxin.core.pojo.User;
 8 import com.yangxin.core.service.UserService;
 9
10 @Service
11 public class UserServiceImpl implements UserService {
12
13     @Autowired
14     private UserDao userDao;
15
16     @Override
17     public void addUser(User user) {
18         userDao.insertUser(user);
19         System.out.println("新增成功");
20     }
21
22     @Override
23     public void deleteUser(String name) {
24         userDao.deteleUser(name);
25         System.out.println("刪除成功");
26     }
27
28 }
要做的事情很簡單,插入一條資料,刪除一條資料
接下來看下切面程式碼
 1 package com.yangxin.core.transaction;
 2
 3 import org.aspectj.lang.ProceedingJoinPoint;
 4
 5 import com.yangxin.core.pojo.User;
 6
 7 public class TransactionDemo {
 8
 9     //前置通知
10     public void startTransaction(){
11         System.out.println("begin transaction ");
12     }
13
14     //後置通知
15     public void commitTransaction(){
16         System.out.println("commit transaction ");
17     }
18
19     //環繞通知
20     public void around(ProceedingJoinPoint joinPoint) throws Throwable{
21         System.out.println("begin transaction");
22
23         joinPoint.proceed();
24
25         System.out.println("commit transaction");
26     }
27
28 }
然後看下這個切面在applicationContext.xml中是如何配置的

按 Ctrl+C 複製程式碼
按 Ctrl+C 複製程式碼
這裡沒有演示環繞通知
好了,執行測試程式碼
測試程式碼如下
 1   @Test
 2     public void test1(){
 3         ApplicationContext applicationContext = new ClassPathXmlApplicationContext("spring/applicationContext.xml");
 4
 5         UserService userService = applicationContext.getBean(UserService.class);
 6
 7         User user = new User();
 8
 9         user.setAge(19);
10         user.setName("yangxin");
11
12         userService.addUser(user);
13         userService.deteleUser("yangxin");
1415
16     }
控制檯輸出如下
begin transaction
新增成功
commit transaction
begin transaction
刪除成功
commit transaction
現在來測試一下環繞通知
修改一下applicationContext.xml中的配置切面那一部分
修改後的程式碼
1 <aop:config>
2         <aop:pointcut expression="execution(* com.yangxin.core.service.*.*.*(..))" id="p1" />
3
4         <aop:aspect ref = "transactionDemo">
5
6         <aop:around method="around" pointcut-ref="p1"/>
7
8         </aop:aspect>
9     </aop:config>
執行測試程式碼
輸出如下
begin transaction
新增成功
commit transaction
begin transaction
刪除成功
commit transaction
好了,現在貼下如何用註解的方法
貼下基於註解的切面的程式碼
 1 package com.yangxin.core.transaction;
 2
 3 import org.aspectj.lang.ProceedingJoinPoint;
 4 import org.aspectj.lang.annotation.AfterReturning;
 5 import org.aspectj.lang.annotation.Around;
 6 import org.aspectj.lang.annotation.Aspect;
 7 import org.aspectj.lang.annotation.Before;
 8 import org.aspectj.lang.annotation.Pointcut;
 9
10 @Aspect
11 public class TransactionDemo2 {
12
13     @Pointcut(value="execution(* com.yangxin.core.service.*.*.*(..))")
14     public void point(){
15
16     }
17
18     @Before(value="point()")
19     public void before(){
20         System.out.println("transaction begin");
21     }
22
23     @AfterReturning(value = "point()")
24     public void after(){
25         System.out.println("transaction commit");
26     }
27
28     @Around("point()")
29     public void around(ProceedingJoinPoint joinPoint) throws Throwable{
30         System.out.println("transaction begin");
31         joinPoint.proceed();
32         System.out.println("transaction commit");
33
34     }
35 }
在applicationContext.xml中配置
1 <bean id = "transactionDemo2" class = "com.yangxin.core.transaction.TransactionDemo2" />
1 <aop:aspectj-autoproxy />
測試步驟和以上一致,這裡就不貼了
完畢
記一下使用javaConfig配置方式的一些坑
以上 切面 不管是基於註解的還是基於xml配置的 這裡把切面載入到容器中都是用xml配置bean的方式
如果用javaConfig方式的話
需要在配置類上加上 @EnableAspectJAutoProxy 註解
然後如果使用掃包的方式配置切面bean的話
切面上除了要加上@Aspect註解標識為這是一個切面bean之外
還需要在上面加上@component這個註解
很急很關鍵
排錯的時候只關注切點表示式的問題了
當時一直在找切點表示式的問題
其實這個表示式寫的是沒有問題的
是配置切面bean的時候出的問題