
Elasticsearch 程式設計API入門系列
說明:我這裡是3臺機器組建的es叢集,然後編寫其程式碼!
192.168.80.10、192.168.80.11、192.168.80.12
我這裡,elasticsearch用的是2.4.X版本。
API文件:https://www.elastic.co/guide/en/elasticsearch/client/java-api/2.4/java-docs.html
刪除預設的App.java

以TestEs.java為例

專案結構


通過TransportClient這個類,指定es叢集中其中一臺或多臺機的ip地址和埠
TransportClient client = TransportClient.builder().build().addTransportAddress(new InetSocketTransportAddress (InetAddress.getByName("host1"), 9300)).addTransportAddress(new InetSocketTransportAddress(InetAddress.getByName("host2"), 9300));
如果需要使用其他名稱的叢集(預設是elasticsearch),需要如下設定
Settings settings = Settings.settingsBuilder().put("cluster.name", "myClusterName").build();
TransportClientclient = TransportClient.builder().settings(settings).build().addTransportAddress(new InetSocketTransportAddress (InetAddress.getByName("host1"), 9300));
通過TransportClient這個介面,自動嗅探整個叢集的狀態,es會自動把叢集中其它機器的ip地址加到客戶端中
Settings settings = Settings.settingsBuilder().put("client.transport.sniff", true).build();
TransportClient.builder().settings(settings).build().addTransportAddress(new InetSocketTransportAddress (InetAddress.getByName("host1"), 9300));
索引index(四種json,map,bean,es helper)
IndexResponse response = client.prepareIndex("zhouls", "emp", "1").setSource().get()
查詢get
GetResponse response = client.prepareGet("zhouls", "emp", "1").get();
更新update
刪除delete
DeleteResponse response = client.prepareDelete("zhouls", "emp", "1").execute().actionGet();
總數count
long count = client.prepareCount("zhouls").get().getCount();
前提
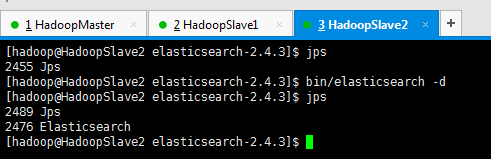
準備,開啟3臺機器組建的es叢集程序


程式碼編寫:
package zhouls.bigdata.myElasticsearch;

import static org.junit.Assert.*;

import java.net.InetAddress;
import java.util.HashMap;
import java.util.List;

import org.elasticsearch.action.bulk.BulkItemResponse;
import org.elasticsearch.action.bulk.BulkRequestBuilder;
import org.elasticsearch.action.bulk.BulkResponse;
import org.elasticsearch.action.delete.DeleteRequest;
import org.elasticsearch.action.get.GetResponse;
import org.elasticsearch.action.index.IndexRequest;
import org.elasticsearch.action.index.IndexResponse;
import org.elasticsearch.action.search.SearchResponse;
import org.elasticsearch.action.search.SearchType;
import org.elasticsearch.action.update.UpdateResponse;
import org.elasticsearch.client.transport.TransportClient;
import org.elasticsearch.cluster.node.DiscoveryNode;
import org.elasticsearch.common.settings.Settings;
import org.elasticsearch.common.transport.InetSocketTransportAddress;
import org.elasticsearch.common.transport.TransportAddress;
import org.elasticsearch.common.xcontent.XContentBuilder;
import org.elasticsearch.common.xcontent.XContentFactory;
import org.elasticsearch.index.query.MatchQueryBuilder.Operator;
import org.elasticsearch.index.query.QueryBuilders;
import org.elasticsearch.search.SearchHit;
import org.elasticsearch.search.SearchHits;
import org.elasticsearch.search.aggregations.Aggregation;
import org.elasticsearch.search.aggregations.AggregationBuilders;
import org.elasticsearch.search.aggregations.bucket.terms.Terms;
import org.elasticsearch.search.aggregations.bucket.terms.Terms.Bucket;
import org.elasticsearch.search.aggregations.metrics.sum.Sum;
import org.elasticsearch.search.sort.SortOrder;
import org.junit.Before;
import org.junit.Test;

import com.fasterxml.jackson.databind.ObjectMapper;
import com.google.common.collect.ImmutableList;

public class TestEs {

    //es和hadoop沒關係啊,獲取一個transportclient就可以操作es了


    private TransportClient transportClient;
    @Before//@Before和@Test的區別:每次執行都要先經過@Before,好比是,它是一個模板。
    //before表示在執行每個test方法之前執行,常與@Test搭配使用
    public void test0() throws Exception {
        //獲取TransportClient,來操作es
        transportClient = TransportClient.builder().build();
        //需要使用9300埠
        TransportAddress transportAddress = new InetSocketTransportAddress(InetAddress.getByName("192.168.80.10"), 9300);
        //新增節點資訊,最少指定叢集內的某一個節點即可操作這個es叢集
        transportClient.addTransportAddress(transportAddress);
    }

    /**
     * 用java程式碼測試的時候這樣寫是沒有問題的,比較簡單
     * @throws Exception
     */
    @Test
    public void test1() throws Exception {
        //獲取TransportClient,來操作es
        TransportClient transportClient = TransportClient.builder().build();
        //需要使用9300埠,指定es叢集中的節點資訊, 這個地方指定的埠是節點和節點之間的通訊埠是9300,不是Http請求的埠9200.
        TransportAddress transportAddress = new InetSocketTransportAddress(InetAddress.getByName("192.168.80.11"), 9300);
        //新增節點資訊,最少指定叢集內的某一個節點即可操作這個es叢集
        transportClient.addTransportAddress(transportAddress);
        System.out.println(transportClient.toString());
    }

    /**
     * 可以這樣寫,防止程式碼中指定的連結失效
     * 但是寫起來比較麻煩
     * 在實際工作中這樣寫不是很靠譜,需要完善,做測試可以
     * @throws Exception
     */
    @Test
    public void test2() throws Exception {
        //獲取TransportClient,來操作es,通過TransportClient可以和es叢集互動
        TransportClient transportClient = TransportClient.builder().build();
        //需要使用9300埠,指定es叢集中的節點資訊, 這個地方指定的埠是節點和節點之間的通訊埠是9300,不是Http請求的埠9200.
        TransportAddress transportAddress = new InetSocketTransportAddress(InetAddress.getByName("192.168.80.10"), 9300);
        TransportAddress transportAddress1 = new InetSocketTransportAddress(InetAddress.getByName("192.168.80.11"), 9300);
        TransportAddress transportAddress2 = new InetSocketTransportAddress(InetAddress.getByName("192.168.80.12"), 9300);
        //新增節點資訊,最少指定叢集內的某一個節點即可操作這個es叢集
        transportClient.addTransportAddresses(transportAddress,transportAddress1,transportAddress2);//加入多個地址
        System.out.println(transportClient.toString());
    }

    /**
     * 實際生產環境下面,建議這樣用,加上下面這些配置資訊
     * @throws Exception
     */
    @Test
    public void test3() throws Exception {
        //指定es的配置資訊
        Settings settings = Settings.settingsBuilder()
                .put("cluster.name", "elasticsearch")//叢集名稱
                        //如果叢集名稱在配置檔案中被修改了,那麼在這需要顯式定義一下
                        //es叢集名稱預設是 elasticsearch  sniff嗅; 發現;
                .put("client.transport.sniff", true)//開啟叢集的嗅探功能,只需要指定叢集中一個節點資訊即可獲取到叢集中的所有節點資訊
                        //開啟叢集的嗅探功能,這樣可以保證es會自動把叢集中的其他節點資訊新增到transportClient裡面
                        //開啟嗅探功能後 只要指定叢集中的任意一個可用節點就可以了.當把程式碼執行之後TransportClient裡面會把叢集中所有節點的資訊都拿到,能識別叢集中的所有節點.
                .build();

        //獲取TransportClient,來操作es,//通過TransportClient可以和es叢集互動
        TransportClient transportClient = TransportClient.builder().settings(settings).build();
        //需要使用9300埠,指定es叢集中的節點資訊, 這個地方指定的埠是節點和節點之間的通訊埠是9300,不是Http請求的埠9200.
        TransportAddress transportAddress = new InetSocketTransportAddress(InetAddress.getByName("192.168.80.10"), 9300);
        //新增節點資訊,最少指定叢集內的某一個節點即可操作這個es叢集
        transportClient.addTransportAddress(transportAddress);

        //獲取client連結到的節點資訊, //獲取當前transportClient連線到了叢集多少個節點
        List<DiscoveryNode> connectedNodes = transportClient.connectedNodes();
        for (DiscoveryNode discoveryNode : connectedNodes) {//for星型迴圈,將connectedNodes的值,一一傳給DiscoveryNode discoveryNode
            System.out.println(discoveryNode.getHostName());//列印192.168.80.10;192.168.80.11;192.168.80.12
            //如果加入transportClient.addTransportAddresses(transportAddress)  只有一個ip,列印的就只有一個.
        }
    }


    String index = "zhouls";//設定索引庫
    String type = "emp";//設定型別

    //索引index(四種格式:json,map,bean,es helper)

    /**
     * index-1 json
     * 實際工作中使用
     * @throws Exception
     */
    @Test
    public void test4() throws Exception {
        String jsonStr = "{\"name\":\"tom zhang\",\"age\":19}";//需要轉義下  //向索引庫中傳入一個String字串,還可以接受其他型別
        IndexResponse indexResponse = transportClient.prepareIndex(index, type, "1")//新增一個id=1的資料
                                                     .setSource(jsonStr)//設值,這是json格式的
                                                     .get();
                        //.execute().actionGet();   這個和上面的get()方法是一樣的,get()就是對.execute().actionGet() 進行了封裝
        System.out.println(indexResponse.getVersion());
                        //得到這個資料的version,如果version=1代表是新新增的資料
    }


    /**
     * index-2 hashmap
     * 實際工作中使用
     * @throws Exception
     */
    @Test
    public void test5() throws Exception {//把hashmap型別的資料放入index庫
        HashMap<String, Object> hashMap = new HashMap<String, Object>();
                //HashMap<String, Object> hashMap是迭代器變數
        hashMap.put("name", "tom");
        hashMap.put("age", 15);
        IndexResponse indexResponse = transportClient.prepareIndex(index, type, "2")//新增一個id=2的資料
                                                     .setSource(hashMap)//設值
                                                     .get();
                    //.execute().actionGet();   這個和上面的get()方法是一樣的,get()就是對.execute().actionGet() 進行了封裝
        System.out.println(indexResponse.getVersion());
    }


    /**
     * index-3 bean
     * 實際工作中使用
     * 使用物件的時候需要把物件中的屬性轉化成json字串
     * @throws Exception
     */

//    <dependency>
//                <groupId>com.fasterxml.jackson.core</groupId>
//                <artifactId>jackson-databind</artifactId>
//                <version>2.1.3</version>
//    </dependency>


    @Test
    public void test6() throws Exception {//傳入一個物件到index索引庫,這裡是Person物件
        Person person = new Person();
        person.setName("mack");
        person.setAge(20);

         //如果直接傳入一個person物件會報錯,java.lang.IllegalArgumentException,必須把物件轉換成一個Json字串,使用jackson依賴
        //IndexResponse indexResponse = transportClient.prepareIndex(index, type, "9").setSource(person).get();


        ObjectMapper objectMapper = new ObjectMapper();
        String writeValueAsString = objectMapper.writeValueAsString(person);
        IndexResponse indexResponse = transportClient.prepareIndex(index, type, "3")
                                                     .setSource(writeValueAsString)
                                                     .get();
//        IndexResponse indexResponse = transportClient.prepareIndex(index, type, "3").setSource(objectMapper.writeValueAsString(person)).get();

        System.out.println(indexResponse.getVersion());
    }

    /**
     * index -4 es helper
     * 測試資料這樣使用
     * @throws Exception
     */
    @Test
    public void test7() throws Exception {
        XContentBuilder builder = XContentFactory.jsonBuilder()//XContentFactory 這個是ES官方提供的可以構建Json字串的工具類.
                                                 .startObject()
                                                 .field("name", "jessic")
                                                 .field("age", 28)
                                                 .endObject();

        IndexResponse indexResponse = transportClient.prepareIndex(index, type, "4")
                                                     .setSource(builder)
                                                     .get();
        System.out.println(indexResponse.getVersion());
    }


    /**
     * get 查詢
     * 通過id查詢
     * @throws Exception
     */
    @Test
    public void test8() throws Exception {
        GetResponse getResponse = transportClient.prepareGet(index, type, "4")//查詢id為4的資料
                                                 .get();
        System.out.println(getResponse.getSourceAsString());
    }

    /**
     * 區域性更新
     * @throws Exception
     */
    @Test
    public void test9() throws Exception {
        XContentBuilder builder = XContentFactory.jsonBuilder()//XContentFactory 這個是ES官方提供的可以構建Json字串的工具類.
                                                 .startObject()
                                                 .field("age", 29)
                                                 .endObject();

        UpdateResponse updateResponse = transportClient.prepareUpdate(index, type, "4")//更新id為4的資料
                                                 .setDoc(builder)
                                                 .get();
        System.out.println(updateResponse.getVersion());//version列印2 資料更新
    }

    /**
     * 刪除
     * 通過id刪除
     * @throws Exception
     */
    @Test
    public void test10() throws Exception {
            transportClient.prepareDelete(index, type, "4")//刪除id為4的資料
                        .get();
    }

    /**
     * count 取總數  類似於sql中的 select count(1) from table;
     * 求總數
     * 類似於mysql中的select count(*)
     */
    @Test
    public void test11() throws Exception {
        long count = transportClient.prepareCount(index)//查詢索引庫中的資料個數
                                    .setTypes(type)
                                    .get()
                                    .getCount();
        System.out.println(count);
    }


    /**
     * bulk 批量操作 適合初始化資料的時候使用,提高效率
     * 批量操作 bulk
     * @throws Exception
     */
    @Test
    public void test12() throws Exception {
        BulkRequestBuilder prepareBulk = transportClient.prepareBulk();

        //for迴圈執行----
        //index請求
        IndexRequest indexRequest = new IndexRequest(index, type, "10");
        indexRequest.source("{\"name\":\"zhangsan\",\"age\":17}");
        //delete請求
        DeleteRequest deleteRequest = new DeleteRequest(index, type, "1");


        prepareBulk.add(indexRequest );//bulkBuilder中可以新增多個操作,這裡一個是建立索引的操作.
        prepareBulk.add(deleteRequest);//一個是刪除的操作

        //執行 bulk
        BulkResponse bulkResponse = prepareBulk.get();
        if(bulkResponse.hasFailures()){//批量操作中可能有的操作會出現問題,這個地方對操作失敗的處理
            //有執行失敗的
            BulkItemResponse[] items = bulkResponse.getItems();
            for (BulkItemResponse bulkItemResponse : items) {
                //獲取失敗資訊,並列印
                System.out.println(bulkItemResponse.getFailureMessage());
            }
        }else{
            System.out.println("全部執行成功!");
        }
    }


