NGINX-RTMP直播伺服器搭建-OBS錄製推流-VLC視訊流播放
阿新 • • 發佈:2019-01-11
網上關於視訊直播的資料還是挺多的,看了一些文章,自己也動手實踐了下。主要有三個步驟:(1)NginxRTMP伺服器搭建(2)視訊錄製推流器 (3)拉流器(播放器),有了這些就可以開始簡單視訊相關的直播了。對於延時什麼的,還需要深入去研究 ,以及如何進行視訊開發等後續再深入研究。
Nginx-RTMP伺服器搭建
Nginx點播設定:
worker_processes  1;

events {
    worker_connections  1024;
}

##################RTMP服務#################
rtmp {

    server {

        listen 1935;  #//服務埠

	chunk_size 4096;   #//資料傳輸塊的大小

	application video {
	    play /usr/local/data/video; #//視訊檔案存放位置,訪問方式rtmp://localhost:1935/video

	    #如視訊路徑存有視訊welcome.mp4訪問路徑即為rtmp://localhost:1935/video/welcome.mp4
	}
    }
}

http {
    include       mime.types;

    default_type  application/octet-stream;

    sendfile        on;

    keepalive_timeout  65;

    server {

        listen       80;

        server_name  localhost;

        location / {
            root   html;
            index  index.html index.htm;
        }

        error_page   500 502 503 504  /50x.html;

        location = /50x.html {
            root   html;
        }
    }
}
Nginx直播配置:
worker_processes  1;

events {
    worker_connections  1024;
}

##################RTMP服務#################
rtmp {

    server {

        listen 1935;

        chunk_size 4096;

        application video {
           play /usr/local/data/video;
        }

	application live{ #第一處新增的直播欄位
	   live on;
	}
    }

}
####啟動瀏覽器檢視http://localhost:80/stat
http {
    include       mime.types;

    default_type  application/octet-stream;

    sendfile        on;

    keepalive_timeout  65;

    server {

        listen       80;

        server_name  localhost;

    location /stat {
            #第二處新增的location欄位。
            rtmp_stat all;
            rtmp_stat_stylesheet stat.xsl;
    }

    location /stat.xsl {
        #第二處新增的location欄位。
        root /usr/local/nginx/nginx-rtmp-module/;
    }

        location / {
            root   html;
            index  index.html index.htm;
        }

        error_page   500 502 503 504  /50x.html;
        location = /50x.html {
            root   html;
        }
    }
}
Nginx直播回放配置:
worker_processes  1;

events {
    worker_connections  1024;
}

##################RTMP服務#################
rtmp {
    server {
        listen 1935;
        chunk_size 4096;

        application video {
            play /usr/local/data/video;
        }

        application live {

		live on;#直播模式

		hls on; #這個引數把直播伺服器改造成實時回放伺服器。

		wait_key on; #對視訊切片進行保護,這樣就不會產生馬賽克了。

		hls_path /usr/local/data/hls; #切片視訊檔案存放位置。

		hls_fragment 10s;     #每個視訊切片的時長。

		hls_playlist_length 60s;  #總共可以回看的事件,這裡設定的是1分鐘。

		hls_continuous on; #連續模式。

		hls_cleanup on;    #對多餘的切片進行刪除。

		hls_nested on;     #巢狀模式。
        }
    }
}

http {
    include       mime.types;

    default_type  application/octet-stream;

    sendfile        on;

    keepalive_timeout  65;

    server {
            listen       80;

            server_name  localhost;

	    location /stat {
		    rtmp_stat all;
		rtmp_stat_stylesheet stat.xsl;
	    }

	    location /stat.xsl {
		root /usr/local/nginx/nginx-rtmp-module/;
	    }

	    location /live {  #這裡也是需要新增的欄位。

		types {

		    application/vnd.apple.mpegurl m3u8;

		    video/mp2t ts;
		}
		alias /opt/video/hls;
		expires -1;
		add_header Cache-Control no-cache;
	    }

	   location / {
		root   html;
		index  index.html index.htm;
	   }

	   error_page   500 502 503 504  /50x.html;

	   location = /50x.html {
		root   html;
	   }
    }
}
OBS下載及錄製推流
這裡以下載地址一的OBS版本與Nginx直播模式配置為例I埠相應的做了調整(http Server listen 1990):
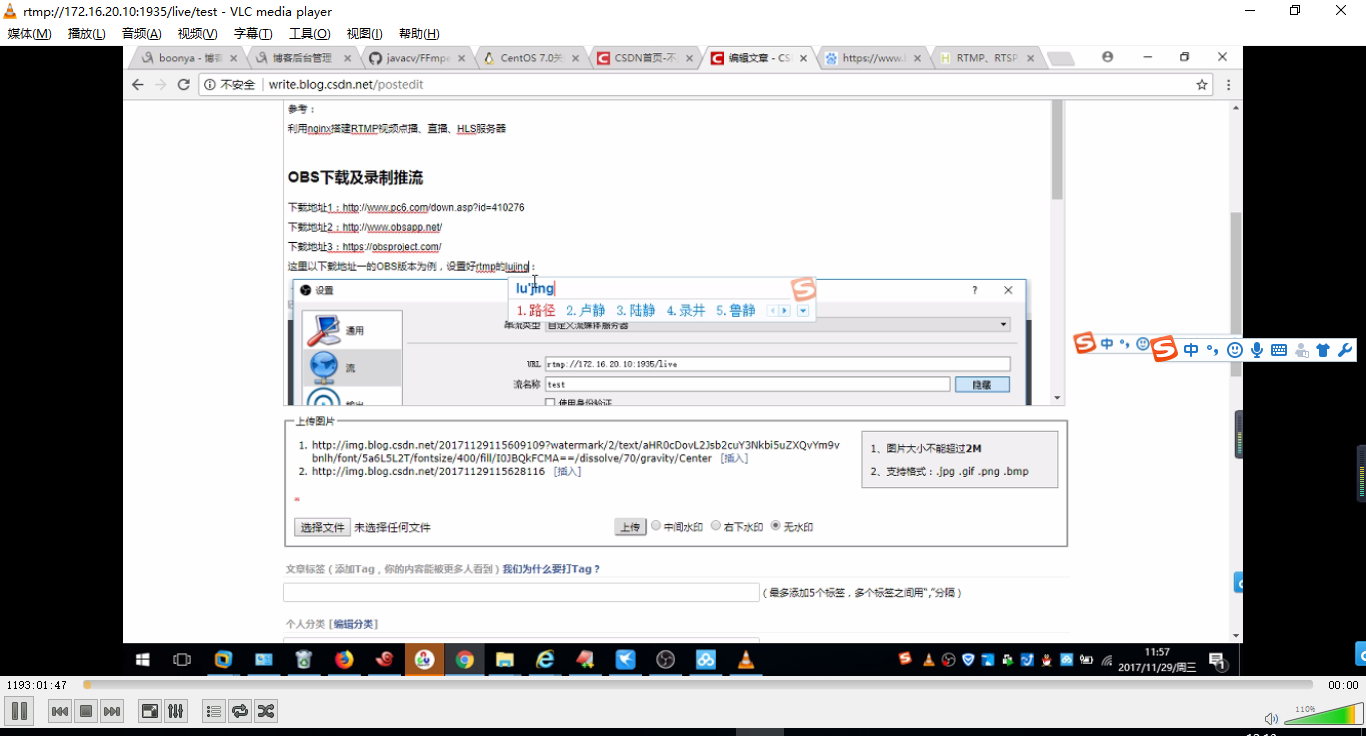
設定步驟:
1、新增場景
2、新增來源:顯示器獲取 、音訊獲取等等
3、設定RTMP的伺服器路徑,並設定流名稱

4、開始錄製、開始推流
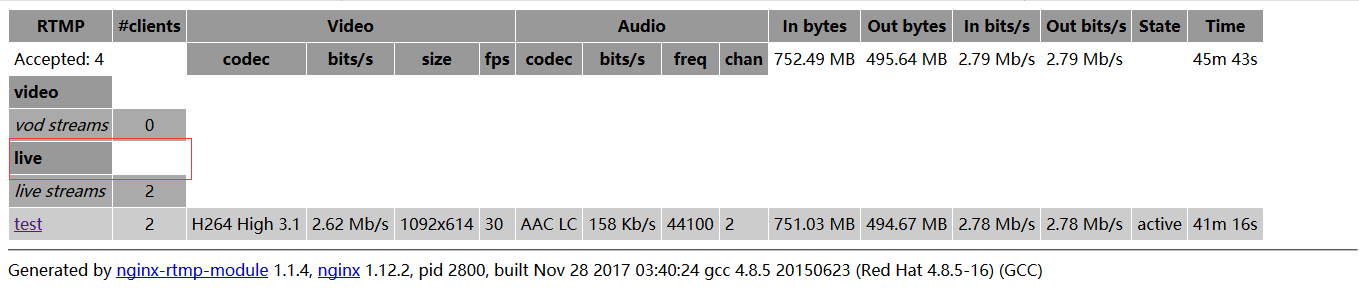
5、驗證是否直播成功,開啟瀏覽器http://172.16.20.10:1990/stat,看到如下介面表示直播正常。
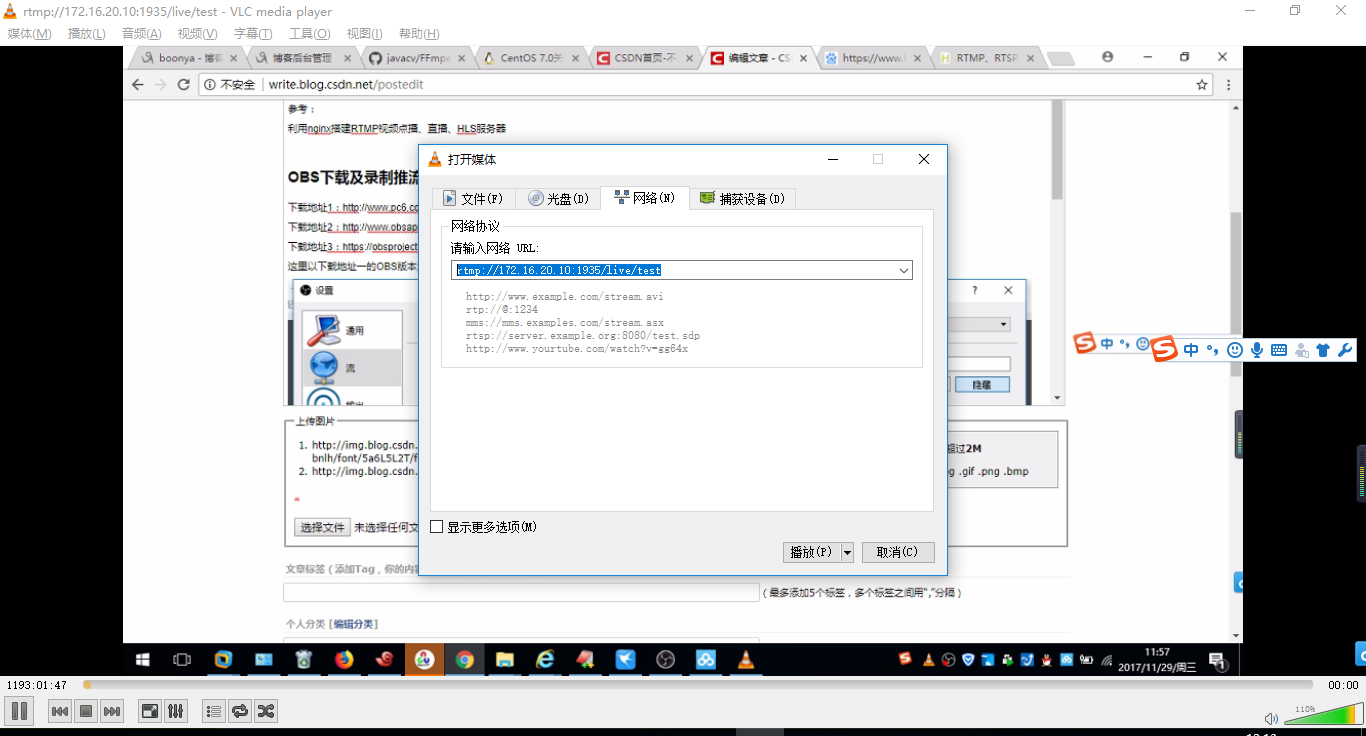
VLC視訊流播放
只需要設定播放流地址就可以驗證前面配置的直播地址了:
直播中: