
Zookeeper——4、使用Curator操作Zookeeper
為了更好的實現Java操作zookeeper伺服器,後來出現了Curator框架,非常的強大,目前已經是Apache的頂級專案,裡面提供了更多豐富的操作,例如session超時重連、主從選舉、分散式計數器、分散式鎖等等適用於各種複雜的zookeeper場景的API封裝。(zookeeper文章所需的jar包)
Curator所需的maven依賴:
Curator框架中使用鏈式程式設計風格,易讀性更強,使用工廠方法建立zookeeper客戶端物件。<dependency> <groupId>org.apache.curator</groupId> <artifactId>curator-framework</artifactId> <version>3.2.1</version> </dependency> <dependency> <groupId>org.apache.curator</groupId> <artifactId>curator-recipes</artifactId> <version>3.2.1</version> </dependency> <dependency> <groupId>org.apache.curator</groupId> <artifactId>curator-client</artifactId> <version>3.2.1</version> </dependency>
1.使用CuratorFrameworkFactory的兩個靜態工廠方法(引數不同)來建立zookeeper客戶端物件。
引數1:connectString,zookeeper伺服器地址及埠號,多個zookeeper伺服器地址以“,”分隔。
引數2:sessionTimeoutMs,會話超時時間,單位毫秒,預設為60000ms。
引數3:connectionTimeoutMs,連線超時時間,單位毫秒,預設為15000ms。
引數4:retryPolicy,重試連線策略,有四種實現,分別為:ExponentialBackoffRetry(重試指定的次數, 且每一次重試之間停頓的時間逐漸增加)、RetryNtimes(指定最大重試次數的重試策略)、RetryOneTimes(僅重試一次)、RetryUntilElapsed(一直重試直到達到規定的時間)
Curator的Helloworld入門:
PS:create建立節點方法可選的鏈式項:creatingParentsIfNeeded(是否同時建立父節點)、withMode(建立的節點型別)、forPath(建立的節點路徑)、withACL(安全項)public class CuratorHelloworld { private static final String CONNECT_ADDR = "192.168.1.102:2181,192.168.1.104:2181,192.168.1.105:2181"; private static final int SESSION_TIMEOUT = 5000; public static void main(String[] args) throws Exception { //重試策略,初試時間1秒,重試10次 RetryPolicy policy = new ExponentialBackoffRetry(1000, 10); //通過工廠建立Curator CuratorFramework curator = CuratorFrameworkFactory.builder().connectString(CONNECT_ADDR) .sessionTimeoutMs(SESSION_TIMEOUT).retryPolicy(policy).build(); //開啟連線 curator.start(); ExecutorService executor = Executors.newCachedThreadPool(); /**建立節點,creatingParentsIfNeeded()方法的意思是如果父節點不存在,則在建立節點的同時建立父節點; * withMode()方法指定建立的節點型別,跟原生的Zookeeper API一樣,不設定預設為PERSISTENT型別。 * */ curator.create().creatingParentsIfNeeded().withMode(CreateMode.PERSISTENT) .inBackground((framework, event) -> { //添加回調 System.out.println("Code:" + event.getResultCode()); System.out.println("Type:" + event.getType()); System.out.println("Path:" + event.getPath()); }, executor).forPath("/super/c1", "c1內容".getBytes()); Thread.sleep(5000); //為了能夠看到回撥資訊 String data = new String(curator.getData().forPath("/super/c1")); //獲取節點資料 System.out.println(data); Stat stat = curator.checkExists().forPath("/super/c1"); //判斷指定節點是否存在 System.out.println(stat); curator.setData().forPath("/super/c1", "c1新內容".getBytes()); //更新節點資料 data = new String(curator.getData().forPath("/super/c1")); System.out.println(data); List<String> children = curator.getChildren().forPath("/super"); //獲取子節點 for(String child : children) { System.out.println(child); } //放心的刪除節點,deletingChildrenIfNeeded()方法表示如果存在子節點的話,同時刪除子節點 curator.delete().guaranteed().deletingChildrenIfNeeded().forPath("/super"); curator.close(); } }
delete刪除節點方法可選的鏈式項:deletingChildrenIfNeeded(是否同時刪除子節點)、guaranteed(安全刪除)、withVersion(版本檢查)、forPath(刪除的節點路徑)
inBackground繫結非同步回撥方法。比如在建立節點時繫結一個回撥方法,該回調方法可以輸出伺服器的狀態碼以及伺服器的事件型別等資訊,還可以加入一個執行緒池進行優化操作。
2.Curator的監聽
1)NodeCache:監聽節點的新增、修改操作。
public class CuratorWatcher1 {
    private static final String CONNECT_ADDR = "192.168.1.102:2181,192.168.1.104:2181,192.168.1.105:2181";
    private static final int SESSION_TIMEOUT = 5000;

    public static void main(String[] args) throws Exception {
        RetryPolicy policy = new ExponentialBackoffRetry(1000, 10);
        CuratorFramework curator = CuratorFrameworkFactory.builder().connectString(CONNECT_ADDR)
                .sessionTimeoutMs(SESSION_TIMEOUT).retryPolicy(policy).build();
        curator.start();
//最後一個引數表示是否進行壓縮
        NodeCache cache = new NodeCache(curator, "/super", false);
        cache.start(true);
        //只會監聽節點的建立和修改,刪除不會監聽
        cache.getListenable().addListener(() -> {
            System.out.println("路徑:" + cache.getCurrentData().getPath());
            System.out.println("資料:" + new String(cache.getCurrentData().getData()));
            System.out.println("狀態:" + cache.getCurrentData().getStat());
        });

        curator.create().forPath("/super", "1234".getBytes());
        Thread.sleep(1000);
        curator.setData().forPath("/super", "5678".getBytes());
        Thread.sleep(1000);
        curator.delete().forPath("/super");
        Thread.sleep(5000);
        curator.close();
    }
}
2)PathChildrenCache:監聽子節點的新增、修改、刪除操作。
public class CuratorWatcher2 {
private static final String CONNECT_ADDR = "192.168.1.102:2181,192.168.1.104:2181,192.168.1.105:2181";
private static final int SESSION_TIMEOUT = 5000;
public static void main(String[] args) throws Exception {
RetryPolicy policy = new ExponentialBackoffRetry(1000, 10);
CuratorFramework curator = CuratorFrameworkFactory.builder().connectString(CONNECT_ADDR)
.sessionTimeoutMs(SESSION_TIMEOUT).retryPolicy(policy).build();
curator.start();
//第三個引數表示是否接收節點資料內容
PathChildrenCache childrenCache = new PathChildrenCache(curator, "/super", true);
/**
* 如果不填寫這個引數,則無法監聽到子節點的資料更新
如果引數為PathChildrenCache.StartMode.BUILD_INITIAL_CACHE,則會預先建立之前指定的/super節點
如果引數為PathChildrenCache.StartMode.POST_INITIALIZED_EVENT,效果與BUILD_INITIAL_CACHE相同,只是不會預先建立/super節點
引數為PathChildrenCache.StartMode.NORMAL時,與不填寫引數是同樣的效果,不會監聽子節點的資料更新操作
*/
childrenCache.start(PathChildrenCache.StartMode.POST_INITIALIZED_EVENT);
childrenCache.getListenable().addListener((framework, event) -> {
switch (event.getType()) {
case CHILD_ADDED:
System.out.println("CHILD_ADDED,型別:" + event.getType() + ",路徑:" + event.getData().getPath() + ",資料:" +
new String(event.getData().getData()) + ",狀態:" + event.getData().getStat());
break;
case CHILD_UPDATED:
System.out.println("CHILD_UPDATED,型別:" + event.getType() + ",路徑:" + event.getData().getPath() + ",資料:" +
new String(event.getData().getData()) + ",狀態:" + event.getData().getStat());
break;
case CHILD_REMOVED:
System.out.println("CHILD_REMOVED,型別:" + event.getType() + ",路徑:" + event.getData().getPath() + ",資料:" +
new String(event.getData().getData()) + ",狀態:" + event.getData().getStat());
break;
default:
break;
}
});
curator.create().forPath("/super", "123".getBytes());
curator.create().creatingParentsIfNeeded().withMode(CreateMode.PERSISTENT).forPath("/super/c1", "c1內容".getBytes());
//經測試,不會監聽到本節點的資料變更,只會監聽到指定節點下子節點資料的變更
curator.setData().forPath("/super", "456".getBytes());
curator.setData().forPath("/super/c1", "c1新內容".getBytes());
curator.delete().guaranteed().deletingChildrenIfNeeded().forPath("/super");
Thread.sleep(5000);
curator.close();
}
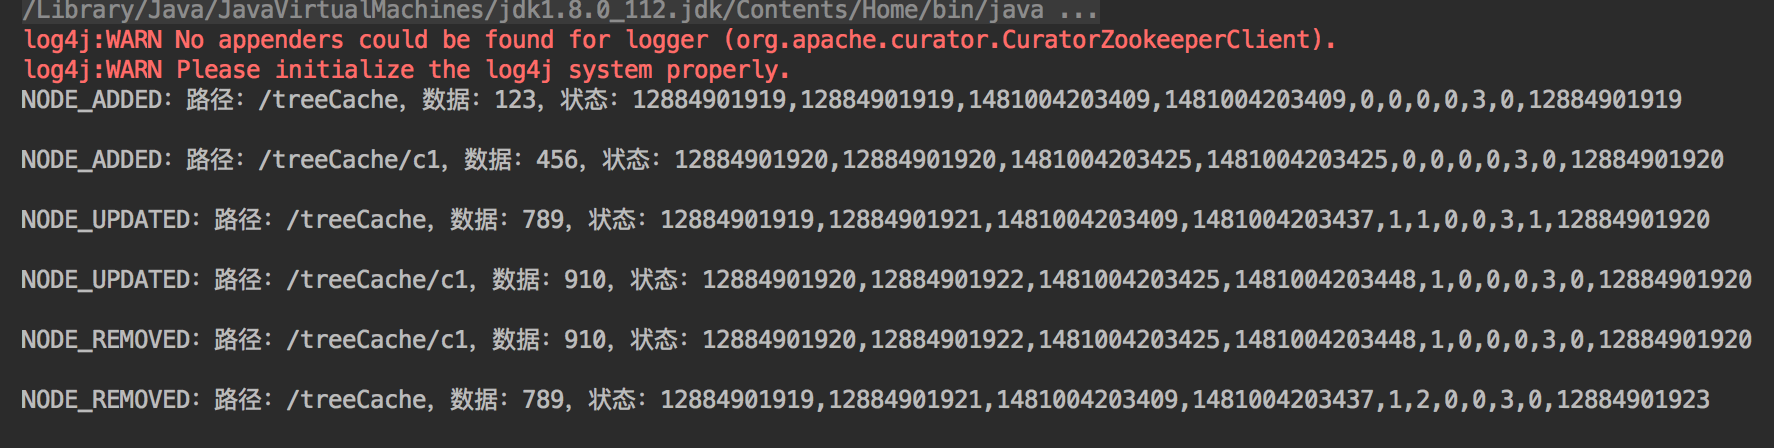
}3)TreeCache:既可以監聽節點的狀態,又可以監聽子節點的狀態。類似於上面兩種Cache的組合。
public class CuratorWatcher3 {
    private static final String CONNECT_ADDR = "192.168.3.58:2181,192.168.3.59:2181,192.168.3.66:2181";
    private static final int SESSION_TIMEOUT = 5000;

    public static void main(String[] args) throws Exception {
        RetryPolicy policy = new ExponentialBackoffRetry(1000, 10);
        CuratorFramework curator = CuratorFrameworkFactory.builder().connectString(CONNECT_ADDR).sessionTimeoutMs(SESSION_TIMEOUT)
                .retryPolicy(policy).build();
        curator.start();
        TreeCache treeCache = new TreeCache(curator, "/treeCache");
        treeCache.start();
        treeCache.getListenable().addListener((curatorFramework, treeCacheEvent) -> {
            switch (treeCacheEvent.getType()) {
                case NODE_ADDED:
                    System.out.println("NODE_ADDED:路徑:" + treeCacheEvent.getData().getPath() + ",資料:" + new String(treeCacheEvent.getData().getData())
                    + ",狀態:" + treeCacheEvent.getData().getStat());
                    break;
                case NODE_UPDATED:
                    System.out.println("NODE_UPDATED:路徑:" + treeCacheEvent.getData().getPath() + ",資料:" + new String(treeCacheEvent.getData().getData())
                            + ",狀態:" + treeCacheEvent.getData().getStat());
                    break;
                case NODE_REMOVED:
                    System.out.println("NODE_REMOVED:路徑:" + treeCacheEvent.getData().getPath() + ",資料:" + new String(treeCacheEvent.getData().getData())
                            + ",狀態:" + treeCacheEvent.getData().getStat());
                    break;
                default:
                    break;
            }
        });

        curator.create().forPath("/treeCache", "123".getBytes());
        curator.create().creatingParentsIfNeeded().withMode(CreateMode.PERSISTENT).forPath("/treeCache/c1", "456".getBytes());
        curator.setData().forPath("/treeCache", "789".getBytes());
        curator.setData().forPath("/treeCache/c1", "910".getBytes());
        curator.delete().forPath("/treeCache/c1");
        curator.delete().forPath("/treeCache");
        Thread.sleep(5000);
        curator.close();
    }
}
PS:Curator 2.4.2的jar包沒有TreeCache,我升級到了3.2.1的版本。但是在執行時報java.lang.NoSuchMethodError:org.apache.zookeeper.server.quorum.flexible.QuorumMaj.<init>(Ljava/util/Map;,出現這個錯誤的原因是因為zookeeper伺服器的版本與zookeeper.jar的版本不一致,因此將zookeeper.jar升級到與zookeeper伺服器對應的3.5.2。再次執行,又報java.lang.NoSuchMethodError: com.google.common.collect.Sets.newConcurrentHashSet()Ljav;,好吧,一看跟之前的錯誤一樣,都是NoSuchMethodError,我猜想應該是guava的版本與zookeeper.jar所依賴的版本不一致(zookeeper.jar依賴io.netty,而io.netty依賴com.google.protobuf » protobuf-java),so,將guava的版本升級到了20.0,執行成功!
3.Curator應用場景
在分散式場景中,為了保證資料的一致性,經常在程式執行的某一個點需要進行同步操作(Java中提供了Synchronized和ReentrantLock實現)。我們使用Curator基於Zookeeper的特性提供的分散式鎖來處理分散式場景的資料一致性。
可重入鎖:InterProcessMutex(CuratorFramework client, String path)
通過acquire()獲得鎖,並提供超時機制;通過release()釋放鎖。makeRevocable(RevocationListener<T> listener)定義了可協商的撤銷機制,當別的程序或執行緒想讓你釋放鎖時,listener會被呼叫。如果請求撤銷當前的鎖,可以呼叫attemptRevoke(CuratorFramework client, String path)。
首先建立一個模擬的公共資源,這個資源期望只能單執行緒的訪問,否則會有併發問題。
public class FakeLimitedResource {
    private final AtomicBoolean inUse = new AtomicBoolean(false);
    public void use() throws Exception {
        //這個例子在使用鎖的情況下不會丟擲非法併發異常IllegalStateException
        //但是在無鎖的情況下,由於sleep了一段時間,所以很容易丟擲異常
        if(!inUse.compareAndSet(false, true)) {
            throw new IllegalStateException("Needs to be used by one client at a time");
        }

        try {
            Thread.sleep((long) (3 * Math.random()));
        } finally {
            inUse.set(false);
        }
    }
}public class ExampleClientThatLocks {
private final InterProcessMutex lock;
//private final InterProcessSemaphoreMutex lock;
private final FakeLimitedResource resource;
private final String clientName;
public ExampleClientThatLocks(CuratorFramework framework, String path, FakeLimitedResource resource, String clientName) {
this.lock = new InterProcessMutex(framework, path);
//this.lock = new InterProcessSemaphoreMutex(framework, path);
this.resource = resource;
this.clientName = clientName;
}
public void doWork(long time, TimeUnit timeUnit) throws Exception {
if(!lock.acquire(time, timeUnit)) {
throw new IllegalStateException(clientName + " could not acquire the lock!");
}
System.out.println(clientName + " has the lock");
/*if(!lock.acquire(time, timeUnit)) {
throw new IllegalStateException(clientName + " could not acquire the lock!");
}
System.out.println(clientName + " has the lock");*/
try {
resource.use();
} finally {
System.out.println(clientName + " releasing the lock");
lock.release();
//lock.release();
}
}
}最後建立主程式來測試。
public class InterProcessMutexExample {
    private static final int QTY = 5;
    private static final int REPETITIONS = QTY * 10;
    private static final String PATH = "/examples/locks";
    private static final String CONNECT_ADDR = "192.168.3.58:2181,192.168.3.59:2181,192.168.3.66:2181";

    public static void main(String[] args) throws Exception {
        final FakeLimitedResource resource = new FakeLimitedResource();
        ExecutorService executor = Executors.newFixedThreadPool(QTY);
        try {
            for(int i=0; i<QTY; i++) {
                final int index = i;
                Callable<Void> task = () -> {
                    CuratorFramework curator = CuratorFrameworkFactory.newClient(CONNECT_ADDR, new RetryNTimes(3, 1000));
                    curator.start();
                    try {
                        final ExampleClientThatLocks example = new ExampleClientThatLocks(curator, PATH, resource, "Client " + index);
                        for(int j=0; j<REPETITIONS; j++) {
                            example.doWork(10, TimeUnit.SECONDS);
                        }
                    } catch (Exception e) {
                        e.printStackTrace();
                    } finally {
                        CloseableUtils.closeQuietly(curator);
                    }
                    return null;
                };
                executor.submit(task);
            }
            executor.shutdown();
            executor.awaitTermination(10, TimeUnit.MINUTES);
        } catch (Exception e) {
            e.printStackTrace();
        }
    }
}不可重入鎖:InterProcessSemaphoreMutex
這個鎖和可重入鎖相比,就是少了Reentrant功能,也就意味著不能在同一個執行緒中重入,使用方法和上面的類似。將ExampleClientThatLocks修改成如下:
public class ExampleClientThatLocks {
    //private final InterProcessMutex lock;
    private final InterProcessSemaphoreMutex lock;
    private final FakeLimitedResource resource;
    private final String clientName;

    public ExampleClientThatLocks(CuratorFramework framework, String path, FakeLimitedResource resource, String clientName) {
        //this.lock = new InterProcessMutex(framework, path);
        this.lock = new InterProcessSemaphoreMutex(framework, path);
        this.resource = resource;
        this.clientName = clientName;
    }

    public void doWork(long time, TimeUnit timeUnit) throws Exception {
        if(!lock.acquire(time, timeUnit)) {
            throw new IllegalStateException(clientName + " could not acquire the lock!");
        }
        System.out.println(clientName + " has the lock");

        if(!lock.acquire(time, timeUnit)) {
            throw new IllegalStateException(clientName + " could not acquire the lock!");
        }
        System.out.println(clientName + " has the lock");

        try {
            resource.use();
        } finally {
            System.out.println(clientName + " releasing the lock");
            lock.release();
            lock.release();
        }
    }
}
注意我們也需要呼叫release兩次。這和JDK的ReentrantLock用法一致。如果少呼叫一次release,則此執行緒依然擁有鎖。 上面的程式碼沒有問題,我們可以多次呼叫acquire,後續的acquire也不會阻塞。 將上面的InterProcessMutex換成不可重入鎖InterProcessSemaphoreMutex,如果再執行上面的程式碼,結果就會發現執行緒被阻塞再第二個acquire上。 也就是此鎖不是可重入的。
可重入讀寫鎖:InterProcessReadWriteLock 類似JDK的ReentrantReadWriteLock. 一個讀寫鎖管理一對相關的鎖。 一個負責讀操作,另外一個負責寫操作。 讀操作在寫鎖沒被使用時可同時由多個程序使用,而寫鎖使用時不允許讀 (阻塞)。 此鎖是可重入的。一個擁有寫鎖的執行緒可重入讀鎖,但是讀鎖卻不能進入寫鎖。 這也意味著寫鎖可以降級成讀鎖, 比如請求寫鎖 —>讀鎖 —->釋放寫鎖。 從讀鎖升級成寫鎖是不行的。使用時首先建立一個InterProcessReadWriteLock例項,然後再根據你的需求得到讀鎖或者寫鎖, 讀寫鎖的型別是InterProcessLock。
在可重入鎖的程式碼基礎上,使用下面的ExampleClientReadWriteLocks替換ExampleClientThatLocks類即可。
public class ExampleClientReadWriteLocks {
    private final InterProcessReadWriteLock readWriteLock;
    private final InterProcessMutex readLock;
    private final InterProcessMutex writeLock;
    private final FakeLimitedResource resource;
    private final String clientName;

    public ExampleClientReadWriteLocks(CuratorFramework client, String path, FakeLimitedResource resource, String clientName) {
        this.readWriteLock = new InterProcessReadWriteLock(client, path);
        this.readLock = readWriteLock.readLock();
        this.writeLock = readWriteLock.writeLock();
        this.resource = resource;
        this.clientName = clientName;
    }

    public void doWork(long time, TimeUnit unit) throws Exception {
        if(!writeLock.acquire(time, unit)) {
            throw new IllegalStateException(clientName + " could not acquire the writeLock!");
        }
        System.out.println(clientName + " has the writeLock");

        if(!readLock.acquire(time, unit)) {
            throw new IllegalStateException(clientName + " could not acquire the readLock!");
        }
        System.out.println(clientName + " has the readLock");

        try {
            resource.use();
        } finally {
            readLock.release();
            writeLock.release();
        }
    }
}訊號量:InterProcessSemaphoreV2 一個計數的訊號量類似JDK的Semaphore。 JDK中Semaphore維護的一組許可(permits),而Cubator中稱之為租約(Lease)。 有兩種方式可以決定semaphore的最大租約數。第一種方式是有使用者給定的path決定。第二種方式使用SharedCountReader類。 如果不使用SharedCountReader, 沒有內部程式碼檢查程序是否假定有10個租約而程序B假定有20個租約。 所以所有的例項必須使用相同的numberOfLeases值.
這次呼叫acquire會返回一個租約物件。 客戶端必須在finally中close這些租約物件,否則這些租約會丟失掉。 但是, 但是,如果客戶端session由於某種原因比如crash丟掉, 那麼這些客戶端持有的租約會自動close, 這樣其它客戶端可以繼續使用這些租約。 租約還可以通過下面的方式返還:
public void returnAll(Collection<Lease> leases)
public void returnLease(Lease lease)public Lease acquire()
public Collection<Lease> acquire(int qty)
public Lease acquire(long time, TimeUnit unit)
public Collection<Lease> acquire(int qty, long time, TimeUnit unit)public class InterProcessSemaphoreExample {
private static final int MAX_LEASE = 10;
private static final String PATH = "/examples/locks";
public static void main(String[] args) throws Exception {
FakeLimitedResource resource = new FakeLimitedResource();
try (TestingServer server = new TestingServer()) {
CuratorFramework client = CuratorFrameworkFactory.newClient(server.getConnectString(), new ExponentialBackoffRetry(1000, 3));
client.start();
InterProcessSemaphoreV2 semaphore = new InterProcessSemaphoreV2(client, PATH, MAX_LEASE);
Collection<Lease> leases = semaphore.acquire(5);
System.out.println("get " + leases.size() + " leases");
Lease lease = semaphore.acquire();
System.out.println("get another lease");
resource.use();
Collection<Lease> leases2 = semaphore.acquire(5, 10, TimeUnit.SECONDS);
System.out.println("Should timeout and acquire return " + leases2);
System.out.println("return one lease");
semaphore.returnLease(lease);
System.out.println("return another 5 leases");
semaphore.returnAll(leases);
}
}
}多鎖物件:InterProcessMultiLock Multi Shared Lock是一個鎖的容器。 當呼叫acquire, 所有的鎖都會被acquire,如果請求失敗,所有的鎖都會被release。 同樣呼叫release時所有的鎖都被release(失敗被忽略)。 基本上,它就是組鎖的代表,在它上面的請求釋放操作都會傳遞給它包含的所有的鎖。
例子如下:
public class InterProcessMultiLockExample {
    private static final String PATH1 = "/examples/locks1";
    private static final String PATH2 = "/examples/locks2";

    public static void main(String[] args) throws Exception {
        FakeLimitedResource resource = new FakeLimitedResource();
        try (TestingServer server = new TestingServer()) {
            CuratorFramework client = CuratorFrameworkFactory.newClient(server.getConnectString(), new ExponentialBackoffRetry(1000, 3));
            client.start();

            InterProcessLock lock1 = new InterProcessMutex(client, PATH1);
            InterProcessLock lock2 = new InterProcessSemaphoreMutex(client, PATH2);

            InterProcessMultiLock lock = new InterProcessMultiLock(Arrays.asList(lock1, lock2));

            if (!lock.acquire(10, TimeUnit.SECONDS)) {
                throw new IllegalStateException("could not acquire the lock");
            }
            System.out.println("has the lock");

            System.out.println("has the lock1: " + lock1.isAcquiredInThisProcess());
            System.out.println("has the lock2: " + lock2.isAcquiredInThisProcess());

            try {
                resource.use(); //access resource exclusively
            } finally {
                System.out.println("releasing the lock");
                lock.release(); // always release the lock in a finally block
            }
            System.out.println("has the lock1: " + lock1.isAcquiredInThisProcess());
            System.out.println("has the lock2: " + lock2.isAcquiredInThisProcess());
        }
    }

}一說到分散式計數器,你可能馬上想到AtomicInteger這種經典的方式。如果是在同一個JVM下肯定沒有問題,但是在分散式場景下,肯定會存在問題。所以就需要使用Curator框架的DistributedAtomicInteger了。
public class CuratorDistributedAtomicInteger {
    private static final String CONNECT_ADDR = "192.168.1.102:2181,192.168.1.104:2181,192.168.1.105:2181";
    private static final int SESSION_TIMEOUT = 5000;

    public static void main(String[] args) throws Exception {
        //重試策略,初試時間1秒,重試10次
        RetryPolicy policy = new ExponentialBackoffRetry(1000, 10);
        //通過工廠建立Curator
        CuratorFramework curator = CuratorFrameworkFactory.builder().connectString(CONNECT_ADDR)
                .sessionTimeoutMs(SESSION_TIMEOUT).retryPolicy(policy).build();
        //開啟連線
        curator.start();

        DistributedAtomicInteger atomicInteger = new DistributedAtomicInteger(curator, "/super", new RetryNTimes(3, 1000));
        AtomicValue<Integer> value = atomicInteger.add(1);
        System.out.println(value.succeeded());
        System.out.println(value.preValue()); //新值
        System.out.println(value.postValue()); //舊值
        curator.close();
    }
}
③Barrier
分散式Barrier是這樣一個類:它會阻塞所有節點上的等待程序,知道某一個被滿足,然後所有的節點繼續執行。比如賽馬比賽中,等賽馬陸續來到起跑線前,一聲令下,所有的賽馬都飛奔而出。
DistributedBarrier類實現了欄柵的功能,構造方法如下:
public DistributedBarrier(CuratorFramework client, String barrierPath)接下來看例子:
public class DistributedBarrierExample {
    private static final String CONNECT_ADDR = "192.168.1.102:2181,192.168.1.104:2181,192.168.1.105:2181";
    private static final int SESSION_TIMEOUT = 5000;

    public static void main(String[] args) throws Exception {
        CuratorFramework curator = CuratorFrameworkFactory.newClient(CONNECT_ADDR, new RetryNTimes(3, 1000));
        curator.start();

        ExecutorService executor = Executors.newFixedThreadPool(5);
        DistributedBarrier controlBarrier = new DistributedBarrier(curator, "/example/barrier");
        controlBarrier.setBarrier();

        for(int i=0; i<5; i++) {
            final DistributedBarrier barrier = new DistributedBarrier(curator, "/example/barrier");
            final int index = i;
            Callable<Void> task = () -> {
                Thread.sleep((long) (3 * Math.random()));
                System.out.println("Client#" + index + " wait on Barrier");
                barrier.waitOnBarrier();
                System.out.println("Client#" + index + " begins");
                return null;
            };

            executor.submit(task);
        }

        Thread.sleep(5000);
        controlBarrier.removeBarrier();
        Thread.sleep(5000);
        executor.shutdown();
        curator.close();
    }
}public DistributedDoubleBarrier(CuratorFramework client, String barrierPath, int memberQty)例子程式碼:
public class DistributedDoubleBarrierExample {
    private static final String CONNECT_ADDR = "192.168.1.102:2181,192.168.1.104:2181,192.168.1.105:2181";

    public static void main(String[] args) throws InterruptedException {
        CuratorFramework curator = CuratorFrameworkFactory.newClient(CONNECT_ADDR, new RetryNTimes(3, 1000));
        curator.start();

        ExecutorService executor = Executors.newFixedThreadPool(5);
        for(int i=0; i<5; i++) {
            final DistributedDoubleBarrier barrier = new DistributedDoubleBarrier(curator, "/example/barrier", 5);
            final int index = i;
            Callable<Void> task = () -> {
                Thread.sleep((long) (3000 * Math.random()));
                System.out.println("Client#" + index + " enter");
                barrier.enter();
                System.out.println("Client#" + index + "begin");
                Thread.sleep((long) (3000 * Math.random()));
                barrier.leave();
                System.out.println("Client#" + index + "left");
                return null;
            };
            executor.submit(task);
        }

        executor.shutdown();;
        executor.awaitTermination(10, TimeUnit.MINUTES);
        curator.close();
    }
}
相關推薦
使用Java API、Curator操作zookeeper的acl許可權
zk原生api操作acl許可權 預設匿名許可權 ZooKeeper提供瞭如下幾種驗證模式(scheme): digest:Client端由使用者名稱和密碼驗證,譬如user:password,digest的密碼生成方式是Sha1摘要的base64形式 auth:不使用任何id
Zookeeper——4、使用Curator操作Zookeeper
為了更好的實現Java操作zookeeper伺服器,後來出現了Curator框架,非常的強大,目前已經是Apache的頂級專案,裡面提供了更多豐富的操作,例如session超時重連、主從選舉、分散式計數器、分散式鎖等等適用於各種複雜的zookeeper場景的API封裝。(z
Apache Curator操作zookeeper的API使用
zookeeper 分布式 集群 curator 中間件 curator簡介與客戶端之間的異同點 常用的zookeeper java客戶端: zookeeper原生Java API zkclient Apache curator ZooKeeper原生Java API的不足之處: 在
基於Curator操作ZooKeeper(三)-Curator整合Spring
Java原生API操作ZooKeeper可參看: Java原生API操作Zookeeper(一) Java原生API操作Zookeeper(二) 相關內容: 基於Curator操作ZooKeeper(一)-基本操作 基於Curator操作ZooKeeper(二)-Watche
基於Curator操作ZooKeeper(二)-Watcher操作-補充TreeCache
轉自:https://blog.csdn.net/Leafage_M/article/details/78735485#treecache Java原生API操作ZooKeeper可參看: Java原生API操作Zookeeper(一) Java原生API操作Zookeeper(二)
基於Curator操作ZooKeeper(二)-Watcher操作
Java原生API操作ZooKeeper可參看: Java原生API操作Zookeeper(一) Java原生API操作Zookeeper(二) 相關內容: 基於Curator操作ZooKeeper(一)-基本操作 基於Curator操作ZooKeeper(二)-Watche
基於Curator操作ZooKeeper(一)-基本操作
Java原生API操作ZooKeeper可參看: Java原生API操作Zookeeper(一) Java原生API操作Zookeeper(二) 相關內容: 基於Curator操作ZooKeeper(二)-Watcher操作 基於Curator操作ZooKeeper(二)-W
Curator 操作 zookeeper 全面講解
zookeeper 的安裝與叢集的搭建 請參考我的另一片文章 https://blog.csdn.net/weixin_40461281/article/details/85336396 首先 建立一個maven專案 (不細講了,不會的自行百度) 匯入curator jar包
Apache Curator操作zookeeper的API使用——watcher
curator在註冊watch事件上,提供了一個usingWatcher方法,使用這個方法註冊的watch事件和預設watch事件一樣,監聽只會觸發一次,監聽完畢後就會銷燬,也就是一次性的。而這個方法有兩種引數可選,一個是zk原生API的Watcher介面的實現類,另一個是Curator提供的Cur
使用curator操作zookeeper
使用Java操作zookeeper時,一般有兩種方式:使用zkclient或者curator,相比較來說,curator的使用較為簡便。今天就來看看如何使用curator來操作zookeeper。 需要的依賴如下: <dependency>
18 大資料zookeeper --使用java api操作zookeeper
ZooKeeper服務命令: 在準備好相應的配置之後,可以直接通過zkServer.sh 這個指令碼進行服務的相關操作 1. 啟動ZK服務: sh bin/zkServer.sh start 2. 檢視ZK服務狀態: sh bin/zkServer.sh status 3. 停止
zookeeper概念、應用場景、資料組織、叢集搭建、客戶端操作、Java客戶端、curator
一、zookeeper簡介 1.1 zookeeper簡介 Apache的很多專案以動物來命令,比如Hadoop(大象)、Hive(小蜜蜂)、Pig(豬豬),這些專案都是hadoop生態系統的成員。Hadoop生態系統是為了解決大資料儲存、大資料計算和大資料資料分析的,解決大
zookeeper入門之curator框架--幾種鎖的操作
package com.git.zookeeper.passwordmanager.lock; import java.util.ArrayList; import java.util.List; import java.util.concurrent.TimeUnit; import or
Zookeeper實現原理、結構、相關操作命令
一、基本介紹 Zookeeper 是 Google 的 Chubby一個開源的實現,是 Hadoop 的分散式協調服務 。它包含一個簡單的原語集,分散式應用程式可以基於它實現同步服務,配置維護和命名服
Zookeeper——2、使用Zookeeper原生API操作Zookeeper
zookeeper的javaclient可以使我們更輕鬆的實現對zookeeper的各種操作,要使用java操作zookeeper,需要引入zookeeper-3.4.5.jar和zkclient-0.1.jar。zookeeper-3.4.5.jar是官方提供的JAVA
Zookeeper客戶端基本操作java實現——建立連線、建立節點、新增修改節點內容、獲取子節點、獲取節點資料、刪除節點
一、引入Zookeeper包,新增pom依賴 <dependency> <groupId>org.apache.zookeeper</groupId> <artifactId>zookeeper<
zookeeper(四)——Java的API、Curator、watcher
一、JavaAPI提供ZooKeeper新增、查詢、修改、刪除節點操作 pom檔案: <dependency> <groupId>org.apache.zookeeper</groupId> <artifact
Java操作Zookeeper實現分散式鎖、佇列
Zookeeper客戶端(Apache Curator) ZooKeeper常用客戶端 - zookeeper自帶的客戶端是官方提供的,比較底層、使用起來寫程式碼麻煩、不夠直接。 - Apache Curator是Apache的開源專案,封裝了zooke
Python全棧開發之4、內置函數、文件操作和遞歸
開發 hang mon alien yun alpha err fdm ax1 %E5%AD%97%E8%8A%82%E5%BA%8F%E8%BD%AC%E6%8D%A2%E4%B8%8E%E7%BB%93%E6%9E%84%E4%BD%93%E4%BD%8D%E5%9F%
ActiveMQ 高可用集群安裝、配置(ZooKeeper + LevelDB)
訪問 wrap 創建 管理 apache link over love 其他 ActiveMQ 高可用集群安裝、配置(ZooKeeper + LevelDB) 1、ActiveMQ 集群部署規劃: 環境: JDK7 版本:ActiveMQ 5.11.1 ZooKeep