jmeter使用BeanShell Sampler測試自己寫的java介面(一)
阿新 • • 發佈:2019-01-28
/*
* Created on 2009-9-14
* Copyright 2009 by www.xfok.net. All Rights Reserved
*
*/
package test;
import java.io.File;
import java.io.FileInputStream;
import java.io.FileOutputStream;
import java.util.Properties;
import java.util.Vector;
import com.jcraft.jsch.Channel;
import com.jcraft.jsch.ChannelSftp;
import com.jcraft.jsch.JSch;
import com.jcraft.jsch.Session;
import com.jcraft.jsch.SftpException;
/**
* @author YangHua
* 轉載請註明出處:http://www.xfok.net/2009/10/124485.html
*/
public class TestSftp {
/**
* 連線sftp伺服器
* @param host 主機
* @param port 埠
* @param username 使用者名稱
* @param password 密碼
* @return
*/
public ChannelSftp connect (String host, int port, String username,
String password) {
ChannelSftp sftp = null;
try {
JSch jsch = new JSch();
jsch.getSession(username, host, port);
Session sshSession = jsch.getSession(username, host, port);
System.out.println("Session created.");
sshSession.setPassword(password);
Properties sshConfig = new Properties();
sshConfig.put("StrictHostKeyChecking", "no");
sshSession.setConfig(sshConfig);
sshSession.connect();
System.out.println("Session connected.");
System.out.println("Opening Channel.");
Channel channel = sshSession.openChannel("sftp");
channel.connect();
sftp = (ChannelSftp) channel;
System.out.println("Connected to " + host + ".");
} catch (Exception e) {
}
return sftp;
}
/**
* 上傳檔案
* @param directory 上傳的目錄
* @param uploadFile 要上傳的檔案
* @param sftp
*/
public void upload(String directory, String uploadFile, ChannelSftp sftp) {
try {
sftp.cd(directory);
File file=new File(uploadFile);
sftp.put(new FileInputStream(file), file.getName());
} catch (Exception e) {
e.printStackTrace();
}
}
/**
* 下載檔案
* @param directory 下載目錄
* @param downloadFile 下載的檔案
* @param saveFile 存在本地的路徑
* @param sftp
*/
public void download(String directory, String downloadFile,String saveFile, ChannelSftp sftp) {
try {
sftp.cd(directory);
File file=new File(saveFile);
sftp.get(downloadFile, new FileOutputStream(file));
} catch (Exception e) {
e.printStackTrace();
}
}
/**
* 刪除檔案
* @param directory 要刪除檔案所在目錄
* @param deleteFile 要刪除的檔案
* @param sftp
*/
public void delete(String directory, String deleteFile, ChannelSftp sftp) {
try {
sftp.cd(directory);
sftp.rm(deleteFile);
} catch (Exception e) {
e.printStackTrace();
}
}
/**
* 列出目錄下的檔案
* @param directory 要列出的目錄
* @param sftp
* @return
* @throws SftpException
*/
public Vector listFiles(String directory, ChannelSftp sftp) throws SftpException{
return sftp.ls(directory);
}
public static void main(String[] args) {
TestSftp sf = new TestSftp();
String host = "192.168.0.1";
int port = 22;
String username = "root";
String password = "root";
String directory = "/";
String uploadFile = "D:\\tmp\\upload.txt";
String downloadFile = "upload.txt";
String saveFile = "D:\\tmp\\download.txt";
String deleteFile = "delete.txt";
ChannelSftp sftp=sf.connect(host, port, username, password);
sf.upload(directory, uploadFile, sftp);
sf.download(directory, downloadFile, saveFile, sftp);
sf.delete(directory, deleteFile, sftp);
try{
sftp.cd(directory);
sftp.mkdir("ss");
System.out.println("finished");
}catch(Exception e){
e.printStackTrace();
}
}
}
- 寫測試程式碼,除錯下載
package test;
import com.jcraft.jsch.ChannelSftp;
public class TestSftpMain {
public static void main(String[] args){
TestSftp sf = new TestSftp();
String host = "192.168.1.107";
int port = 22;
String username = "root";
String password = "wxf";
String directory = "/root/Desktop";
String uploadFile = "D:\\tmp\\upload.txt";
String downloadFile = "threadServer.py";
String saveFile = "D:\\threadServer.py";
String deleteFile = "delete.txt";
ChannelSftp sftp=sf.connect(host, port, username, password);
// sf.upload(directory, uploadFile, sftp);
sf.download(directory, downloadFile, saveFile, sftp);
// sf.delete(directory, deleteFile, sftp);
try{
sftp.cd(directory);
sftp.mkdir("ss");
System.out.println("finished");
}catch(Exception e){
e.printStackTrace();
}
}
}
程式碼是將伺服器的Desktop下面的一個py檔案下載到本地的D盤
執行結果:下載成功
程式碼沒有問題。使用上面的方法還需要下載第三方jar包地址:
下載地址:CSDN有下載
- 在jmeter中實現呼叫
搞了半天,呼叫上面的程式碼失敗了,總是提示Typed variable declaration : Object constructorshi
問題定位過程:
1 經過不斷嘗試,定位問題,以為BeanShell Sampler不允許例項化物件,只能使用匿名物件。
2 實際是因為有了型別變數宣告:
下面聲明瞭一個ChannelSftp的型別變數。也就是說程式碼中只能宣告基礎變數
3 實際是沒有載入建立型別變數的jar包,在eclipse裡面通過新增外部jar包加進去了所以是成功的。到了jmeter就會出現編譯都失敗。只是這個問題提示不好定位。
錯誤如下
Response message: org.apache.jorphan.util.JMeterException:
Error invoking bsh method: eval Sourced file: inline
evaluation of:
`source("F:\\javatcp\\test\\src\\test\\test11.java");
test11 ts = new test11(); . . . '' :
Typed variable declaration : Object constructor
public ChannelSftp connect(String host, int port, String username,
String password) {
ChannelSftp sftp = null;
return sftp;
}
先附上簡單的呼叫介面方式,再解決前面的問題
beanShell測試自己的java介面:
步驟:
1 編寫程式碼:
public class Test {
public int ad(){
return 3;
}
}
2 beanshell指令碼
source是直接載入java,也可以載入class檔案更快
vars.put(“ad”,res.toString()); 給變數ad賦值
source("F:\\javatcp\\BSFjmeter\\src\\TestAdd.java");
int res = new Test().ad(3,3);
vars.put("ad",res.toString());
Debug Sampler樣本的結果
JMeterVariables:
JMeterThread.last_sample_ok=true
JMeterThread.pack=org.apache.jmeter.threads.SamplePackage@c5adae
START.HMS=173222
START.MS=1458466342471
START.YMD=20160320
TESTSTART.MS=1458467432453
ddd=2
這裡實現了簡單的呼叫
BeanShell Sampler測試還有很多強大的用法,後面測試中繼續加強練習
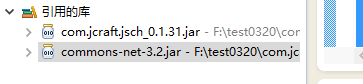
搞了好久,前面提示了不能宣告型別變數,是因為沒有引入對應的jar包。現在引入jar包
jmter引入第三方jar包除了直接放到lib/ext下,還有一種方式就是如圖:
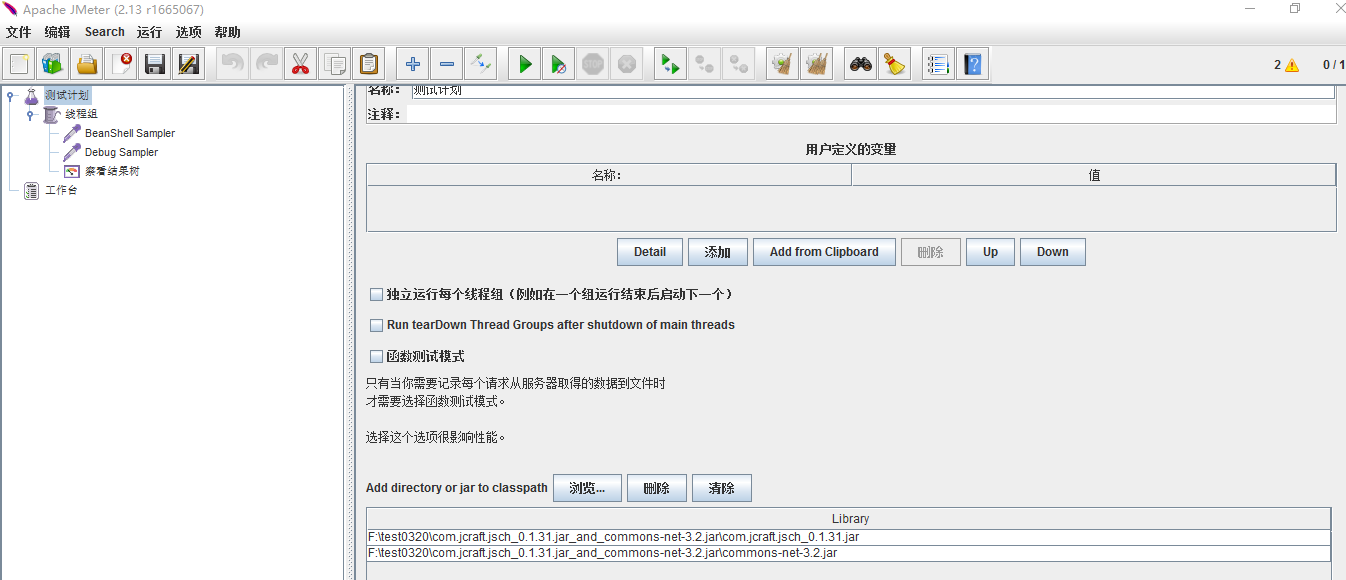
然後再測試就可以通過了