
Netty4(二)服務端和客戶端實現
阿新 • • 發佈:2019-02-04
目標
用netty4實現一個服務端和客戶端,兩者之間可以進行測試通訊
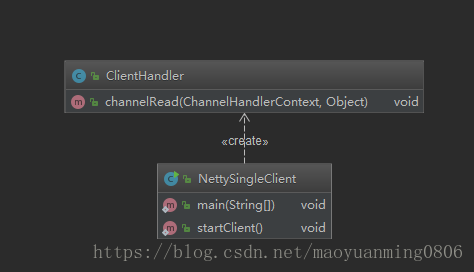
程式碼UML類圖
服務端

客戶端
Netty4實現服務端
服務類
package com.mym.netty.server;
import io.netty.bootstrap.ServerBootstrap;
import io.netty.channel.*;
import io.netty.channel.nio.NioEventLoopGroup;
import io.netty.channel.socket.nio.NioServerSocketChannel;
import io.netty.handler.codec.string.StringDecoder;
import Handler1
package com.mym.netty.server;

import io.netty.channel.ChannelHandlerContext;
import io.netty.channel.ChannelInboundHandlerAdapter;

public class ServerHandler extends ChannelInboundHandlerAdapter {


    /*
    * ChannelInboundHandlerAdapter:ChannelInboundHandlerAdapter是ChannelInboundHandler的一個簡單實現,預設情況下不會做任何處理,
    *   只是簡單的將操作通過fire*方法傳遞到ChannelPipeline中的下一個ChannelHandler中讓鏈中的下一個ChannelHandler去處理。
    *
    * SimpleChannelInboundHandler:SimpleChannelInboundHandler支援泛型的訊息處理,預設情況下訊息處理完將會被自動釋放,無法提供
    *   fire*方法傳遞給ChannelPipeline中的下一個ChannelHandler,如果想要傳遞給下一個ChannelHandler需要呼叫ReferenceCountUtil#retain方法。
    * */

    @Override
    public void channelRead(ChannelHandlerContext ctx, Object msg) throws Exception {
        System.out.println("ServerHandler receive msg:"+msg.toString());

        //寫訊息:先得到channel,在寫如通道然後flush重新整理通道把訊息發出去。
        ctx.channel().writeAndFlush("this is ServerHandler reply msg happend at !"+System.currentTimeMillis());

        //把訊息往下一個Handler傳
        ctx.fireChannelRead(msg);
    }
}
Handler2
package com.mym.netty.server;

import io.netty.channel.ChannelHandlerContext;
import io.netty.channel.ChannelInboundHandlerAdapter;

public class ServerHandler2  extends ChannelInboundHandlerAdapter {
    @Override
    public void channelRead(ChannelHandlerContext ctx, Object msg) throws Exception {
        System.out.println("ServerHandler2 receive msg:"+msg.toString());
        ctx.channel().writeAndFlush("this is ServerHandler2 reply msg happend at !"+System.currentTimeMillis());
    }
}
Netty4實現客戶端
客戶端服務類
package com.mym.netty.client;

import io.netty.bootstrap.Bootstrap;
import io.netty.channel.*;
import io.netty.channel.nio.NioEventLoopGroup;
import io.netty.channel.socket.nio.NioSocketChannel;
import io.netty.handler.codec.string.StringDecoder;
import io.netty.handler.codec.string.StringEncoder;

import java.io.BufferedReader;
import java.io.InputStreamReader;

/**
 * netty客戶端
 */
public class NettySingleClient {

    public static void main(String[] args) {
        startClient();
    }

    public static void startClient(){
        //1.定義服務類
        Bootstrap clientBootstap = new Bootstrap();

        //2.定義執行執行緒組
        EventLoopGroup worker = new NioEventLoopGroup();

        //3.設定執行緒池
        clientBootstap.group(worker);

        //4.設定通道
        clientBootstap.channel(NioSocketChannel.class);

        //5.新增Handler
        clientBootstap.handler(new ChannelInitializer<Channel>() {
            @Override
            protected void initChannel(Channel channel) throws Exception {
                System.out.println("client channel init!");
                ChannelPipeline pipeline = channel.pipeline();
                pipeline.addLast("StringDecoder",new StringDecoder());
                pipeline.addLast("StringEncoder",new StringEncoder());
                pipeline.addLast("ClientHandler",new ClientHandler());
            }
        });

        //6.建立連線
        ChannelFuture channelFuture = clientBootstap.connect("0.0.0.0",9099);
        try {
            //7.測試輸入
            BufferedReader bufferedReader = new BufferedReader(new InputStreamReader(System.in));
            while(true){
                System.out.println("請輸入:");
                String msg = bufferedReader.readLine();
                channelFuture.channel().writeAndFlush(msg);
            }
        } catch (Exception e) {
            e.printStackTrace();
        }finally {
            //8.關閉連線
            worker.shutdownGracefully();
        }
    }
}
客戶端的handler
package com.mym.netty.client;

import io.netty.channel.ChannelHandlerContext;
import io.netty.channel.ChannelInboundHandlerAdapter;

public class ClientHandler extends ChannelInboundHandlerAdapter {
    @Override
    public void channelRead(ChannelHandlerContext ctx, Object msg) throws Exception {
        System.out.println("client receive msg:"+msg.toString());
    }
}
測試
啟動服務端和客戶端後,客戶端傳送nihao!服務端迴應,然後客戶端傳送hello,服務端迴應。
服務端輸出
success to initHandler!
ServerHandler receive msg:nihao!
ServerHandler2 receive msg:nihao!
ServerHandler receive msg:hello
ServerHandler2 receive msg:hello
客戶端輸出
client channel init!
請輸入:
nihao!
請輸入:
client receive msg:this is ServerHandler reply msg happend at !1531893027697this is ServerHandler2 reply msg happend at !1531893027698
hello
請輸入:
client receive msg:this is ServerHandler reply msg happend at !1531893045446this is ServerHandler2 reply msg happend at !1531893045447
小結
需要注意的是,服務端和客戶端除了啟動類和socket channel不一樣以外,其他幾乎一致的操作。
本文的客戶端是單連線,下文將介紹多連線客戶端的操作。