
品優購專案記錄:day04
今日目標:
(1)實現 Spring Security 入門 Demo
(2)完成運營商登入與安全控制功能
(3)完成商家入駐
(4)完成商家稽核
(5)完成商家系統登入與安全控制功能
目錄
1、運營商系統登入與安全控制
1.1 匯入 Spring Security 依賴
        <!-- spring security -->
        <dependency>
            <groupId>org.springframework.security</groupId>
            <artifactId>spring-security-web</artifactId>
        </dependency>
        <dependency>
            <groupId>org.springframework.security</groupId>
            <artifactId>spring-security-config</artifactId>
        </dependency>
1.2 配置檔案相關
(1)web.xml 新增配置
    <context-param>
        <param-name>contextConfigLocation</param-name>
        <param-value>classpath:spring/spring-security.xml</param-value>
    </context-param>
    <listener>
        <listener-class>
            org.springframework.web.context.ContextLoaderListener
        </listener-class>
    </listener>

    <filter>
        <filter-name>springSecurityFilterChain</filter-name>
        <filter-class>org.springframework.web.filter.DelegatingFilterProxy</filter-class>
    </filter>
    <filter-mapping>
        <filter-name>springSecurityFilterChain</filter-name>
        <url-pattern>/*</url-pattern>
    </filter-mapping>
(2)新增spring-security.xml 檔案
<?xml version="1.0" encoding="UTF-8"?>
<beans:beans xmlns="http://www.springframework.org/schema/security"
	xmlns:beans="http://www.springframework.org/schema/beans" xmlns:xsi="http://www.w3.org/2001/XMLSchema-instance"
	xsi:schemaLocation="http://www.springframework.org/schema/beans http://www.springframework.org/schema/beans/spring-beans.xsd
						http://www.springframework.org/schema/security http://www.springframework.org/schema/security/spring-security.xsd">

	<!-- 以下頁面不被攔截 -->
	<http pattern="/login.html" security="none"></http>
	<http pattern="/css/**" security="none"></http>
	<http pattern="/img/**" security="none"></http>
	<http pattern="/js/**" security="none"></http>
	<http pattern="/plugins/**" security="none"></http>

	<!-- 頁面攔截規則 -->
	<http use-expressions="false">
		<intercept-url pattern="/**" access="ROLE_ADMIN" />
		<form-login login-page="/login.html"  default-target-url="/admin/index.html"
					authentication-failure-url="/login.html" always-use-default-target="true"/>
		<csrf disabled="true"/>
		<headers>
			<frame-options policy="SAMEORIGIN"/>
		</headers>
	</http>

	<!-- 認證管理器 -->
	<authentication-manager>
		<authentication-provider>
			<user-service>
				<user name="admin" password="123456" authorities="ROLE_ADMIN"/>
				<user name="user" password="123456" authorities="ROLE_ADMIN"/>
			</user-service>
		</authentication-provider>
	</authentication-manager>


</beans:beans>
(3)指定登入頁面,訪問的action路徑為Spring Security提供的/login,並配置賬號密碼提交的欄位為username和password

注意:提交路徑,和name屬性的值都是可以在配置檔案中修改的,都可以在form-login 的屬性中配置
<!--
	login-processing-url="/sysLogin" : 配置登入請求的路徑
	username-parameter="user" : 配置賬號提交到的欄位
	password-parameter="pwd" : 配置密碼提交到的欄位
-->
(4)指定表單id,並給登入按鈕設定繫結事件,提交表單
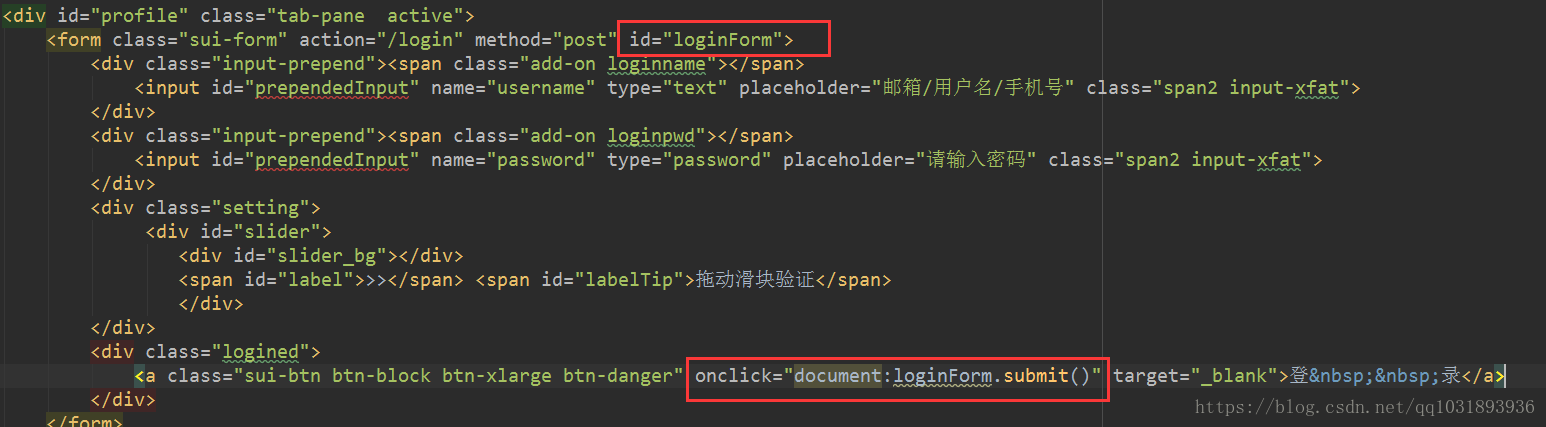
注意:
(1)表單提交必須為post
(2)提交路徑、賬號和密碼欄位,均可以自定義
(3)登入成功預設是跳轉到本次會話的上一次沒有訪問成功的頁面,如果沒有就跳轉到預設登入成功頁面,always-user-default-target="true"配置,可以設定,登陸成功總是跳轉到預設登入成功頁面,一般後臺管理系統會配置。前臺頁面不配置,使用者體驗會更好。
1.3 登入後顯示登入使用者名稱
(1)後端程式碼,新建一個LoginController,用於獲取登入名並返回到前端
package com.pinyougou.manager.controller;

import org.springframework.security.core.context.SecurityContextHolder;
import org.springframework.web.bind.annotation.RequestMapping;
import org.springframework.web.bind.annotation.RestController;

import java.util.HashMap;
import java.util.Map;

/**
 * 登入相關控制層
 * Author xushuai
 * Description
 */
@RestController
@RequestMapping("/login")
public class LoginController {


    /**
     * 返回當前登入使用者名稱
     *
     * @return java.util.Map
     */
    @RequestMapping("/showName")
    public Map showName() {
        // 使用spring security的方法獲取
        String name = SecurityContextHolder.getContext().getAuthentication().getName();
        // 封裝到 Map 中
        Map<String, String> map = new HashMap<>();
        map.put("loginName", name);

        return map;
    }
}
(2)前端
a、編寫loginService.js
app.service('loginService', function ($http) {

    //獲取登入使用者名稱
    this.showName = function () {
        return $http.get('../login/showName.do');
    }
});
b、編寫indexService.js
app.controller('indexController', function ($scope, loginService) {

    // 顯示當前登入使用者名稱
    $scope.showName = function () {
        loginService.showName().success(
            function (rtn) {
                $scope.loginName = rtn.loginName;
            }
        );
    }
});
c、頁面引入js檔案
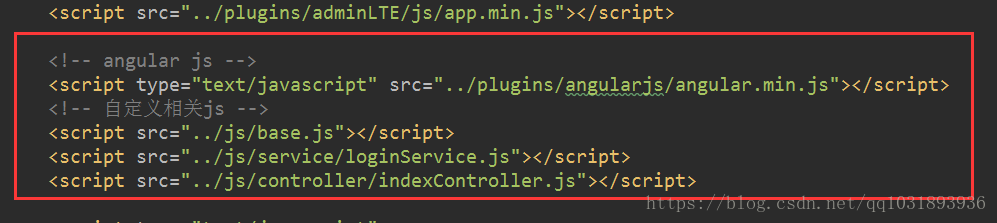
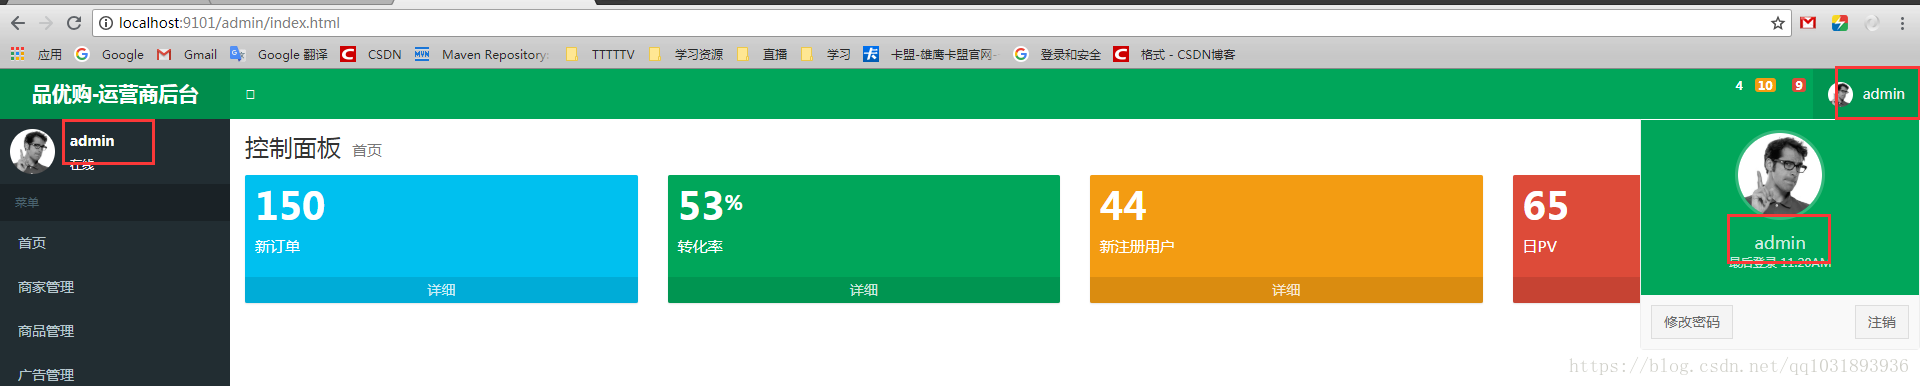
d、修改所有 "測試使用者" 為 "{{loginName}}" ,使用查詢替換

效果:
1.4 退出登入
只需要在 spring-security中的http節點中,配置 logout ,然後在前端頁面中的登出按鈕,請求該 /logout 即可
(1)配置

(2)登出按鈕

2、商家申請入駐
2.1 前端
(1)為所有的輸入框繫結提交變數
(2)給申請入駐按鈕繫結單擊事件
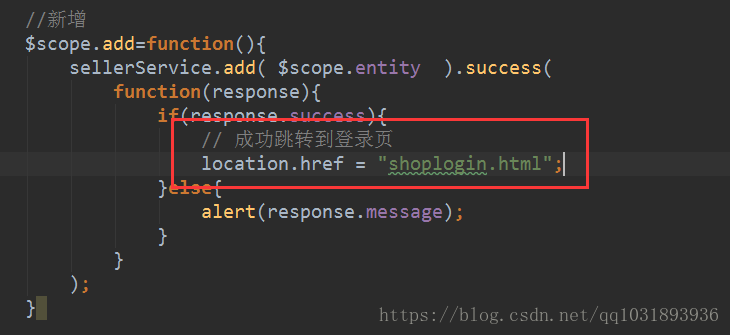
(3)修改前端新增 JS 程式碼
2.2 後端
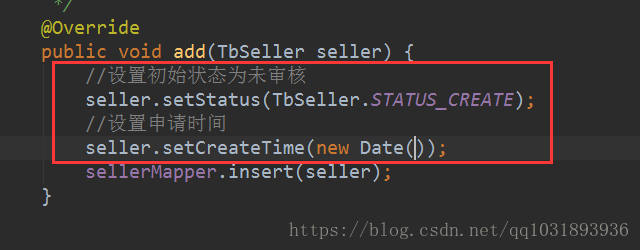
只需要在儲存之前,補全資料即可(sellergoods-service)
3、商家稽核
3.1 待稽核商家列表
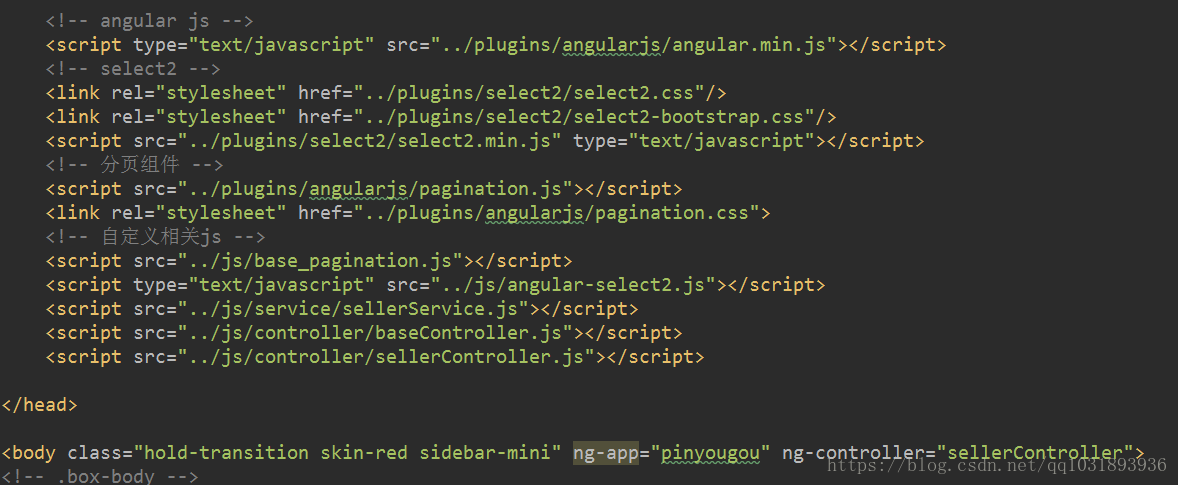
(1)引入js,在頁面新增分頁控制元件,在body中引入 ng-app 和 ng-controller
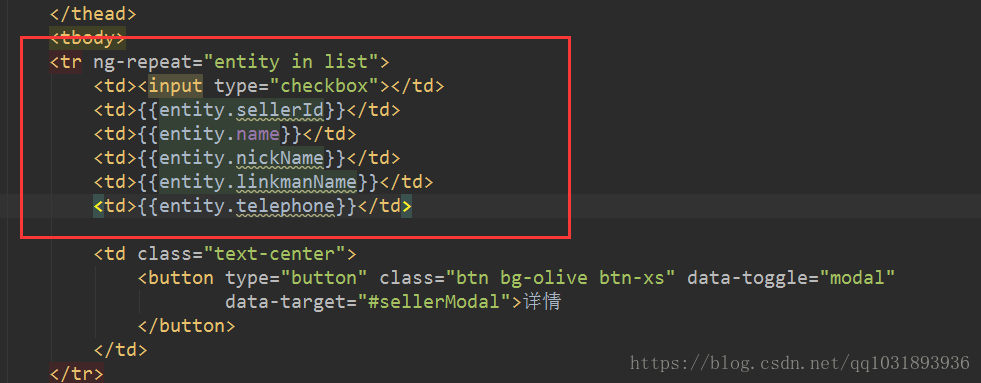
(2)迴圈顯示列表
(3)初始化的時候,設定搜尋status=0

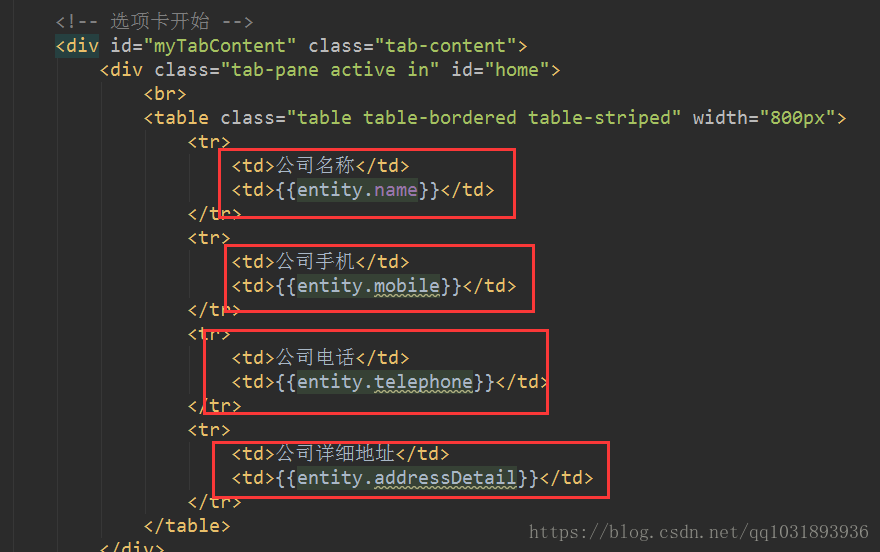
3.2 檢視商家詳情
(1)為詳情按鈕新增單擊事件

(2)繫結變數到需要回顯資料的地方
3.3 商家狀態修改
(1)服務層介面(sellergoods-interface),新增方法
	/**
	 * 修改商家狀態
	 *
	 * @param sellerId 商家id
	 * @param status 狀態
	 */
	void updateStatus(String sellerId, String status);
(2)服務層實現(sellergoods-service),實現
	@Override
	public void updateStatus(String sellerId, String status) {
		//查詢商家
		TbSeller seller = sellerMapper.selectByPrimaryKey(sellerId);
		if(seller != null) {
			//修改狀態
			seller.setStatus(status);
			//儲存
			sellerMapper.updateByPrimaryKey(seller);
		}
	}
(3)控制層(SellerController)
    /**
     * 修改商家狀態
     *
     * @return entity.Result
     */
    public Result updateStatus(String sellerId, String status) {
        try {
            sellerService.updateStatus(sellerId, status);
            return Result.success("修改成功");
        } catch (Exception e) {
            e.printStackTrace();
            return Result.error("修改失敗");
        }
    }
(4)前端sellerService.js新增方法
	//更改狀態
	this.updateStatus = function (sellerId, status) {
		return $http.get('../seller/updateStatus.do?sellerId=' + sellerId + '&status=' + status);
    }
(5)前端sellerController.js新增方法
	//修改商家狀態
	$scope.updateStatus = function (sellerId, status) {
		sellerService.updateStatus(sellerId,status).success(
			function (rtn) {
				alert(rtn.message);
				if(rtn.success) {
                    $scope.reloadList();//重新整理列表
				}
            }
		);
    }
(6)前端按鈕新增單擊事件

4、商家系統登入和安全控制
4.1 準備工作
(1)引入Spring Security依賴
(2)修改web.xml
(3)修改登入表單。提交路徑為"/login";賬號和密碼提交的欄位分別為 username 和password;給按鈕新增單擊事件,用於提交登入表單資料
4.2 商家登入
(1)編寫自定義認證類,需要實現 UserDetailsService
package com.pinyougou.shop.security;

import com.pinyougou.pojo.TbSeller;
import com.pinyougou.sellergoods.service.SellerService;
import org.springframework.security.core.GrantedAuthority;
import org.springframework.security.core.authority.SimpleGrantedAuthority;
import org.springframework.security.core.userdetails.User;
import org.springframework.security.core.userdetails.UserDetails;
import org.springframework.security.core.userdetails.UserDetailsService;
import org.springframework.security.core.userdetails.UsernameNotFoundException;

import java.util.ArrayList;
import java.util.List;

/**
 * Spring Security 自定義認證類
 * Author xushuai
 * Description
 */
public class UserDetailsServiceImpl implements UserDetailsService {


    private SellerService sellerService;

    public void setSellerService(SellerService sellerService) {
        this.sellerService = sellerService;
    }

    @Override
    public UserDetails loadUserByUsername(String username) throws UsernameNotFoundException {
        // 構建角色列表
        List<GrantedAuthority> authorities = new ArrayList<>();
        // 這個角色名必須在 Spring Security 配置檔案中配置
        authorities.add(new SimpleGrantedAuthority("ROLE_SELLER"));

        //按使用者名稱獲取商家
        TbSeller seller = sellerService.findOne(username);
        if (seller != null) {
            // 判斷商家狀態是否合法
            if(seller.getStatus().equals(TbSeller.STATUS_CHECK)) {// 合法
                /*
                 * 進行校驗:
                 *      Spring Security會自動校驗輸入的username、password,與User物件中的useranme和password進行校驗
                 *      如果校驗成功,就將角色列表中的角色賦予給當前登入的使用者
                 */
                return new User(username, seller.getPassword(), authorities);
            }
        }

        return null;
    }
}
(2) spring-security.xml配置檔案
<?xml version="1.0" encoding="UTF-8"?>
<beans:beans xmlns="http://www.springframework.org/schema/security"
	xmlns:beans="http://www.springframework.org/schema/beans" xmlns:xsi="http://www.w3.org/2001/XMLSchema-instance"
	xmlns:dubbo="http://code.alibabatech.com/schema/dubbo"
	xsi:schemaLocation="http://www.springframework.org/schema/beans http://www.springframework.org/schema/beans/spring-beans.xsd
						http://www.springframework.org/schema/security http://www.springframework.org/schema/security/spring-security.xsd
						http://code.alibabatech.com/schema/dubbo http://code.alibabatech.com/schema/dubbo/dubbo.xsd">

	<!-- 以下頁面不被攔截 -->
	<http pattern="/*.html" security="none"></http>
	<http pattern="/css/**" security="none"></http>
	<http pattern="/img/**" security="none"></http>
	<http pattern="/js/**" security="none"></http>
	<http pattern="/plugins/**" security="none"></http>
	<http pattern="/seller/add.do" security="none"></http>

	<!-- 頁面攔截規則 -->
	<http use-expressions="false">
		<intercept-url pattern="/**" access="ROLE_SELLER" />
		<!--
			login-processing-url="/sysLogin" : 配置登入請求的路徑
			 username-parameter="user" : 配置賬號提交到的欄位
			 password-parameter="pwd" : 配置密碼提交到的欄位

			 always-use-default-target :
			 	總是跳轉到預設的登入成功後顯示的頁面,如果不寫這個配置,
			 	預設登入成功後首先跳轉到當前會話上次沒有訪問成功的頁面

		 -->
		<form-login login-page="/shoplogin.html"  default-target-url="/admin/index.html"
					authentication-failure-url="/shoplogin.html" always-use-default-target="true"/>
		<!-- 退出登入 -->
		<logout />
		<csrf disabled="true"/>
		<!-- 配置ifream允許訪問 -->
		<headers>
			<frame-options policy="SAMEORIGIN"/>
		</headers>
	</http>

	<!-- 認證管理器 -->
	<authentication-manager>
		<!-- 指定自定認證類為認證提供者 -->
		<authentication-provider user-service-ref="userDetailsService"/>
	</authentication-manager>

	<!-- 配置自定義認證類 -->
	<beans:bean id="userDetailsService" class="com.pinyougou.shop.security.UserDetailsServiceImpl">
		<beans:property name="sellerService" ref="sellerService"/>
	</beans:bean>

	<!-- 引用dubbo 服務 -->
	<dubbo:application name="pinyougou-shop-web" />
	<dubbo:registry address="zookeeper://192.168.25.170:2181"/>
	<dubbo:reference id="sellerService" interface="com.pinyougou.sellergoods.service.SellerService"/>
</beans:beans>
4.3 BCrypt加密演算法
使用者表的密碼通常使用MD5等不可逆演算法加密後儲存,為防止彩虹表破解更會先使用一個特定的字串(如域名)加密,然後再使用一個隨機的salt(鹽值)加密。 特定字串是程式程式碼中固定的,salt是每個密碼單獨隨機,一般給使用者表加一個欄位單獨儲存,比較麻煩。 BCrypt演算法將salt隨機並混入最終加密後的密碼,驗證時也無需單獨提供之前的salt,從而無需單獨處理salt問題。
4.4 商家入駐時,進行密碼加密
(1)修改SellerController的add方法(shop-web)

(2)在spring-security.xml配置檔案中,配置登入時的密碼加密方式

4.5 商家管理與商家稽核一致,參考商家稽核
5、商家修改資料
5.1 回顯資料到修改資料頁面
(1)後端,LoginController(shop-web),新增方法獲取當前登入使用者的id
    /**
     * 返回當前登入使用者ID
     */
    @RequestMapping("/sellerId")
    public String sellerId() {
        // 使用spring security的方法獲取
        String name = SecurityContextHolder.getContext().getAuthentication().getName();

        return name;
    }
5.2 前端
(1)引入js檔案,設定ng-app和ng-controller
(2)輸入框繫結變數,回顯資料

(3)loginService.js新增方法
    this.sellerId = function () {
        return $http.get('../login/sellerId.do');
    }
(4)sellerService.js新增方法
	// 使用id載入當前商家資訊
	$scope.sellerId = "";
	$scope.loadId = function () {
		loginService.sellerId().success(
			function (rtn) {
                sellerId = JSON.parse(rtn);
                $scope.findOne(sellerId);
            }
		);
    }
注意:需要注入loginService服務,且前端頁面要引入loginService.js檔案
(5)頁面初始化執行 loadId()

(6)效果

5.2 點選儲存,修改資料(後端部分已由程式碼生成器生成)
(1)前端,sellerController.js新增方法
    //更新
    $scope.update=function(){
        sellerService.update( $scope.entity  ).success(
            function(response){
                if(response.success){
                    alert(response.message);
                    $scope.loadId();
                }else{
                    alert(response.message);
                }
            }
        );
    }
(2)為頁面中的 儲存按鈕繫結單擊事件

6、商家修改密碼
6.1 後端
(0)新增一個實體類,用於接受前端傳過來的新舊密碼
package entity;

/**
 * 修改密碼時,存放舊密碼和新密碼的實體
 * Author xushuai
 * Description
 */
public class Password {

    private String oldPwd;
    private String newPwd;

    public String getOldPwd() {
        return oldPwd;
    }

    public void setOldPwd(String oldPwd) {
        this.oldPwd = oldPwd;
    }

    public String getNewPwd() {
        return newPwd;
    }

    public void setNewPwd(String newPwd) {
        this.newPwd = newPwd;
    }
}
(1)服務層介面(sellergoods-interface),新增方法
    /**
     * 修改密碼
     *
     * @param sellerId 商家id
     * @param oldPwd   舊密碼
     * @param newPwd   新密碼
     */
    void updatePassword(String sellerId, String newPwd);
(2)服務層實現(sellergoods-service),實現
	@Override
	public void updatePassword(String sellerId, String newPwd) {
		// 查詢商家
		TbSeller seller = sellerMapper.selectByPrimaryKey(sellerId);
		if(seller != null) {
			// 修改密碼
			seller.setPassword(newPwd);
			sellerMapper.updateByPrimaryKey(seller);
		}

	}
(3)控制層,shop-web下的SellerController(重點是使用 BCrypt.checkpw() 進行密碼校驗)
    @RequestMapping("/updatePassword")
    public Result updatePassword(@RequestBody Password password) {
        try {
            // 對密碼進行加密處理
            BCryptPasswordEncoder passwordEncoder = new BCryptPasswordEncoder();
            String newPwd = passwordEncoder.encode(password.getNewPwd());
            //獲取當前登入的使用者id
            String name = SecurityContextHolder.getContext().getAuthentication().getName();
            TbSeller seller = findOne(name);
            //校驗兩個密碼是否一致
            if(BCrypt.checkpw(password.getOldPwd(),seller.getPassword())) {//一致
                sellerService.updatePassword(name, newPwd);
                return Result.success("修改密碼成功");
            }

            return Result.error("原密碼錯誤");
        } catch (Exception e) {
            e.printStackTrace();
            return Result.error("修改密碼失敗");
        }
    }
6.2 前端
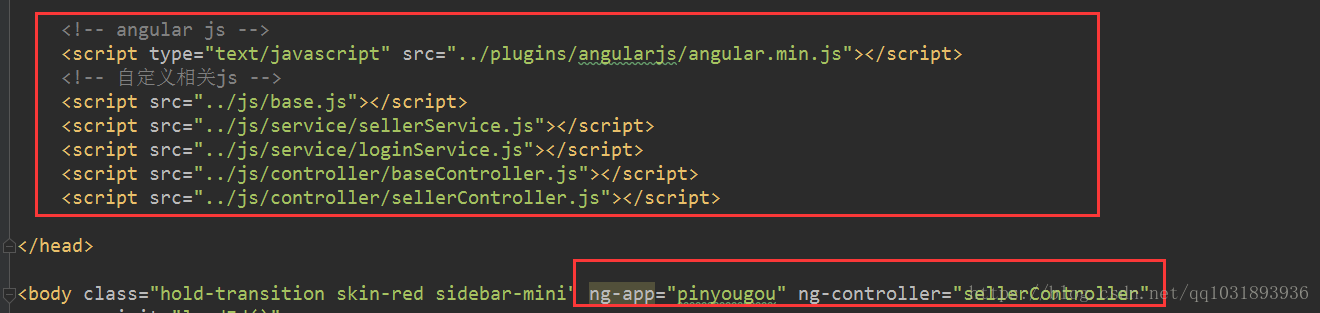
(1)引入js相關
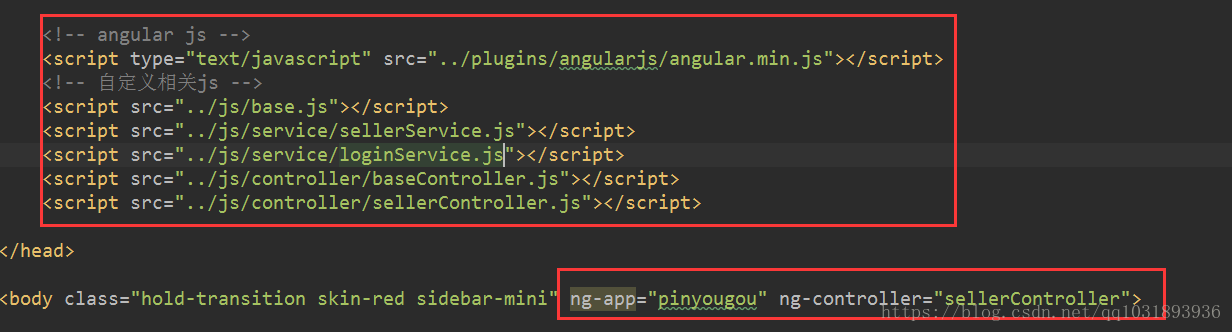
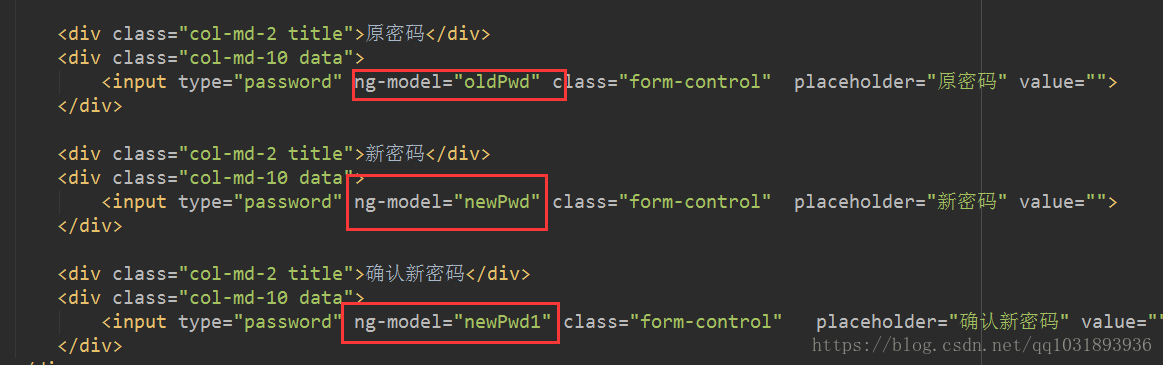
(2)繫結變數到輸入框
(3) sellerController.js新增方法
    // 修改密碼
	$scope.updatePassword = function () {
        //校驗兩次密碼是否一致
		if($scope.newPwd != $scope.newPwd1) {
			alert("兩次密碼輸入不一致!");
		} else {
			$scope.password={oldPwd:$scope.oldPwd,newPwd:$scope.newPwd};
			sellerService.updatePassword($scope.password).success(
				function (rtn) {
					alert(rtn.message);
                }
			);
		}
    }
(4)sellerService.js新增方法
	//修改密碼
	this.updatePassword = function (password) {
		return $http.post('../seller/updatePassword.do', password);
    }
(5)儲存按鈕繫結單擊事件
