
字元驗證碼識別專案記錄

專案簡介:
最近在做一個有趣的專案,需要對某網站的驗證碼進行識別。
某網站驗證碼如圖: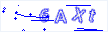 ,畫素大小:30x106x3
通過人工標記的驗證碼數量約為1000條:

現在需要通過機器學習方法來進行識別新驗證碼,設計的方案有如下四種:
-
KNN + 原樣本圖;需要對影象去噪、二值化、切割等處理。對資料量要求沒CNN高。
-
CNN + 原樣本圖;缺點:樣本少,優點:資料質量高。
-
CNN + 構造類似驗證碼圖;缺點:構造驗證碼是否和和原驗證碼類似,需要較高技術;優點:樣本多。
-
CNN + 單字元樣本圖;優點:輸入影象小,且輸出類別少。
-
其他:如用pytesseract+去噪+二值化等,簡單嘗試了一下準確率很低,pass掉了
方案一:KNN + 原樣本圖
步驟:
-
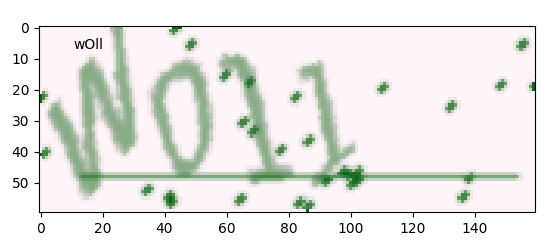
去噪: 原圖:
	 class NoiseDel():
		#去除干擾噪聲
		def noise_del(self,img):
			height = img.shape[0]
			width = img.shape[1]
			channels = img.shape[2]

			# 清除四周噪點
			for row in [0,height-1]:
				for column in range(0, width):
					if img[row, column, 0] == 0 and img[row, column, 1] == 0:
						img[row, column, 0] = 255
						img[row, column, 1] = 255
			for column in [0,width-1]:
				for row in range(0, height):
					if img[row, column, 0] == 0 and img[row, column, 1] == 0:
						img[row, column, 0] = 255
						img[row, column, 1] = 255

			# 清除中間區域噪點
			for row in range(1,height-1):
				for column in range(1,width-1):
					if img[row, column, 0] == 0 and img[row, column, 1] == 0:
						a = img[row - 1, column]  # 上
						b = img[row + 1, column]  # 下
						c = img[row, column - 1]  # 左
						d = img[row, column + 1]  # 右
						ps = [p for p in [a, b, c, d] if 1 < p[1] < 255]
						# 如果上下or左右為白色,設定白色
						if  (a[1]== 255 and b[1]== 255) or (c[1]== 255 and d[1]== 255):
							img[row, column, 0] = 255
							img[row, column, 1] = 255
						# 設定灰色

						elif len(ps)>1:
							kk = np.array(ps).mean(axis=0)
							img[row, column, 0] = kk[0]
							img[row, column, 1] = kk[1]
							img[row, column, 2] = kk[2]
						else:
							img[row, column, 0] = 255
							img[row, column, 1] = 255
			return img
	    # 灰度化
		def convert2gray(self,img):
			if len(img.shape) > 2:
				gray = np.mean(img, -1)
				# 上面的轉法較快,正規轉法如下
				# r, g, b = img[:,:,0], img[:,:,1], img[:,:,2]
				# gray = 0.2989 * r + 0.5870 * g + 0.1140 * b
				return gray
			else:
				return img

		# 二值化
		def binarizing(self,img,threshold, cov=False):
			w, h = img.shape
			if cov:
				for y in range(h):
					for x in range(w):
						if img[x, y] > threshold:
							img[x, y] = 0
						else:
							img[x, y] = 255
			else:
				for y in range(h):
					for x in range(w):
						if img[x, y] < threshold:
							img[x, y] = 0
						else:
							img[x, y] = 255
			return img
去噪後:
-
切分最小圖
	def cut_box(img,resize=(64,18)):

		# 灰度,二值化
		image = nd.convert2gray(img)
		image = nd.binarizing(image,190, True)

		image = Image.fromarray(image)
		img0 = Image.fromarray(img)
		box = image.getbbox()
		box1 = (box[0]-2,box[1]-2,box[2]+2,box[3]+2)
		image = img0.crop(box1)
		image = image.resize(resize)

		return np.array(image)
切分後:

-
分割字串:
	def seg_img(img):
		h,w,c = img.shape
		d = int(w/4)
		img_list = []
		for i in range(4):
			img_list.append(img[:,i*d:(i+1)*d])
		return img_list
分割後:
 ,
, ,
, ,
,
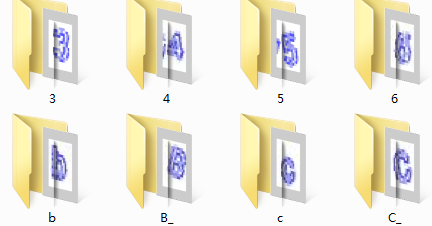
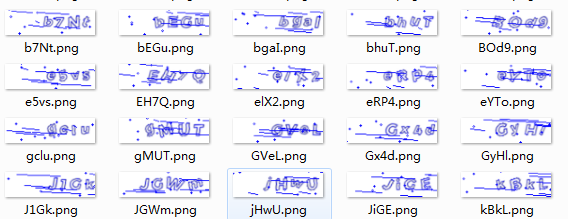
經過對1000張標記好的圖片進行處理,得到各個字母數字對應的單字元圖片資料集:
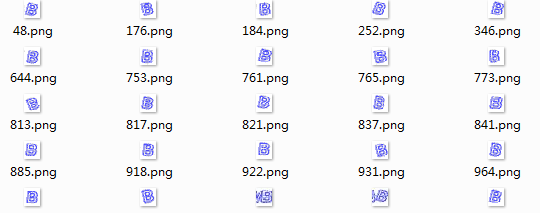
-
KNN訓練及預測:
對影象進行灰度處理
import os from PIL import Image import numpy as np from cut_prc import cut_box,seg_img from noise_prc import NoiseDel from sklearn import neighbors, svm,tree,linear_model from sklearn.model_selection import train_test_split nd = NoiseDel() def predict_img(img, clf): text = '' image = nd.noise_del(img) image = cut_box(image) image_list = seg_img(image) for im in image_list: im = nd.convert2gray(im) im = im.reshape(-1) c = clf.predict([im,])[0] text += c return text if __name__=="__main__": # 獲取訓練資料 path = 'data/png_cut' classes = os.listdir(path) x = [] y = [] for c in classes: c_f = os.path.join(path, c) if os.path.isdir(c_f): files = os.listdir(c_f) for file in files: img = Image.open(os.path.join(c_f, file)) img = np.array(img) img = nd.convert2gray(img) img = img.reshape(-1) x.append(img) y.append(c.replace('_','')) x = np.array(x) y = np.array(y) # 拆分訓練資料與測試資料 x_train, x_test, y_train, y_test = train_test_split(x, y, test_size=0.02) # 訓練KNN分類器 clf = neighbors.KNeighborsClassifier(n_neighbors=5) clf.fit(x_train, y_train) # 預測測試集 test_pre = clf.predict(x_test) print("KNN accuracy score:", (test_pre == y_test).mean()) # 預測新樣本集 newpath = 'data/png_new' newfiles = os.listdir(newpath) for file in newfiles: image = Image.open(os.path.join(newpath,file)) image = np.array(image) text = predict_img(image, clf) print(text) # # 訓練svm分類器 # clf = svm.LinearSVC() ### # clf.fit(x_train, y_train) # # test_pre = clf.predict(x_test) # print("SVM accuracy score:", (test_pre == y_test).mean()) # # # 訓練dt分類器 # clf = tree.DecisionTreeClassifier() # clf.fit(x_train, y_train) # # test_pre = clf.predict(x_test) # print("DT accuracy score:", (test_pre == y_test).mean()) # # # 訓練lr分類器 # clf = linear_model.LogisticRegression() ### t # clf.fit(x_train, y_train) # # test_pre = clf.predict(x_test) # print("LR accuracy score:", (test_pre == y_test).mean()) -
執行結果:(單個字元預測精度),KNN最高,達到80%,而SVM,DT,LR均較低
	KNN accuracy score: 0.8170731707317073
	SVM accuracy score: 0.6341463414634146
	DT accuracy score: 0.4878048780487805
	LR accuracy score: 0.5975609756097561
KNN 預測圖片:
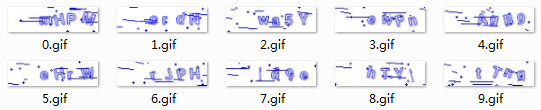
	mHFM
	crdN
	wa5Y
	swFn
	ApB9
	eBrN
	rJpH
	fd9e
	kTVt
	t7ng
方案二:CNN+原樣本圖
步驟:
-
處理樣本資料1020張圖,灰度化 ,畫素大小30*106,標籤為小寫字元(標記人員太懶了);
-
拆分資料:train:80%, val:20%
-
網路模型:輸入資料維度30*106,採用三層CNN,每一層輸出特徵維數分別:16,128,16,FC層輸出 512維,最後全連線輸出4x63,每行代表預測字元的概率。
-
結果:驗證集字元準確率最高到達了50%
方案三: CNN+ 構造類似驗證碼圖
第三方庫生成的驗證碼如下所示:
from captcha.image import ImageCaptcha # pip install captcha
下載相應的字型(比較難找),然後修改第三方庫中image.py檔案,修改了第三方庫後生成的驗證碼:
效果和我們需要的驗證碼比較相似了,但還是有區別。
    fonts = ["font/TruenoBdOlIt.otf", "font/Euro Bold.ttf", "STCAIYUN.TTF"]
    image = ImageCaptcha(width=106, height=30,fonts=[fonts[0]],font_sizes=(18,18,18))
    captcha = image.generate(captcha_text)
image.py
略..
採用自動生成的驗證碼,用於CNN訓練模型,訓練和驗證精度都達到了98%,但測試原圖1000樣本的字元精度最高只有40%,由此可見,生成的驗證碼還是與目標驗證碼相差較大。
step: 18580/20000...  loss: 0.0105...
step: 18600/20000...  loss: 0.0121...
step: 18600/20000...  --------- val_acc: 0.9675     best: 0.9775  --------- test_acc2: 0.4032
step: 18620/20000...  loss: 0.0131...
step: 18640/20000...  loss: 0.0139...
step: 18660/20000...  loss: 0.0135...
step: 18680/20000...  loss: 0.0156...
step: 18700/20000...  loss: 0.0109...
step: 18700/20000...  --------- val_acc: 0.9625     best: 0.9775  --------- test_acc2: 0.3995
方案四: CNN+ 字元樣本集
由於只有1000樣本,直接經過CNN端到端輸出字元序列,很難到達精度要求,為此方案三採用自動建立樣本集的方法,但樣本質量和真實樣本之間存在差異,導致預測不準。為此,將原1000樣本進行分割處理為單字符集,樣本數量約4000左右,且輸入維度減小很多,同時輸出類別也減小很多。分析後改方案有一定可行性。
樣本集處理與之前KNN一樣:
經過對1000張標記好的圖片進行處理,得到各個字母數字對應的單字元圖片資料集:
import os
import numpy as np
import tensorflow as tf
from PIL import Image

from noise_prc import NoiseDel
from cut_prc import cut_box,seg_img
from sklearn.model_selection import train_test_split
from sklearn.preprocessing import LabelBinarizer

nd = NoiseDel()

class Config():
    file_name = 'char_02'  # 存放模型資料夾

    w_alpha = 0.01  #cnn權重係數
    b_alpha = 0.1  #cnn偏執係數
    image_h = 18
    image_w = 16


    cnn_f = [16,32,32,512]  # [cov1輸出特徵維度,cov2輸出特徵維度,cov3輸出特徵維度,全連線層輸出維度]

    max_captcha = 1  #驗證碼最大長度
    char_set_len = 50  #字符集長度

    lr = 0.001
    batch_size = 32  # 每批訓練大小
    max_steps = 200000  # 總迭代batch數

    log_every_n = 20  # 每多少輪輸出一次結果
    save_every_n = 100  # 每多少輪校驗模型並儲存


class Model():

    def __init__(self, config):
        self.config = config

        self.input()
        self.cnn()

        # 初始化session
        self.saver = tf.train.Saver()
        self.session = tf.Session()
        self.session.run(tf.global_variables_initializer())

    def input(self):
        self.X = tf.placeholder(tf.float32, [None, self.config.image_h * self.config.image_w])
        self.Y = tf.placeholder(tf.float32, [None, self.config.max_captcha * self.config.char_set_len])
        self.keep_prob = tf.placeholder(tf.float32)  # dropout

        # 兩個全域性變數
        self.global_step = tf.Variable(0, trainable=False, name="global_step")
        self.global_loss = tf.Variable(0, dtype=tf.float32, trainable=False, name="global_loss")

    def cnn(self):
        x = tf.reshape(self.X, shape=[-1, self.config.image_h , self.config.image_w, 1])

        # 3 conv layer
        w_c1 = tf.Variable(self.config.w_alpha * tf.random_normal([3, 3, 1, self.config.cnn_f[0]]))
        b_c1 = tf.Variable(self.config.b_alpha * tf.random_normal([self.config.cnn_f[0]]))
        conv1 = tf.nn.relu(tf.nn.bias_add(tf.nn.conv2d(x, w_c1, strides=[1, 1, 1, 1], padding='SAME'), b_c1))
        conv1 = tf.nn.max_pool(conv1, ksize=[1, 2, 2, 1], strides=[1, 2, 2, 1], padding='SAME')
        conv1 = tf.nn.dropout(conv1, self.keep_prob)

        w_c2 = tf.Variable(self.config.w_alpha * tf.random_normal([3, 3, self.config.cnn_f[0], self.config.cnn_f[1]]))
        b_c2 = tf.Variable(self.config.b_alpha * tf.random_normal([self.config.cnn_f[1]]))
        conv2 = tf.nn.relu(tf.nn.bias_add(tf.nn.conv2d(conv1, w_c2, strides=[1, 1, 1, 1], padding='SAME'), b_c2))
        conv2 = tf.nn.max_pool(conv2, ksize=[1, 2, 2, 1], strides=[1, 2, 2, 1], padding='SAME')
        conv2 = tf.nn.dropout(conv2, self.keep_prob)

        w_c3 = tf.Variable(self.config.w_alpha * tf.random_normal([3, 3, self.config.cnn_f[1], self.config.cnn_f[2]]))
        b_c3 = tf.Variable(self.config.b_alpha * tf.random_normal([self.config.cnn_f[2]]))
        conv3 = tf.nn.relu(tf.nn.bias_add(tf.nn.conv2d(conv2, w_c3, strides=[1, 1, 1, 1], padding='SAME'), b_c3))
        conv3 = tf.nn.max_pool(conv3, ksize=[1, 2, 2, 1], strides=[1, 2, 2, 1], padding='SAME')
        conv3 = tf.nn.dropout(conv3, self.keep_prob)

        # Fully connected layer
        h =tf.cast( conv3.shape[1],tf.int32)
        w = tf.cast( conv3.shape[2],tf.int32)
        f = tf.cast( conv3.shape[3],tf.int32)

        w_d = tf.Variable(self.config.w_alpha * tf.random_normal([h* w * f, self.config.cnn_f[3]]))
        b_d = tf.Variable(self.config.b_alpha * tf.random_normal([self.config.cnn_f[3]]))
        dense = tf.reshape(conv3, [-1, w_d.get_shape().as_list()[0]])
        dense = tf.nn.relu(tf.add(tf.matmul(dense, w_d), b_d))
        dense = tf.nn.dropout(dense, self.keep_prob)

        w_out = tf.Variable(self.config.w_alpha * tf.random_normal([self.config.cnn_f[3], self.config.max_captcha * self.config.char_set_len]))
        b_out = tf.Variable(self.config.b_alpha * tf.random_normal([self.config.max_captcha * self.config.char_set_len]))
        out = tf.add(tf.matmul(dense, w_out), b_out)
        # out = tf.nn.softmax(out)

        # loss
        # loss = tf.reduce_mean(tf.nn.softmax_cross_entropy_with_logits(output, Y))
        self.loss = tf.reduce_mean(tf.nn.sigmoid_cross_entropy_with_logits(logits=out, labels=self.Y))

        # optimizer 為了加快訓練 learning_rate應該開始大,然後慢慢衰
        self.optimizer = tf.train.AdamOptimizer(learning_rate=self.config.lr).minimize(self.loss,global_step=self.global_step)

        predict = tf.reshape(out, [-1, self.config.max_captcha, self.config.char_set_len])
        self.max_idx_p = tf.argmax(predict, 2)
        max_idx_l = tf.argmax(tf.reshape(self.Y, [-1, self.config.max_captcha, self.config.char_set_len]), 2)
        correct_pred = tf.equal(self.max_idx_p, max_idx_l)
        self.accuracy = tf.reduce_mean(tf.cast(correct_pred, tf.float32))


    def load(self, checkpoint):
        self.saver.restore(self.session, checkpoint)
        print('Restored from: {}'.format(checkpoint))


    def train(self, get_next_batch, model_path, x_train, y_train, x_test, y_test):
        with self.session as sess:
            while True:
                batch_x, batch_y = get_next_batch(x_train, y_train,self.config.batch_size)
                _, loss_ = sess.run([self.optimizer, self.loss], feed_dict={self.X: batch_x, self.Y: batch_y, self.keep_prob: 0.75})

                if self.global_step.eval() % self.config.log_every_n == 0:
                    print('step: {}/{}... '.format(self.global_step.eval(), self.config.max_steps),
                          'loss: {:.4f}... '.format(loss_))

                # 每100 step計算一次準確率
                if self.global_step.eval() % self.config.save_every_n == 0:
                    # batch_x_test, batch_y_test = get_next_batch(100)
                    acc = sess.run(self.accuracy, feed_dict={self.X: x_test, self.Y: y_test, self.keep_prob: 1.})
                    print('step: {}/{}... '.format(self.global_step.eval(), self.config.max_steps),
                          '--------- acc: {:.4f} '.format(acc),
                          '   best: {:.4f} '.format(self.global_loss.eval()))

                    if acc > self.global_loss.eval():
                        print('save best model...')
                        update = tf.assign(self.global_loss, acc)  # 更新最優值
                        sess.run(update)
                        self.saver.save(sess, os.path.join(model_path, 'model'), global_step=self.global_step)
                    if self.global_step.eval() >= self.config.max_steps:
                        #self.saver.save(sess, os.path.join(model_path, 'model_last'), global_step=self.global_step)
                        break

    def test(self, batch_x_test):
        sess = self.session
        max_idx_p = sess.run(self.max_idx_p, feed_dict={self.X: batch_x_test, self.keep_prob: 1.})
        return max_idx_p


def get_next_batch( train_x, train_y, batch_size=32):
    n = train_x.shape[0]
    chi_list = np.random.choice(n, batch_size)
    return train_x[chi_list],train_y[chi_list]


def img_cut_to_arry(img):
    imgs = []
    image = nd.noise_del(img)
    image = cut_box(image)
    image_list = seg_img(image)
    for im in image_list:
        im = nd.convert2gray(im)
        im = im.reshape(-1)
        imgs.append(im)
    return imgs


if __name__=="__main__":
    # nd = NoiseDel()
    # 獲取訓練資料
    path = 'data/png_cut'
    classes = os.listdir(path)
    x = []
    y = []
    for c in classes:
        c_f = os.path.join(path, c)
        if os.path.isdir(c_f):
            files = os.listdir(c_f)
            for file in files:
                img = Image.open(os.path.join(c_f, file))
                img = np.array(img)
                img = nd.convert2gray(img)
                img = img.reshape(-1)
                x.append(img)
                y.append(c.replace('_',''))

    lb = LabelBinarizer()
    ly = lb.fit_transform(y)  # one-hot
    x = np.array(x)
    y = np.array(ly)

    # 拆分訓練資料與測試資料
    x_train, x_test, y_train, y_test = train_test_split(x, y, test_size=0.02)


    # 建立模型目錄
    model_path = os.path.join('c_models', Config.file_name)
    if os.path.exists(model_path) is False:
        os.makedirs(model_path)

    # 載入上一次儲存的模型
    model = Model(Config)
    checkpoint_path = tf.train.latest_checkpoint(model_path)
    if checkpoint_path:
        model.load(checkpoint_path)

    # train and val
    print('start to training...')
    model.train(get_next_batch, model_path, x_train,y_train, x_test, y_test)


    # test

    # 預測新樣本集
    newpath = 'data/png_new'
    newfiles = os.listdir(newpath)
    for file in newfiles:
        pre_text=''
        image = Image.open(os.path.join(newpath,file))
        image = np.array(image)
        imgs= img_cut_to_arry(image)
        for img in imgs:
            p = model.test([img,])
            p_arr = np.zeros([1,50])
            p_arr[0,p] =1
            c = lb.inverse_transform(p_arr)
            pre_text += c[0]


        print(pre_text)
- 執行結果:字元預測精度95%以上
step: 2500/200000...  loss: 0.0803...
step: 2500/200000...  --------- acc: 0.0854     best: 0.1341
step: 2520/200000...  loss: 0.0818...
step: 2540/200000...  loss: 0.0844...
step: 2560/200000...  loss: 0.0827...
step: 2580/200000...  loss: 0.0794...
step: 2600/200000...  loss: 0.0823...
step: 2600/200000...  --------- acc: 0.1951     best: 0.1341
save best model...
step: 2620/200000...  loss: 0.0775...
step: 2640/200000...  loss: 0.0754...
step: 2660/200000...  loss: 0.0823...
step: 2680/200000...  loss: 0.0678...
step: 2700/200000...  loss: 0.0763...
step: 2700/200000...  --------- acc: 0.3049     best: 0.1951
.
.
.
.
step: 41400/200000...  --------- acc: 0.8659     best: 0.9512
step: 41450/200000...  loss: 0.0091...
step: 41500/200000...  loss: 0.0134...
step: 41550/200000...  loss: 0.0151...
step: 41600/200000...  loss: 0.0256...
step: 41600/200000...  --------- acc: 0.9390     best: 0.9512
預測圖片:
mHPM
srdN
wa5Y
eWpn
AgB9
eHr8
rJpH
fd9e
bTYt
tTwg
最後,附上原始碼地址:
開發十年,就只剩下這套架構體系了!
>>>
這幾天閒來無事,在等雅思成績出來的過程中,只能寫點東西來打發時間。剛好在上影象處理這門課,於是就想寫個驗證碼識別,普通的驗證碼識別難度太低,於是想要做粘連扭曲的驗證碼識別,如12306的驗證碼識別,此外,這個演算法同樣也可以適用於手寫體識別,反而我覺得手寫體比12306的驗 本專案使用卷積神經網路識別字符型圖片驗證碼,其基於 TensorFlow 框架。它封裝了非常通用的校驗、訓練、驗證、識別和呼叫 API,極大地減低了識別字符型驗證碼花費的時間和精力。
專案地址:
https://github.com/nickliqian/cnn_captcha
1.專案背景
我在實習過程中,當我抓取環保平臺相關資料時,常常發現有圖片的情況,比如以下這種圖片,所以抓取這種圖片中的資訊是我進行圖片文字識別的動力:
2.專案思路
因為在某一網站中有大量這種想要抓取的圖片,所以我的思路是,
1.先抓取這些圖片的名稱和URL;
2.然後再根 字元驗證碼殺手--CNN
1 abstract
目前隨著深度學習,越來越蓬勃的發展,在影象識別和語音識別中也表現出了強大的生產力。對於普通的深度學習愛好者來說,一上來就去跑那邊公開的大型資料庫,比如ImageNet或者CoCo,可以會覺得這個屠龍之技離生活好遙遠。那麼本文就是希望將此技術運用到一些普通使
4 本文工作
解釋了原作者程式碼註釋中提到的關於sigmoid選型的困惑問題並應用到程式碼中
將原作者的程式碼進行模組工程化,成為整體專案,方便研究的同學直接進行模式套用
原作者程式碼中:
def train_crack_captcha_cnn():
outp
關鍵字:Python,SVM,字元驗證碼,機器學習,驗證碼識別
1 概述
基於Python使用SVM識別簡單的驗證字串的完整程式碼開源分享。
因為目前有了更厲害的新技術來解決這類問題了,但是本文作為初級入門方法,還是具有一定的學習意義的,所以就將原始碼和相關的素材開源出來。
本文雖然已經不具備
1111000111111000111111100001111100000011
1110111011110111011111011110111100110111
1001110011110111101011011010101101110111
110111111111011010111111010 like target bottom edr ocr extra spl apple creat
import ssl
import json
from PIL import Image
import requests
import re
import urllib.r code threshold 識別 div out style end gray .cn
# -*- coding: utf-8 -*-
import urllib.request, urllib.parse
from PIL import Image
from pyt wow gif .get extra time ade upd orm log 0.目錄
1.參考2.沒事畫個流程圖3.完整代碼4.改進方向
1.參考
https://en.wikipedia.org/wiki/Cosine_similarity
https://zh.wi int tab 權限 linux a-z 都是 提示 解釋 text 首先是安裝,我參考的是這個 http://blog.csdn.net/xinghun_4/article/details/47860645
我是centos,使用yum
yum install pyt 轉化 end double show ray app def 藍色 代碼實現
# -*- coding: utf-8 -*-
import numpy
from PIL import Image
image = Image.open("5.gif")
heigh renren 幫助 流行 人工 esp 導致 edi count public 本文實例講述了C#驗證碼識別基礎方法,是非常實用的技巧。分享給大家供大家參考。具體方法分析如下: 背景 最近有朋友在搞一個東西,已經做的挺不錯了,最後想再完美一點,於是乎就提議把這種驗證碼 www 2016年 復制 egit 關於 廣泛 效果 yun 概念 轉:https://bbs.125.la/thread-14031313-1-1.html
隨著大數據時代,人工智能時代的到來,深度學習的應用越來越廣,場景識別、目標檢測、人臉識別、圖像識別等等廣泛應用。在 please 沒有 pan eas pin mage 需要 utf 文件夾 一、環境
windows 7 x64
Python 3 +
二、安裝
1、tesseract-ocr安裝
http://digi.bib.uni-mannheim. 區域 總結 nim 系列 red clust 記錄 完成 form 基於SVM的字母驗證碼識別
摘要
本文研究的問題是包含數字和字母的字符驗證碼的識別。我們采用的是傳統的字符分割識別方法,首先將圖像中的字符分割出來,然後再對單字符進行識別。首先通過圖像的初步去噪、濾波、形態 ops hold 成功 驗證碼識別 濾波 put else 函數 直接 總結: pytesseract 識別比較標準的圖片 識別成功率 還是不錯的。
驗證碼的圖片識別 需要先處理好 再用pytesseract 識別
from PIL import Image img tex 下載 分享 int class 驗證碼 pre imp 先找了一個簡單的圖形驗證碼進行測試,比如知網,從網頁裏把驗證碼下載到本地
進行簡單的灰度處理和二值化處理,能夠提高不少識別正確率
驗證碼:
代碼:
1 import tess mini shu nal array pool 利用 imp 大小寫 標註 TensorFlow 可以用來實現驗證碼識別的過程,這裏識別的驗證碼是圖形驗證碼,首先用標註好的數據來訓練一個模型,然後再用模型來實現這個驗證碼的識別。
生成驗證碼
首先生成驗證碼,這裏使用 相關推薦
字元驗證碼識別專案記錄
基於慣性大水滴滴水演算法和支援向量機的粘連字元驗證碼識別
字元型圖片驗證碼,使用tensorflow實現卷積神經網路,進行驗證碼識別CNN
Python爬蟲專案實戰3 | 圖片文字識別(以驗證碼識別為例)
[驗證碼識別技術]字元驗證碼殺手--CNN
基於python語言的tensorflow的‘端到端’的字元型驗證碼識別原始碼整理(github原始碼分享)
基於Python使用SVM識別簡單的字元驗證碼的完整程式碼開源分享
字元型圖片驗證碼識別完整過程及Python實現
Python3.4 12306 2015年3月驗證碼識別
驗證碼識別
python之驗證碼識別 特征向量提取和余弦相似性比較
linux環境下pytesseract的安裝和央行征信中心的登錄驗證碼識別實戰
驗證碼識別(最簡單之印刷體數字)
C#驗證碼識別基礎方法實例分析
深度學習下的驗證碼識別教程
python tesseract-ocr 基礎驗證碼識別功能(Windows)
基於SVM的字母驗證碼識別
python 豆瓣驗證碼識別總結
驗證碼識別——圖形驗證碼
基於TensorFlow的簡單驗證碼識別