
Spring Cloud 系列之 Netflix Hystrix 服務容錯

什麼是 Hystrix
Hystrix 源自 Netflix 團隊於 2011 年開始研發。2012年 Hystrix 不斷髮展和成熟,Netflix 內部的許多團隊都採用了它。如今,每天在 Netflix 上通過 Hystrix 執行數百億個執行緒隔離和數千億個訊號量隔離的呼叫。極大地提高了系統的穩定性。
在分散式環境中,不可避免地會有許多服務依賴項中的某些服務失敗而導致雪崩效應。Hystrix 是一個庫,可通過新增等待時間容限和容錯邏輯來幫助您控制這些分散式服務之間的互動。Hystrix 通過隔離服務之間的訪問點,停止服務之間的級聯故障並提供後備選項來實現此目的,所有這些都可以提高系統的整體穩定性。
雪崩效應
在微服務架構中,一個請求需要呼叫多個服務是非常常見的。如客戶端訪問 A 服務,而 A 服務需要呼叫 B 服務,B 服務需要呼叫 C 服務,由於網路原因或者自身的原因,如果 B 服務或者 C 服務不能及時響應,A 服務將處於阻塞狀態,直到 B 服務 C 服務響應。此時若有大量的請求湧入,容器的執行緒資源會被消耗完畢,導致服務癱瘓。服務與服務之間的依賴性,故障會傳播,造成連鎖反應,會對整個微服務系統造成災難性的嚴重後果,這就是服務故障的“雪崩”效應。以下圖示完美解釋了什麼是雪崩效應。
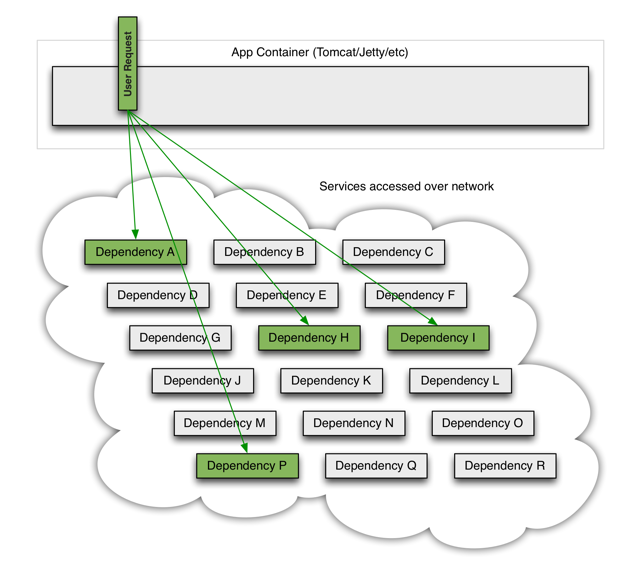
當一切服務正常時,請求看起來是這樣的:
當其中一個服務有延遲時,它可能阻塞整個使用者請求:
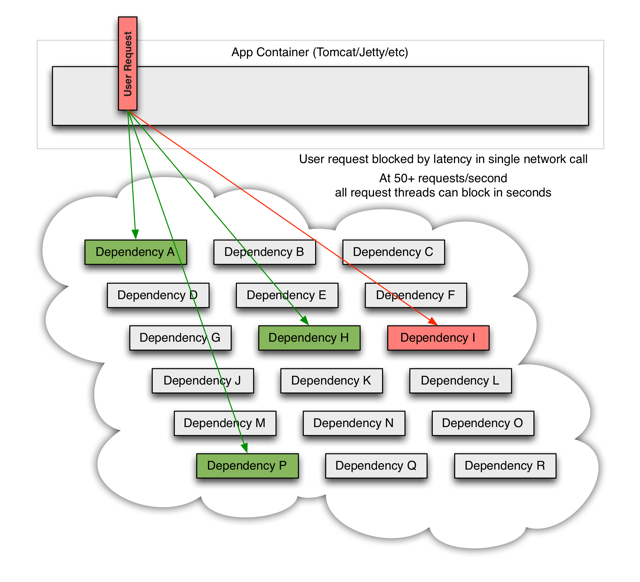
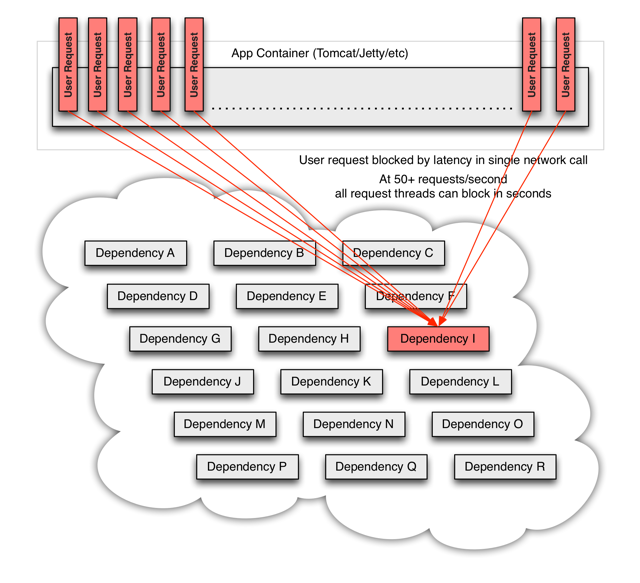
在高併發的情況下,一個服務的延遲可能導致所有伺服器上的所有資源在數秒內飽和。比起服務故障,更糟糕的是這些應用程式還可能導致服務之間的延遲增加,從而備份佇列,執行緒和其他系統資源,從而導致整個系統出現更多級聯故障。
總結
造成雪崩的原因可以歸結為以下三點:
- 服務提供者不可用(硬體故障,程式 BUG,快取擊穿,使用者大量請求等)
- 重試加大流量(使用者重試,程式碼邏輯重試)
- 服務消費者不可用(同步等待造成的資源耗盡)
最終的結果就是:一個服務不可用,導致一系列服務的不可用。
解決方案
雪崩是系統中的蝴蝶效應導致,其發生的原因多種多樣,從源頭我們無法完全杜絕雪崩的發生,但是雪崩的根本原因來源於服務之間的強依賴,所以我們可以提前評估做好服務容錯。解決方案大概可以分為以下幾種:
- 請求快取:支援將一個請求與返回結果做快取處理;
- 請求合併:將相同的請求進行合併然後呼叫批處理介面;
- 服務隔離:限制呼叫分散式服務的資源,某一個呼叫的服務出現問題不會影響其他服務呼叫;
- 服務熔斷:犧牲區域性服務,保全整體系統穩定性的措施;
- 服務降級:服務熔斷以後,客戶端呼叫自己本地方法返回預設值。
環境準備
eureka-server:註冊中心eureka-server02:註冊中心product-service:商品服務,提供了/product/{id}介面,/product/list介面,/product/listByIds介面order-service-rest:訂單服務,基於Ribbon通過RestTemplate呼叫商品服務order-server-feign:訂單服務,基於Feign通過宣告式服務呼叫商品服務
模擬高併發場景
服務提供者介面新增 Thread.sleep(2000),模擬服務處理時長。
package com.example.controller;

import com.example.pojo.Product;
import com.example.service.ProductService;
import org.springframework.beans.factory.annotation.Autowired;
import org.springframework.web.bind.annotation.*;

import java.util.List;

@RestController
@RequestMapping("/product")
public class ProductController {

    @Autowired
    private ProductService productService;

    /**
     * 查詢商品列表
     *
     * @return
     */
    @GetMapping("/list")
    public List<Product> selectProductList() {
        try {
            Thread.sleep(2000);
        } catch (InterruptedException e) {
            e.printStackTrace();
        }
        return productService.selectProductList();
    }

    /**
     * 根據多個主鍵查詢商品
     *
     * @param ids
     * @return
     */
    @GetMapping("/listByIds")
    public List<Product> selectProductListByIds(@RequestParam("id") List<Integer> ids) {
        return productService.selectProductListByIds(ids);
    }

    /**
     * 根據主鍵查詢商品
     *
     * @param id
     * @return
     */
    @GetMapping("/{id}")
    public Product selectProductById(@PathVariable("id") Integer id) {
        return productService.selectProductById(id);
    }

}
服務消費者降低 Tomcat 最大執行緒數方便模擬高併發。
server:
  port: 8080
  tomcat:
    max-threads: 10 # 降低最大執行緒數方便模擬高併發
JMeter

Apache JMeter 應用程式是開源軟體,100% 純 Java 應用而設計的負載測試功能行為和測量效能。它最初是為測試 Web 應用程式而設計的,但此後已擴充套件到其他測試功能。
Apache JMeter 可用於測試靜態和動態資源,Web 動態應用程式的效能。它可用於模擬伺服器,伺服器組,網路或物件上的繁重負載,以測試其強度或分析不同負載型別下的整體效能。
安裝
官網:https://jmeter.apache.org/ 本文安裝 Windows 版本。
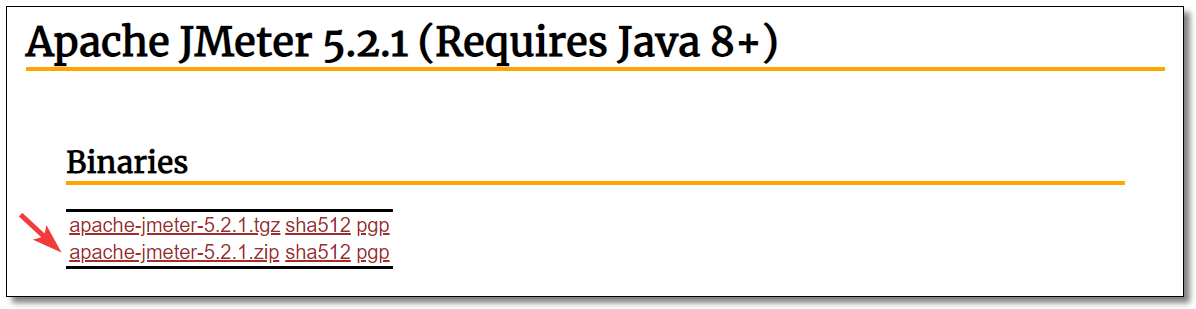
解壓 apache-jmeter-5.2.1.zip,進入 bin 目錄執行 jmeter.bat 即可。不過執行之前我們先來修改一下配置檔案,方便大家更友好的使用。
修改配置
進入 bin 目錄編輯 jmeter.properties 檔案,修改 37 行和 1085 行兩處程式碼(不同的電腦可能行數不一致,不過上下差距不大)。
language=zh_CN介面顯示中文sampleresult.default.encoding=UTF-8編碼字符集使用 UTF-8
#language=en
language=zh_CN

#sampleresult.default.encoding=ISO-8859-1
sampleresult.default.encoding=UTF-8
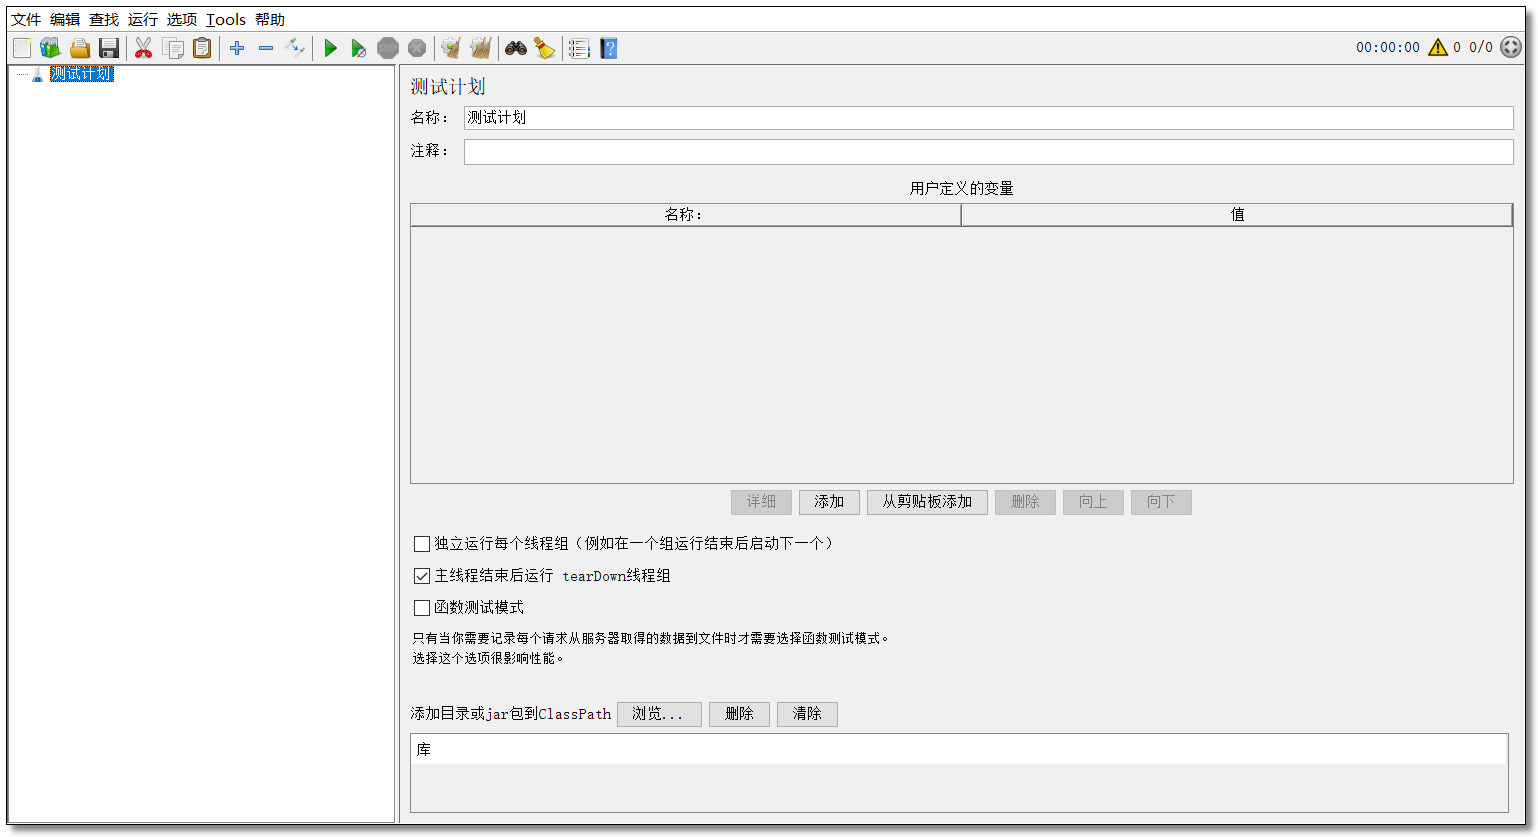
執行
執行 bin/jmeter.bat 檔案,介面顯示如下。
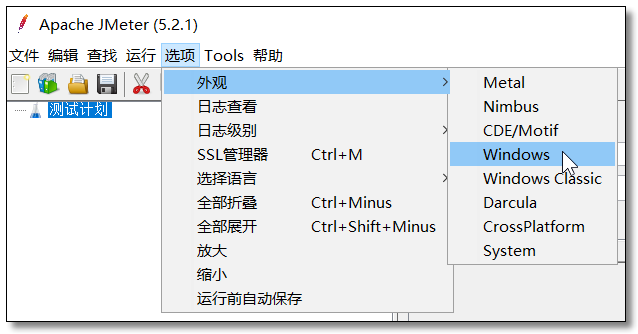
大家可以通過 選項 → 外觀 選擇自己喜歡的介面風格。
基本使用
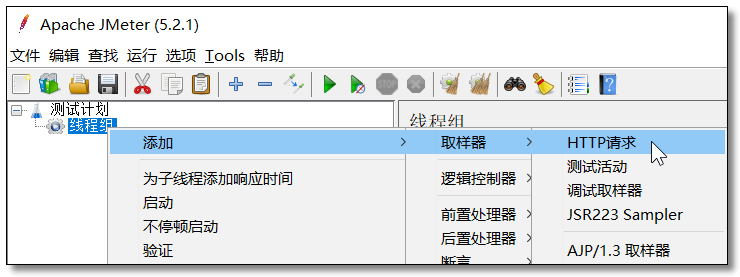
新增執行緒組
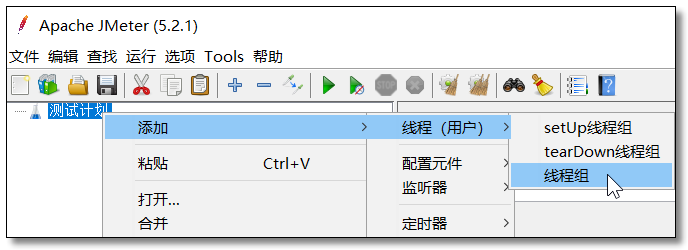

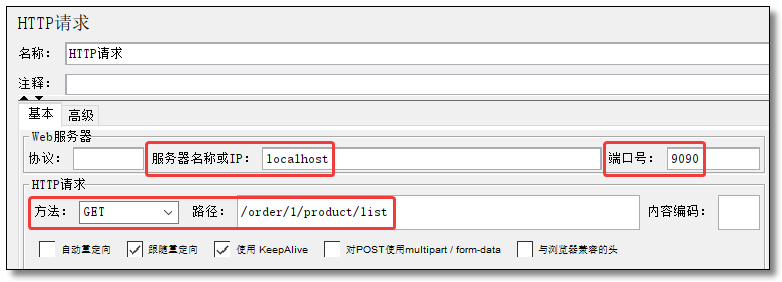
新增 HTTP 請求
HTTP 請求配置為服務消費者的 http://localhost:9090/order/1/product/list
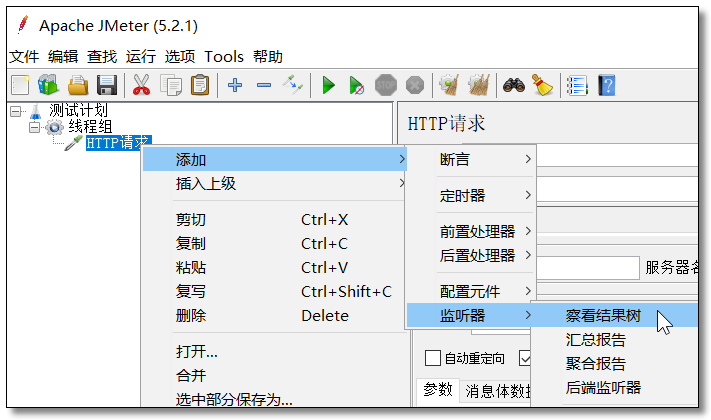
新增結果數
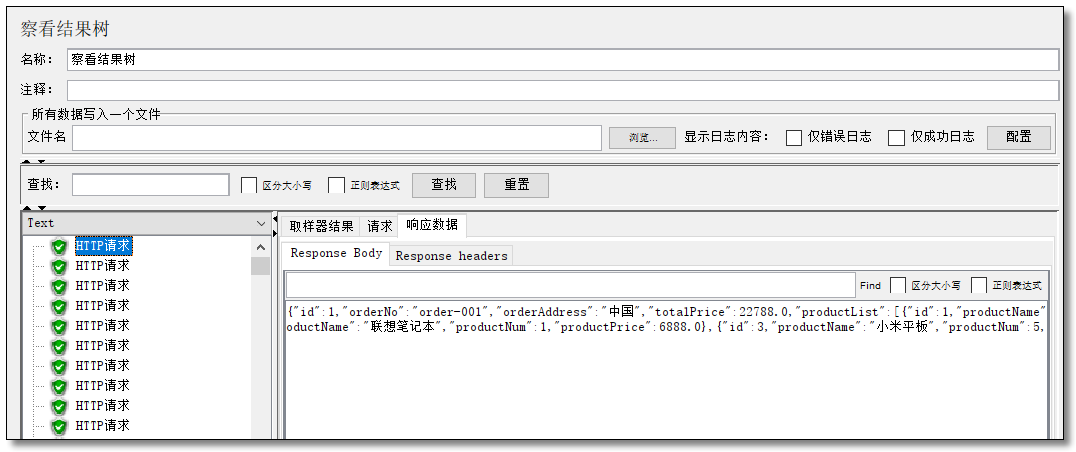
我們可以新增結果數來檢視請求響應的結果資料。
下圖是執行請求以後所顯示的效果。
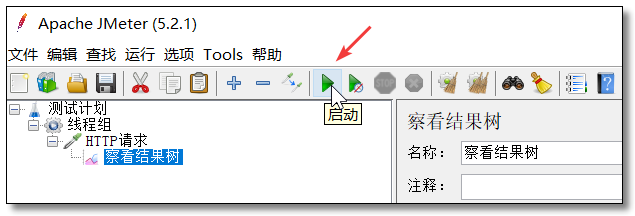
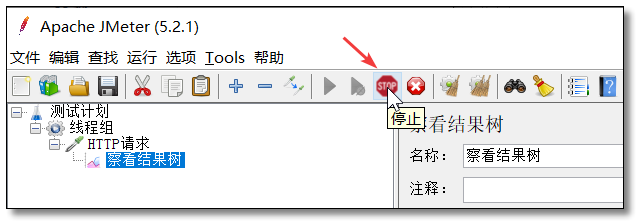
執行請求
如下圖所示,點選啟動按鈕即可開始執行請求。STOP 按鈕則為停止請求。
測試請求
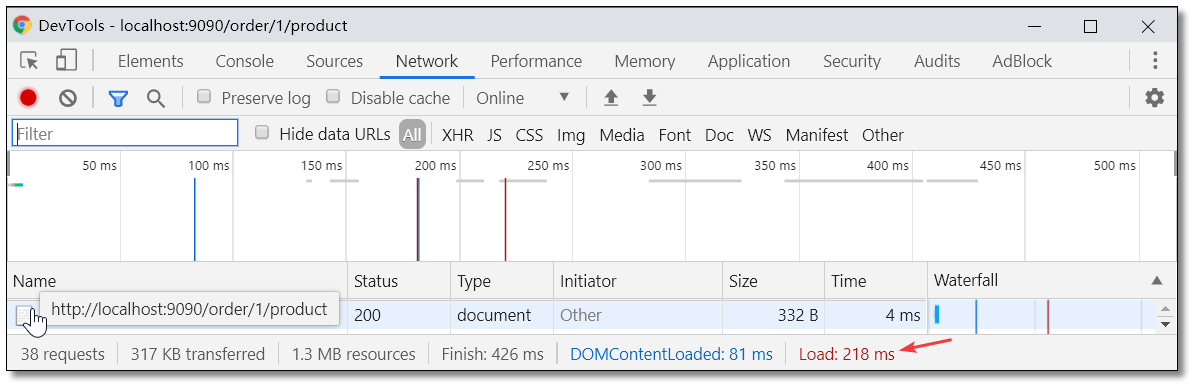
瀏覽器請求 http://localhost:9090/order/1/product 統計耗時如下。請求耗時:235ms

通過 JMeter 開啟 50 執行緒迴圈 50 次請求服務消費者 http://localhost:9090/order/1/product/list 然後瀏覽器再次請求 http://localhost:9090/order/1/product 統計耗時如下。請求耗時:9.12s

通過以上測試我們可以發現,/product/list 服務如果出現故障或延遲整個系統的資源會被耗盡從而導致影響其他服務的正常使用,這種情況在微服務專案中是非常常見的,所以我們需要對服務做出容錯處理。接下來我們就一個個學習服務容錯的解決方案。
請求快取
Hystrix 為了降低訪問服務的頻率,支援將一個請求與返回結果做快取處理。如果再次請求的 URL 沒有變化,那麼 Hystrix 不會請求服務,而是直接從快取中將結果返回。這樣可以大大降低訪問服務的壓力。
安裝 Redis
Hystrix 自帶快取有兩個缺點:
- 本地快取,叢集情況下快取無法同步。
- 不支援第三方快取容器,如:Redis,MemCache。
本文使用 Spring 的快取整合方案,NoSql 使用 Redis 來實現,Redis 使用的是 5.0.7 版本。
新增依賴
服務消費者 pom.xml 新增 redis 和 commons-pool2 依賴。
<!-- spring boot data redis 依賴 -->
<dependency>
    <groupId>org.springframework.boot</groupId>
    <artifactId>spring-boot-starter-data-redis</artifactId>
</dependency>
<!-- commons-pool2 物件池依賴 -->
<dependency>
    <groupId>org.apache.commons</groupId>
    <artifactId>commons-pool2</artifactId>
</dependency>
配置檔案
服務消費者 application.yml 配置 Redis 快取。
spring:
  # redis 快取
  redis:
    timeout: 10000        # 連線超時時間
    host: 192.168.10.101  # Redis伺服器地址
    port: 6379            # Redis伺服器埠
    password: root        # Redis伺服器密碼
    database: 0           # 選擇哪個庫,預設0庫
    lettuce:
      pool:
        max-active: 1024  # 最大連線數,預設 8
        max-wait: 10000   # 最大連線阻塞等待時間,單位毫秒,預設 -1
        max-idle: 200     # 最大空閒連線,預設 8
        min-idle: 5       # 最小空閒連線,預設 0
配置類
新增 Redis 配置類重寫序列化規則。
package com.example.config;

import org.springframework.context.annotation.Bean;
import org.springframework.context.annotation.Configuration;
import org.springframework.data.redis.cache.RedisCacheConfiguration;
import org.springframework.data.redis.cache.RedisCacheManager;
import org.springframework.data.redis.cache.RedisCacheWriter;
import org.springframework.data.redis.connection.RedisConnectionFactory;
import org.springframework.data.redis.core.RedisTemplate;
import org.springframework.data.redis.serializer.GenericJackson2JsonRedisSerializer;
import org.springframework.data.redis.serializer.RedisSerializationContext;
import org.springframework.data.redis.serializer.StringRedisSerializer;

import java.time.Duration;

/**
 * Redis 配置類
 */
@Configuration
public class RedisConfig {

    // 重寫 RedisTemplate 序列化
    @Bean
    public RedisTemplate<String, Object> redisTemplate(RedisConnectionFactory redisConnectionFactory) {
        RedisTemplate<String, Object> template = new RedisTemplate<>();
        // 為 String 型別 key 設定序列化器
        template.setKeySerializer(new StringRedisSerializer());
        // 為 String 型別 value 設定序列化器
        template.setValueSerializer(new GenericJackson2JsonRedisSerializer());
        // 為 Hash 型別 key 設定序列化器
        template.setHashKeySerializer(new StringRedisSerializer());
        // 為 Hash 型別 value 設定序列化器
        template.setHashValueSerializer(new GenericJackson2JsonRedisSerializer());
        template.setConnectionFactory(redisConnectionFactory);
        return template;
    }

    // 重寫 Cache 序列化
    @Bean
    public RedisCacheManager redisCacheManager(RedisTemplate redisTemplate) {
        RedisCacheWriter redisCacheWriter = RedisCacheWriter.nonLockingRedisCacheWriter(redisTemplate.getConnectionFactory());
        RedisCacheConfiguration redisCacheConfiguration = RedisCacheConfiguration.defaultCacheConfig()
                // 設定預設過期時間 30 min
                .entryTtl(Duration.ofMinutes(30))
                // 設定 key 和 value 的序列化
                .serializeKeysWith(RedisSerializationContext.SerializationPair.fromSerializer(redisTemplate.getKeySerializer()))
                .serializeValuesWith(RedisSerializationContext.SerializationPair.fromSerializer(redisTemplate.getValueSerializer()));
        return new RedisCacheManager(redisCacheWriter, redisCacheConfiguration);
    }

}
啟動類
服務消費者啟動類開啟快取註解
package com.example;

import org.springframework.boot.SpringApplication;
import org.springframework.boot.autoconfigure.SpringBootApplication;
import org.springframework.cache.annotation.EnableCaching;
import org.springframework.cloud.client.loadbalancer.LoadBalanced;
import org.springframework.context.annotation.Bean;
import org.springframework.web.client.RestTemplate;

// 開啟快取註解
@EnableCaching
@SpringBootApplication
public class OrderServiceRestApplication {

    @Bean
    @LoadBalanced
    public RestTemplate restTemplate() {
        return new RestTemplate();
    }

    public static void main(String[] args) {
        SpringApplication.run(OrderServiceRestApplication.class, args);
    }

}
業務層
服務消費者業務層程式碼新增快取規則。
package com.example.service.impl;

import com.example.pojo.Product;
import com.example.service.ProductService;
import org.springframework.beans.factory.annotation.Autowired;
import org.springframework.cache.annotation.Cacheable;
import org.springframework.core.ParameterizedTypeReference;
import org.springframework.http.HttpMethod;
import org.springframework.stereotype.Service;
import org.springframework.web.client.RestTemplate;

import java.util.List;

@Service
public class ProductServiceImpl implements ProductService {

    @Autowired
    private RestTemplate restTemplate;

    /**
     * 查詢商品列表
     *
     * @return
     */
    @Cacheable(cacheNames = "orderService:product:list")
    @Override
    public List<Product> selectProductList() {
        // ResponseEntity: 封裝了返回資料
        return restTemplate.exchange(
                "http://product-service/product/list",
                HttpMethod.GET,
                null,
                new ParameterizedTypeReference<List<Product>>() {
                }).getBody();
    }

    /**
     * 根據主鍵查詢商品
     *
     * @param id
     * @return
     */
    @Cacheable(cacheNames = "orderService:product:single", key = "#id")
    @Override
    public Product selectProductById(Integer id) {
        return restTemplate.getForObject("http://product-service/product/" + id, Product.class);
    }

}
測試
為了方便檢視效果我們在服務提供者對應介面中新增列印語句。
訪問:http://localhost:9090/order/1/product/list 和 http://localhost:9090/order/1/product 效果如下。
當我們請求相同服務時,服務提供者也不再列印語句說明服務消費者的請求直接獲取了快取的資料。
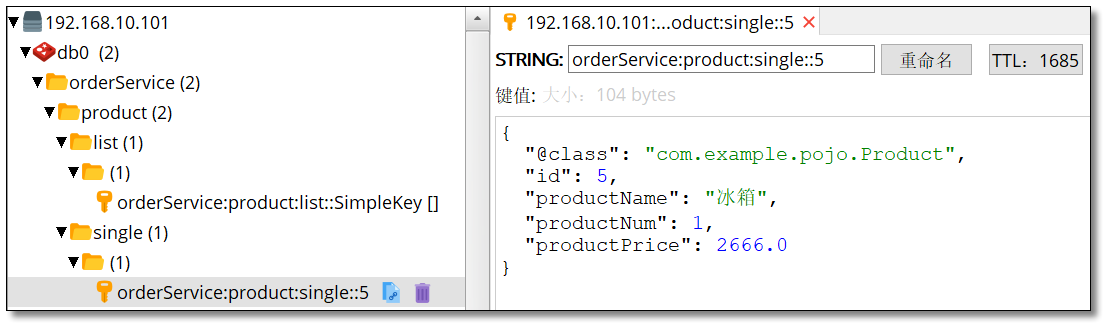
JMeter 開啟 50 執行緒迴圈 50 次請求 http://localhost:9090/order/1/product/list
瀏覽器請求 http://localhost:9090/order/1/product,結果如下:
從結果可以看出請求快取已解決之前服務響應速度過慢的問題。
請求合併
在微服務架構中,我們將一個專案拆分成很多個獨立的模組,這些獨立的模組通過遠端呼叫來互相配合工作,但是,在高併發情況下,通訊次數的增加會導致總的通訊時間增加,同時,執行緒池的資源也是有限的,高併發環境會導致有大量的執行緒處於等待狀態,進而導致響應延遲,為了解決這些問題,我們需要來了解 Hystrix 的請求合併。
請求合併的缺點
設定請求合併之後,本來一個請求可能 5ms 就搞定了,但是現在必須再等 10ms 看看還有沒有其他的請求一起,這樣一個請求的耗時就從 5ms 增加到 15ms 了。
如果我們要發起的命令本身就是一個高延遲的命令,那麼這個時候就可以使用請求合併了,因為這個時候時間消耗就顯得微不足道了,另外高併發也是請求合併的一個非常重要的場景。
新增依賴
服務消費者 pom.xml 新增 hystrix 依賴。
<!-- spring-cloud netflix hystrix 依賴 -->
<dependency>
    <groupId>org.springframework.cloud</groupId>
    <artifactId>spring-cloud-starter-netflix-hystrix</artifactId>
</dependency>
業務層
服務消費者業務層程式碼新增請求合併規則。
package com.example.service.impl;

import com.example.pojo.Product;
import com.example.service.ProductService;
import com.netflix.hystrix.contrib.javanica.annotation.HystrixCollapser;
import com.netflix.hystrix.contrib.javanica.annotation.HystrixCommand;
import com.netflix.hystrix.contrib.javanica.annotation.HystrixProperty;
import org.springframework.beans.factory.annotation.Autowired;
import org.springframework.core.ParameterizedTypeReference;
import org.springframework.http.HttpMethod;
import org.springframework.stereotype.Service;
import org.springframework.web.client.RestTemplate;

import java.util.List;
import java.util.concurrent.Future;

@Service
public class ProductServiceImpl implements ProductService {

    @Autowired
    private RestTemplate restTemplate;

    /**
     * 根據多個主鍵查詢商品
     *
     * @param ids
     * @return
     */
    // 宣告需要服務容錯的方法
    @HystrixCommand
    @Override
    public List<Product> selectProductListByIds(List<Integer> ids) {
        System.out.println("-----orderService-----selectProductListByIds-----");
        StringBuffer sb = new StringBuffer();
        ids.forEach(id -> sb.append("id=" + id + "&"));
        return restTemplate.getForObject("http://product-service/product/listByIds?" + sb.toString(), List.class);
    }

    /**
     * 根據主鍵查詢商品
     *
     * @param id
     * @return
     */
    // 處理請求合併的方法一定要支援非同步,返回值必須是 Future<T>
    // 合併請求
    @HystrixCollapser(batchMethod = "selectProductListByIds", // 合併請求方法
            scope = com.netflix.hystrix.HystrixCollapser.Scope.GLOBAL, // 請求方式
            collapserProperties = {
                    // 間隔多久的請求會進行合併,預設 10ms
                    @HystrixProperty(name = "timerDelayInMilliseconds", value = "20"),
                    // 批處理之前,批處理中允許的最大請求數
                    @HystrixProperty(name = "maxRequestsInBatch", value = "200")
            })
    @Override
    public Future<Product> selectProductById(Integer id) {
        System.out.println("-----orderService-----selectProductById-----");
        return null;
    }

}
@HystrixCollapser 註解各項引數說明如下:

服務消費者模擬同一時間使用者發起多個請求。
package com.example.service.impl;

import com.example.pojo.Order;
import com.example.pojo.Product;
import com.example.service.OrderService;
import com.example.service.ProductService;
import org.springframework.beans.factory.annotation.Autowired;
import org.springframework.stereotype.Service;

import java.util.Arrays;
import java.util.concurrent.ExecutionException;
import java.util.concurrent.Future;

@Service
public class OrderServiceImpl implements OrderService {

    @Autowired
    private ProductService productService;

    /**
     * 根據主鍵查詢訂單
     *
     * @param id
     * @return
     */
    @Override
    public Order searchOrderById(Integer id) {
        // 模擬同一時間使用者發起多個請求。
        Future<Product> p1 = productService.selectProductById(1);
        Future<Product> p2 = productService.selectProductById(2);
        Future<Product> p3 = productService.selectProductById(3);
        Future<Product> p4 = productService.selectProductById(4);
        Future<Product> p5 = productService.selectProductById(5);
        try {
            System.out.println(p1.get());
            System.out.println(p2.get());
            System.out.println(p3.get());
            System.out.println(p4.get());
            System.out.println(p5.get());
        } catch (InterruptedException e) {
            e.printStackTrace();
        } catch (ExecutionException e) {
            e.printStackTrace();
        }
        return new Order(id, "order-003", "中國", 29000D, null);
    }

}
啟動類
服務消費者啟動類開啟熔斷器註解。
package com.example;

import org.springframework.boot.SpringApplication;
import org.springframework.boot.autoconfigure.SpringBootApplication;
import org.springframework.cloud.client.circuitbreaker.EnableCircuitBreaker;
import org.springframework.cloud.client.loadbalancer.LoadBalanced;
import org.springframework.context.annotation.Bean;
import org.springframework.web.client.RestTemplate;

// 開啟熔斷器註解 2 選 1,@EnableHystrix 封裝了 @EnableCircuitBreaker
// @EnableHystrix
@EnableCircuitBreaker
@SpringBootApplication
public class OrderServiceRestApplication {

    @Bean
    @LoadBalanced
    public RestTemplate restTemplate() {
        return new RestTemplate();
    }

    public static void main(String[] args) {
        SpringApplication.run(OrderServiceRestApplication.class, args);
    }

}
測試
訪問:http://localhost:9090/order/1/product 控制檯列印結果如下:
-----orderService-----selectProductListByIds-----
{id=1, productName=電視機1, productNum=1, productPrice=5800.0}
{id=2, productName=電視機2, productNum=1, productPrice=5800.0}
{id=3, productName=電視機3, productNum=1, productPrice=5800.0}
{id=4, productName=電視機4, productNum=1, productPrice=5800.0}
{id=5, productName=電視機5, productNum=1, productPrice=5800.0}
根據結果得知,請求本來呼叫的是單個商品查詢,請求合併以後只請求了一次批處理查詢。
服務隔離