
5.pytest引數化使用
阿新 • • 發佈:2020-12-14
JavaEE專案實現
1.在專案的src目錄下建立log4j.properties檔案。
log4j.rootLogger=ERROR, stdout
log4j.logger.com.itheima=DEBUG
log4j.appender.stdout=org.apache.log4j.ConsoleAppender
log4j.appender.stdout.layout=org.apache.log4j.PatternLayout
log4j.appender.stdout.layout.ConversionPattern=%5p [%t] - %m%n
2.在src目錄下建立db.properties 檔案。編寫資料庫相關屬性和對應值。
jdbc.driver=com.mysql.jdbc.Driver
jdbc.url=jdbc:mysql://localhost:3306/mybatis
jdbc.username=root
jdbc.password=123456
jdbc.maxTotal=30
jdbc.maxIdle=10
jdbc.initialSize=5
3.在src目錄下,建立Spring的配置檔案applicationContext.xml.
<?xml version="1.0" encoding="UTF-8"?>
<beans xmlns="http://www.springframework.org/schema/beans"
    xmlns:xsi="http://www.w3.org/2001/XMLSchema-instance"
    xmlns:aop="http://www.springframework.org/schema/aop"
    xmlns:tx="http://www.springframework.org/schema/tx"
    xmlns:context="http://www.springframework.org/schema/context"
    xsi:schemaLocation="http://www.springframework.org/schema/beans
        http://www.springframework.org/schema/beans/spring-beans-4.3.xsd
        http://www.springframework.org/schema/aop
        http://www.springframework.org/schema/aop/spring-aop-4.3.xsd
        http://www.springframework.org/schema/tx
        http://www.springframework.org/schema/tx/spring-tx-4.3.xsd
        http://www.springframework.org/schema/context
        http://www.springframework.org/schema/context/spring-context-4.3.xsd
        " >
<!--     讀取db.properties檔案  -->
<context:property-placeholder location="classpath:db.properties"/>

<!-- 配置資料來源 -->
<bean id="dataSource" class="org.apache.commons.dbcp2.BasicDataSource">
<property name="driverClassName" value="${jdbc.driver}"></property>
<property name="url" value="${jdbc.url}"></property>
<property name="username" value="${jdbc.username}"></property>
<property name="password" value="${jdbc.password}"></property>
<property name="maxTotal" value="${jdbc.maxTotal}"></property>
<property name="maxIdle" value="${jdbc.maxIdle}"></property>
<property name="initialSize" value="${jdbc.initialSize}"></property>
</bean>
<!-- 事物管理器  依賴於資料來源 -->
<bean id="transactionManager" class="org.springframework.jdbc.datasource.DataSourceTransactionManager">
<property name="dataSource" ref="dataSource"></property>
</bean>
<!-- 開啟事物註解 -->
<tx:annotation-driven transaction-manager="transactionManager"/>


<!-- 配置mybatis工廠 -->
<bean id="sqlSessionFactory" class="org.mybatis.spring.SqlSessionFactoryBean">
<property name="dataSource" ref="dataSource"></property>
<!-- 指定核心配置檔案位置 -->
<property name="configLocation" value="classpath:mybatis-config.xml"></property>
</bean>

<bean class="org.mybatis.spring.mapper.MapperScannerConfigurer">
<property name="basePackage" value="com.itheima.dao"></property>
</bean>

<!-- 掃描Service -->
<context:component-scan base-package="com.itheima.service"></context:component-scan>
</beans>
4.在src目錄下,建立MyBatis的核心配置檔案mybatis-config.xml.
<?xml version="1.0" encoding="UTF-8"?>
<!DOCTYPE configuration
 PUBLIC "-//mybatis.org//DTD Config 3.0//EN"
 "http://mybatis.org/dtd/mybatis-3-config.dtd">
<configuration>
<!-- 配置別名 -->
<typeAliases>
<package name="com.itheima.po"/>
</typeAliases>
</configuration
5.src目錄下,建立SpringMVC的配置檔案springmvc-config.xml,宣告中引入spring-context,使用context:component-scan元素指定需要的類包。
<?xml version="1.0" encoding="UTF-8"?>
<beans xmlns="http://www.springframework.org/schema/beans"
    xmlns:xsi="http://www.w3.org/2001/XMLSchema-instance"
    xmlns:context="http://www.springframework.org/schema/context"
    xsi:schemaLocation="http://www.springframework.org/schema/beans
        http://www.springframework.org/schema/beans/spring-beans-4.3.xsd
         http://www.springframework.org/schema/context
        http://www.springframework.org/schema/context/spring-context-4.3.xsd
        ">
<context:component-scan base-package="com.itheima.controller"></context:component-scan>
</beans>
6.修改web.xml,在檔案配置SpringMVC前端控制器DispatcherServlet.
<!--   配置載入Spring的配置檔案  通過監聽器實現的-->
<context-param>
<param-name>contextConfigLocation</param-name>
<param-value>classpath:applicationContext.xml</param-value>
</context-param>

<listener>
<listener-class>org.springframework.web.context.ContextLoaderListener</listener-class>
</listener>

<!--   配置springmvc前置核心控制器 -->
    <servlet>
    <servlet-name>springmvc</servlet-name>
    <servlet-class>org.springframework.web.servlet.DispatcherServlet</servlet-class>
    <init-param>
      <param-name>contextConfigLocation</param-name>
      <param-value>classpath:springmvc-config.xml</param-value>
    </init-param>
  </servlet>
  <servlet-mapping>
    <servlet-name>springmvc</servlet-name>
    <url-pattern>/</url-pattern>
  </servlet-mapping>
7.在src目錄下,建立一個com.itheima.po包,在該包下建立持久化類Customer,編寫屬性和屬性的set/get方法。
package com.itheima.po;
public class Customer {
	private Integer id;
	private String username;
	private String jobs;
	private String phone;
	public Integer getId() {
		return id;
	}
	public void setId(Integer id) {
		this.id = id;
	}
	public String getUsername() {
		return username;
	}
	public void setUsername(String username) {
		this.username = username;
	}
	public String getJobs() {
		return jobs;
	}
	public void setJobs(String jobs) {
		this.jobs = jobs;
	}
	public String getPhone() {
		return phone;
	}
	public void setPhone(String phone) {
		this.phone = phone;
	}
	@Override
	public String toString() {
		return "Customer [id=" + id + ", username=" + username + ", jobs=" + jobs + ", phone=" + phone + "]";
	}


}
8.在src目錄下,建立一個com.itheima.dao包,並在包中建立介面CustomerDao和CustomerDao.xml。在CustomerDao.java中編寫public Customer findCustomerById(Integer id)抽象方法,在CustomerDao.xml中編寫實現該方法的SQL語句
package com.itheima.dao;

import com.itheima.po.Customer;

public interface CustomerDao {
	public Customer findCustomerById(Integer id);
}
<?xml version="1.0" encoding="UTF-8"?>
<!DOCTYPE mapper
 PUBLIC "-//mybatis.org//DTD Mapper 3.0//EN"
 "http://mybatis.org/dtd/mybatis-3-mapper.dtd">
<mapper namespace="com.itheima.dao.CustomerDao">
<select id="findCustomerById" parameterType="Integer" resultType="customer">
select * from t_customer where id=#{id}
</select>
</mapper>
9.在src目錄下,建立一個com.itheima.service包,並在包中建立介面CustomerService和CustomerServiceImp實現類。在CustomerService.java中編寫public Customer findCustomerById(Integer id)抽象方法,在CustomerServiceImp.java中實現該抽象方法
public interface CustomerService{
	public Customer findCustomerById(Integer id);
}
CustomerServiceImp.java
@Service
public class  CustomerServiceImp implements CustomerService {
    	@Autowired
	private CustomerDao customerDao;
	public Customer findCustomerById(Integer id) {
		return this.customerDao.findCustomerById(id);
	}


}
10.在src目錄下,建立一個com.itheima.controller包,在包下建立CustomerController類,在類中新增到findCustomerById方法,並通過@RequestMapping註解該方
@Controller
public class CustomerController {
	@Autowired
	private CustomerService customerService;
	/**
	 *根據id查詢客戶資訊
	 */
	@RequestMapping("/findCustomerById")
	public String findCustomerById(Integer id,Model model) {
		Customer customer =customerService.findCustomerById(id);
		model.addAttribute("customer", customer);
		//返回客戶資訊展示頁面
		return "customer";
	}
}
11在Web-INF目錄下,建立名為jsp的資料夾,然後在檔案中建立customer.jsp頁面。
<%@ page language="java" contentType="text/html; charset=UTF-8"
pageEncoding="UTF-8"%>
<!DOCTYPE html>
<html>
<head>
<meta charset="=UTF-8">
<title>新增使用者</title>
</head>
<body>
<table border="1">
<tr>
<td>編號</td>
<td>名稱</td>
<td>職業</td>
<td>電話</td>
</tr>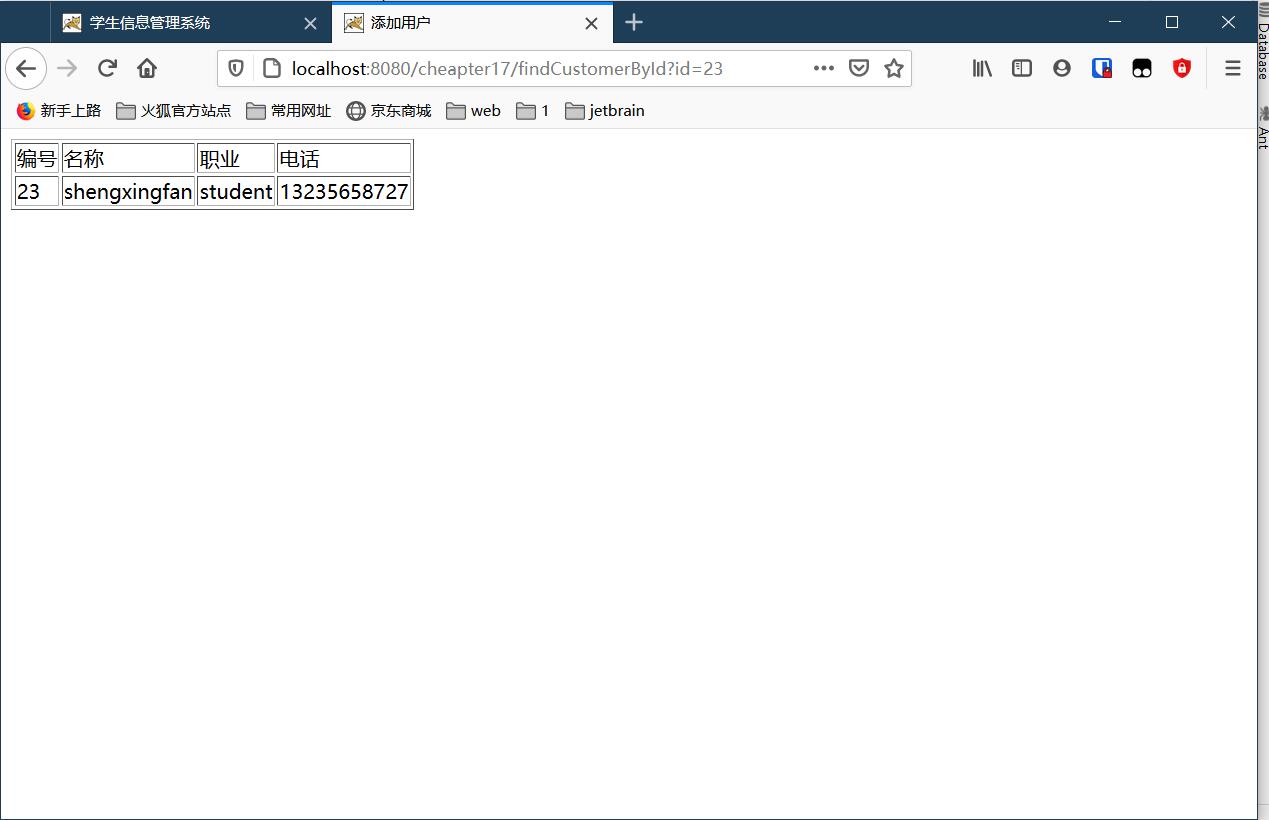
<tr>
<td>${customer.id}</td>
<td>${customer.username}</td>
<td>${customer.jobs}</td>
<td>${customer.phone}</td>
</tr>
</table></body>
</html>