
【圖片預覽】第三種方式:將元件資料放在公共狀態下
阿新 • • 發佈:2022-03-11
-
問題:微服務RPC遠端服務呼叫最核心的是什麼
高可用,試想你的註冊中心只有一個only one, 它出故障了那就會導致整個為服務環境不可用,所以解決辦法:搭建Eureka註冊中心叢集 ,實現負載均衡+故障容錯 -
eureka-serve叢集搭建步驟
-
構建cloud-eureka-server7001和cloud-eureka-server7002模組,參考前一篇文章
-
找到C:\Windows\System32\drivers\etc路徑下的hosts檔案
127.0.0.1 eureka7001.com 127.0.0.1 eureka7002.com -
修改YML檔案
- cloud-eureka-server700下的application.yml
server: port: 7001 eureka: instance: hostname: eureka7001.com client: #表示是否將自己註冊進EurekaServer預設為true。false表示不向註冊中心註冊自己 register-with-eureka: false #false表示自己端就是註冊中心,職責就是維護服務例項,並不需要去檢索服務 fetchRegistry: false service-url: defaultZone: http://eureka7002.com:7002/eureka/ #7001的要指向7002- cloud-eureka-server700下的application.yml
server: port: 7002 eureka: instance: hostname: eureka7002.com client: #表示是否將自己註冊進EurekaServer預設為true。false表示不向註冊中心註冊自己 register-with-eureka: false #false表示自己端就是註冊中心,職責就是維護服務例項,並不需要去檢索服務 fetchRegistry: false service-url: defaultZone: http://eureka7001.com:7001/eureka/#7002的要指向7001 -
將cloud-consumer-order80、cloud-provider-payment8001、cloud-provider-payment8002新增到2天Eureka叢集配置中。
#分別在三個模組中的application.yml中新增下面的eureka配置 eureka: client: #表示是否將自己註冊進EurekaServer預設為true。false表示不向註冊中心註冊自己 register-with-eureka: true #false表示自己端就是註冊中心,職責就是維護服務例項,並不需要去檢索服務 #是否從EurekaServer抓取已有的註冊資訊,預設為true。單節點無所謂,叢集必須設定為true才能配合ribbon使用負載均衡 fetchRegistry: true service-url: defaultZone: http://eureka7002.com:7002/eureka,http://eureka7001.com:7001/eureka -
測試
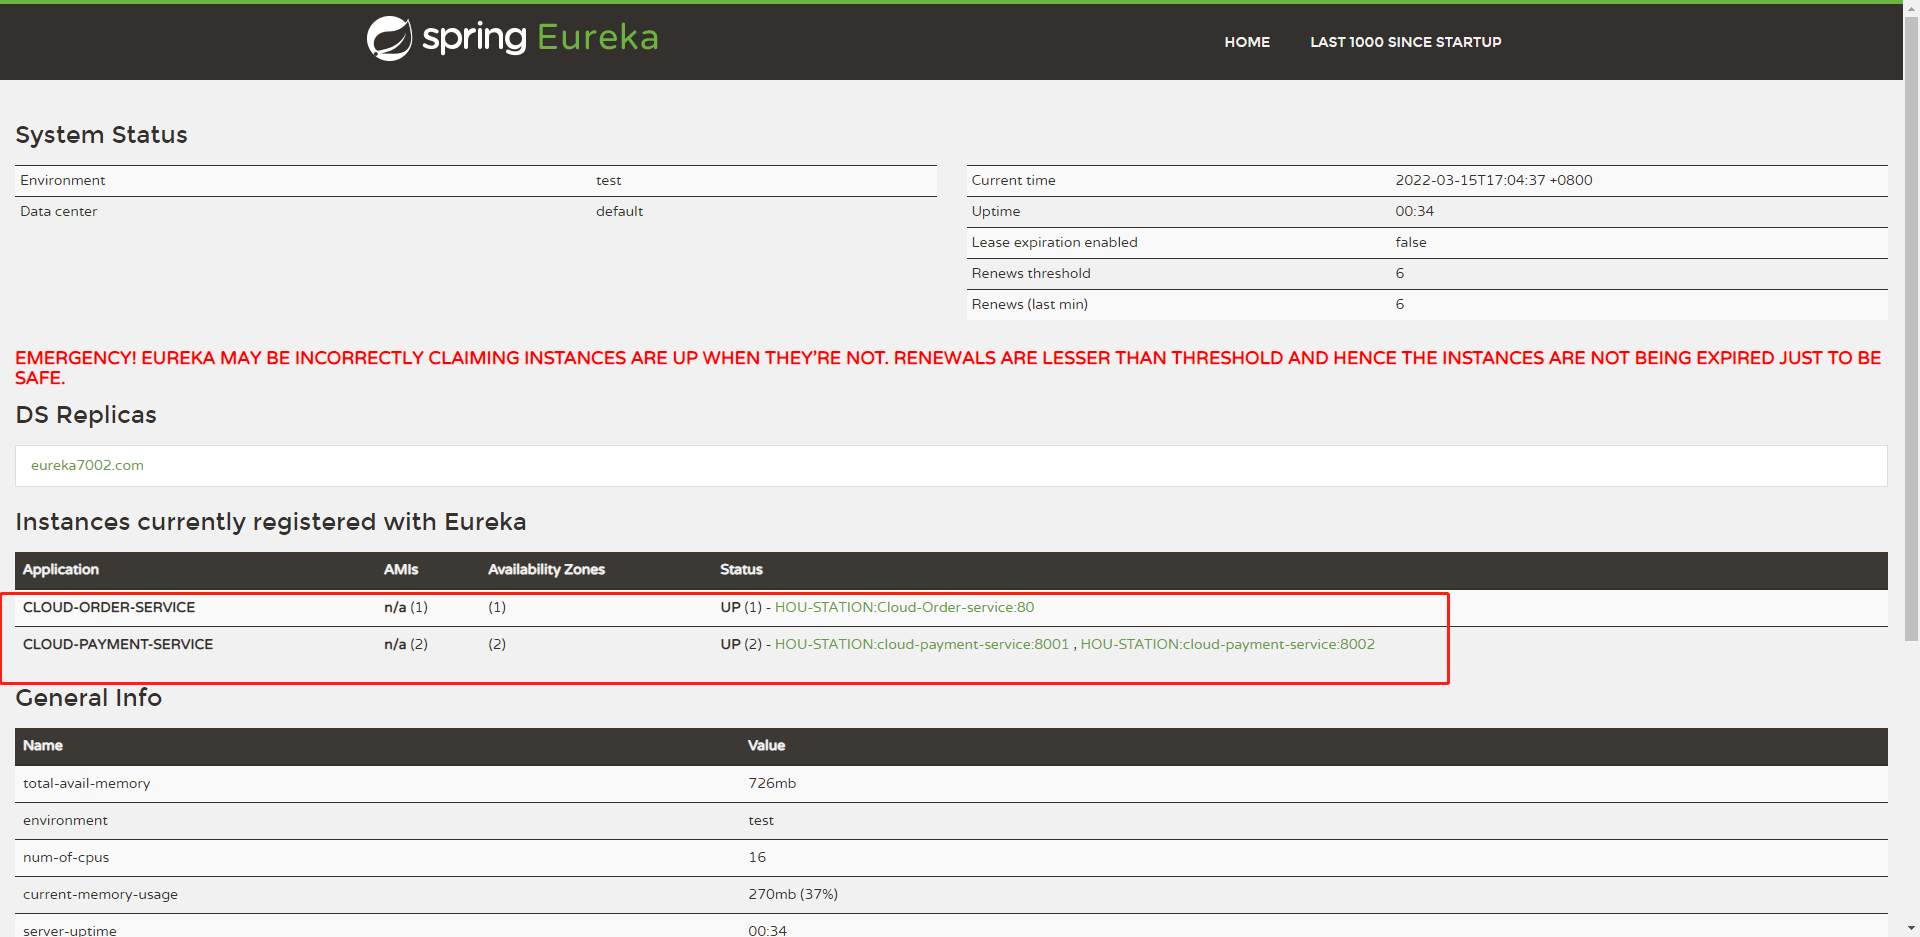
#啟動順序
1.先要啟動EurekaServer,7001/7002服務
2.再要啟動服務提供者provider,8001
3.再要啟動消費者,80
4.分別訪問
http://eureka7002.com:7002/
http://eureka7001.com:7001/
可以看到80 8001 8002已經註冊到Eureka中了
-
負載均衡問題
由於支付服務提供者叢集環境中存在8001 和 8002兩個服務提供者,當用戶訪問服務的時候,選擇那臺服務就是個問題,通過負載均衡配置就能解決該問題,具體配置如下:
import org.springframework.cloud.client.loadbalancer.LoadBalanced;
import org.springframework.context.annotation.Bean;
import org.springframework.context.annotation.Configuration;
import org.springframework.web.client.RestTemplate;
/**
* @Author: hcx
* @Description: RestTemplate模板配置:RestTemplate提供了多種便捷訪問遠端Http服務的方法,
是一種簡單便捷的訪問restful服務模板類,是Spring提供的用於訪問Rest服務的客戶端模板工具集
* @Date: 2021/12/16 11:10
* @Param:
* @return:
**/

@Configuration
public class ApplicationContextConfig {

    @Bean
    @LoadBalanced//負載均衡註解
    public RestTemplate restTemplate(){
        return new RestTemplate();
    }
}
配置成功後,訪問其中一個介面,8001/8002埠交替出現,就表明負載均衡配置成功。