1. 程式人生 > >windows 上用xshell使用 ssh自動登錄linux

windows 上用xshell使用 ssh自動登錄linux

xshell key

說明:今天來了一個小夥伴,因為業務需要,要登錄一臺測試系統,問我密碼是多少,我說我配置的密鑰登錄的,估計他不太熟悉,所以我簡單的演示了一下配置過程給他看,順便也記錄了下整個配置過程。

1、關於密鑰登錄系統的原理

關於配置原理,可以參考https://help.aliyun.com/knowledge_detail/41493.html,現在阿裏雲的官方文檔寫的很詳細,我也不想粘貼復制了。


2、服務端的配置過程

a)生成密鑰對(這裏我只是做個測試,所以一路回車就好了)

[[email protected] ~]# ssh-keygen -t rsa
Generating public/private rsa key pair.
Enter file in which to save the key (/root/.ssh/id_rsa): 
Created directory ‘/root/.ssh‘.
Enter passphrase (empty for no passphrase): 
Enter same passphrase again: 
Your identification has been saved in /root/.ssh/id_rsa.
Your public key has been saved in /root/.ssh/id_rsa.pub.
The key fingerprint is:
ce:6a:a7:fc:e6:d4:f4:21:98:5c:3b:f1:03:01:9d:7a [email protected]
/* */ The key‘s randomart image is: +--[ RSA 2048]----+ | .o.. | | o. | | .+ | | ..+E= | | S.= + | | o o + o | | + . . | | ..oo | | .+*o | +-----------------+

b)查看密鑰的位置(默認存在家目錄的.ssh下)*:

[[email protected]
/* */ ~]# cd /root/.ssh/ [[email protected] .ssh]# ll total 8 -rw------- 1 root root 1679 Jun 26 20:13 id_rsa -rw-r--r-- 1 root root 409 Jun 26 20:13 id_rsa.pub

c)設置Linux主機:

把id_rsa.pub 復制為authorized_keys,放在需要登陸的linux主機的~/.ssh目錄下
[[email protected] .ssh]# cat id_rsa.pub >>authorized_keys

d)設置ssh服務參數

SSH 服務默認開啟了證書認證支持。編輯 SSH 服務配置文件(默認為/etc/ssh/sshd_config),確保如下參數沒有顯示的置為 no。否則,將參數值修改為yes,或者刪除或註釋(在最開頭添加 # 號)整行配置。

[[email protected] .ssh]# vim /etc/ssh/sshd_config
將下面兩行的註釋取消
#RSAAuthentication yes
#PubkeyAuthentication yes

e)下載私鑰到遠程計算機(公鑰相當於鎖,私鑰相當於鑰匙)

[[email protected] .ssh]# sz -y id_rsa

3、客戶端的配置

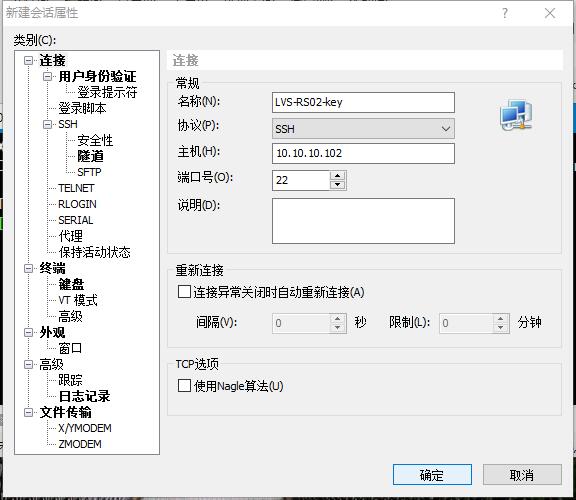
a)如下圖所示,進入xshell的登錄界面

技術分享

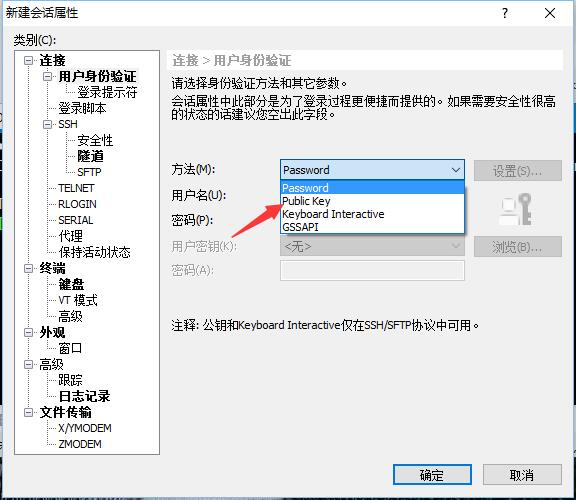
b)選擇基於Public Key的登錄驗證方式

技術分享

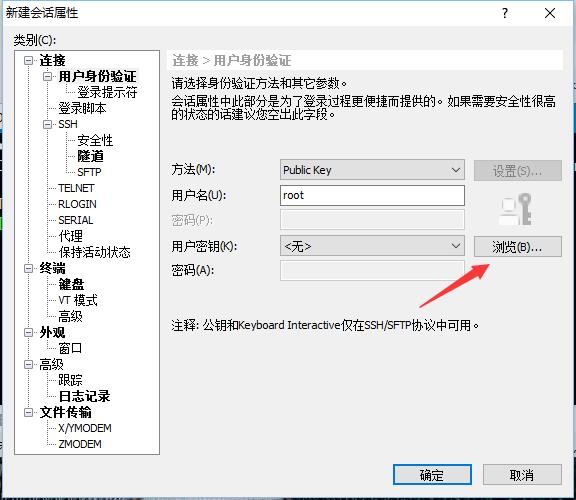
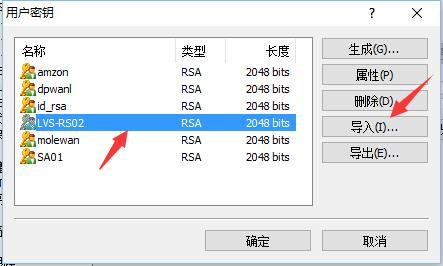
c)導入key

技術分享

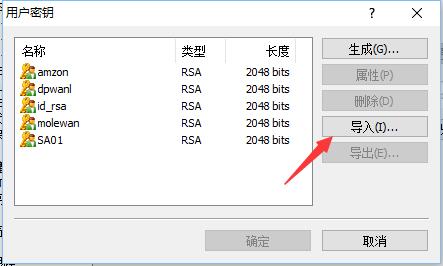
d)選擇導入

技術分享

e)這裏我們將之前從服務端sz -y導入的id_rsa改名為LVS-RS02,主要也是為了對應不同的服務

技術分享

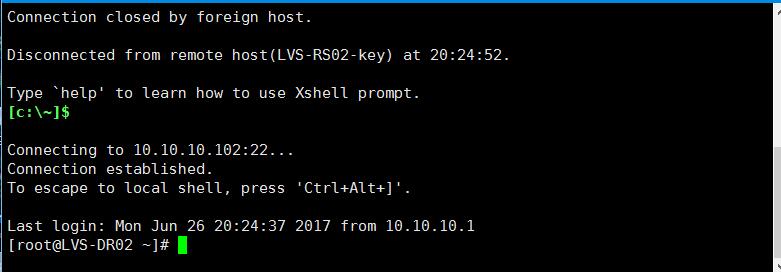
f)這樣我們就可以很方便的登錄到系統中了

技術分享


本文出自 “冰凍vs西瓜” 博客,請務必保留此出處http://molewan.blog.51cto.com/287340/1942173

windows 上用xshell使用 ssh自動登錄linux