《Java從入門到放棄》入門篇:spring中IOC的註入姿勢
IOC到底是個什麽東東呢?控制反轉(Inversion of Control,英文縮寫為IoC),其實就是這個東東。
你隨便百度一下就會得到比較書面的解釋:通過引入實現了IoC模式的IoC容器,即可由IoC容器來管理對象的生命周期、依賴關系等,從而使得應用程序的配置和依賴性規範與實際的應用程序代碼分開。其中一個特點就是通過文本的配置文件進行應用程序組件間相互關系的配置,而不用重新修改並編譯具體的代碼。
說了這麽多,通過一個例子就能很好的來理解。以前小王要找對象,要麽雲茫茫人海中進行匹配(通過 小王.對象=小張 這樣的語法進行關聯),要麽通過3D打印直接打印出心中女神的樣子(通過new實例化),而現在,只要到51CTO婚介中心去註冊,同時提出自己的要求,51CTO婚介中心就會在所有的註冊用戶中進行匹配,如果有匹配上的就安排小王去相親。
這兒的51CTO婚介心中就相當於是IOC容器,同時,因為有了中介(Ioc容器),找對象是不是變得非常簡單了(很多事情不用小王自己去處理)。
解釋完畢,接下來介紹spring中的IOC,其註入方式有以下三種:
屬性註入(set註入)
構造器註入(構造方法註入)
工廠註入(很少使用,你如果非要用····,那就自己搞定吧,哈哈)
接下來,有請代碼君上場! (的寫代碼前記得導入spring相關Jar包)
一、屬性註入
屬性註入有兩種情況,一種是Java基本數據類型,一種是自定義類型
1.1) 編寫Song實體類
    //歌曲類
    public class Song {
	private int songID;		//歌曲ID
	private String songName;	//歌曲名
	private String songType;	//歌曲類型

	public Song() {	}
	public Song(int songID, String songName, String songType) {
		this.songID = songID;
		this.songName = songName;
		this.songType = songType;
	}

	public int getSongID() {
		return songID;
	}
	public void setSongID(int songID) {
		this.songID = songID;
	}
	public String getSongName() {
		return songName;
	}
	public void setSongName(String songName) {
		this.songName = songName;
	}
	public String getSongType() {
		return songType;
	}
	public void setSongType(String songType) {
		this.songType = songType;
	}
    }
1.2) 在spring配置文件中註入bean對象
<beans
	xmlns="http://www.springframework.org/schema/beans"
	xmlns:xsi="http://www.w3.org/2001/XMLSchema-instance"
	xmlns:p="http://www.springframework.org/schema/p"
	xsi:schemaLocation="http://www.springframework.org/schema/beans http://www.springframework.org/schema/beans/spring-beans-3.1.xsd">

	<bean id="yjm" class="com.pxy.entity.Song">
		<property name="songID" value="10086"></property>
		<property name="songName" value="一剪梅"></property>
		<property name="songType" value="經典老歌"></property>
	</bean>
</beans>
1.3) 創建Test類進行測試(簡單點,普通類包含main方法就行)
public static void main(String[] args) {
    ApplicationContext applicationContext = new ClassPathXmlApplicationContext("applicationContext.xml");
    Song song = applicationContext.getBean("yjm", Song.class);
    System.out.println("歌曲名:"+song.getSongName());
    System.out.println("歌曲類型:"+song.getSongType());
}
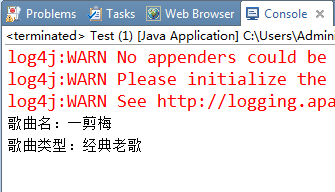
1.4) 顯示結果如下:

以上是基本數據類型的註入寫法,如果包含自定義類型,則做如下修改:
1.5) 添加Singer實體類
public class Singer {
    private int singerID;     	//歌手ID
    private String singerName;	//歌手姓名
    private String area;      	//所屬地區

    public int getSingerID() {
        return singerID;
    }
    public void setSingerID(int singerID) {
        this.singerID = singerID;
    }
    public String getSingerName() {
        return singerName;
    }
    public void setSingerName(String singerName) {
        this.singerName = singerName;
    }
    public String getArea() {
        return area;
    }
    public void setArea(String area) {
        this.area = area;
    }
}
1.6) 在Song類中添加Singer屬性
//歌曲類
public class Song {
        //之前代碼省略...

        //新增代碼
	private Singer singer;		//對應歌手

	public Singer getSinger() {
		return singer;
	}
	public void setSinger(Singer singer) {
		this.singer = singer;
	}
}
1.7) 修改配置文件,添加Singer對象,並在Song對象中使用 ref 進行引用
        <!-- 創建Singer對象fyq -->
	<bean id="fyq" class="com.pxy.entity.Singer">
		<property name="singerID" value="10000"></property>
		<property name="singerName" value="費玉清"></property>
	</bean>
	<!-- 創建Song對象yjm -->
	<bean id="yjm" class="com.pxy.entity.Song">
		<property name="songID" value="10086"></property>
		<property name="songName" value="一剪梅"></property>
		<property name="songType" value="經典老歌"></property>
		<!-- 使用ref引用上面的bean -->
		<property name="singer" ref="fyq"></property>
	</bean>
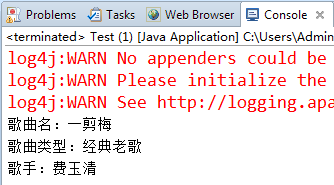
1.8) 修改測試類並查看結果
public static void main(String[] args) {
    ApplicationContext applicationContext = new ClassPathXmlApplicationContext("applicationContext.xml");
    Song song = applicationContext.getBean("yjm", Song.class);
    System.out.println("歌曲名:"+song.getSongName());
    System.out.println("歌曲類型:"+song.getSongType());
    System.out.println("歌手:"+song.getSinger().getSingerName());
}
屬性註入的方式到這兒就告一段落....
二、構造器註入
前面我們已經在Song類中編寫了構造方法Song(int songID, String songName, String songType),接下來,我們直接在spring配置文件中通過構造器方式來註入看看效果。
2.1) 在spring配置文件中註入bean對象
<bean id="jht" class="com.pxy.entity.Song">
    <constructor-arg index="0" value="10088"></constructor-arg>
    <constructor-arg index="1" value="菊花臺"></constructor-arg>
    <constructor-arg index="2" value="流行歌曲"></constructor-arg>
</bean>
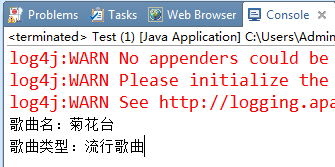
2.2) 在Test類中查看效果
public static void main(String[] args) {
    ApplicationContext applicationContext = new ClassPathXmlApplicationContext("applicationContext.xml");
    Song song = applicationContext.getBean("jht", Song.class);
    System.out.println("歌曲名:"+song.getSongName());
    System.out.println("歌曲類型:"+song.getSongType());
}
今天的內容就到這兒,感謝各位看官百閑中無聊逛到這兒並且還看完了!!!
最後,請各位看官離開前點個贊,如果實在沒別的事做,順便評論兩句...
本文出自 “軟件思維” 博客,請務必保留此出處http://softi.blog.51cto.com/13093971/1952958
《Java從入門到放棄》入門篇:spring中IOC的註入姿勢
