1. 程式人生 > >LNMP-Nginx配置SSL

LNMP-Nginx配置SSL

ssl

SSL證書是數字證書的一種,因為配置在服務器上,也稱為SSL服務器證書。它遵守SSL協議,由受信任的數字證書頒發機構CA,在驗證服務器身份後頒發,具有服務器身份驗證和數據傳輸加密功能。
技術分享

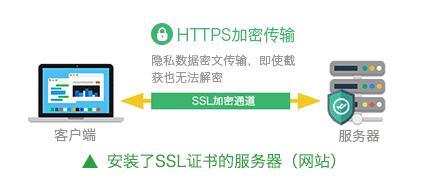
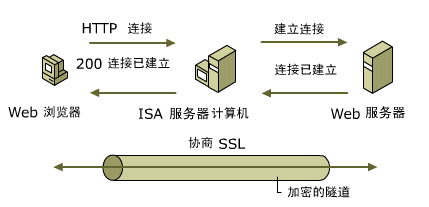
SSL證書通過在客戶端瀏覽器和Web服務器之間建立一條SSL安全通道,通過它可以激活SSL協議,實現數據信息在客戶端和服務器之間的加密傳輸,可以防止數據信息的泄露。保證了雙方傳遞信息的安全性,而且用戶可以通過服務器證書驗證他所訪問的網站是否是真實可靠。
技術分享

下面將演示在nginx環境下ssl的配置方式。


一、產生SSL密鑰對

1、安裝openssl

[[email protected] ~]# cd /usr/local/nginx/conf/
[[email protected] conf]# rpm -qf `which openssl`
openssl-1.0.1e-60.el7_3.1.x86_64
[[email protected]
/* */ conf]# yum install -y openssl

2、設置私鑰

[[email protected] conf]# openssl genrsa -des3 -out tmp.key 2048
Generating RSA private key, 2048 bit long modulus
..........................+++
...........................................................................................................................................................+++
e is 65537 (0x10001)
Enter pass phrase for tmp.key:
Verifying - Enter pass phrase for tmp.key:
[[email protected]
/* */ conf]# openssl rsa -in tmp.key -out sykey.key ##取消密碼,生成新的私鑰文件 Enter pass phrase for tmp.key: writing RSA key [[email protected] conf]# rm -rf tmp.key

3、生成證書請求文件

[[email protected] conf]# openssl req -new -key sykey.key -out key.csr
You are about to be asked to enter information that will be incorporated
into your certificate request.
What you are about to enter is what is called a Distinguished Name or a DN.
There are quite a few fields but you can leave some blank
For some fields there will be a default value,
If you enter ‘.‘, the field will be left blank.
-----
Country Name (2 letter code) [XX]:cn
State or Province Name (full name) []:shanghai
Locality Name (eg, city) [Default City]:shanghai
Organization Name (eg, company) [Default Company Ltd]:51cto
Organizational Unit Name (eg, section) []:it
Common Name (eg, your name or your server‘s hostname) []:grodd
Email Address []:51cto.51cto.com

Please enter the following ‘extra‘ attributes
to be sent with your certificate request
A challenge password []:pwd
An optional company name []:51cto

4、生成公鑰

[[email protected] conf]# openssl x509 -req -days 365 -in key.csr -signkey sykey.key -out gykey.crt
Signature ok
subject=/C=cn/ST=shanghai/L=shanghai/O=51cto/OU=it/CN=grodd/emailAddress=51cto.51cto.com
Getting Private key


二、Nginx配置SSL

1、編輯配置文件

[[email protected] conf]# mkdir /data/wwwroot/test.com
[[email protected] conf]# vi /usr/local/nginx/conf/vhost/ssl.conf
server
{
    listen 443;
    server_name test.com;
    index index.html index.php;
    root /data/wwwroot/test.com;
    ssl on;
    ssl_certificate gykey.crt;
    ssl_certificate_key sykey.key;
    ssl_protocols TLSv1 TLSv1.1 TLSv1.2;
}

2、重新編譯安裝

[[email protected] conf]# cd /usr/local/src/nginx-1.12.1
[[email protected] nginx-1.12.1]# ./configure --prefix=/usr/local/nginx --with-http_ssl_module
[[email protected] nginx-1.12.1]# echo $?
0
[[email protected] nginx-1.12.1]# make && make install
[[email protected] nginx-1.12.1]# echo $?
0

3、檢查與重載

[[email protected] nginx-1.12.1]# /usr/local/nginx/sbin/nginx -V
nginx version: nginx/1.12.1
built by gcc 4.8.5 20150623 (Red Hat 4.8.5-11) (GCC) 
built with OpenSSL 1.0.1e-fips 11 Feb 2013
TLS SNI support enabled
configure arguments: --prefix=/usr/local/nginx --with-http_ssl_module
[[email protected] nginx-1.12.1]# /usr/local/nginx/sbin/nginx -t
nginx: the configuration file /usr/local/nginx/conf/nginx.conf syntax is ok
nginx: configuration file /usr/local/nginx/conf/nginx.conf test is successful
[[email protected] nginx-1.12.1]# /etc/init.d/nginx restart
Restarting nginx (via systemctl):                          [  OK  ]
[[email protected] nginx-1.12.1]# netstat -lntp |grep -i nginx
tcp        0      0 0.0.0.0:80       0.0.0.0:*        LISTEN      2233/nginx: master  
tcp        0      0 0.0.0.0:443      0.0.0.0:*        LISTEN      2233/nginx: master

4、測試效果

[[email protected] nginx-1.12.1]# cd /data/wwwroot/test.com/
[[email protected] test.com]# echo "ssl test" > index.html

本地測試

[[email protected] test.com]# vi /etc/hosts
127.0.0.1   localhost localhost.localdomain localhost4 localhost4.localdomain4 test.com
::1         localhost localhost.localdomain localhost6 localhost6.localdomain6
[[email protected] test.com]# curl https://test.com
curl: (60) Peer‘s certificate issuer has been marked as not trusted by the user.
More details here: http://curl.haxx.se/docs/sslcerts.html

curl performs SSL certificate verification by default, using a "bundle"
 of Certificate Authority (CA) public keys (CA certs). If the default
 bundle file isn‘t adequate, you can specify an alternate file
 using the --cacert option.
If this HTTPS server uses a certificate signed by a CA represented in
 the bundle, the certificate verification probably failed due to a
 problem with the certificate (it might be expired, or the name might
 not match the domain name in the URL).
If you‘d like to turn off curl‘s verification of the certificate, use
 the -k (or --insecure) option.

遠端測試

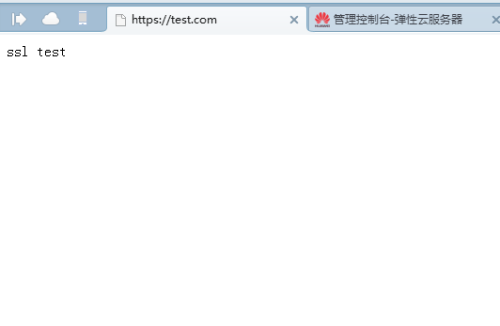
註意:由於模擬使用的是雲主機,要確保安全組策略放過443端口。此外,系統的防火墻沒有做任何限制。

技術分享

技術分享


本文出自 “Gorilla City” 博客,請務必保留此出處http://juispan.blog.51cto.com/943137/1956587

LNMP-Nginx配置SSL