Openstack之用virsh創建帶有OS的image
在用virsh命令創建image之前,要保證你的kvm和libvirt已經安裝且可以運行,如何安裝kvm和libvirt可以參考本人的其他博客
[email protected]:/var/run/libvirt# kvm-ok
INFO: /dev/kvm exists
KVM acceleration can be used
[email protected]:/var/run/libvirt# virsh list
Id Name State
----------------------------------------------------
[email protected]:/home/zxl# mkdir /image
[email protected]:/home/zxl# cd /image/
[email protected]:/image# ll
total 8
drwxr-xr-x 2 root root 4096 Aug 22 10:04 ./
drwxr-xr-x 26 root root 4096 Aug 22 10:04 ../
下面是一個虛擬機配置文件的模板,對其進行特定的修改便可(註,此模板中沒有定義cdrom,需要添加,一般情況下如果你有一個帶有os的raw格式的image,且將此raw文件作文qcow2的backing_file進行大批量虛擬機創建時,則不需要ios鏡像)
下面的為cdrom的定義,添加進模板中第33行便可
<disk type=‘file‘ device=‘cdrom‘>
<driver name=‘qemu‘ type=‘raw‘/>
<source file=‘/image/ubuntu-12.04.5-alternate-amd64.iso‘/>
<target dev=‘hdb‘ bus=‘ide‘/>
<readonly/>
<address type=‘drive‘ controller=‘0‘ bus=‘1‘ unit=‘0‘/>
</disk>
[email protected]:/image# vim ubuntu-12.04.xml
1 <domain type=‘kvm‘>
2 <name>%VM_NAME%</name>
3 <uuid>%UUID%</uuid>
4 <memory>1048576</memory>
5 <currentMemory>1048576</currentMemory>
6 <vcpu>1</vcpu>
7 <os>
8 <type arch=‘x86_64‘ machine=‘pc-0.14‘>hvm</type>
9 <boot dev=‘hd‘/>
10 <bootmenu enable=‘yes‘/>
11 </os>
12 <cpu match=‘exact‘>
13 <model>core2duo</model>
14 <feature policy=‘require‘ name=‘vmx‘/>
15 </cpu>
16 <features>
17 <acpi/>
18 <apic/>
19 <pae/>
20 </features>
21 <clock offset=‘localtime‘/>
22 <on_poweroff>destroy</on_poweroff>
23 <on_reboot>restart</on_reboot>
24 <on_crash>restart</on_crash>
25 <devices>
26 <emulator>/usr/bin/kvm</emulator>
27 <disk type=‘file‘ device=‘disk‘>
28 <driver name=‘qemu‘ type=‘qcow2‘ cache=‘none‘/>
29 <source file=‘%IMAGE_PATH%‘/>
30 <target dev=‘vda‘ bus=‘virtio‘/>
31 <alias name=‘virtio-disk0‘/>
32 </disk>
33
34 <disk type=‘file‘ device=‘disk‘>
35 <driver name=‘qemu‘ type=‘raw‘ cache=‘none‘/>
36 <source file=‘%RAW_DISK_PATH%‘/>
37 <target dev=‘vdb‘ bus=‘virtio‘/>
38 <address type=‘pci‘ domain=‘0x0000‘ bus=‘0x00‘ slot=‘0x08‘ function=‘0x0‘/>
39 </disk>
40
41
42 <controller type=‘ide‘ index=‘0‘>
43 <address type=‘pci‘ domain=‘0x0000‘ bus=‘0x00‘ slot=‘0x01‘ function=‘0x1‘/>
44 </controller>
45 <controller type=‘fdc‘ index=‘0‘/>
46
47 <interface type=‘bridge‘>
48 <mac address=‘%MAC%‘/>
49 <source bridge=‘br100‘/>
50 <target dev=‘vnet0‘/>
51 <alias name=‘net0‘/>
52 <address type=‘pci‘ domain=‘0x0000‘ bus=‘0x00‘ slot=‘0x03‘ function=‘0x0‘/>
53 </interface>
54
55 <interface type=‘network‘>
56 <mac address=‘%MAC2%‘/> <!-- 192.168.222.%IP1% -->
57 <source network=‘default‘/>
58 <target dev=‘vnet1‘/>
59 <alias name=‘net1‘/>
60 <address type=‘pci‘ domain=‘0x0000‘ bus=‘0x00‘ slot=‘0x06‘ function=‘0x0‘/>
61 </interface>
62
63 <interface type=‘network‘>
64 <mac address=‘%MAC3%‘/> <!-- 192.168.111.%IP2% -->
65 <source network=‘default‘/>
66 <target dev=‘vnet2‘/>
67 <alias name=‘net2‘/>
68 <address type=‘pci‘ domain=‘0x0000‘ bus=‘0x00‘ slot=‘0x09‘ function=‘0x0‘/>
69 </interface>
70
71
72
73 <serial type=‘pty‘>
74 <target port=‘0‘/>
75 </serial>
76 <console type=‘pty‘>
77 <target type=‘serial‘ port=‘0‘/>
78 </console>
79 <input type=‘tablet‘ bus=‘usb‘/>
80 <input type=‘mouse‘ bus=‘ps2‘/>
81 <graphics type=‘vnc‘ port=‘5900‘ autoport=‘yes‘ listen=‘0.0.0.0‘ keymap=‘en-us‘>
82 <listen type=‘address‘ address=‘0.0.0.0‘/>
83 </graphics>
84 <sound model=‘ich6‘>
85 <address type=‘pci‘ domain=‘0x0000‘ bus=‘0x00‘ slot=‘0x04‘ function=‘0x0‘/>
86 </sound>
87 <video>
88 <model type=‘vga‘ vram=‘9216‘ heads=‘1‘/>
89 <address type=‘pci‘ domain=‘0x0000‘ bus=‘0x00‘ slot=‘0x02‘ function=‘0x0‘/>
90 </video>
91 <memballoon model=‘virtio‘>
92 <address type=‘pci‘ domain=‘0x0000‘ bus=‘0x00‘ slot=‘0x05‘ function=‘0x0‘/>
93 </memballoon>
94 </devices>
95 </domain>
指定虛擬機名稱
[email protected]:/image# sed -i "s,%VM_NAME%,ubuntu-12.04,g" ubuntu-12.04.xml
指定UUID
[email protected]:/image# uuidgen
f43b668f-f13c-4129-bee1-20673dcff5fb
[email protected]:/image# sed -i "s,%UUID%,f43b668f-f13c-4129-bee1-20673dcff5fb,g" ubuntu-12.04.xml
創建一個raw格式的image(註:如果制作的image需要長期使用,盡量采用raw格式)
[email protected]:/image# qemu-img create -f raw ubuntu-12.04.raw 30G
Formatting ‘ubuntu-12.04.raw‘, fmt=raw size=32212254720
[email protected]:/image# sed -i "s,%IMAGE_PATH%,/image/ubuntu-12.04.raw,g" ubuntu-12.04.xml
[email protected]:/image#
設置虛擬光盤,用來安裝操作系統 (此鏡像需要你提前下載好)
[email protected]:/image# sed -i "s,%ISO_PATH%,/image/ubuntu-12.04.5-alternate-amd64.iso" ubuntu-12.04.xml
[email protected]:/image#
[email protected]:/image# ll
total 779280
drwxr-xr-x 2 root root 4096 Aug 22 10:15 ./
drwxr-xr-x 26 root root 4096 Aug 22 10:04 ../
-rw-r--r-- 1 root root 797966336 Aug 13 06:17 ubuntu-12.04.5-alternate-amd64.iso
-rw-r--r-- 1 root root 32212254720 Aug 22 10:11 ubuntu-12.04.raw
-rw-r--r-- 1 root root 2894 Aug 22 10:12 ubuntu-12.04.xml
設置虛擬網卡,在此之前需要確保br100啟用,用如下命令生成並替換MAC地址
[email protected]:/image# sed -i "s,%ISO_PATH%,/image/ubuntu-12.04.5-alternate-amd64.iso,g" ubuntu-12.04.xml
[email protected]:/image# MAC="fa:95:$(dd if=/dev/urandom count=1 2> /dev/null | md5sum | sed ‘s/^\(..\)\(..\)\(..\)\(..\).*$/\1:\2:\3:\4/‘)"
[email protected]:/image# sed -i "s,%MAC%,$MAC,g" ubuntu-12.04.xml
[email protected]:/image# MAC2="52:54:$(dd if=/dev/urandom count=1 2> /dev/null | md5sum | sed ‘s/^\(..\)\(..\)\(..\)\(..\).*$/\1:\2:\3:\4/‘)"
[email protected]:/image# sed -i "s,%MAC2%,$MAC2,g" ubuntu-12.04.xml
這時ubuntu12.04.xml的文件就已經配置好了,下面就可以創建並且啟動虛擬機了,在此之前先要進行define操作
[email protected]:/image# virsh define ubuntu-12.04.xml
error: Failed to define domain from ubuntu-12.04.xml
error: XML error: unable to parse mac address ‘%MAC3%‘
出現錯誤,刪除ubuntu-12.04.xml中關於MAC3的定義後重新define
修改關於名稱的定義為ubuntu-12.04
[email protected]:/image# virsh define ubuntu-12.04.xml
Domain ubuntu-12.04 defined from ubuntu-12.04.xml
可以看到此虛擬機已經定義,處於關閉狀態
[email protected]:/image# virsh list --all
Id Name State
----------------------------------------------------
- ubuntu-12.04 shut off
[email protected]:/image# virsh start ubuntu-12.04
error: Failed to start domain %ubuntu-12.04%
error: Cannot access storage file ‘%RAW_DISK_PATH%‘ (as uid:0, gid:0): No such file or directory
出現錯誤,刪除ubuntu-12.04.xml中關於vdb raw磁盤的定義後啟動
[email protected]:~# virsh start ubuntu-12.04
error: Failed to start domain ubuntu-12.04
error: unsupported configuration: guest and host CPU are not compatible: Host CPU does not provide required features: monitor
出現錯誤刪除下面內容
<cpu match=‘exact‘>
<model>core2duo</model>
<feature policy=‘require‘ name=‘vmx‘/>
</cpu>
[email protected]:~# virsh start ubuntu-12.04
error: Failed to start domain ubuntu-12.04
error: Cannot get interface MTU on ‘br100‘: No such device
出現錯誤刪除,沒有配置基於網橋的虛擬網卡
[email protected]:~# vim /etc/network/interfaces
[email protected]:/image# virsh start ubuntu-12.04
error: Failed to start domain ubuntu-12.04
error: internal error: Process exited while reading console log output: char device redirected to /dev/pts/1
Unsupported cluster size: 2^0kvm: -drive file=/image/ubuntu-12.04.raw,if=none,id=drive-virtio-disk0,format=qcow2,cache=none: could not open disk image /image/ubuntu-12.04.raw: Invalid argument
磁盤格式錯誤將<driver name=‘qemu‘ type=‘qcow2‘ cache=‘none‘/>中的qcow2該為raw
[email protected]:/image# virsh start ubuntu-12.04
Domain ubuntu-12.04 started
[email protected]:/image# virsh list
Id Name State
----------------------------------------------------
11 ubuntu-12.04 running
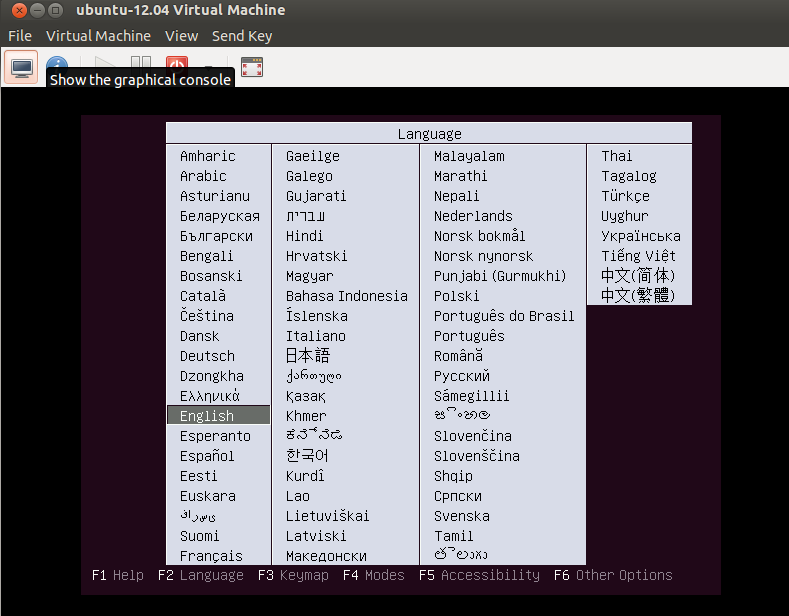
已經可以用virt-manager看到虛擬機正在安裝

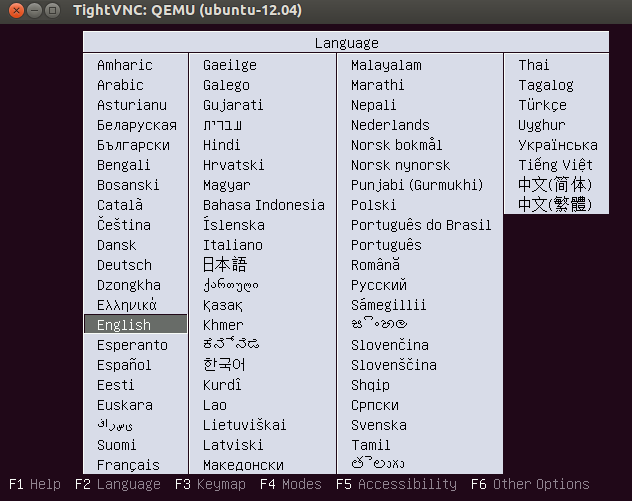
但是我們一般用vnc查看虛擬機
[email protected]:/image#apt-get install vncviewer
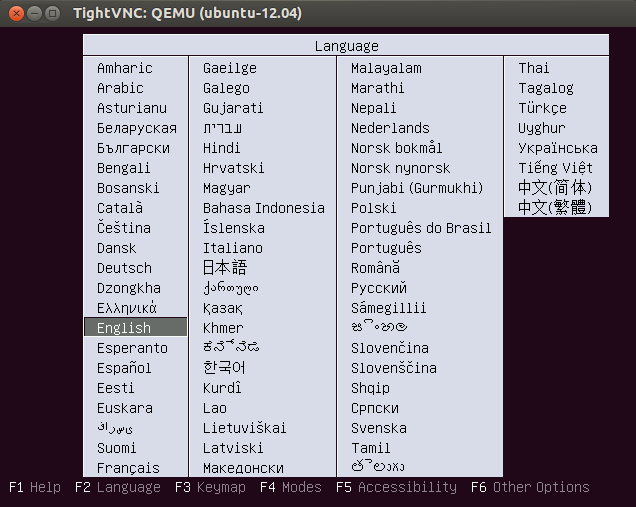
[email protected]:/image#vncviewer 192.168.139.5:5900 (vncviewer 宿主機IP:xml中配置的端口)

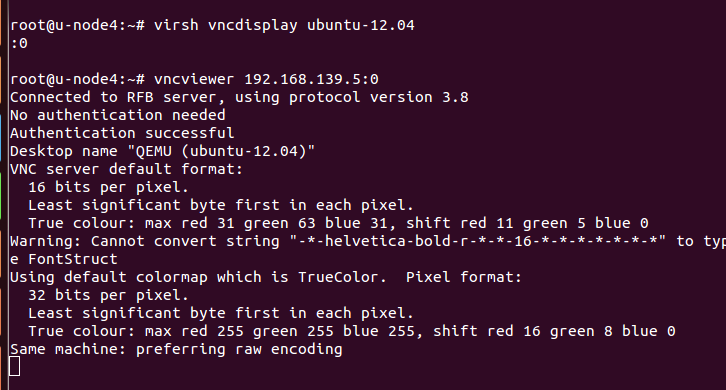
也可以通過如下命令確定虛擬機vnc的端口,可以看到顯示的是:0


這是最終虛擬機配置文件
[email protected]:/image# vim ubuntu-12.04.xml
<domain type=‘kvm‘>
<name>ubuntu-12.04</name>
<uuid>f43b668f-f13c-4129-bee1-20673dcff5fb</uuid>
<memory>1048576</memory>
<currentMemory>1048576</currentMemory>
<vcpu>1</vcpu>
<os>
<type arch=‘x86_64‘ machine=‘pc-0.14‘>hvm</type>
<boot dev=‘hd‘/>
<bootmenu enable=‘yes‘/>
</os>
<features>
<acpi/>
<apic/>
<pae/>
</features>
<clock offset=‘localtime‘/>
<on_poweroff>destroy</on_poweroff>
<on_reboot>restart</on_reboot>
<on_crash>restart</on_crash>
<devices>
<emulator>/usr/bin/kvm</emulator>
<disk type=‘file‘ device=‘disk‘>
<driver name=‘qemu‘ type=‘raw‘ cache=‘none‘/>
<source file=‘/image/ubuntu-12.04.raw‘/>
<target dev=‘vda‘ bus=‘virtio‘/>
<alias name=‘virtio-disk0‘/>
</disk>
<disk type=‘file‘ device=‘cdrom‘>
<driver name=‘qemu‘ type=‘raw‘/>
<source file=‘/image/ubuntu-12.04.5-alternate-amd64.iso‘/>
<target dev=‘hdb‘ bus=‘ide‘/>
<readonly/>
<address type=‘drive‘ controller=‘0‘ bus=‘1‘ unit=‘0‘/>
</disk>
<controller type=‘ide‘ index=‘0‘>
<address type=‘pci‘ domain=‘0x0000‘ bus=‘0x00‘ slot=‘0x01‘ function=‘0x1‘/>
</controller>
<controller type=‘fdc‘ index=‘0‘/>
<interface type=‘bridge‘>
<mac address=‘fa:95:d9:d9:9a:ca‘/>
<source bridge=‘br100‘/>
<target dev=‘vnet0‘/>
<alias name=‘net0‘/>
<address type=‘pci‘ domain=‘0x0000‘ bus=‘0x00‘ slot=‘0x03‘ function=‘0x0‘/>
</interface>
<interface type=‘network‘>
<mac address=‘52:54:d8:c3:69:30‘/> <!-- 192.168.222.%IP1% -->
<source network=‘default‘/>
<target dev=‘vnet1‘/>
<alias name=‘net1‘/>
<address type=‘pci‘ domain=‘0x0000‘ bus=‘0x00‘ slot=‘0x06‘ function=‘0x0‘/>
</interface>
<serial type=‘pty‘>
<target port=‘0‘/>
</serial>
<console type=‘pty‘>
<target type=‘serial‘ port=‘0‘/>
</console>
<input type=‘tablet‘ bus=‘usb‘/>
<input type=‘mouse‘ bus=‘ps2‘/>
<graphics type=‘vnc‘ port=‘5900‘ autoport=‘yes‘ listen=‘0.0.0.0‘ keymap=‘en-us‘>
<listen type=‘address‘ address=‘0.0.0.0‘/>
</graphics>
<sound model=‘ich6‘>
<address type=‘pci‘ domain=‘0x0000‘ bus=‘0x00‘ slot=‘0x04‘ function=‘0x0‘/>
</sound>
<video>
<model type=‘vga‘ vram=‘9216‘ heads=‘1‘/>
<address type=‘pci‘ domain=‘0x0000‘ bus=‘0x00‘ slot=‘0x02‘ function=‘0x0‘/>
</video>
<memballoon model=‘virtio‘>
<address type=‘pci‘ domain=‘0x0000‘ bus=‘0x00‘ slot=‘0x05‘ function=‘0x0‘/>
</memballoon>
</devices>
</domain>
本文出自 “11097124” 博客,請務必保留此出處http://11107124.blog.51cto.com/11097124/1959487
Openstack之用virsh創建帶有OS的image
