zabbix服務端監控搭建(一)
第1章 環境搭建
[[email protected] zabbix]# uname -m
x86_64
[[email protected] zabbix]# uname -r
2.6.32-642.el6.x86_64
[[email protected] zabbix]# cat /etc/redhat-release
CentOS release 6.8 (Final)
先安裝zabbix相關服務,再安裝數據庫。zabbix相關服務安裝完成後,默認會把apache自動安裝上去。這就是傳說中的lamp。
第2章 安裝zabbix
2.1 zabbix版本選擇
yum源安裝為什麽不選擇zabbix 3.0
1)官網指導文檔裏面寫明了yum包適合centos 7,沒有寫適用於centos6
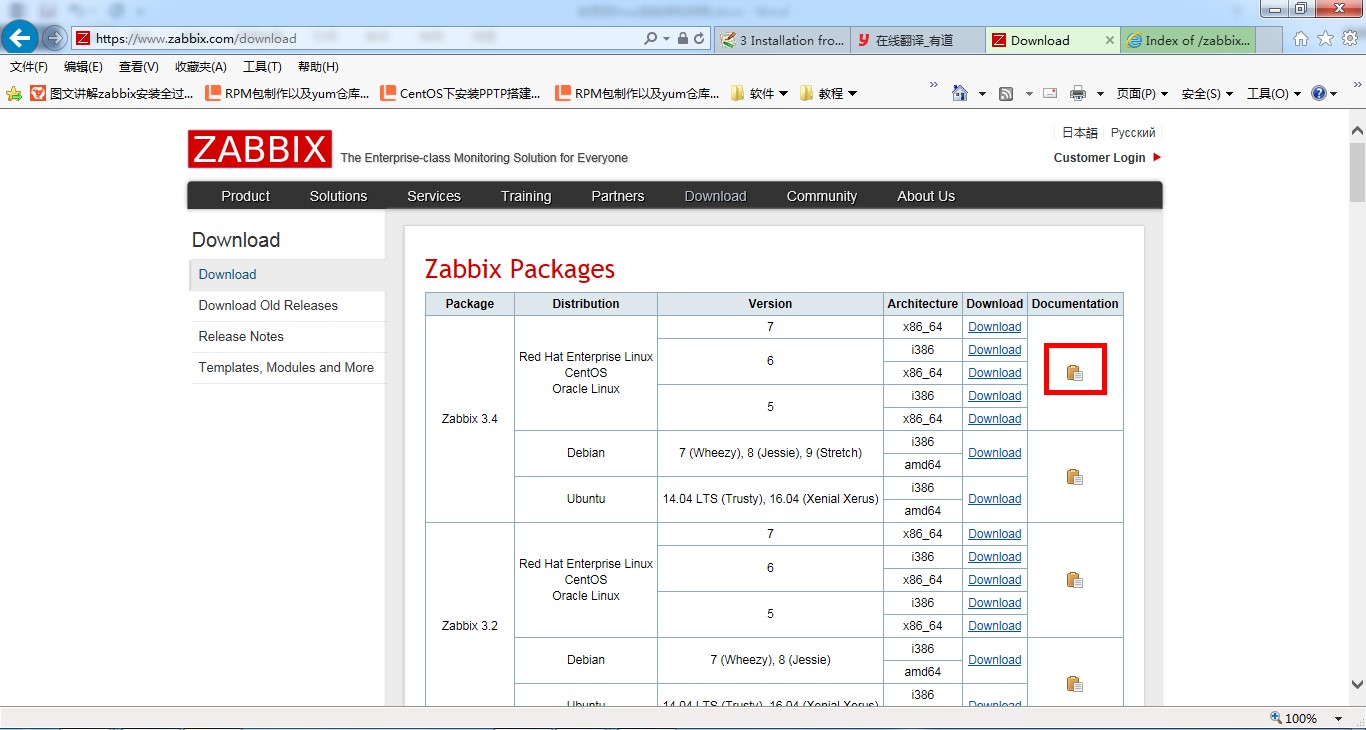
舉例:打開一個zabbix官網指導文檔:
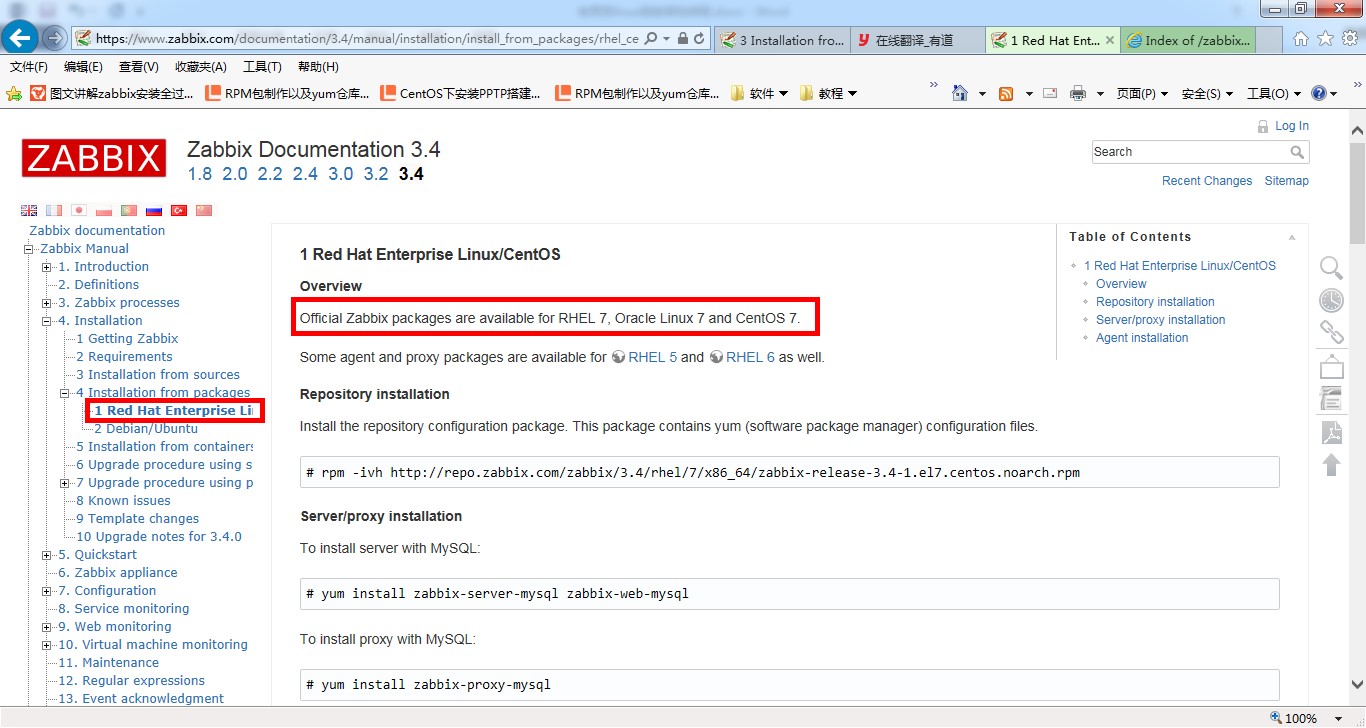
官網指導文檔已經告知,此yum包只適用於RHEL 7, Oracle Linux 7 and CentOS 7.
1 Red Hat Enterprise Linux/CentOS
Overview
Official Zabbixpackages are available for RHEL 7, Oracle Linux 7 and CentOS 7.
Some agent andproxy packages are available for RHEL 5 and RHEL 6 as well.
2)此yum 源包中的rpm包不完整。
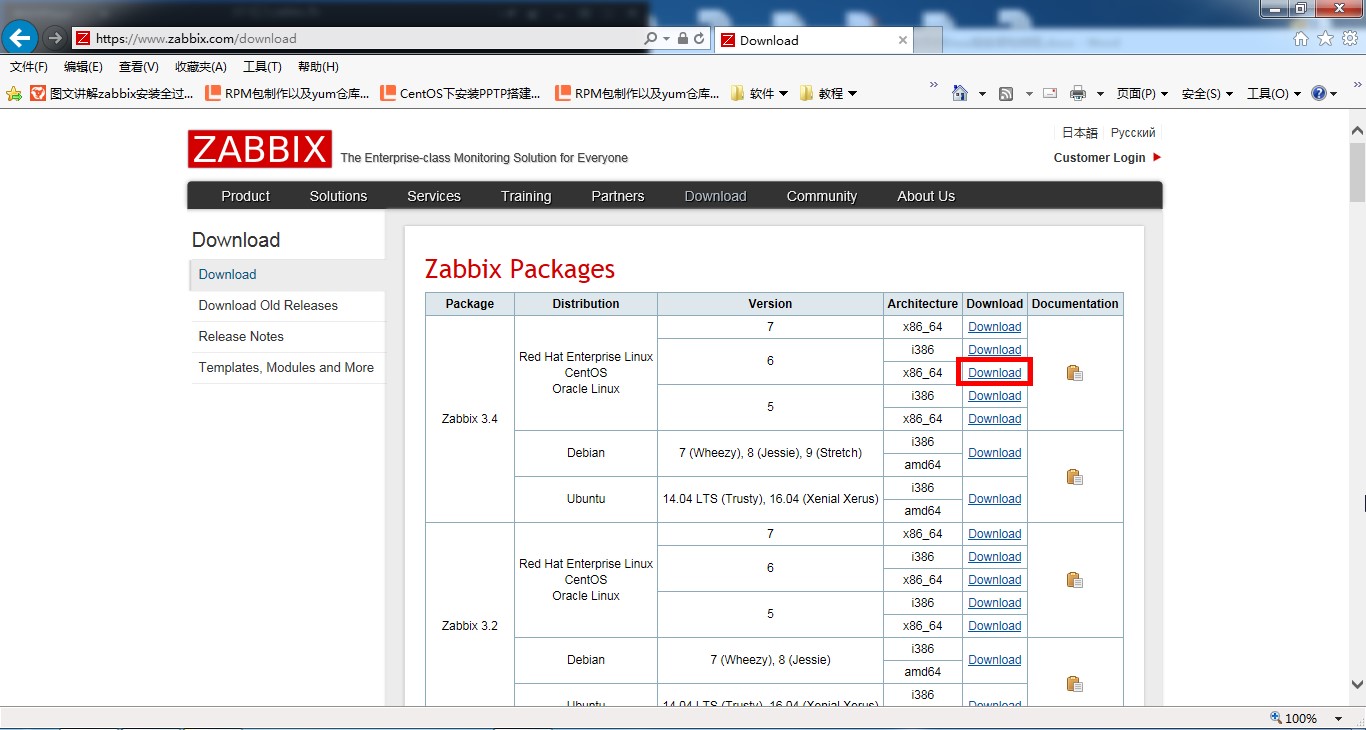
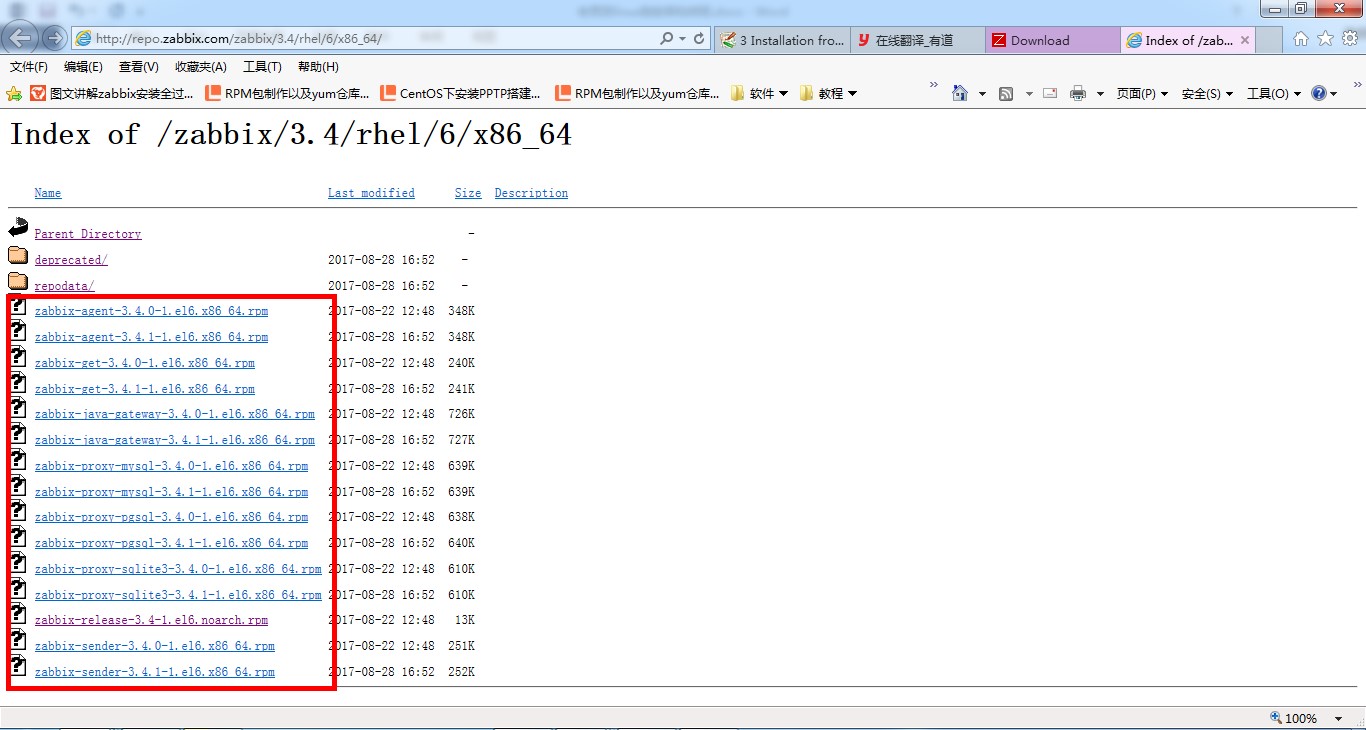
打開zabbix 3.4 centos 6,裏面的rpm包太少了,zabbix基本組件都沒有。即是此包適用於centos 6,但是裏面的rpm包不完整也不能用此yum源。
2.2 安裝、卸載zabbix 2.2yum源
安裝:建議學習環境中yum源安裝,工作環境中編譯安裝。
本文選擇yum源安裝方法
zabbix官方提供了yum源,如下所示:
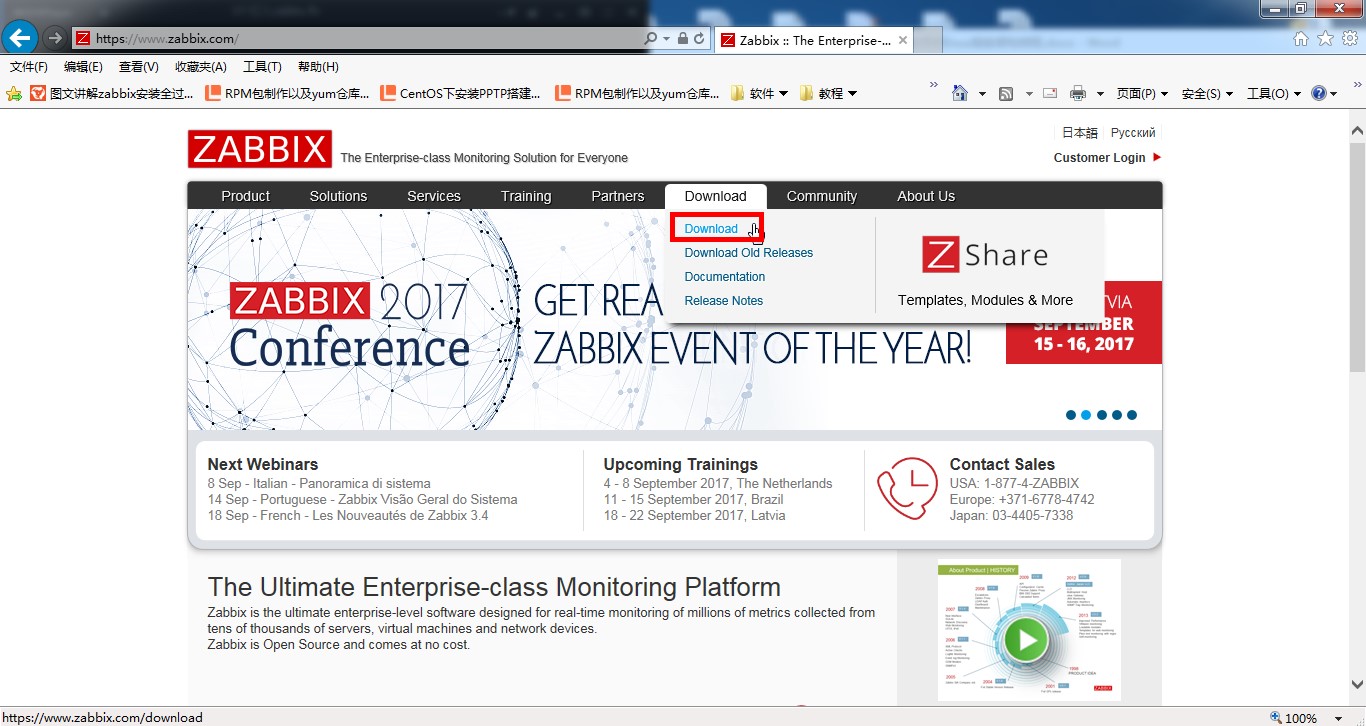
根據本機系統是centos 6 64位系統選擇對應的yum源。由於zabbix3.0以上的都是centos 7版本,所以根據官網選擇2.2的版本。
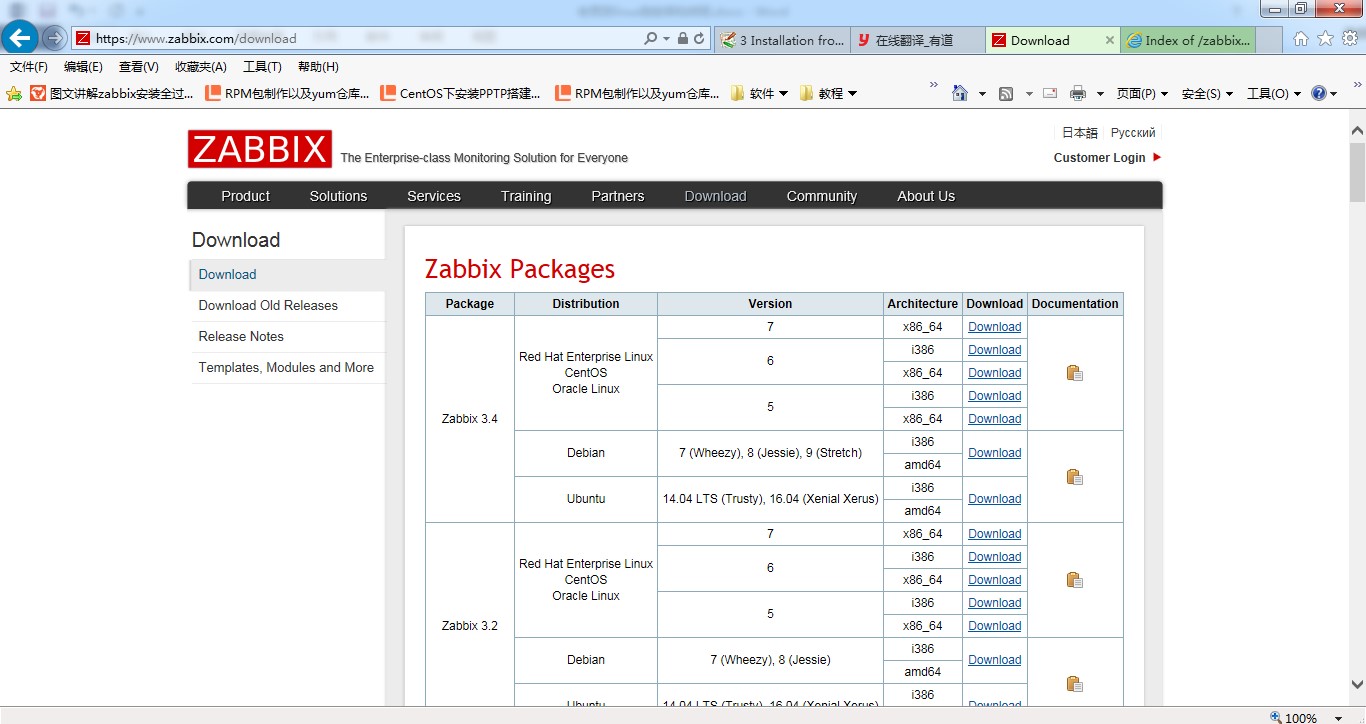
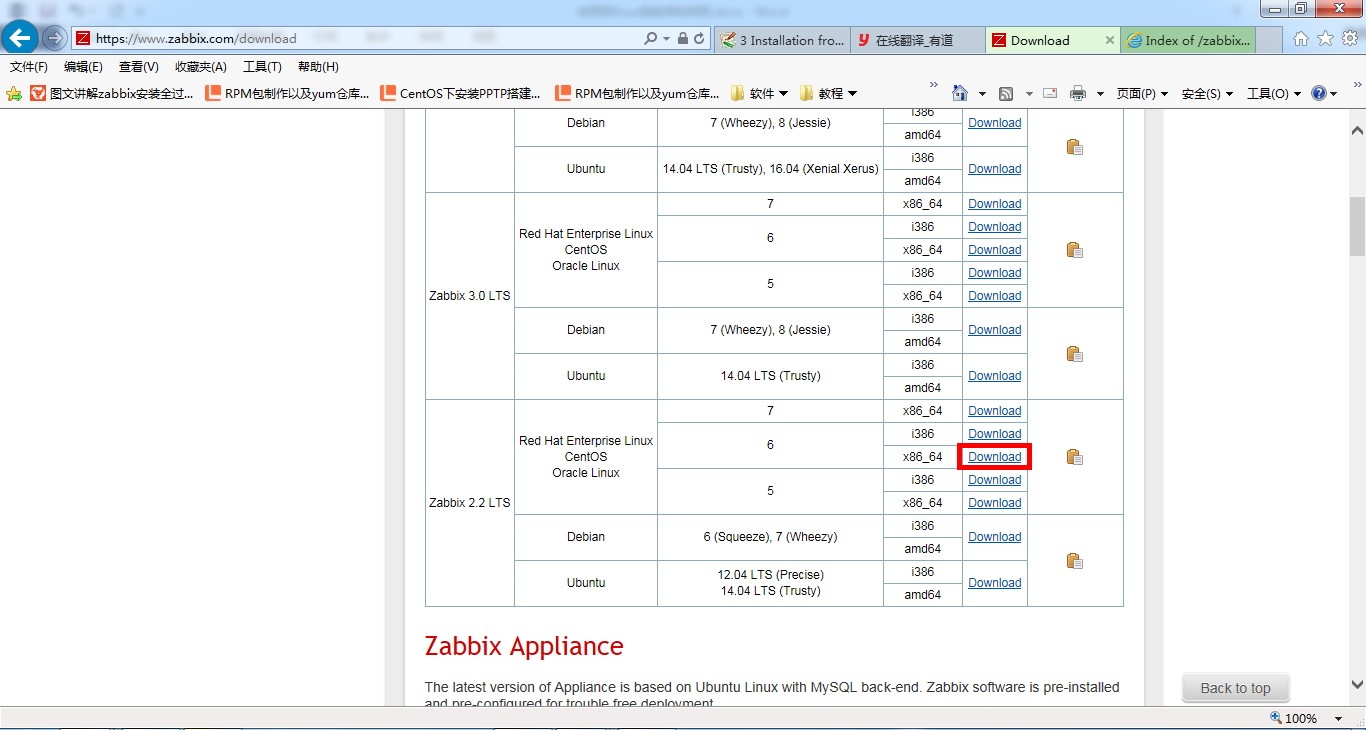
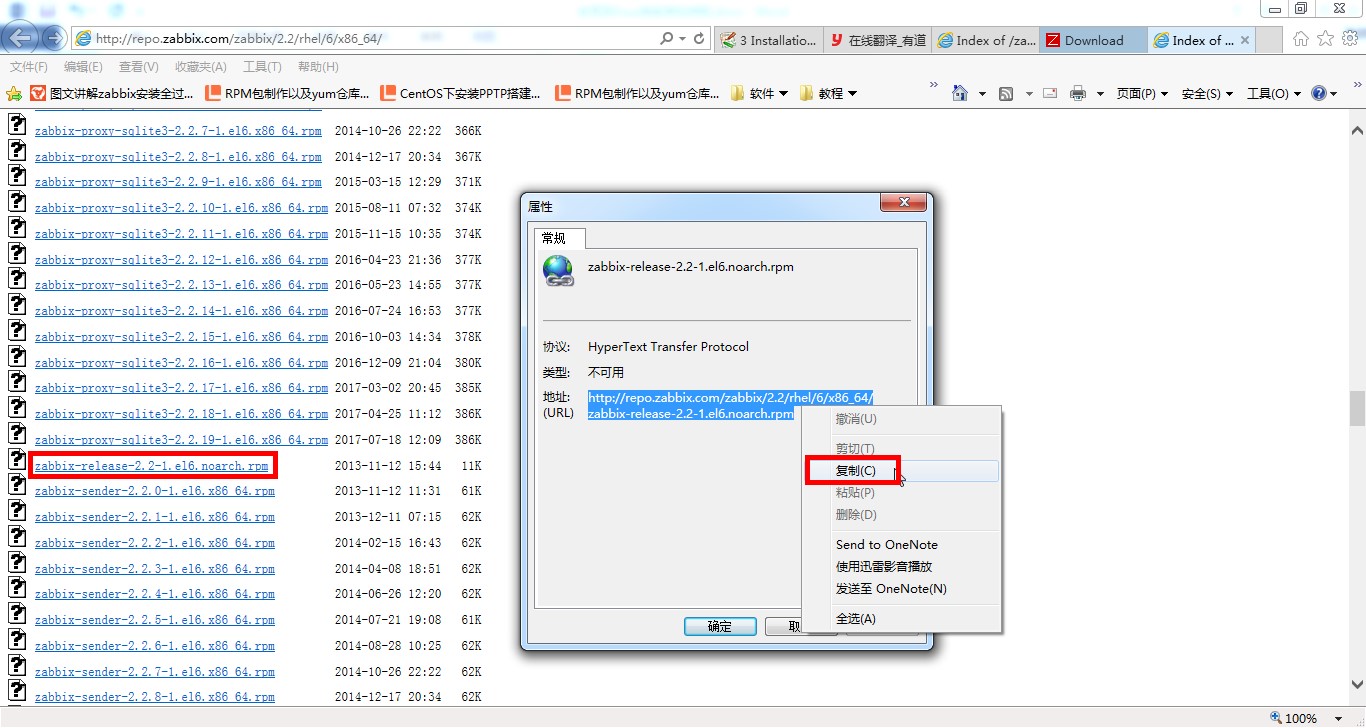
復制zabbix yum源地址:
http://repo.zabbix.com/zabbix/2.2/rhel/6/x86_64/zabbix-release-2.2-1.el6.noarch.rpm
安裝zabbix yum repo源:rpm –ivh 源地址或者yum install 源地址都可以
[[email protected]~]# rpm -ivh http://repo.zabbix.com/zabbix/2.2/rhel/6/x86_64/zabbix-release-2.2-1.el6.noarch.rpm   #安裝zabbix 2.2 yum repo源
卸載yum repo源
###########zabbix 2.2 yum repo源########################
[[email protected] ~]# rpm -qa zabbix-release #查看zabbix版本rpm源
zabbix-release-2.2-1.el6.noarch
[[email protected] ~]# rpm -ezabbix-release-2.2-1.el6.noarch #卸載zabbix2.2yum repo源
[[email protected]~]# rpm -qa zabbix-release #檢查有沒有卸載成功。(如果沒有就代表已經下載成功了)
2.3 安裝zabbix 2.4過程
根據zabbix安裝文檔裏面查看有zabbix 2.4版本的,適用於centos 6,所有下面根據操作指導安裝zabbix 2.4版本
安裝方法:yum repo源安裝
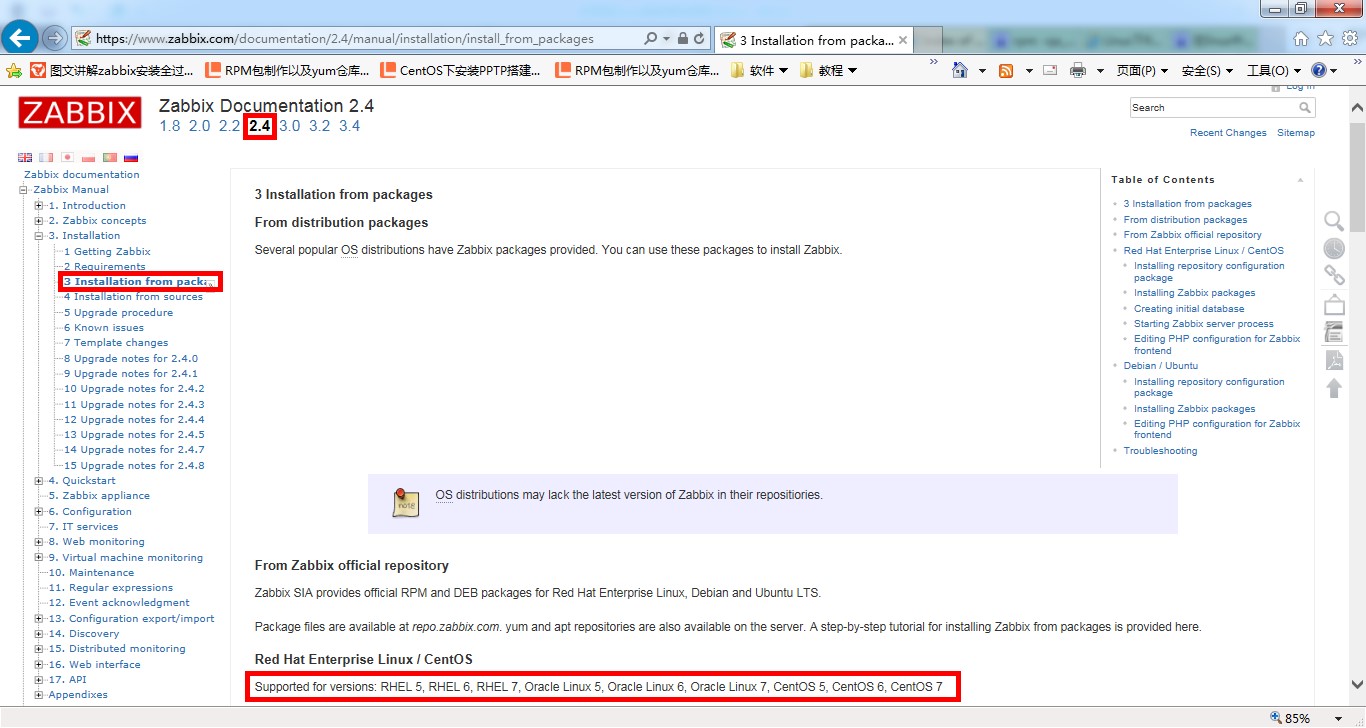
####安裝zabbix 2.4 yum repo源#########
[[email protected] ~]# rpm -ivh http://repo.zabbix.com/zabbix/2.4/rhel/6/x86_64/zabbix-release-2.4-1.el6.noarch.rpm    ###使用yum install rpm地址也可以
####安裝成功後如何查看這個軟件都安裝了哪些東西##########
[[email protected] ~]# rpm -ql zabbix-release
/etc/pki/rpm-gpg/RPM-GPG-KEY-ZABBIX
/etc/yum.repos.d/zabbix.repo
/usr/share/doc/zabbix-release-2.4
/usr/share/doc/zabbix-release-2.4/GPL
#######檢查是否安裝成功##################
[[email protected] ~]# rpm -qa zabbix-release
zabbix-release-2.4-1.el6.noarch
開始安裝
[[email protected]
~]# yum install zabbix zabbix-server zabbix-web zabbix-server-mysql
zabbix-web-mysql zabbix-agent –y
報錯如下:
http://repo.zabbix.com/zabbix/2.4/rhel/6/x86_64/zabbix-server-mysql-2.4.8-1.el6.x86_64.rpm:[Errno 14] PYCURL ERROR 7 - "couldn‘t connect to host"
嘗試其他鏡像。
(27/28):zabbix-web-2.4.8-1.el6.noarch.rpm                    | 4.9 MB     00:23
http://repo.zabbix.com/zabbix/2.4/rhel/6/x86_64/zabbix-web-mysql-2.4.8-1.el6.noarch.rpm:[Errno 14] PYCURL ERROR 7 - "couldn‘t connect to host"
嘗試其他鏡像。
下載軟件包出錯:
 zabbix-server-mysql-2.4.8-1.el6.x86_64: failure:zabbix-server-mysql-2.4.8-1.el6.x86_64.rpm from zabbix: [Errno 256] No moremirrors to try.
  zabbix-web-mysql-2.4.8-1.el6.noarch: failure:zabbix-web-mysql-2.4.8-1.el6.noarch.rpm from zabbix: [Errno 256] No moremirrors to try.
嘗試方法:
嘗試方法1:去下載zabbix2.2版本的yum repo源,也是一樣的報錯
嘗試方法2:去阿裏雲下載zabbix2.2和2.4yumrepo源,也是一樣的報錯。
一旦報錯,那麽沒有一個rpm包安裝成功的。
百度了一天終於找到解決方法了:只需要安裝yum-y install unixODBC即可。
yum -y install unixODBC
然後yum繼續安裝:
[[email protected]~]# yum install zabbix zabbix-server zabbix-web zabbix-server-mysql
zabbix-web-mysql zabbix-agent –y
檢查包是否安裝完整,如下查看6個包都已安裝完成了。
[[email protected] ~]# rpm -qa zabbixzabbix-server zabbix-web zabbix-server-mysql zabbix-web-mysql zabbix-agent
zabbix-2.4.8-1.el6.x86_64
zabbix-server-mysql-2.4.8-1.el6.x86_64
zabbix-web-mysql-2.4.8-1.el6.noarch
zabbix-server-2.4.8-1.el6.x86_64
zabbix-web-2.4.8-1.el6.noarch
zabbix-agent-2.4.8-1.el6.x86_64
檢查有沒有安裝數據庫,沒有就yum安裝數據庫。
[[email protected] ~]# rpm -qa mysql-server mysql
[[email protected] ~]# yum install -y mysql-server
mysql
[[email protected] ~]# /etc/init.d/mysqld rtart
[[email protected] ~]# cp /usr/share/mysql/my-medium.cnf /etc/my.cnf
cp:是否覆蓋"/etc/my.cnf"? y
[[email protected] ~]# vim /etc/my.cnf
在第37行myisam_sort_buffer_size = 8M的下面增加兩行,如下所示
37 myisam_sort_buffer_size = 8M
character-set-server = utf8
init-connect = ‘SET NAMES utf8‘
collation-server = utf8_general_ci

[[email protected] ~]# /etc/init.d/mysqld restart
Please report any problems with the/usr/bin/mysqlbug script!

                                                          [確定]
正在啟動 mysqld:                                          [確定]
建立數據庫:
進入數據庫:mysql
查看數據庫:show databases;
mysql> show databases;
+--------------------+
| Database           |
+--------------------+
| information_schema |
| mysql              |
| test               |
+--------------------+
3 rows in set (0.00 sec)
創建zabbix數據庫
create database zabbix character set utf8 collateutf8_bin;
數據庫授權:
mysql> grant all privileges on zabbix.*to [email protected] identified by ‘zabbix‘;
Query OK, 0 rowsaffected (0.01 sec)
[[email protected] ~]#cd /usr/share/doc/zabbix-server-mysql-2.4.8/create/
[[email protected]]# mysql -uroot -p zabbix < schema.sql
[[email protected]]# mysql -uroot -p zabbix < images.sql
[[email protected]]# mysql -uroot -p zabbix < data.sql
zabbix默認是用apache,默認已經幫安裝好了。
[[email protected] create]# cd /etc/httpd/conf.d/
[[email protected] conf.d]# ls
php.conf README  welcome.conf  zabbix.conf
[[email protected] conf.d]# vim/etc/httpd/conf.d/zabbix.conf
把19行的
19        # php_value date.timezone Europe/Riga
修改為:
19         php_value date.timezone Asia/Shanghai
啟動apache
[[email protected]d]# /etc/init.d/httpd start
修改zabbix配置文件讓它連接數據庫(數據庫的主機,名稱,用戶名,密碼)
[[email protected] zabbix]# vim/etc/zabbix/zabbix_server.conf
把72行的#註釋刪除
# DBHost=localhost修改為DBHost=localhost
82行的DBName=zabbix 默認的不用管(已建立好了)
98行的DBUser=zabbix 默認的不用管(已建立好了)
106行的 # DBPassword=修改為DBPassword=zabbix
重啟apache
[[email protected]
zabbix]# /etc/init.d/httpd restart
2.4 啟動zabbix web界面
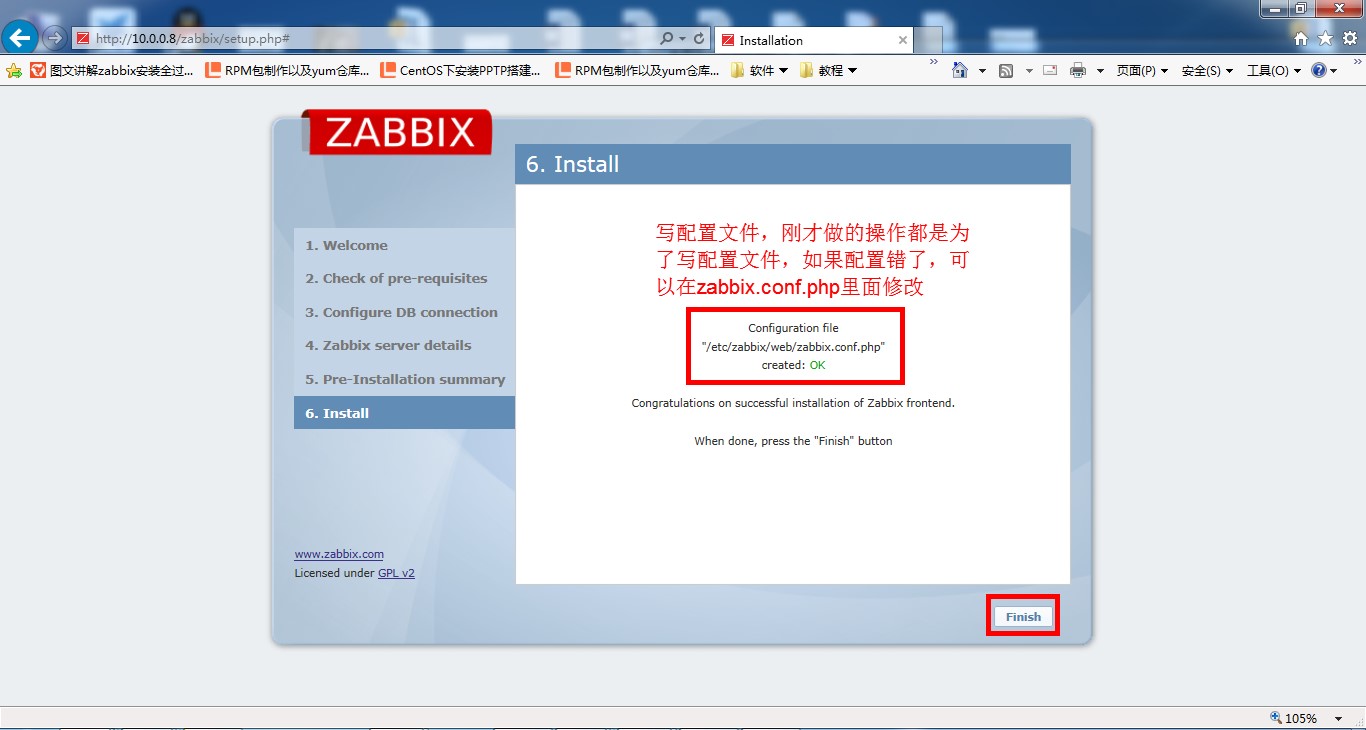
在ie中直接輸入http://10.0.0.8/zabbix即可(10.0.0.8為機器的ip地址)
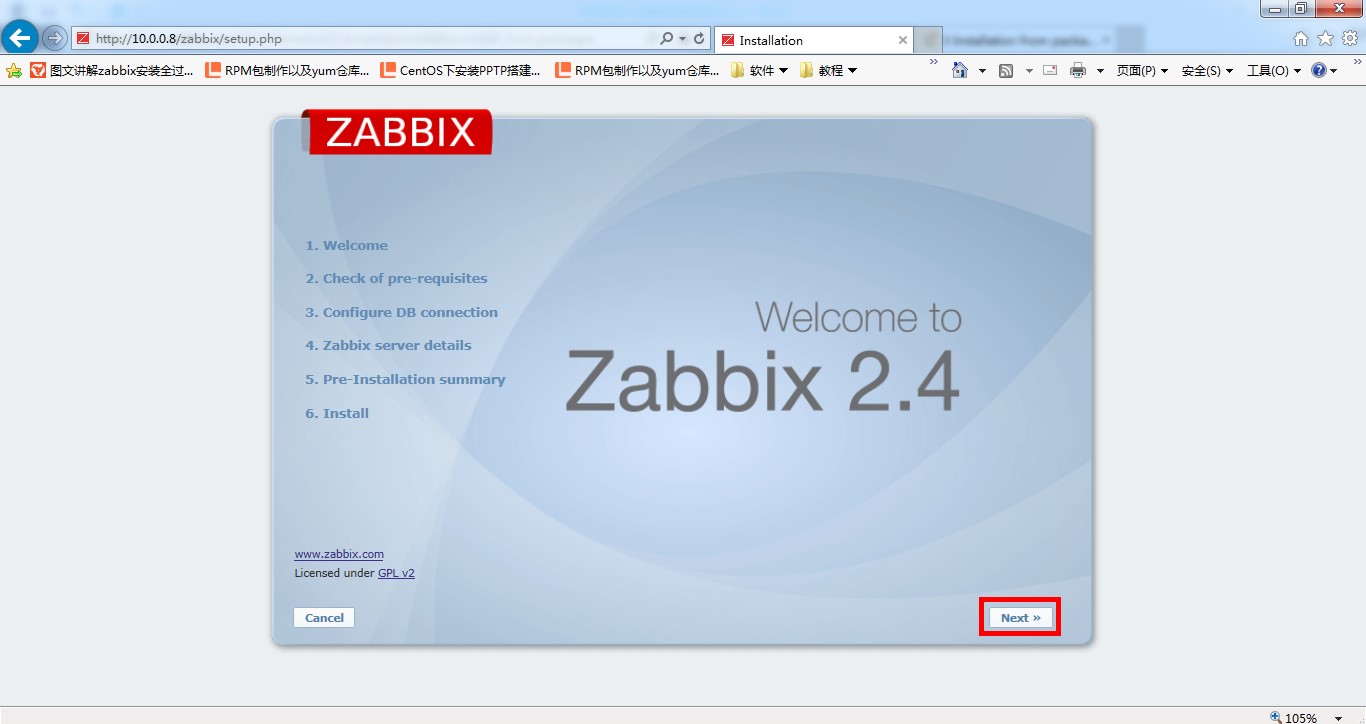
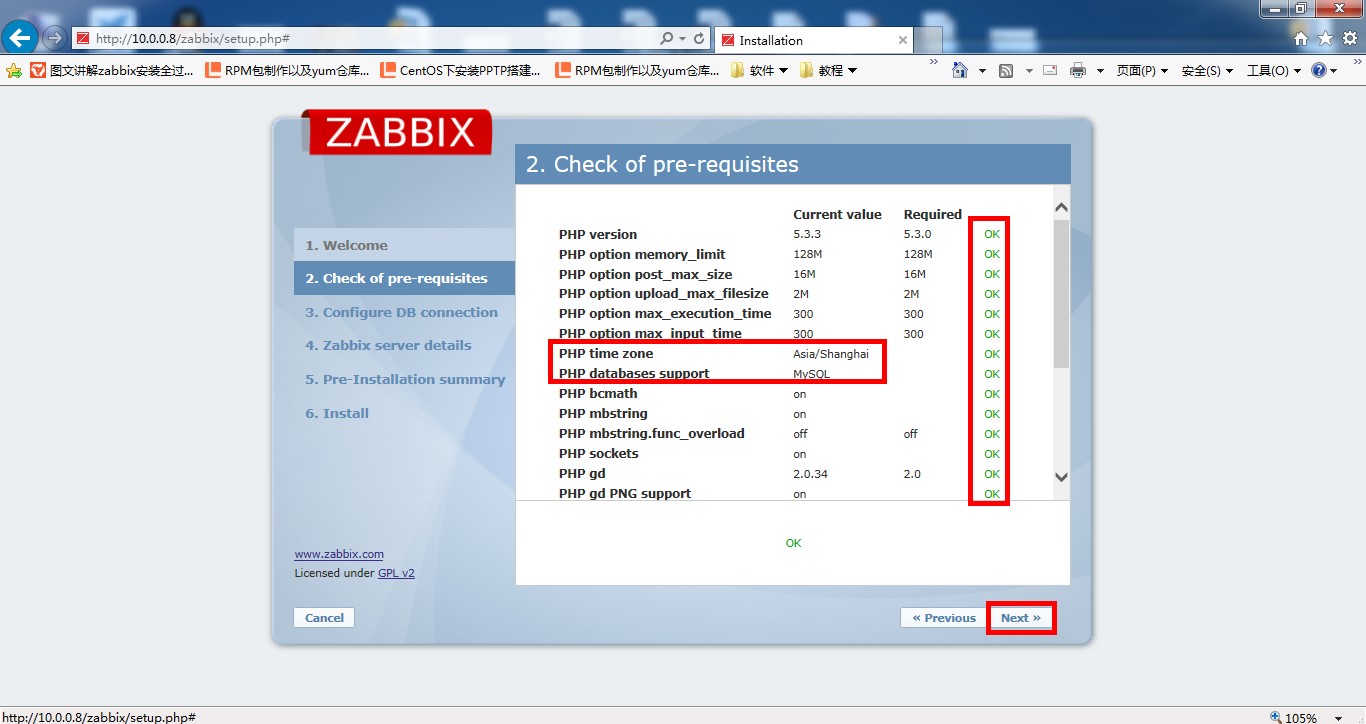
確保自檢都OK,點擊下一步
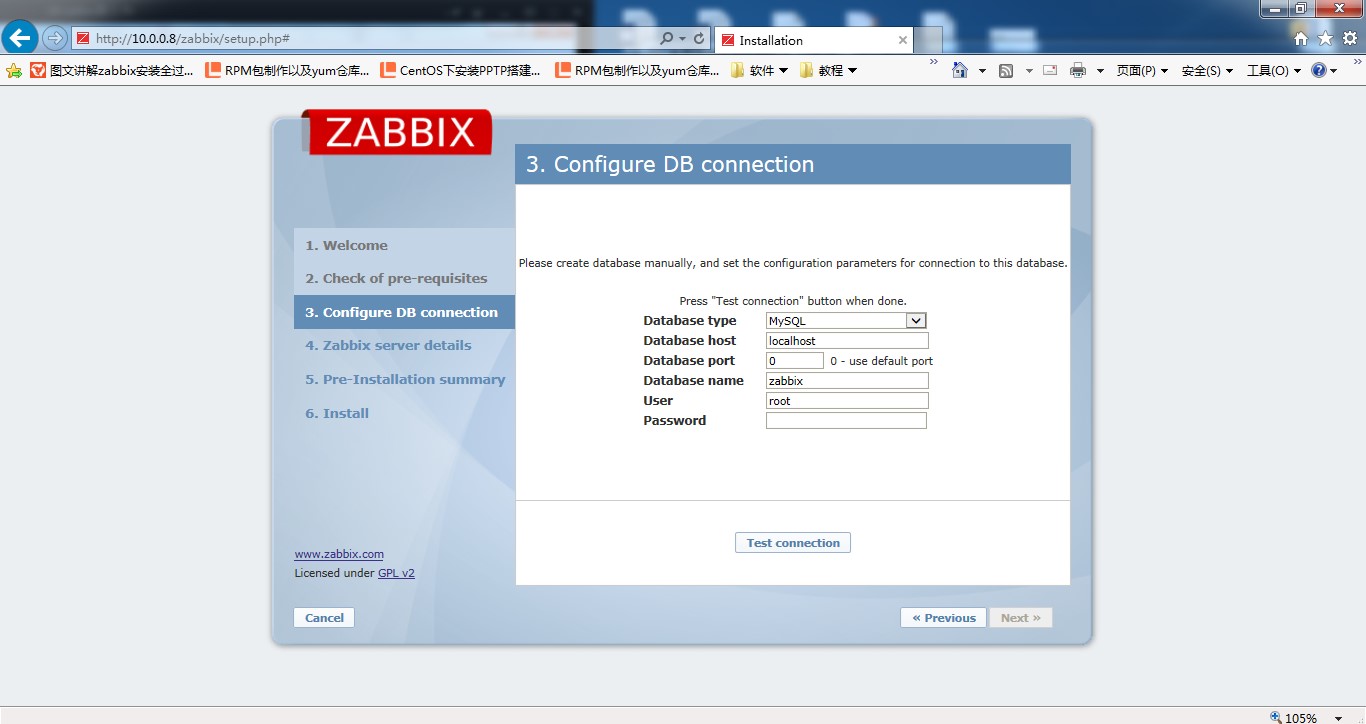
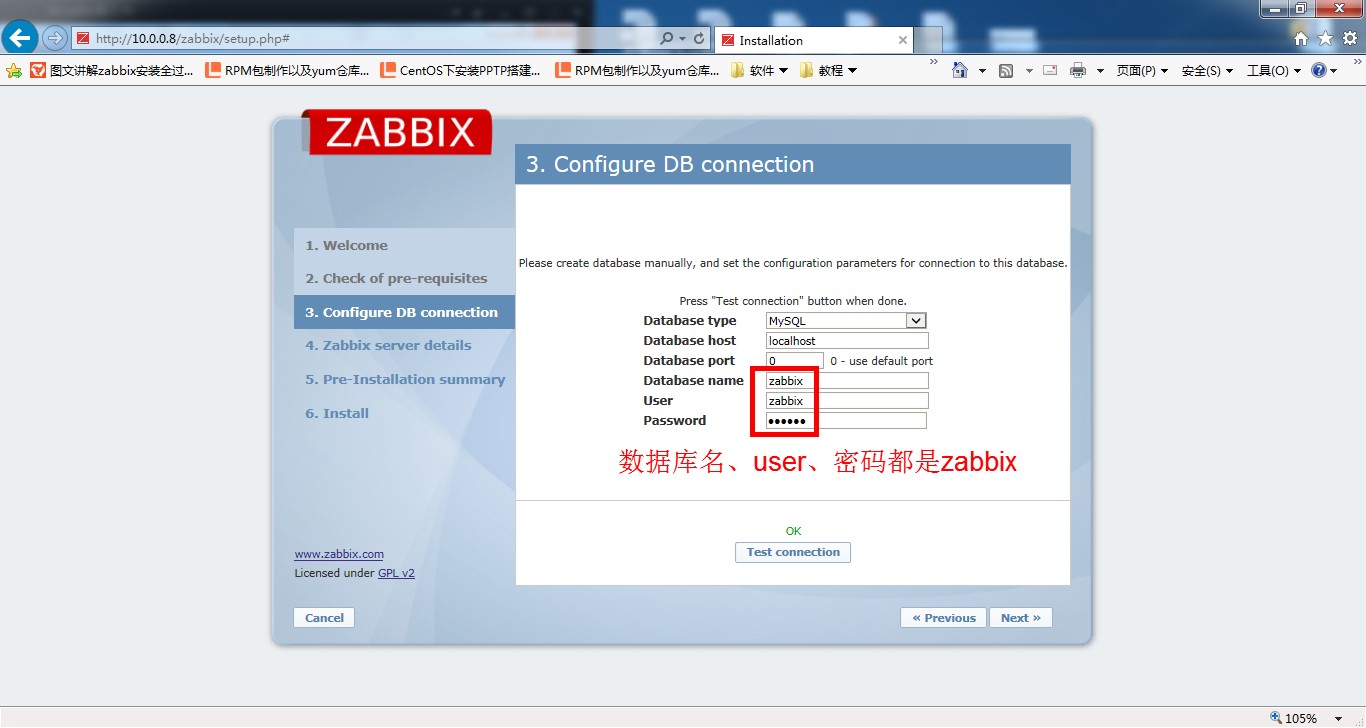
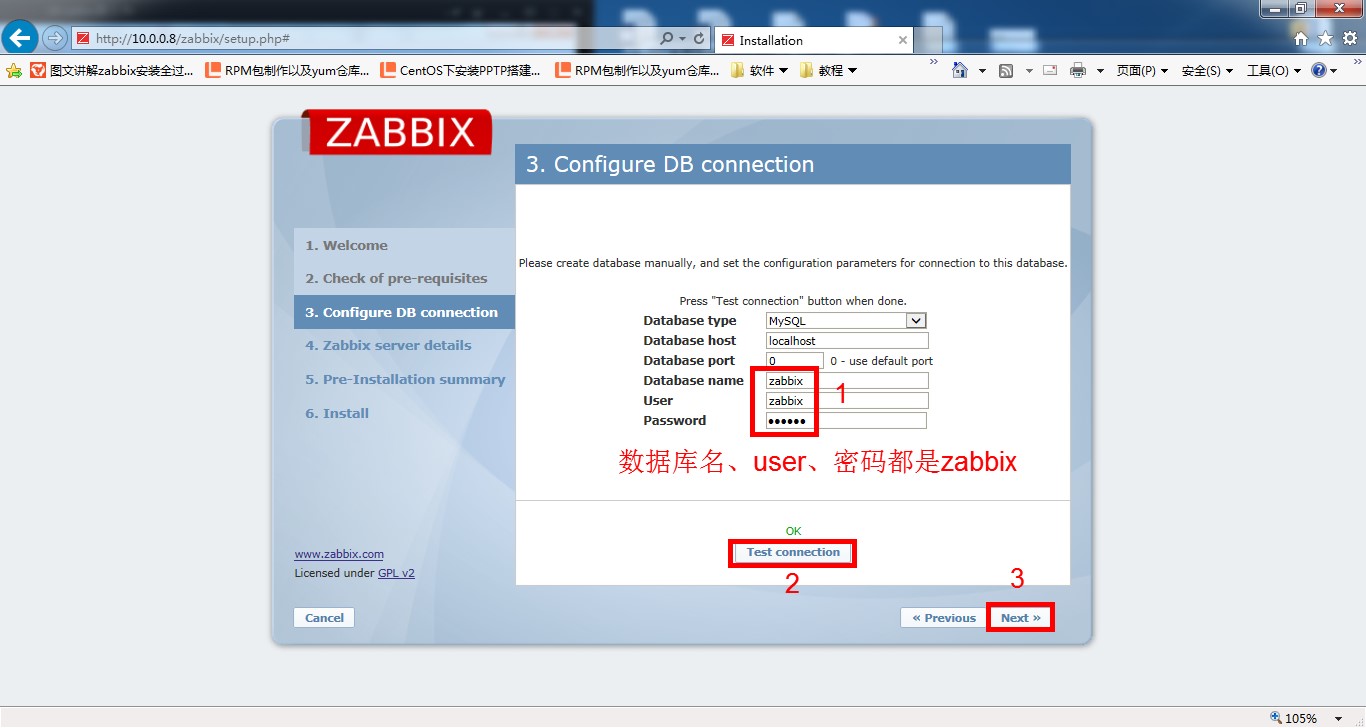
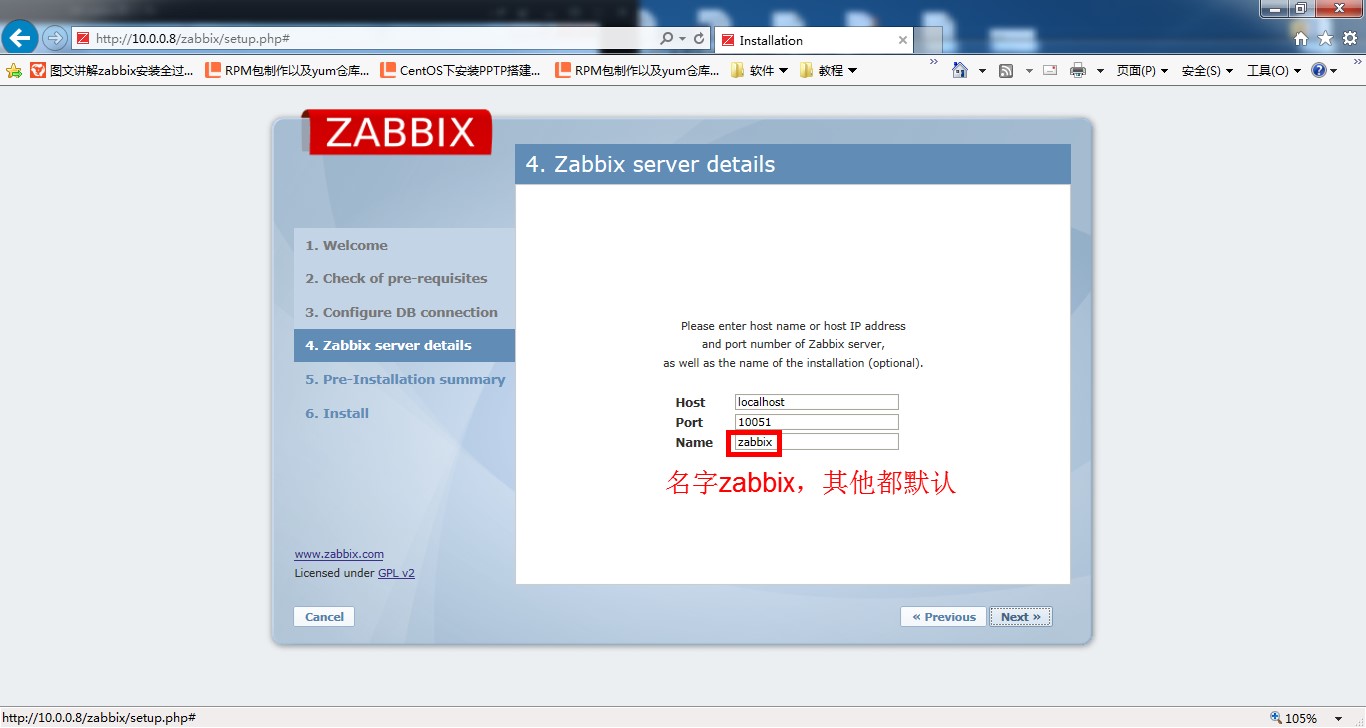
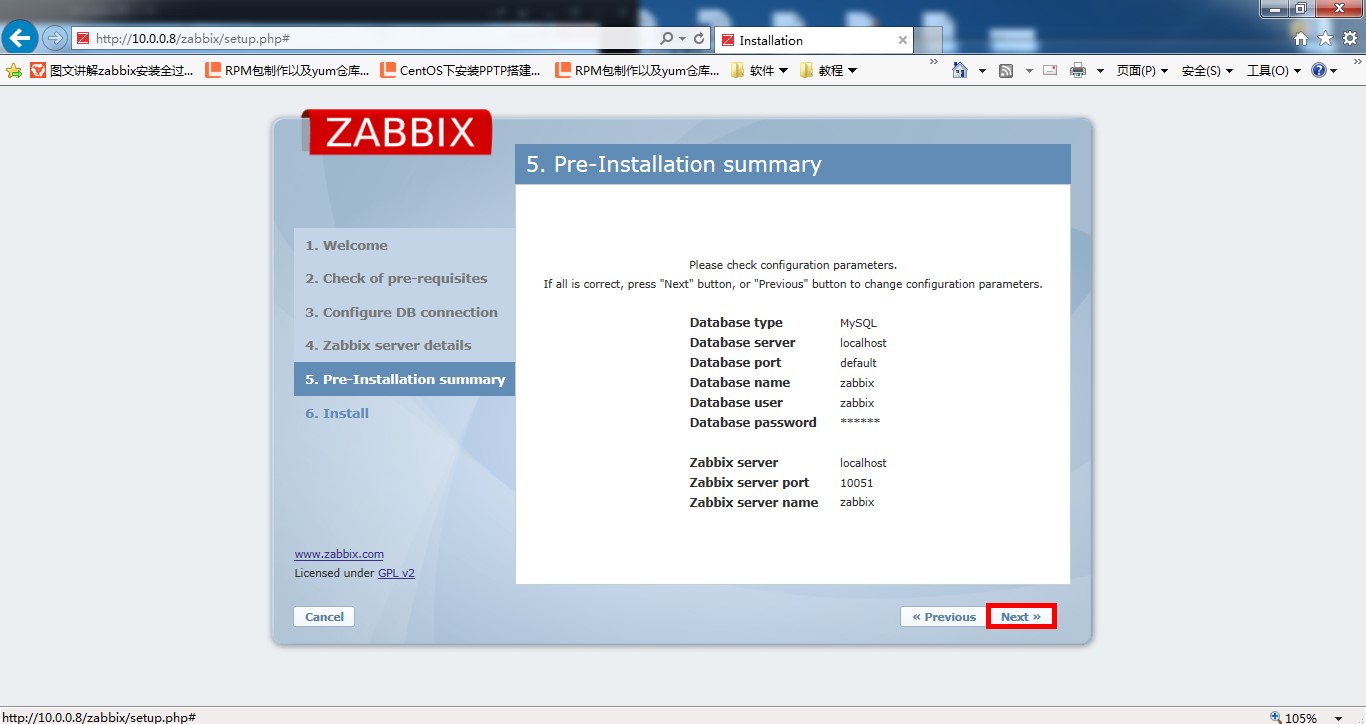
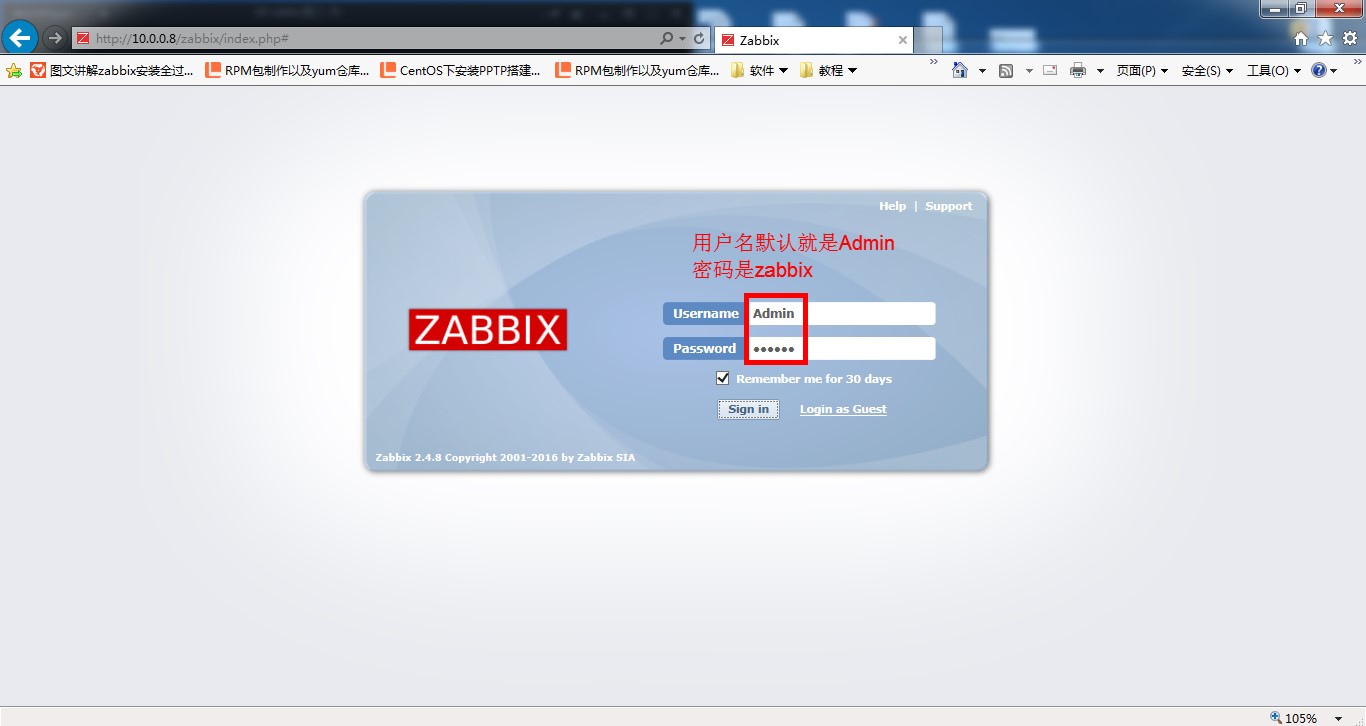
登錄後提示zabbix server未運行。
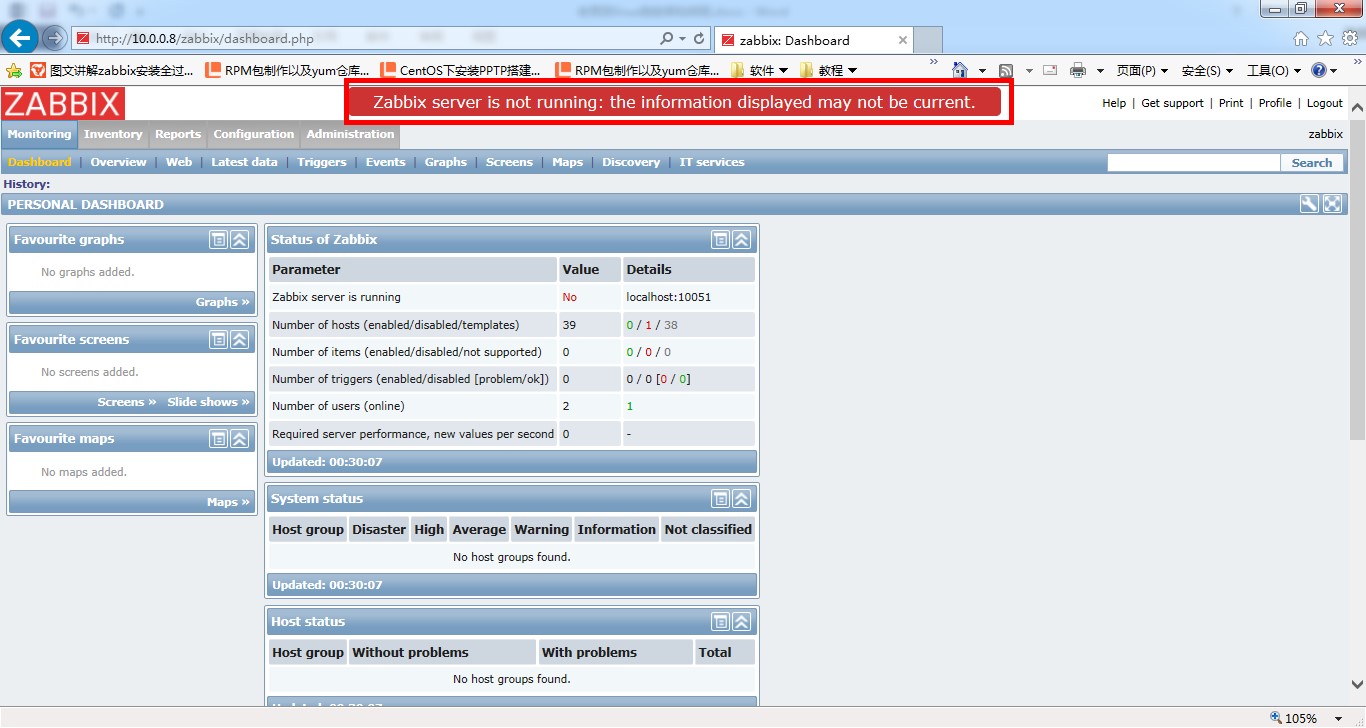
啟動zabbix server
[[email protected] zabbix]#/etc/init.d/zabbix-server start
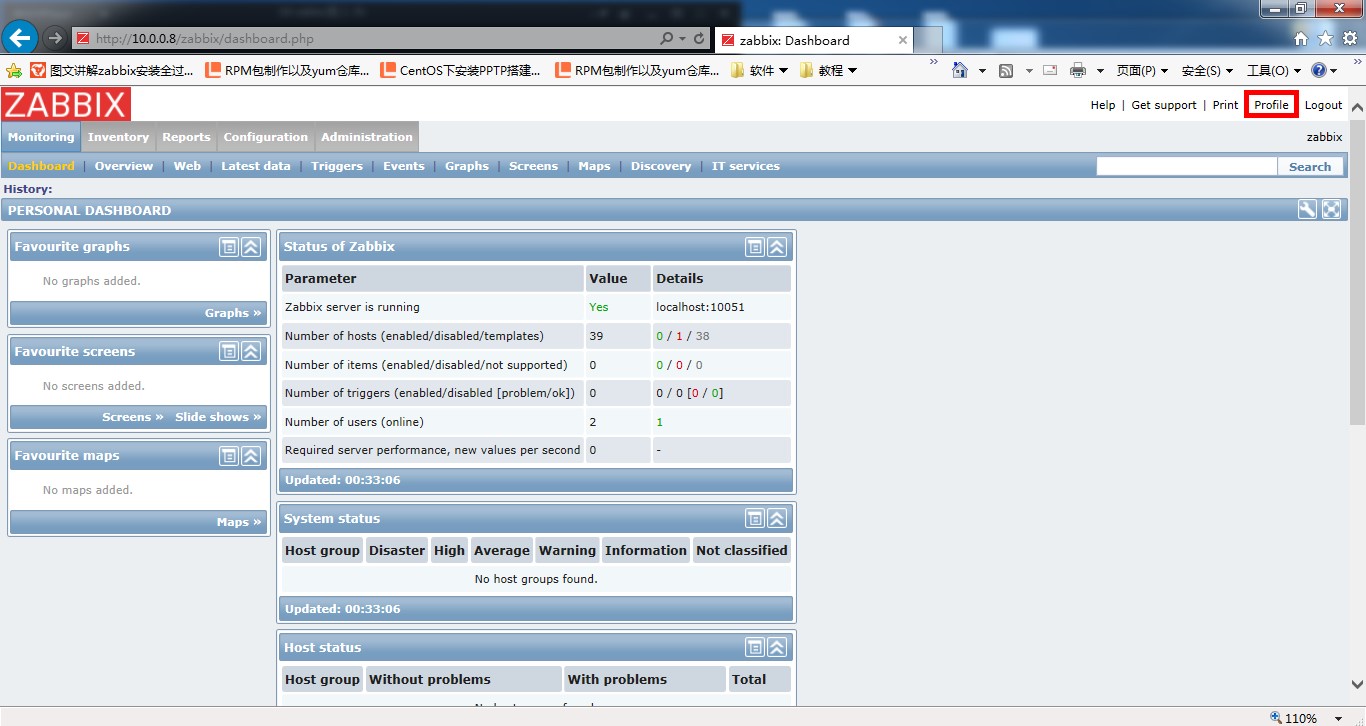
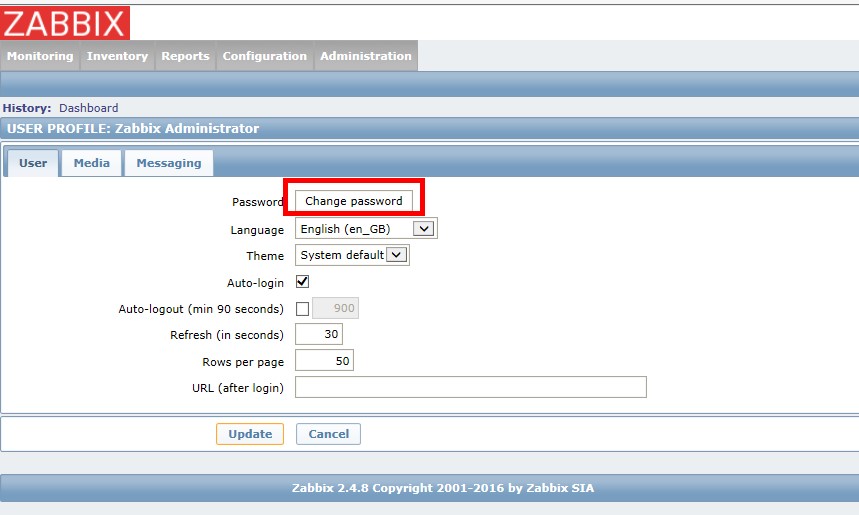
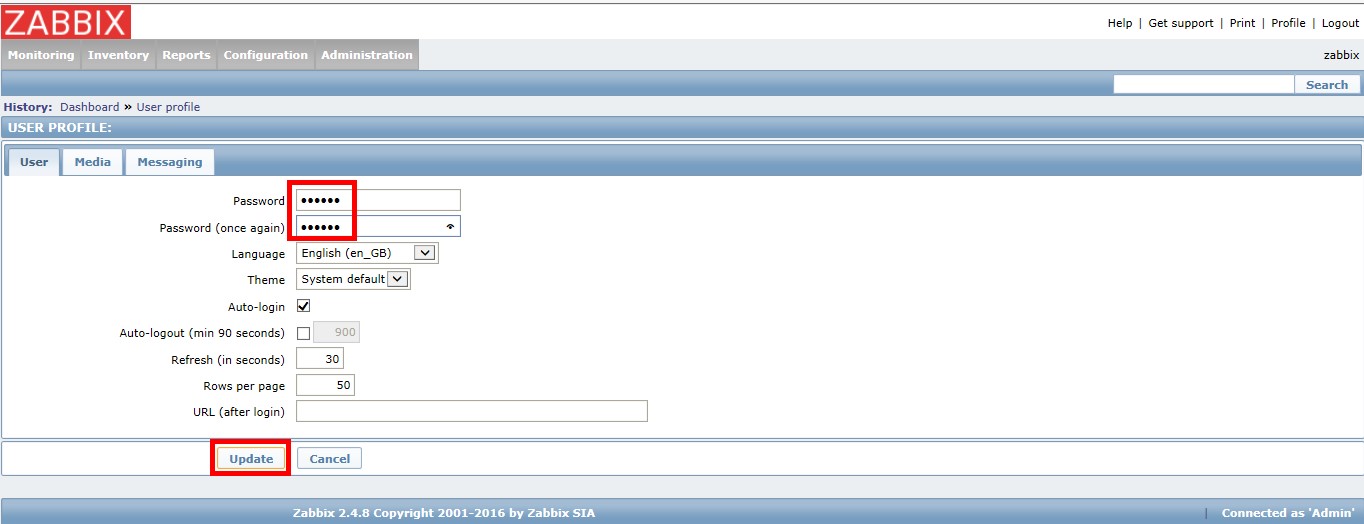
修改zabbix的密碼:點擊profile
2.5 配置zabbix客戶端
把zabbix服務端自己加入到客戶端裏面,監控自己。
[[email protected] zabbix]# vim/etc/zabbix/zabbix_agentd.conf
85行Server=127.0.0.1修改為Server=10.0.0.8   #意思就是指向zabbix服務器
啟動zabbix-agent客戶端
[[email protected]]# /etc/init.d/zabbix-agent start
本文出自 “sandshell” 博客,請務必保留此出處http://sandshell.blog.51cto.com/9055959/1962400
zabbix服務端監控搭建(一)
