
Netty自娛自樂之類Dubbo RPC 框架設計構想 【上篇】
之前在前一篇的《Netty自娛自樂之協議棧設計》,菜鳥我已經自娛自樂了設計協議棧,gitHub地址為https://github.com/vOoT/ncustomer-protocal。先這一篇中,準備接著自娛去實現一個RPC框架,現在公司共的是Dubbo,那麽先不看其代碼,先自行實現一下吧。
dubbo 包括 註冊和服務調用,細節我們先不管,然後,我先先實現一個如下的簡單模型

哈哈哈,第一個版本就是這麽簡單,粗暴。說到自定義配置,首先想到的是Spring 自定義標簽,利用標簽進行配置服務。而我設計的標簽頁非常的簡單,使用如下:
    <rpc:provider id="helloServiceImpl" class="com.qee.rpc.HelloServiceImpl"/>

    <rpc:cumsumer id="helloService" interface="com.qee.rpc.HelloService"/>
看到了沒,非常像dubbo,那麽如何實現一個自定義標簽呢,從網上可以了解搜索的到,現在我就簡單說明一下,如何編寫和測試自己自定義的Spring 標簽。
一、 定義xsd 文件,該文件是xml文件的 schema 定義。從上面的例子中,我們知道xsd文件裏面應該有2個節點,1個provider節點和1個cumsumer節點定義。然後制定provider節點有id 和classs屬性,而cumsumer節點有 id和 interface屬性。定義文件如下(該文件名為light-weight-rpc.xsd):
<?xml version="1.0" encoding="UTF-8"?> <xsd:schema xmlns="http://www.qee.com/schema/rpc" xmlns:xsd="http://www.w3.org/2001/XMLSchema" xmlns:beans="http://www.springframework.org/schema/beans" targetNamespace="http://www.qee.com/schema/rpc" elementFormDefault="qualified" attributeFormDefault="unqualified"> <xsd:import namespace="http://www.springframework.org/schema/beans"/> <xsd:element name="provider" type="rpc-provider-type"></xsd:element><xsd:element name="cumsumer" type="rpc-cumsumer-type"></xsd:element> <xsd:complexType name="rpc-provider-type"> <xsd:attribute name="id" type="xsd:string" use="required"></xsd:attribute> <xsd:attribute name="class" type="xsd:string" use="required"></xsd:attribute> </xsd:complexType> <xsd:complexType name="rpc-cumsumer-type"> <xsd:attribute name="id" type="xsd:string" use="required"></xsd:attribute> <xsd:attribute name="interface" type="xsd:string" use="required"></xsd:attribute> </xsd:complexType> </xsd:schema>
上面,畫上紅線的地方需要註意和主要的關註點,首先需要說明這個文件的name space 為 xmlns="http://www.qee.com/schema/rpc 。其他的具體如何寫可以到網上搜索。有了這個文件,我們需要在xml的文件引入他,比如如下test.xml文件如何引用該文件
<?xml version="1.0" encoding="UTF-8"?>
<beans xmlns="http://www.springframework.org/schema/beans"
       xmlns:xsi="http://www.w3.org/2001/XMLSchema-instance"
       xmlns:rpc="http://www.qee.com/schema/rpc"
       xsi:schemaLocation="http://www.springframework.org/schema/beans http://www.springframework.org/schema/beans/spring-beans.xsd
        http://www.qee.com/schema/rpc http://www.qee.com/schema/rpc/light-weight-rpc.xsd">

    <rpc:provider id="helloServiceImpl" class="com.qee.rpc.HelloServiceImpl"/>

    <rpc:cumsumer id="helloService" interface="com.qee.rpc.HelloService"/>

</beans>
上面就是一個spring xml 文件,主要關註的是花黃線的部分,這樣就可以使用<rpc:provider> 和<rpc:cumsumer>。
二、組織文件,即要把文件放到合適的地方,讓Spring能夠識別。第一步,需要把light-weight-rpc.xsd文件放到META-INF的文件夾下,然後在META-INF文件創建2個新的文件,名字固定。
文件1:spring.schemes ,該文件裏面直有一行數據,如下
http\://www.qee.com/schema/rpc/light-weight-rpc.xsd=META-INF/light-weight-rpc.xsd
該行告訴Spring容器,http://www.qee.com/schema/rpc/light-weight-rpc.xsd ,之前定義命名空間的light-weight-rpc.xsd文件是META-INF下的light-weight-rpc.xsd
文件2:spring.handlers,該文件裏面也只有一行數據,如下
http\://www.qee.com/schema/rpc=com.qee.rpc.config.support.LightWeightRpcNamespaceHandlerSupport
該行告訴Spring容器,命名空間http://www.qee.com/schema/rpc的解析處理器是 com.qee.rpc.config.support.LightWeightRpcNamespaceHandlerSupport。這個例子的目錄如下

好了到現在我們基本把文件的位置放置正確了。之後就是需要編寫com.qee.rpc.config.support.LightWeightRpcNamespaceHandlerSupport。
三、編寫com.qee.rpc.config.support.LightWeightRpcNamespaceHandlerSupport,該類需要繼承NamespaceHandlerSupport,重寫init()方法。主要的目的就是註冊,節點解析處理器。
代碼如下:
public class LightWeightRpcNamespaceHandlerSupport extends NamespaceHandlerSupport {

    @Override
    public void init() {
        //註冊用於解析<rpc>的解析器
        registerBeanDefinitionParser("provider", new LightWeightRpcBeanDefinitionParser());
        registerBeanDefinitionParser("cumsumer", new LightWeightRpcBeanDefinitionParser());
    }
}
從代碼上我們只要,就是把解析xml文件provider和cumsumer節點進行BeanDefinition轉化解析。
因為這2個節點非常的類型。所以我就只想用痛一個解析處理器,LightWeightRpcBeanDefinitionParser,該轉化器繼承org.springframework.beans.factory.xml.AbstractSingleBeanDefinitionParser。具體代碼如下:
public class LightWeightRpcBeanDefinitionParser extends AbstractSingleBeanDefinitionParser {


    protected Class getBeanClass(Element element) {
        return LightWeightRPCElement.class;
    }

    protected void doParse(Element element, BeanDefinitionBuilder bean) {
        String interfaces = element.getAttribute("interface");
        String clazz = element.getAttribute("class");
        String id = element.getAttribute("id");
        bean.addPropertyValue("id", id + "Config");
        if (StringUtils.hasText(id)) {
            bean.addPropertyValue("beanName", id);
        }
        if (StringUtils.hasText(clazz)) {
            bean.addPropertyValue("clazz", clazz);
        }
        if (StringUtils.hasText(interfaces)) {
            bean.addPropertyValue("interfaces", interfaces);
        }
    }

}
我們把xml的id 放到 bean 的beanName,把id+"Config"放到 id上,因為這個 BeanDefinitionBuilder 最終生成的對象是 LightWeightRPCElement,不是我們需要的代碼對象。
@Data
@ToString
public class LightWeightRPCElement {
  private String id;

  private String beanName;

  private String clazz;

  private String interfaces;
}
是不是非常的簡單,到目前為止,我們已經完成了所有的自定義標簽工作,下一步當然就是測試一下啦,代碼如下:
public class RPCTest {
    public static void main(String[] args) {
        ApplicationContext ctx = new ClassPathXmlApplicationContext("test.xml");
        LightWeightRPCElement p1= (LightWeightRPCElement)ctx.getBean("helloServiceImplConfig");
        LightWeightRPCElement p2= (LightWeightRPCElement)ctx.getBean("helloServiceConfig");
        System.out.println(p1);
        System.out.println(p2);

    }
}
執行結果是:

四、這一步的話,我們需要處理之前已經註冊到Spring的 LightWeightRPCElement 的對象,在上面的例子中,這兩個的Bean Id分別是helloServiceImplConfig、helloServiceConfig,之後我們需要通過這2個對象來產生我們需要代理對象。首先我們來看一下JDK的生成代理對象的方法:
public static Object newProxyInstance(ClassLoader loader, Class<?>[] interfaces,InvocationHandler invocationHandler);

從上面的代碼中,我們知道生產一個代理對象需要一個類加載器loader,和代理接口的字節碼interfaces,和代理處理具柄invocationHandler。那麽我程序定義了一個名為InterfaceProxyHandler的代理處理具柄,它繼承InvocationHandler。代碼如下:
@Data
public class InterfaceProxyHandler implements InvocationHandler {


    private CallBackExcuteHandler excuteHandler;


    public InterfaceProxyHandler(CallBackExcuteHandler excuteHandler) {
        this.excuteHandler = excuteHandler;
    }


    @Override
    public Object invoke(Object proxy, Method method, Object[] args) throws Throwable {

        MessageCallback callback = ExcuteManager.invoke(excuteHandler);
        .......//這裏代碼還沒寫,其實就是處理返回結果,準備下章解決。
    }


}
從上面的代碼,我們知道,它具體的執行邏輯是invoke方法。具體內容就是通過一個ExcuteManager來處理邏輯,該ExcuteManager就是一個封裝了ExecutorService的線程池管理類。其意思是每個代理對象去執行方法時,都是通過線程池的一個線程去執行,而這個線程池管理類的執行方法invoke需要一個Callable任務,所以程序自定義了一個CallBackExcuteHandler類。代碼如下:
public class CallBackExcuteHandler implements Callable<MessageCallback> {


    private String beanName;

    private List<InetSocketAddress> remoteAddresses;


    private LoadBalancedStrategy loadBalancedStrategy;


    public CallBackExcuteHandler(String beanName) {
        this.beanName = beanName;
    }

    public CallBackExcuteHandler(String beanName, List<InetSocketAddress> remoteAddresses) {
        this.beanName = beanName;
        this.remoteAddresses = remoteAddresses;
    }

    public CallBackExcuteHandler(String beanName, List<InetSocketAddress> remoteAddresses, LoadBalancedStrategy loadBalancedStrategy) {
        this.beanName = beanName;
        this.remoteAddresses = remoteAddresses;
        this.loadBalancedStrategy = loadBalancedStrategy;
    }

    public CallBackExcuteHandler() {

    }

    /**
     * 線程執行
     *
     * @return
     * @throws Exception
     */
    @Override
    public MessageCallback call() throws Exception {
        if (CollectionUtils.isEmpty(remoteAddresses)) {
            List<ServiceAddressConfig> remoteUrls = ServiceRemoteUrlContext.getInstance().getRemoteUrls(beanName);
            if (CollectionUtils.isEmpty(remoteUrls)) {
                throw new RuntimeException("服務 [" + beanName + " ]遠程地址錯誤");
            }
        }

        int size = remoteAddresses.size();

        int idx = loadBalancedStrategy.strategy(size);


        InetSocketAddress inetSocketAddress = remoteAddresses.get(idx);
        System.out.println("返回的地址" + inetSocketAddress + "  idx=" + idx);

        MessageCallback messageCallback = new MessageCallback();

        return messageCallback;
    }
}
具體邏輯就是看call,這裏就是處理的具體邏輯,這個邏輯其實就是處理Netty網絡通信的內容,等下章開始講解,這一章主要通過搭建具體的框架,之後補充細節。這裏遠程地址為空的話,去遠程地址管理上下文獲取,接著通過一個負載均衡策略對象,返回其中一個地址的index。通過這種方式實現負載均衡調用。
遠程地址管理上下文對象代碼如下:
public class ServiceRemoteUrlContext {

    private Map<String, List<ServiceAddressConfig>> remoteUrls;

    private volatile static ServiceRemoteUrlContext context;


    private ServiceRemoteUrlContext() {

    }

    public static ServiceRemoteUrlContext getInstance() {
        if (context == null) {
            synchronized (ServiceRemoteUrlContext.class) {
                if (context == null) {
                    context = new ServiceRemoteUrlContext();
                    context.remoteUrls = new HashMap<>();
                }
            }
        }
        return context;
    }


    /**
     * 添加一個遠程地址,地址從service-url.properties 獲取
     *
     * @param beanName
     * @param serviceAddressConfig
     * @return
     */
    public boolean addServiceAddress(String beanName, ServiceAddressConfig serviceAddressConfig) {
        if (StringUtils.isEmpty(beanName) || serviceAddressConfig == null) {
            return false;
        }
        synchronized (remoteUrls) {
            if (remoteUrls.get(beanName) == null) {
                List<ServiceAddressConfig> remoteAddress = new ArrayList<>();
                remoteAddress.add(serviceAddressConfig);
                remoteUrls.put(beanName, remoteAddress);
            } else {
                List<ServiceAddressConfig> serviceAddressConfigs = remoteUrls.get(beanName);
                if (serviceAddressConfigs.contains(serviceAddressConfig)) {
                    return false;
                }
                serviceAddressConfigs.add(serviceAddressConfig);
                return true;
            }
        }
        return false;
    }

    /**
     * 獲取一個服務的遠程地址 ,beanName like "com.qee.rpc.config.test.HelloService"
     *
     * @param beanName
     * @return
     */
    public List<ServiceAddressConfig> getRemoteUrls(String beanName) {
        return remoteUrls.get(beanName);
    }


}
負載均衡的接口,代碼如下:
public interface LoadBalancedStrategy {

    /**
     * 從 0 -size-1 獲取一個值
     *
     * @param size
     * @return
     */
    int strategy(int size);
}
現在只實現了1中,輪詢方法,之後可以寫成可配置,代碼如下:
public class RollPolingStrategy implements LoadBalancedStrategy {

    private int currentValue = 0;

    private Class<?> clazz;

    public RollPolingStrategy(Class<?> clazz) {
        this.clazz = clazz;
    }

    @Override
    public int strategy(int size) {
        synchronized (clazz) {
            int nextValue = (currentValue + 1) % size;
            currentValue = nextValue;
            if (currentValue > size) {
                nextValue = 0;
            }
            return currentValue;
        }
    }
}
接著,我們需要看一下簡單的ExcuteManager類,代碼如下:
public class ExcuteManager {

    /**
     * 默認是200個線程
     */
    private static final int DEFAULT_THRED_NUM = 200;

    /**
     * 超時時間為1秒
     */
    private static final int DEFAULT_TIME_OUT_TIME = 1000;

    private static ExecutorService executorService = Executors.newFixedThreadPool(DEFAULT_THRED_NUM);

    public static MessageCallback invoke(Callable<MessageCallback> call) {
        Future<MessageCallback> submit = executorService.submit(call);
        try {
            return submit.get(DEFAULT_TIME_OUT_TIME, TimeUnit.MILLISECONDS);
        } catch (InterruptedException e) {
            submit.cancel(true);
            throw new RuntimeException("the method is interupted ", e);
        } catch (ExecutionException e) {
            submit.cancel(true);
            throw new RuntimeException("the method cal excute exception", e);
        } catch (TimeoutException e) {
            System.out.println(Thread.currentThread().getName());
            submit.cancel(true);
            throw new RuntimeException("the method call is time out  ", e);
        }
    }

    public static void shutdown() {
        executorService.shutdown();
    }

    public static void shutdownNow() {
        executorService.shutdownNow();
    }

}
這些參數,在後面都做成可配置的。
最後一步了,就是需要生產一個代理對象,並把代理對象註冊到Spring容器裏面。那麽Spring的 BeanPostProcessor可以為我們解決問題,看代碼如下:
@Component
public class RegisterRpcProxyBeanProcessor implements BeanPostProcessor, BeanFactoryAware {


    private BeanFactory beanFactory;

    @Override
    public Object postProcessBeforeInitialization(Object bean, String beanName) throws BeansException {
        return bean;
    }

    @Override
    public Object postProcessAfterInitialization(Object bean, String beanName) throws BeansException {

        Object target = bean;
        if (bean instanceof LightWeightRPCElement) {
        //如果是LightWeightRPCElement,則強轉,否則不處理
            LightWeightRPCElement rpcElement = (LightWeightRPCElement) bean;

           // 接著就是獲取 之前XML 的屬性值
            Class<?> clazz = null;
            if (!StringUtils.isEmpty(rpcElement.getInterfaces())) {
                try {
                    clazz = Class.forName(rpcElement.getInterfaces());
                } catch (ClassNotFoundException e) {
                    throw new RuntimeException("獲取 [" + rpcElement.getInterfaces() + " ] class字節碼失敗");
                }
            }
             //通過ServiceRemoteUrlContext得到這個接口的遠程端口和地址
            List<ServiceAddressConfig> remoteUrls = ServiceRemoteUrlContext.getInstance().getRemoteUrls(rpcElement.getInterfaces());
            List<InetSocketAddress> remoteAddressList = ExtractUtil.extractList(remoteUrls, "remoteAddress", ServiceAddressConfig.class);
            CallBackExcuteHandler callBackExcuteHandler = new CallBackExcuteHandler(rpcElement.getInterfaces(), remoteAddressList,new RollPolingStrategy(clazz));

            InterfaceProxyHandler interfaceProxyHandler = new InterfaceProxyHandler(callBackExcuteHandler);
            //這裏之後可以優化為各種方式產生動態代理,如cglib等
            target = Proxy.newProxyInstance(bean.getClass().getClassLoader(), new Class[]{clazz}, interfaceProxyHandler);
            if (beanFactory instanceof DefaultListableBeanFactory) {
                //這裏就是動態註冊對象,把動態代理對象註冊到Spring上
                DefaultListableBeanFactory defaultFactory = (DefaultListableBeanFactory) beanFactory;
                defaultFactory.registerSingleton(rpcElement.getBeanName(), target);
            }
        }
        return target;
    }


    @Override
    public void setBeanFactory(BeanFactory beanFactory) throws BeansException {
        this.beanFactory = beanFactory;
    }
從上面的註釋大家應該也非常的清楚了,現在只剩下最後一步了,如何獲取該接口的遠程服務地址和端口,dubbo是通過註冊中心zookeeper,而這裏的簡單的采用配置,例子如下:
com.qee.rpc.config.test.HelloService 127.0.0.1:8888,127.0.0.1:7777,127.0.0.1:9999
對,就是在一個properties文件上 通過服務接口全稱 和指定遠程服務主機和端口。之後可以改為有註冊中心的方式。現在我們來看一下讀取這個配置的類,代碼如下:
@Component
public class ServiceRemoteUrlsInit implements InitializingBean {

    /**
     * 遠程服務配置地址路徑,默認
     */
    @Value("${remote-urls-path:classpath:service-urls.properties}")
    private String remoteUrlsPropertyPath;

    @Override
    public void afterPropertiesSet() throws Exception {
        Properties pps = new Properties();
        if (!remoteUrlsPropertyPath.startsWith("classpath")) {
            throw new RuntimeException(remoteUrlsPropertyPath + "不存在");
        }
        String[] filePath = remoteUrlsPropertyPath.split(":");
        if (filePath == null || filePath.length != 2) {
            throw new RuntimeException(remoteUrlsPropertyPath + "內容配置錯誤");
        }
        ClassPathResource resource = new ClassPathResource(filePath[1]);
        InputStream in = new BufferedInputStream(resource.getInputStream());
        pps.load(in);
        Enumeration en = pps.propertyNames();

        while (en.hasMoreElements()) {
            String beanName = (String) en.nextElement();
            String strRemoteUrls = pps.getProperty(beanName);
            String[] remoteUrls = strRemoteUrls.split(",");
            if (remoteUrls == null || remoteUrls.length == 0) {
                break;
            }
            for (String remoteUrl : remoteUrls) {
                String[] hostPort = remoteUrl.split(":");
                if (hostPort == null || hostPort.length != 2) {
                    throw new RuntimeException(remoteUrlsPropertyPath + " 配置內容錯誤");
                }
                ServiceAddressConfig serviceAddressConfig = new ServiceAddressConfig();
                serviceAddressConfig.setBeanName(beanName);
                serviceAddressConfig.setHostName(hostPort[0]);
                serviceAddressConfig.setRemotePort(Integer.valueOf(hostPort[1]));
                InetSocketAddress socketAddress = new InetSocketAddress(serviceAddressConfig.getHostName(), serviceAddressConfig.getRemotePort());
                serviceAddressConfig.setRemoteAddress(socketAddress);
                ServiceRemoteUrlContext.getInstance().addServiceAddress(beanName, serviceAddressConfig);
            }

        }

    }
}
代碼比較簡單,就是實現 InitializingBean這個Spring接口,Spring啟動在Bean創建後,初始化 afterPropertiesSet()這個配置,在這個方法裏面讀取類路徑的配置文件。最後我們來運行一個例子。還是HelloService.我們有一個Invoker類,需要註入HelloService 對象調用。代碼如下:
@Component
public class Invoker {

    @Autowired
    private HelloService helloService;

    @Resource(name = "helloService")
    private HelloService helloService2;

    public void print() {
        helloService.hello("123");
        helloService2.hello("122344");

    }
}
然後通過SpringBoot 啟動測試:
@ComponentScan(basePackages = "com.qee.rpc")
@EnableAutoConfiguration
public class App {

    private static ExecutorService executorService = Executors.newCachedThreadPool();


    private static final CountDownLatch cd = new CountDownLatch(1);


    public static void main(String[] args) {

        try {
            SpringApplication.run(App.class, args);
            System.out.println("the main Thread :" + Thread.currentThread().getName());
            final Invoker invoker = (Invoker) ApplicationContextUtils.getBean("invoker");
            for (int i = 0; i < 300; i++) {
                executorService.execute(new Runnable() {
                    @Override
                    public void run() {
                        try {
                            cd.await();
                        } catch (InterruptedException e) {
                            e.printStackTrace();
                        }
                        invoker.print();
                    }
                });
            }


            cd.countDown();

            Thread.sleep(100000);

        } catch (InterruptedException e) {
            e.printStackTrace();
        } finally {
            ExcuteManager.shutdown();
            executorService.shutdown();
        }

    }
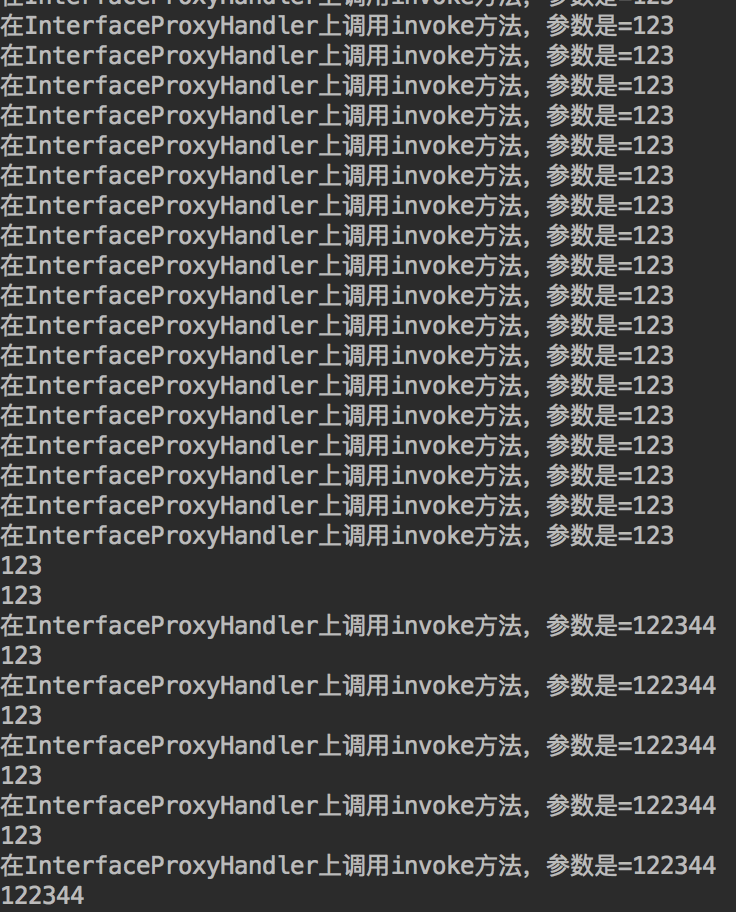
有300個線程去調這個 invoker.print();修改一下 InterfaceProxyHandler的invoke方法,因為我們底層的通信還沒完成。所以以
System.out.println("在InterfaceProxyHandler上調用invoke方法,參數是=" + args[0]);
以這個語句來測試一下代碼,其中這個大致框架已經上傳到gitHub:https://github.com/vOoT/light-weight-rpc, 有什麽建議和問題,大家一起討論吧。最後貼一下執行結果:
哈哈哈,這樣我們是不是就是可以通過Spring註解 @Autowired 和 @Resource 來註入動態對象。
Netty自娛自樂之類Dubbo RPC 框架設計構想 【上篇】