極客驗證官方demo構建使用及代碼分析
#什麽是極客驗證?
官方定義:極驗驗證是一種在計算機領域用於區分自然人和機器人的,通過簡單集成的方式,為開發者提供安全、便捷的雲端驗證服務。
#使用命令從github上獲取:
git clone https://github.com/GeeTeam/gt3-java-sdk.git
#使用idea搭建sdk工程:
>>導入已有的工程:
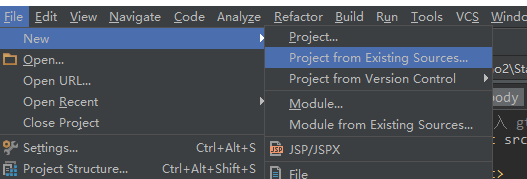
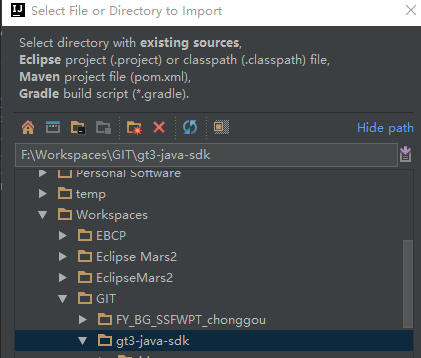
>>選擇從git克隆的項目
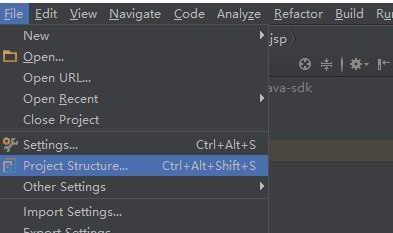
>>選擇Project Structure 設置
>>選擇工程gt3-java-sdk
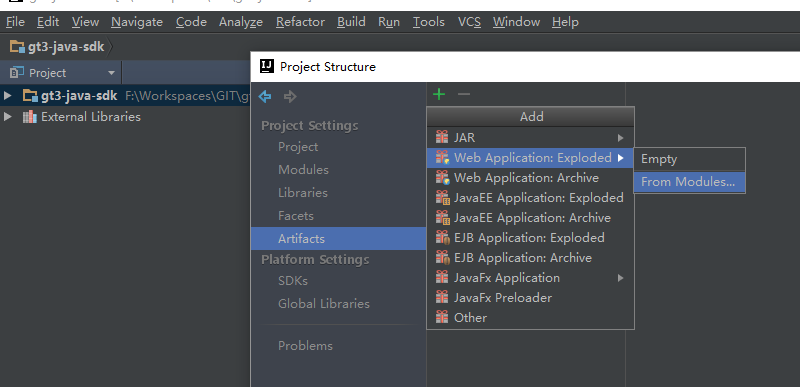
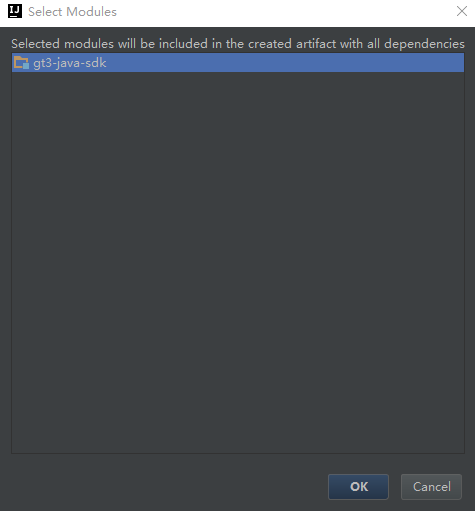
>>選擇之後顯示 gt3-java-sdk:war explorded, 表示成功

>>配置tomcat,加剛才的項目加到tomcat中,選擇Edit Configurations > + > Tomcat Server > Local
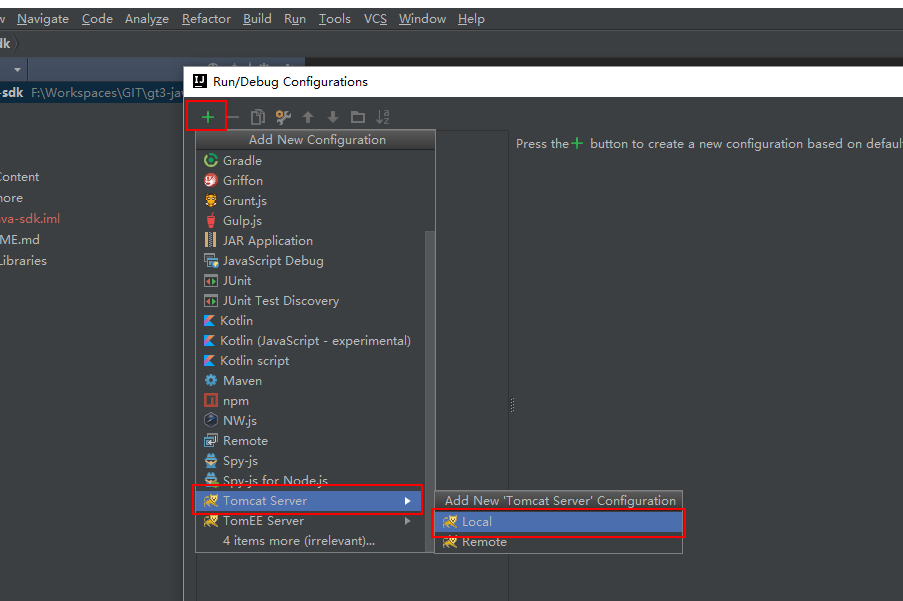
>>取個名字:

>>選擇Deployment -> Artifact

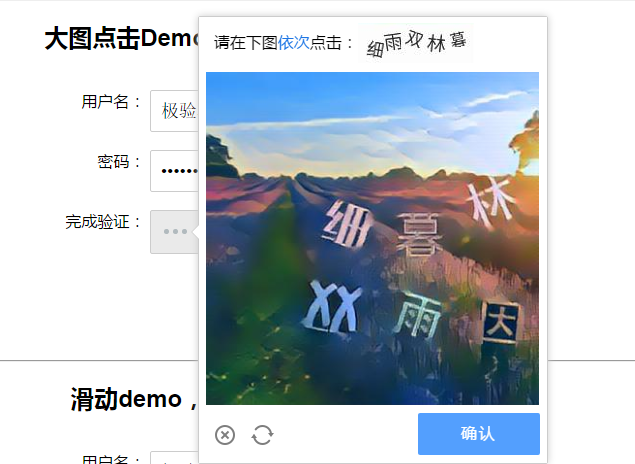
>>加好之後可以,也可以給你的項目加一個訪問空間,訪問項目 /login.jsp
#極客驗證後臺邏輯梳理:
step1: 該段script位於主頁body裏面,也就是說在頁面加載完畢後,會加載該部分內容,這個時候我們發現進行了ajax請求後臺。
<script>
var
step2: 觀察web.xml配置,我們找到請求的類demo.demo1.StartCaptchaServlet
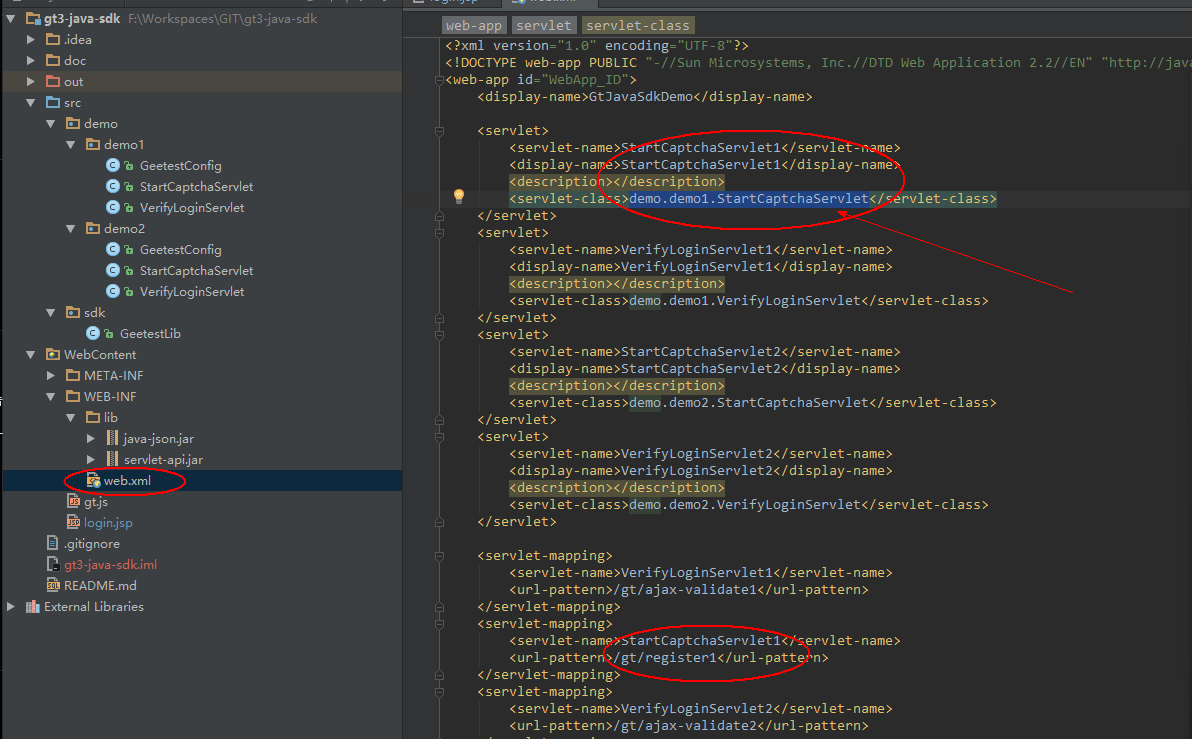
step3: demo.demo1.StartCaptchaServlet 從該類可以看出,該次請求主要做了用戶驗證預處理。主要根據在官方網站註冊得到的captcha_id和private_key進行驗證預處理

GeetestLib gtSdk = new GeetestLib(GeetestConfig.getGeetest_id(), GeetestConfig.getGeetest_key(),
                GeetestConfig.isnewfailback());

        String resStr = "{}";

        //自定義userid
        String userid = "test";

        //進行驗證預處理
        int gtServerStatus = gtSdk.preProcess(userid);

        //將服務器狀態設置到session中
        request.getSession().setAttribute(gtSdk.gtServerStatusSessionKey, gtServerStatus);
        //將userid設置到session中
        request.getSession().setAttribute("userid", userid);
step4: 首先通過userid進行服務註冊,並將註冊結果返回
    /**
     * 驗證初始化預處理
     *
     * @return 1表示初始化成功,0表示初始化失敗
     */
    public int preProcess() {

        if (registerChallenge() != 1) {

            this.responseStr = this.getFailPreProcessRes();
            return 0;

        }

        return 1;

    }
step5: 該處使用HttpURLConnection 連接服務器得到服務器返回的結果,並且更新 challenge
URL getUrl = new URL(URL);
        HttpURLConnection connection = (HttpURLConnection) getUrl
                .openConnection();

        connection.setConnectTimeout(2000);// 設置連接主機超時(單位:毫秒)
        connection.setReadTimeout(2000);// 設置從主機讀取數據超時(單位:毫秒)

        // 建立與服務器的連接,並未發送數據
        connection.connect();

        if (connection.getResponseCode() == 200) {
            // 發送數據到服務器並使用Reader讀取返回的數據
            StringBuffer sBuffer = new StringBuffer();

            InputStream inStream = null;
            byte[] buf = new byte[1024];
            inStream = connection.getInputStream();
            for (int n; (n = inStream.read(buf)) != -1;) {
                sBuffer.append(new String(buf, 0, n, "UTF-8"));
            }
            inStream.close();
            connection.disconnect();// 斷開連接
step6: 並且在成功的時候會將返回的字符串標準化然後返回到前臺
/**
     * 預處理成功後的標準串
     *
     */
    private String getSuccessPreProcessRes(String challenge) {

        gtlog("challenge:" + challenge);

        JSONObject jsonObject = new JSONObject();
        try {

            jsonObject.put("success", 1);
            jsonObject.put("gt", this.captchaId);
            jsonObject.put("challenge", challenge);

        } catch (JSONException e) {

            gtlog("json dumps error");

        }

        return jsonObject.toString();

    }
resStr = gtSdk.getResponseStr();

        PrintWriter out = response.getWriter();
        out.println(resStr);
step7: 使用返回的結果進行參數初始化(這兒進行初始,會在gt.js裏面再次請求服務器,進行驗證圖片相關的請求)
 initGeetest({
                gt: data.gt,
                challenge: data.challenge,
                new_captcha: data.new_captcha, // 用於宕機時表示是新驗證碼的宕機
                offline: !data.success, // 表示用戶後臺檢測極驗服務器是否宕機,一般不需要關註
                product: "float", // 產品形式,包括:float,popup
                width: "100%"
                // 更多配置參數請參見:http://www.geetest.com/install/sections/idx-client-sdk.html#config
            }, handler1);
step: js還很薄弱,後面深入了解了,該處可以用來提升js實戰。
極客驗證官方demo構建使用及代碼分析
