Linux光盤行動之制作光盤
通常我們在使用虛擬機的時候需要掛載光盤,因為光盤中有許多我們使用的軟件包等。那麽我們今天就自己制作一個光盤。
1、首先新建一個目錄,方便我們把所需要的文件統一的放在一塊。
mkdir /app/iso
2、然後在其他光盤中拷貝一些啟動光盤需要的文件,文件在光盤的isolinux這個目錄下,裏面包括boot.cat ,grub.conf, isolinux.bin ,memtest,TRANS.TBL,vmlinuz,boot.msg, initrd.img , isolinux.cfg , splash.jpg vesamenu.c32等文件
solinux.bin:光盤引導程序,在mkisofs的選項中需要明確給出文件路徑,這個文件屬於SYSLINUX項目。
isolinux.cfg: isolinux.bin的配置文件,當光盤啟動後(即運行isolinux.bin),會自動去找isolinux.cfg文件。
vesamenu.c32:是光盤啟動後的安裝圖形界面,也屬於SYSLINUX項目, menu.c32版本是純文本的菜單。
Memtest:內存檢測,這是一個獨立的程序
splash.jgp:光盤啟動界面的背景圖
vmlinuz是內核映像
initrd.img是ramfs (先cpio,再gzip壓縮)
拷貝命令:
cp –r /misc/cd/isolinux/ /app/iso
3、寫應答文件ks.cfg,也可以利用命令創建。
命令創建:先安裝一個圖形化工具:system-config-kickstart
安裝:yum install system-config-kickstart
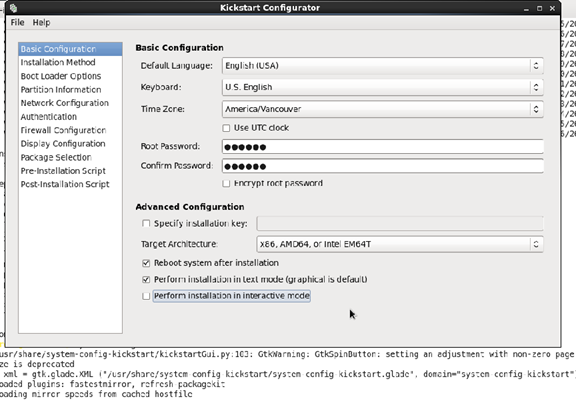
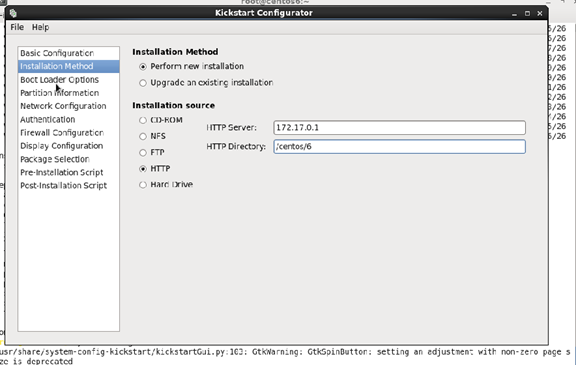
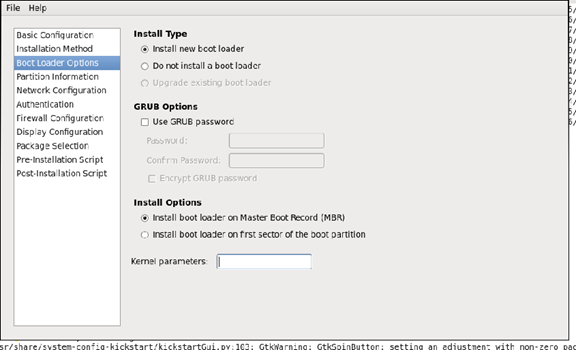
安裝之後把圖中最左邊的選項都打開補齊裏面內容即可。
例如第一個選項:Basic Configuration
第二個:
第三個:
第四個:
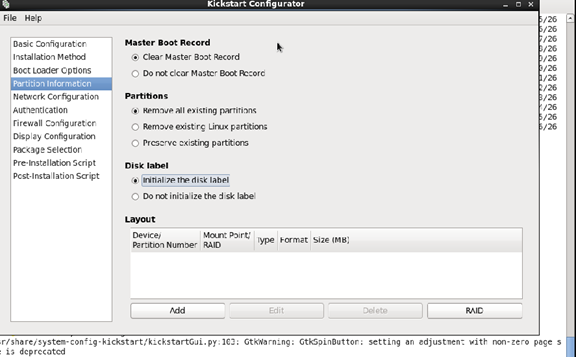
除了這些,還要分區,點擊Add選項,先創建一個/boot分區,選擇對應的系統類型即可。後面依次還要創建/分區和swap分區。之後點擊Ok即可。
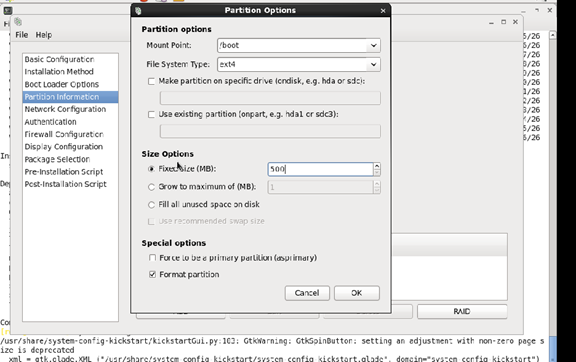
第五個:
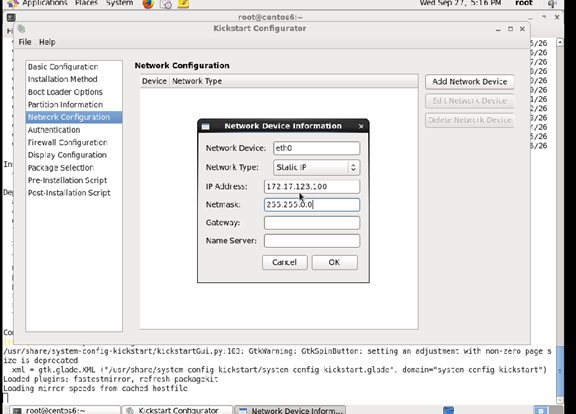
第六個:沒什麽需要填的
第七個:
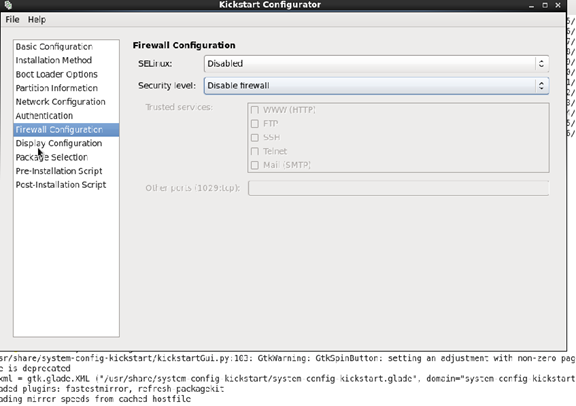
第八個:
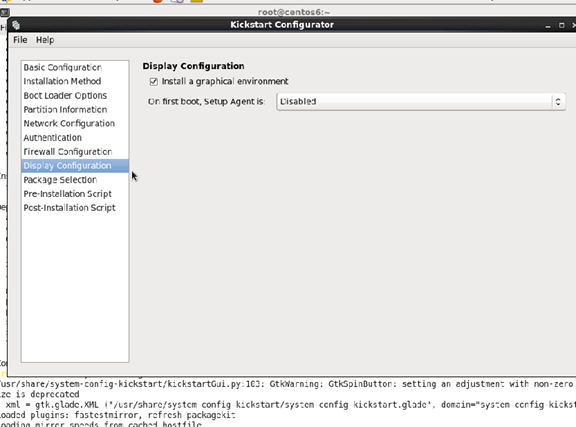
第九個:沒什麽需要填的
第十個:沒什麽需要填的
第十一個:創建後需要寫的腳本,你可以在這裏提前寫好,也可以不寫。
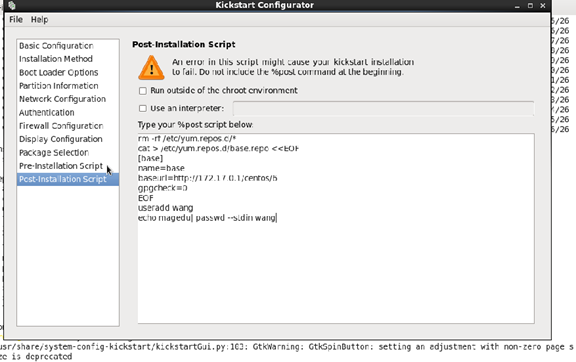
之後點擊file>save>quit即可完成ks.cfg文件的創建。
不想用命令的話就可以自己手寫一份,內容如下:
cd /app/iso
vim ks.cfg
#platform=x86, AMD64, or Intel EM64T
#version=DEVEL
# Firewall configuration
firewall --disabled
# Install OS instead of upgrade
install
# Use network installation
url --url="http://172.17.0.1/centos/6/"
# Root password
rootpw --plaintext magedu
# System authorization information
auth --useshadow --passalgo=sha512
# Use text mode install
text
firstboot --disable
# System keyboard
keyboard us
# System language
lang en_US
# SELinux configuration
selinux --disabled
# Installation logging level
logging --level=info
# Reboot after installation
reboot
# System timezone
timezone Asia/Shanghai
# Network information
network --bootproto=static --device=eth0 --ip=172.17.111.200 --netmask=255.255.0.0 --onboot=on
# System bootloader configuration
bootloader --location=mbr
# Clear the Master Boot Record
zerombr
# Partition clearing information
clearpart --all --initlabel
# Disk partitioning information
part /boot --fstype="ext4" --size=1000
part / --fstype="ext4" --size=20000
part swap --fstype="swap" --size=1024
%packages
@base
@chinese-support
@core
@debugging
@basic-desktop
@desktop-debugging
@desktop-platform
@directory-client
@fonts
%end
%post
rm -rf /etc/yum.repos.d/*
cat > /etc/yum.repos.d/base.repo <<EOF
[base]
name=base
baseurl=http://172.17.0.1/centos/6
gpgcheck=0
EOF
4、定制專屬菜單
vim isolinux.cfg
default vesamenu.c32
#prompt 1
timeout 600
display boot.msg
menu background splash.jpg #定制背景圖片,顏色大小尺寸
menu title Welcome to CentOS Autoinstall!
menu color border 0 #ffffffff #00000000
menu color sel 7 #ffffffff #ff000000
menu color title 0 #ffffffff #00000000
menu color tabmsg 0 #ffffffff #00000000
menu color unsel 0 #ffffffff #00000000
menu color hotsel 0 #ff000000 #ffffffff
menu color hotkey 7 #ffffffff #ff000000
menu color scrollbar 0 #ffffffff #00000000
label desktop #菜單選項,總共四項
menu label Auto Install a ^desktop system
kernel vmlinuz
append initrd=initrd.img ks=cdrom:/ks-desktop.cfg
label mini
menu label ^Auto Install a mini system
kernel vmlinuz
append initrd=initrd.img ks=cdrom:/ks-mini.cfg
label manual
menu label ^Manual install a system
kernel vmlinuz
append initrd=initrd.img
label local
menu default
menu label Boot from ^local drive
localboot 0xffff
註意:這裏有最小化安裝,桌面安裝,都需要ks.cfg文件,但是兩個文件不能一樣,所以中間有些細微差別,可以在安裝包的內容上有些改動。這裏可以把ks.cfg復制兩份,一份名為ks-desktop.cfg,一份名為ks-mini.cfg,然後在安裝包的內容上改動一下就可以。
5、最後就可以刻光盤了,光盤後綴一般為.iso文件。

6、然後把光盤放到桌面上,方便以後使用
sz 放到桌面,
7、用的時候加載即可,完成
Linux光盤行動之制作光盤
