
SSM-整合簡單配置
首先說明Spring和Mybatis的版本:
Spring:3.2.4
Mybatis:3.3.0
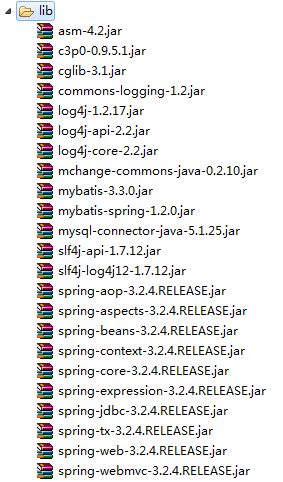
使用了C3P0連接池和Log4J日誌,下面是jar包總覽:
然後是項目目錄總覽:
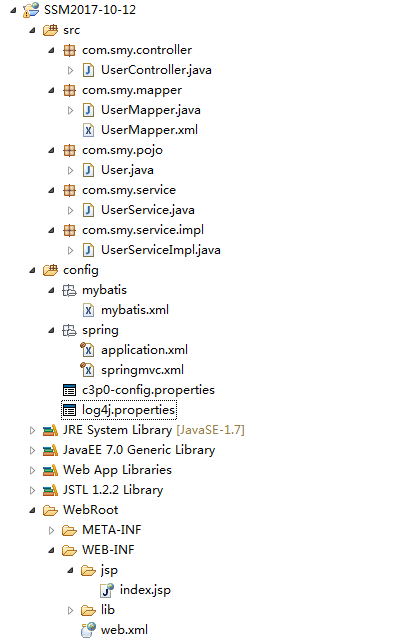
為了能夠讓項目跑一個HelloWorld,添加了簡單User業務,接下來就看一下配置文件的內容:
application.xml
<?xml version="1.0" encoding="UTF-8"?> <beans xmlns="http://www.springframework.org/schema/beans" xmlns:xsi="http://www.w3.org/2001/XMLSchema-instance"xmlns:context="http://www.springframework.org/schema/context" xsi:schemaLocation="http://www.springframework.org/schema/beans http://www.springframework.org/schema/beans/spring-beans.xsd http://www.springframework.org/schema/context http://www.springframework.org/schema/context/spring-context.xsd"> <context:property-placeholder location="classpath:c3p0-config.properties" /> <bean id="dataSource" class="com.mchange.v2.c3p0.ComboPooledDataSource" destroy-method="close"> <property name="driverClass" value="${jdbc.driverClass}" /> <propertyname="jdbcUrl" value="${jdbc.jdbcUrl}" /> <property name="user" value="${jdbc.user}" /> <property name="password" value="${jdbc.password}" /> <property name="minPoolSize" value="${jdbc.miniPoolSize}" /> <property name="maxPoolSize" value="${jdbc.maxPoolSize}" /> <property name="initialPoolSize" value="${jdbc.initialPoolSize}" /> <property name="maxIdleTime" value="${jdbc.maxIdleTime}" /> <property name="acquireIncrement" value="${jdbc.acquireIncrement}" /> <property name="acquireRetryAttempts" value="${jdbc.acquireRetryAttempts}" /> <property name="acquireRetryDelay" value="${jdbc.acquireRetryDelay}" /> <property name="testConnectionOnCheckin" value="${jdbc.testConnectionOnCheckin}" /> <property name="automaticTestTable" value="${jdbc.automaticTestTable}" /> <property name="idleConnectionTestPeriod" value="${jdbc.idleConnectionTestPeriod}" /> </bean> <bean id="transactionManager" class="org.springframework.jdbc.datasource.DataSourceTransactionManager"> <property name="dataSource" ref="dataSource" /> </bean> <bean id="sqlSessionFactory" class="org.mybatis.spring.SqlSessionFactoryBean"> <property name="dataSource" ref="dataSource" /> <property name="configLocation" value="classpath:mybatis/mybatis.xml" /> </bean> <bean class="org.mybatis.spring.mapper.MapperScannerConfigurer"> <property name="basePackage" value="com.smy.mapper" /> </bean> </beans>
因為Spring整合Mybatis,所以數據源和SqlSessionFactory以及事務都由Spring的Bean容器來統一管理。
首先我們要配置我們的數據源DataSource,這裏因為我使用了C3P0連接池,所以就使用了<context:property-placeholder /> 標簽來引入我的C3P0配置文件,然後通過${key} 來讀取值。
配置SqlSessionFactoryBean,為什麽要配置SqlSessionFactory呢? 我們要不要使用Mybatis框架來操作數據庫?答案肯定是要,那就要配置,配置之後我們才能夠得到Mapper映射,生成代理對象來操作數據庫,除了註入DataSource之外,還要註入Mybatis配置文件的路徑。
接下來還要配置Mapper映射文件Bean,這個有多種配置方法,除了上面一種,還可以直接在SqlSessionFactoryBean中直接註入,也可以直接在Mybatis配置文件中配置,但是不管在哪配置,只配置一遍就行,多處配置會出現問題,之前有親身測試過。
springmvc.xml
<?xml version="1.0" encoding="UTF-8"?>
<beans xmlns="http://www.springframework.org/schema/beans"
    xmlns:xsi="http://www.w3.org/2001/XMLSchema-instance" xmlns:context="http://www.springframework.org/schema/context"
    xmlns:mvc="http://www.springframework.org/schema/mvc" xmlns:aop="http://www.springframework.org/schema/aop"
    xmlns:tx="http://www.springframework.org/schema/tx"
    xsi:schemaLocation="http://www.springframework.org/schema/beans
         http://www.springframework.org/schema/beans/spring-beans.xsd
         http://www.springframework.org/schema/context
         http://www.springframework.org/schema/context/spring-context.xsd
         http://www.springframework.org/schema/mvc
         http://www.springframework.org/schema/mvc/spring-mvc.xsd
         http://www.springframework.org/schema/aop
         http://www.springframework.org/schema/aop/spring-aop.xsd
         http://www.springframework.org/schema/tx
          http://www.springframework.org/schema/tx/spring-tx.xsd">
    <mvc:annotation-driven />
    <context:component-scan base-package="com.smy.controller,com.smy.service" />
    <bean id="viewResolver"
        class="org.springframework.web.servlet.view.InternalResourceViewResolver">
        <property name="prefix" value="/WEB-INF/jsp/" />
        <property name="suffix" value=".jsp" />
    </bean>
    <import resource="classpath:/spring/application.xml"/>
</beans>
<mvc:annotation-driven /> :會自動註冊 DefaultAnnotationHandlerMapping 與 AnnotationMethodHandlerAdapter 兩個bean,是spring MVC為 @Controller 分發請求所必須的,當然你要是想要手動配置那兩個Bean,Spring也不會反對。
<context:component-scan /> :有一個 use-default-filters 屬性,改屬性默認為true,這就意味著會掃描指定包下的全部的標有 @Component 的類,並註冊成bean.也就是 @Component 的子註解 @Service , @Reposity 等。所以如果僅僅是在配置文件中這麽寫 <context:component-scan base-package="com.smy" />,Use-default-filter此時為true那麽會對 base-package 包或者子包下的所有的進行java類進行掃描,並把匹配的java類註冊成bean。
viewResolver:視圖解析器,prifix 和 suffix 是在Controller 處理請求之後返回 ModelAndView ,然後由視圖解析器來自動添加前綴和後綴。
import:引入 Spring 其它配置文件,在配置文件分的比較多的時候,也可以使用通配符來引入。
這裏主要配置了MVC必要的三大工具,處理器映射器、處理器適配器、視圖解析器。
mybatis.xml
<?xml version="1.0" encoding="UTF-8" ?>
<!DOCTYPE configuration
PUBLIC "-//mybatis.org//DTD Config 3.0//EN"
"http://mybatis.org/dtd/mybatis-3-config.dtd">
<configuration>
    <settings>
        <setting name="logImpl" value="LOG4J" />
        <setting name="autoMappingBehavior" value="FULL"/>
    </settings>

    <typeAliases>
        <package name="com.smy.pojo" />
    </typeAliases>
</configuration>
在Mybatis配置文件中,只要配置全局行為就可以,如果沒有整合Spring,當然還要配置數據源,這裏我把設置別名配置在了Mybatis配置文件中,前面有說過,這裏也可以把掃描Mapper的配置放進來。
web.xml
<?xml version="1.0" encoding="UTF-8"?>
<web-app xmlns:xsi="http://www.w3.org/2001/XMLSchema-instance" xmlns="http://xmlns.jcp.org/xml/ns/javaee" xsi:schemaLocation="http://xmlns.jcp.org/xml/ns/javaee http://xmlns.jcp.org/xml/ns/javaee/web-app_3_1.xsd" id="WebApp_ID" version="3.1">
  <display-name>SSM2017-10-12</display-name>
  <welcome-file-list>
    <welcome-file>index.html</welcome-file>
    <welcome-file>index.htm</welcome-file>
    <welcome-file>index.jsp</welcome-file>
    <welcome-file>default.html</welcome-file>
    <welcome-file>default.htm</welcome-file>
    <welcome-file>default.jsp</welcome-file>
  </welcome-file-list>

  <servlet>
      <servlet-name>springmvc</servlet-name>
      <servlet-class>org.springframework.web.servlet.DispatcherServlet</servlet-class>
    <init-param>
        <param-name>contextConfigLocation</param-name>
        <param-value>classpath:spring/springmvc.xml</param-value> //這裏配置的是DispatchServlet初始化讀取MVC配置文件,這是最重要的一步
    </init-param>
      <load-on-startup>1</load-on-startup>

  </servlet>
  <servlet-mapping>
      <servlet-name>springmvc</servlet-name>
      <url-pattern>/</url-pattern>
  </servlet-mapping>
</web-app>
c3p0-config.properties
jdbc.driverClass = com.mysql.jdbc.Driver
jdbc.jdbcUrl = jdbc:mysql://localhost:3306/smbms?useUnicode=true&characterEncoding=utf-8
jdbc.user = root
jdbc.password = 123456
jdbc.miniPoolSize = 1
jdbc.maxPoolSize = 20
jdbc.initialPoolSize = 1
jdbc.maxIdleTime = 25000
jdbc.acquireIncrement = 1
jdbc.acquireRetryAttempts = 30
jdbc.acquireRetryDelay = 1000
jdbc.testConnectionOnCheckin = true
jdbc.automaticTestTable = c3p0TestTable
jdbc.idleConnectionTestPeriod = 18000
jdbc.checkoutTimeout=3000
log4j.properties
# rootLogger是所有日誌的根日誌,修改該日誌屬性將對所有日誌起作用
# 下面的屬性配置中,所有日誌的輸出級別是info,輸出源是con
log4j.rootLogger=debug,info,con
# 定義輸出源的輸出位置是控制臺
log4j.appender.con=org.apache.log4j.ConsoleAppender
# 定義輸出日誌的布局采用的類
log4j.appender.con.layout=org.apache.log4j.PatternLayout
# 定義日誌輸出布局
log4j.appender.con.layout.ConversionPattern=%d{MM-dd HH:mm:ss}[%p]%c%n -%m%n
SSM-整合簡單配置