將日誌記錄在是mysql中,實現loganalyzer
三臺主機
192.168.191.106(代號106) 產生日誌
192.168.191.107(代號107) 實現存放日誌的數據庫
192.168.191.173(代號173) 實現日誌報表
1、實現rsyslog將日誌記錄於MySQL中
(1)在107上:
yum install mariadb-server
systemctl start mariadb
mysql_secure_installation 執行安全腳本
(2)在106上:yum install rsyslog-mysql
rpm -ql rsyslog-mysql
scp /usr/share/doc/rsyslog-mysql-5.8.10/createDB.sql 192.168.191.107:/root
(3)在107上運行腳本
mysql-uroot -pcentos < createDB.sql 或者登陸數據庫,執行腳本
grantall on Syslog.* to ‘loguser‘ @ ‘192.168.191.106‘ identified by ‘centos‘
(4)在106上連接測試
mysql -uloguser -pcentos -h‘192.168.191.107‘
(5)支持日誌
在106上
添加該行:
$ModLoad ommysql
修改這一行:
*.info;mail.none;authpriv.none;cron.none :ommysql:192.168.191.107,Syslog,loguser,centos
重啟服務:service rsyslog restart
(6)在107上
mysql -uroot -pcentos
show databases;
useSyslog;
selectcount(
from SystemEvents \G; 查看記錄詳細信息

(7)測試:在106上生成日誌,logger “This is a test log”
在107查看

select count * from SystemEvents \G;
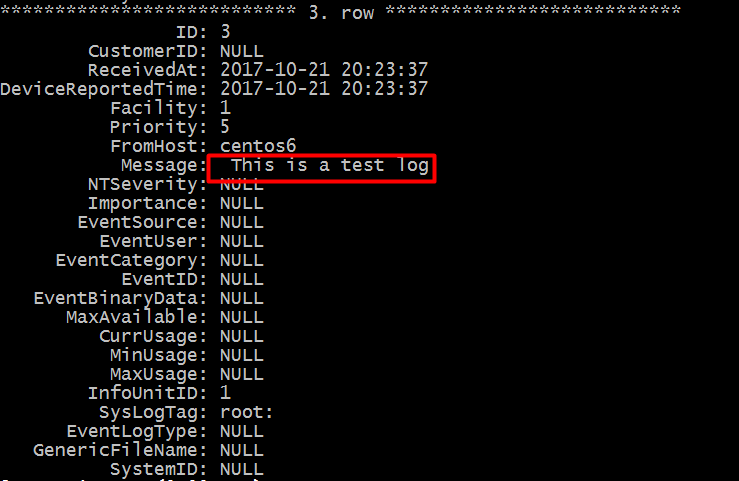
可以看到確實多了一條記錄
2、實現通過loganalyzer展示數據庫中的日誌
1>在173上:實現lap
(1)安裝包
httpd默認安裝過了
yum install php php-mysql php-gd
(2)service httpd start 啟動服務
(3)測試
vim /var/www/html/index.php
<?php
          phpinfo();
?>
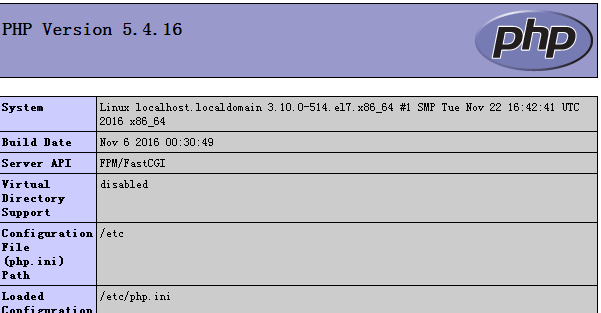
在瀏覽器訪問http://192.168.191.173/index.php 顯示下面信息則實現lap
2>在173上實現loganalyzer
(1)rz 導入文件 loganalyzer-4.1.5.gz
tar xvf loganalyzer-4.1.5.gz
(2) cd loganalyzer-4.1.5
mv src /var/www/html/log
(3)cd /var/www/html/log
touch config.php
chmod 666 config.php
或者在該目錄下 執行該腳本 configure.sh

service httpd restart 重啟服務
(4)瀏覽器訪問http:// 192.168.191.173/log
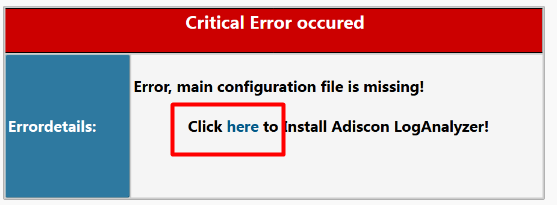

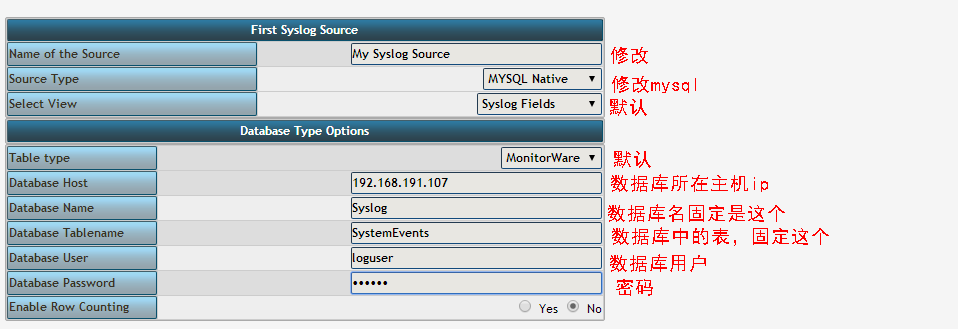
其他步默認next;下面一頁有固定格式
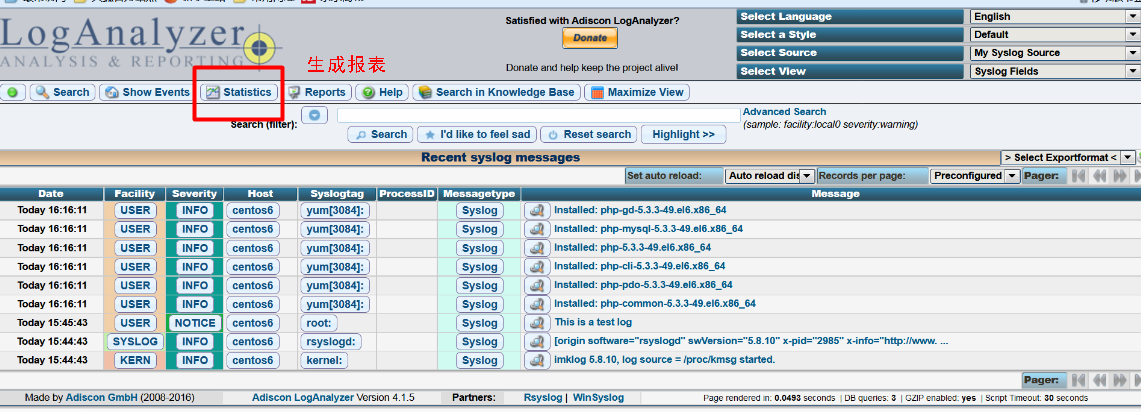
(5)成功,點擊生成想要的報表
本文出自 “Linux 學習記錄” 博客,請務必保留此出處http://guanm.blog.51cto.com/13126952/1976131
將日誌記錄在是mysql中,實現loganalyzer
