日誌分析ELK平臺搭建
阿新 • • 發佈:2017-11-03
elk、es、elasticsearch、kibana
當服務器數量以及應用達到一定的數量後,操作系統日誌以及應用軟件日誌數量龐大,遇到問題時日誌是第一手資料。平時用的sed、grep、awk已經難以滿足我們的需求。隨著互聯網技術的發展,好多大型互聯網公司研發了不同的日誌分析產品,例如開源的Graylog、ELK還有Splunk等,同時Splunk也是一個商業產品,功能很強大,但是在目前的互聯網領域裏ELK的使用應該是更廣泛。接下來會根據官網資料搭建ELK平臺。
環境介紹:
操作系統 CentOS 7.4
Java版本:openjdk 1.8.0_151
安裝方式:yum安裝
一、安裝Elasticsearch
配置yum源
1、下載並安裝公共簽名密鑰
rpm --import  https://artifacts.elastic.co/GPG-KEY-elasticsearch
2、配置Elasticsearch安裝包yum源
編輯 /etc/yum.repos.d/elasticsearch.repo

[elasticsearch-5.x]
name=Elasticsearch repository for 5.x packages
baseurl=https://artifacts.elastic.co/packages/5.x/yum
gpgcheck=1
gpgkey=https://artifacts.elastic.co/GPG-KEY-elasticsearch
enabled=1
autorefresh=1
type=rpm-md
3、安裝命令
yum   install  -y elasticsearch

4、等待安裝完成後將服務啟動,並做好服務自啟動、防火墻等設置
[root@localhost ~]# systemctl   enable  elasticsearch
Created symlink from /etc/systemd/system/multi-user.target.wants/elasticsearch.service to /usr/lib/systemd/system/elasticsearch.service.
[root@localhost ~]# systemctl   restart  elasticsearch
5、檢查監聽端口以及相關服務
[root@localhost ~]# netstat   -nltup  |grep  9200
tcp6       0      0 127.0.0.1:9200          :::*                    LISTEN      13315/java
tcp6       0      0 ::1:9200                :::*                    LISTEN      13315/java

使用curl訪問9200端口
[root@localhost ~]# curl   http://127.0.0.1:9200
{
  "name" : "wEPnzRm",
  "cluster_name" : "elasticsearch",
  "cluster_uuid" : "dKeJNq1xSiizdAomMleZbg",
  "version" : {
    "number" : "5.6.3",
    "build_hash" : "1a2f265",
    "build_date" : "2017-10-06T20:33:39.012Z",
    "build_snapshot" : false,
    "lucene_version" : "6.6.1"
  },
  "tagline" : "You Know, for Search"

  經檢查elasticsearch 服務運行正常
二、安裝Kibana
1、配置Kibana的yum源
 編輯/etc/yum.repos.d/kibana-5.x
[kibana-5.x]
name=Kibana repository for 5.x packages
baseurl=https://artifacts.elastic.co/packages/5.x/yum
gpgcheck=1
gpgkey=https://artifacts.elastic.co/GPG-KEY-elasticsearch
enabled=1
autorefresh=1
type=rpm-md
2、安裝kibana
yum  install  -y  kibana
3、啟動服務
service  restart  kibana
服務開機自啟動
chkconfig --add kibana
4、檢查監聽端口和服務運行
[root@localhost ~]# netstat  -nltup
Active Internet connections (only servers)
Proto Recv-Q Send-Q Local Address           Foreign Address         State       PID/Program name
tcp        0      0 10.1.4.182:5601         0.0.0.0:*               LISTEN
服務默認的端口為5601 默認配置文件的監聽主機為localhost   只能本機訪問,為了方便,將其改為內網地址
10.1.4.182
5、curl訪問
 http://10.1.4.182:5601
<script>var hashRoute = ‘/app/kibana‘;
var defaultRoute = ‘/app/kibana‘;

var hash = window.location.hash;
if (hash.length) {
  window.location = hashRoute + hash;
} else {
  window.location = defaultRoute;
}</script>
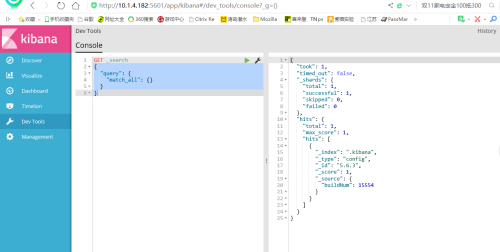
6、瀏覽器訪問後截圖

三、安裝
1、配置yum源
編輯 /etc/yum.repos.d/logstash
[logstash-5.x]
name=Elastic repository for 5.x packages
baseurl=https://artifacts.elastic.co/packages/5.x/yum
gpgcheck=1
gpgkey=https://artifacts.elastic.co/GPG-KEY-elasticsearch
enabled=1
autorefresh=1
type=rpm-md
2、安裝
yum  install  -y  logstash

安裝完畢
日誌分析ELK平臺搭建
