
Rabbitmq集群部署Haproxy
1、為了配合做rabbitmq的負載均衡,本次的安裝包是安裝的低版本1.5.8版本,下載包的地址:https://src.fedoraproject.org/repo/pkgs/haproxy/
2、按照上兩篇博客,先把rabbitmq集群裝好:
單機版Rabbitmq部署:http://blog.51cto.com/10950710/2135676
Rabbitmq集群部署:http://blog.51cto.com/10950710/2135717
安裝步驟:
1、將haproxy-1.5.8.tar.gz上傳到服務器/root下面並解壓
[root@localhost haproxy-1.5.8]# pwd
/root/haproxy-1.5.8
[root@localhost haproxy-1.5.8]# ll
總用量 368
-rw-rw-r--.  1 root root 278375 10月 31 2014 CHANGELOG
drwxrwxr-x. 10 root root    127 10月 31 2014 contrib
drwxrwxr-x.  4 root root   4096 10月 31 2014 doc
drwxrwxr-x.  2 root root   4096 10月 31 2014 ebtree
drwxrwxr-x.  3 root root   4096 10月 31 2014 examples
drwxrwxr-x.  6 root root     60 10月 31 2014 include
-rw-rw-r--.  1 root root   2029 10月 31 2014 LICENSE
-rw-rw-r--.  1 root root  27752 10月 31 2014 Makefile
-rw-rw-r--.  1 root root  26322 10月 31 2014 README
-rw-rw-r--.  1 root root   4040 10月 31 2014 ROADMAP
drwxrwxr-x.  2 root root   4096 10月 31 2014 src
-rw-rw-r--.  1 root root     14 10月 31 2014 SUBVERS
drwxrwxr-x.  2 root root   4096 10月 31 2014 tests
-rw-rw-r--.  1 root root     24 10月 31 2014 VERDATE
-rw-rw-r--.  1 root root      6 10月 31 2014 VERSION
2、編譯安裝:
1)先查看本機系統版本
[root@localhost haproxy-1.5.8]# uname -r
3.10.0-693.el7.x86_64
[root@localhost haproxy-1.5.8]#
參數說明:
? TARGET=linux310,內核版本,使用uname -r查看內核,如:3.10.0-514.el7,此時該參數就為linux310;kernel 大於2.6.28的可以用:TARGET=linux2628;
? ARCH=x86_64,系統位數;
? PREFIX=/usr/local/haprpxy #/usr/local/haprpxy,為haprpxy安裝路徑。
2)編譯安裝
[root@localhost haproxy-1.5.8]# make TARGET=linux310 ARCH=x86_64 PREFIX=/usr/local/haproxy   #執行之前,確認已經安裝了gcc,否則這一步驟會執行失敗
[root@localhost haproxy-1.5.8]# make install PREFIX=/usr/local/haproxy
3、添加配置文件
該版本解壓後文件內就沒有haproxy.cfg文件,所以需要自己寫。這個配置文件是按照搭建rabbitmq的負載均衡來配置的:
[root@localhost haproxy]# mkdir /etc/haproxy   #創建配置文件目錄
[root@localhost haproxy]# cd /etc/haproxy
[root@localhost haproxy]# cat haproxy.cfg   (配置文件解析可以參考鏈接:http://blog.51cto.com/blief/1750952,寫得很詳細)
###########全局配置#########
global
    log 127.0.0.1   local3 info
    #log 127.0.0.1   local0
    log /dev/log    local0
    log /dev/log    local1 notice
    chroot /var/lib/haproxy     # 改變當前工作目錄
    stats socket /run/haproxy/admin.sock mode 660 level admin   # 創建監控所用的套接字目錄
    pidfile  /var/run/haproxy.pid   # haproxy的pid存放路徑,啟動進程的用戶必須有權限訪問此文件
    maxconn  100000                   # 最大連接數,默認4000
    user   haproxy                  # 默認用戶
    group   haproxy                 # 默認用戶組
    daemon                          # 創建1個進程進入deamon模式運行。此參數要求將運行模式設置為"daemon

    # Default SSL material locations
    #ca-base /etc/ssl/certs
    #crt-base /etc/ssl/private

    # Default ciphers to use on SSL-enabled listening sockets.
    # For more information, see ciphers(1SSL). This list is from:
    #  https://hynek.me/articles/hardening-your-web-servers-ssl-ciphers/
    #ssl-default-bind-ciphers ECDH+AESGCM:DH+AESGCM:ECDH+AES256:DH+AES256:ECDH+AES128:DH+AES:ECDH+3DES:DH+3DES:RSA+AESGCM:RSA+AES:RSA+3DES:!aNULL:!MD5:!DSS
    #ssl-default-bind-options no-sslv3

###########默認配置#########
defaults
    log global
    mode    http                                # 默認的模式mode { tcp|http|health },tcp是4層,http是7層,health只會返回OK
    option  httplog                             # 采用http日誌格式
    option  dontlognull                         # 啟用該項,日誌中將不會記錄空連接。所謂空連接就是在上遊的負載均衡器
                                                # 或者監控系統為了探測該 服務是否存活可用時,需要定期的連接或者獲取某
                                                # 一固定的組件或頁面,或者探測掃描端口是否在監聽或開放等動作被稱為空連接;
                                                # 官方文檔中標註,如果該服務上遊沒有其他的負載均衡器的話,建議不要使用
                                                # 該參數,因為互聯網上的惡意掃描或其他動作就不會被記錄下來
    timeout connect 5000                    # 連接超時時間
    timeout client  50000                   # 客戶端連接超時時間
    timeout server  50000                   # 服務器端連接超時時間
    #option  httpclose       # 每次請求完畢後主動關閉http通道
    option  httplog         # 日誌類別http日誌格式
    #option  forwardfor      # 如果後端服務器需要獲得客戶端真實ip需要配置的參數,可以從Http Header中獲得客戶端ip
    option  redispatch      # serverId對應的服務器掛掉後,強制定向到其他健康的服務器
    timeout connect 10000   # default 10 second timeout if a backend is not found
    maxconn     100000       # 最大連接數
    retries     3           # 3次連接失敗就認為服務不可用,也可以通過後面設置
    #errorfile 400 /etc/haproxy/errors/400.http
    #errorfile 403 /etc/haproxy/errors/403.http
    #errorfile 408 /etc/haproxy/errors/408.http
    #errorfile 500 /etc/haproxy/errors/500.http
    #errorfile 502 /etc/haproxy/errors/502.http
    #errorfile 503 /etc/haproxy/errors/503.http
    #errorfile 504 /etc/haproxy/errors/504.http
####################################################################
listen http_front
        bind 0.0.0.0:1080           #監聽端口
        stats refresh 30s           #統計頁面自動刷新時間
        stats uri /haproxy/stats            #統計頁面url
        stats realm Haproxy Manager #統計頁面密碼框上提示文本
        stats auth admin:admin      #統計頁面用戶名和密碼設置*****
        #stats hide-version         #隱藏統計頁面上HAProxy的版本信息

#####################映射rabbitmq的15674端口###############################
listen rabbitmq_admin 0.0.0.0:15672
    bind 0.0.0.0:15672
    server rabbitmq101 10.0.0.101:15672
    server rabbitmq102 10.0.0.102:15672
    server rabbitmq103 10.0.0.103:15672
#####################映射rabbitmq的15674端口###############################
listen rabbitmq_admin 0.0.0.0:15674
    bind 0.0.0.0:15674
    server rabbitmq101 10.0.0.101:15674
    server rabbitmq102 10.0.0.102:15674
    server rabbitmq103 10.0.0.103:15674

####################映射rabbitmq的5672端口###############################
listen rabbitmq_cluster 0.0.0.0:5672  #這裏配置的是服務端口,代碼裏面連接服務就直接用haproxy的IP:5672連接服務了,如10.0.0.101:5672
    bind 0.0.0.0:5672
    option tcplog
    mode tcp
    timeout client  3h
    timeout server  3h
    option          clitcpka
    balance leastconn      #負載均衡算法(#banlance roundrobin 輪詢,balance source 保存session值,支持static-rr,leastconn,first,uri等參數)
    #balance url_param userid
    #balance url_param session_id check_post 64
    #balance hdr(User-Agent)
    #balance hdr(host)
    #balance hdr(Host) use_domain_only
    #balance rdp-cookie
    #balance leastconn
    #balance source //ip
    server   rabbitmq101 10.0.0.101:5672 check inter 5s rise 2 fall 3   #check inter 2000 是檢測心跳頻率,rise 2是2次正確認為服務器可用,fall 3是3次失敗認為服務器不可用
    server   rabbitmq102 10.0.0.102:5672 check inter 5s rise 2 fall 3
    server   rabbitmq103 10.0.0.103:5672 check inter 5s rise 2 fall 3
[root@localhost haproxy]#
4、編輯haproxy的啟動文件:
[root@localhost haproxy]# cat /etc/init.d/haproxy
#!/bin/sh
#
# haproxy
#
# chkconfig:   - 85 15
# description:  HAProxy is a free, very fast and reliable solution #               offering high availability, load balancing, and #               proxying for TCP and  HTTP-based applications
# processname: haproxy
# config:      /etc/haproxy/haproxy.cfg
# pidfile:     /var/run/haproxy.pid

# Source function library.
. /etc/rc.d/init.d/functions

# Source networking configuration.
. /etc/sysconfig/network

# Check that networking is up.
[ "$NETWORKING" = "no" ] && exit 0

exec="/usr/local/haproxy/sbin/haproxy"
prog=$(basename $exec)

[ -e /etc/sysconfig/$prog ] && . /etc/sysconfig/$prog

cfgfile=/etc/haproxy/haproxy.cfg
pidfile=/var/run/haproxy.pid
lockfile=/var/lock/subsys/haproxy

check() {
    $exec -c -V -f $cfgfile $OPTIONS
}

start() {
    $exec -c -q -f $cfgfile $OPTIONS
    if [ $? -ne 0 ]; then
        echo "Errors in configuration file, check with $prog check."
        return 1
    fi

    echo -n $"Starting $prog: "
    # start it up here, usually something like "daemon $exec"
    daemon $exec -D -f $cfgfile -p $pidfile $OPTIONS
    retval=$?
    echo
    [ $retval -eq 0 ] && touch $lockfile
    return $retval
}

stop() {
    echo -n $"Stopping $prog: "
    # stop it here, often "killproc $prog"
    killproc $prog
    retval=$?
    echo
    [ $retval -eq 0 ] && rm -f $lockfile
    return $retval
}

restart() {
    $exec -c -q -f $cfgfile $OPTIONS
    if [ $? -ne 0 ]; then
        echo "Errors in configuration file, check with $prog check."
        return 1
    fi
    stop
    start
}

reload() {
    $exec -c -q -f $cfgfile $OPTIONS
    if [ $? -ne 0 ]; then
        echo "Errors in configuration file, check with $prog check."
        return 1
    fi
    echo -n $"Reloading $prog: "
    $exec -D -f $cfgfile -p $pidfile $OPTIONS -sf $(cat $pidfile)
    retval=$?
    echo
    return $retval
}

force_reload() {
    restart
}

fdr_status() {
    status $prog
}

case "$1" in
    start|stop|restart|reload)
        $1
        ;;
    force-reload)
        force_reload
        ;;
    check)
        check
        ;;
    status)
        fdr_status
        ;;
    condrestart|try-restart)
      [ ! -f $lockfile ] || restart
    ;;
    *)
        echo $"Usage: $0 {start|stop|status|restart|try-restart|reload|force-reload}"
        exit 2
esac
[root@localhost haproxy]#
修改啟動文件的權限:
[root@localhost haproxy]# chmod 777 /etc/init.d/haproxy5、根據haproxy.cfg的配置,創建相應的配置文件並修改權限
[root@localhost  haproxy]# useradd haproxy
[root@localhost  haproxy]# mkdir  /var/lib/haproxy
[root@localhost  haproxy]# mkdir /run/haproxy/
[root@localhost  haproxy]# chown haproxy:haproxy -R /usr/local/haproxy/
[root@localhost  haproxy]# chown haproxy:haproxy -R /var/lib/haproxy
[root@localhost  haproxy]# chown haproxy:haproxy -R /run/haproxy/
[root@localhost  haproxy]# chown haproxy:haproxy -R /etc/haproxy/
[root@localhost haproxy]#chown haproxy:haproxy -R /etc/init.d/haproxy
6、啟動haproxy服務:
[root@localhost haproxy]# service haproxy start
Starting haproxy (via systemctl):                          [  確定  ]
查看進程:
[root@localhost haproxy]# netstat -tlunp|grep 1080
tcp        0      0 0.0.0.0:1080            0.0.0.0:*               LISTEN      8900/haproxy
[root@localhost haproxy]#
[root@localhost haproxy]# ps -ef|grep haproxy
haproxy    8900      1  0 17:43 ?        00:00:00 /usr/local/haproxy/sbin/haproxy -D -f /etc/haproxy/haproxy.cfg -p /var/run/haproxy.pid
root       8986   5662  0 18:17 pts/1    00:00:00 grep --color=auto haproxy
[root@localhost haproxy]#
7、haproxy管理頁面訪問:
http://131.10.11.116:1080/haproxy/stats #訪問的時候要註意防火墻,開始防火墻沒關閉,訪問不到。 後面的/haproxy/stats也是haproxy.cfg裏面配置的,可以改
根據/etc/haproxy/haproxy.cfg的配置,頁面的用戶名和密碼是admin /admin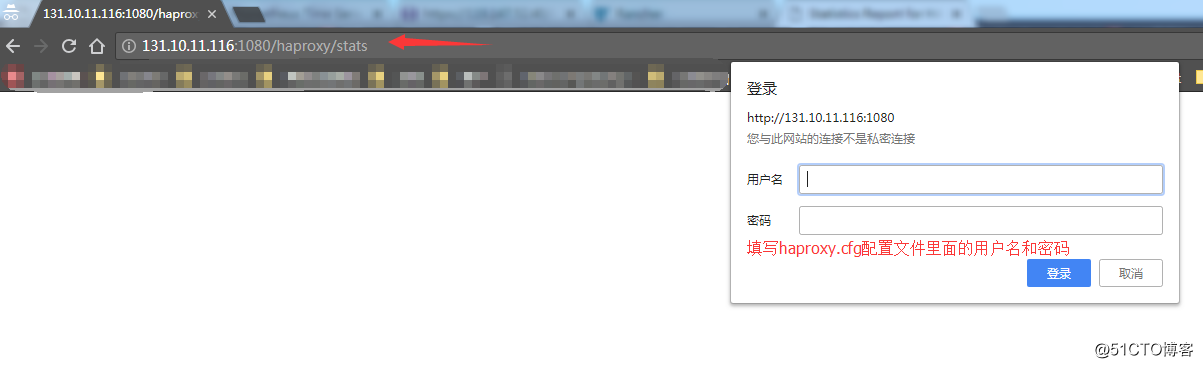
登錄進去看到是這樣的(測試的haproxy忘了截圖,找了個另外環境的haproxy截圖):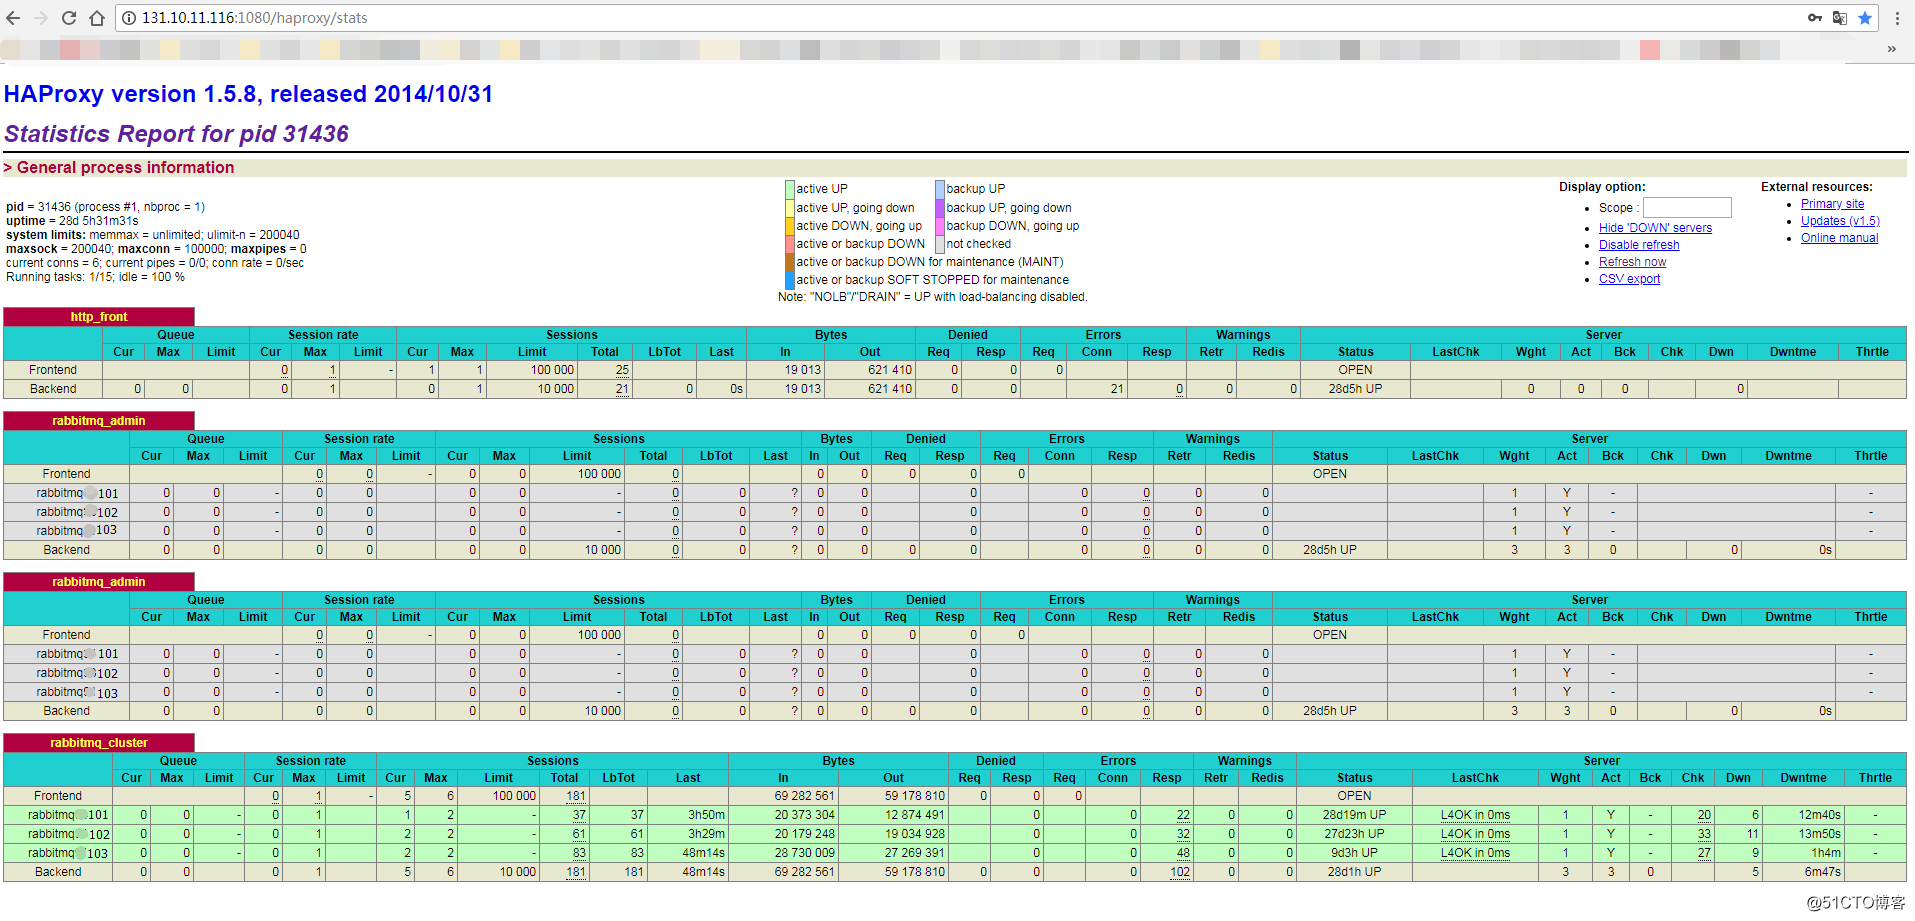
=======================Haproxy開啟日誌記錄==========================
1、創建日誌文件/var/log/haproxy/haproxy.log
    cd?/var/log??
    sudo?mkdir?haproxy??
    cd?haproxy??
    sudo?touch?haproxy.log??
    sudo?chmod?a+w?haproxy.log?
2、開啟rsyslog的haproxy日誌記錄功能
2.1 編輯/etc/rsyslog.conf文件,將下面兩行去掉註釋:
    $ModLoad?imudp??
    $UDPServerRun?514??
並且在
    #?Save?boot?messages?also?to?boot.log??
    local7.*????????????????????????????????????????????????/var/log/boot.log?
這兩行後面添加三行新的內容:
    #?Save?haproxy?log?
    local3.*???????????????????????/var/log/haproxy/haproxy.log?
    local0.*???????????????????????/var/log/haproxy/haproxy.log?
2.2 修改/etc/sysconfig/rsyslog 文件
將SYSLOGD_OPTIONS=""? 改成 SYSLOGD_OPTIONS="-r?-m?0?-c?2"? 3、配置haproxy
修改/etc/haproxy/haproxy.cfg文件,在global區段添加
log?????????127.0.0.1?local0??info4、重啟rsyslog和haproxy服務,haproxy就能記錄日誌了。
    systemctl restart rsyslog
    service haproxy restart
參考文檔:
https://blog.csdn.net/u012758088/article/details/78642063
https://blog.csdn.net/secsky/article/details/60576455
https://www.cnblogs.com/saneri/p/5234101.html
https://www.cnblogs.com/yangxiaoyi/p/6919163.html
Rabbitmq集群部署Haproxy