
tesseract-ocr訓練
參考文件:
http://my.oschina.net/lixinspace/blog/60124
http://blog.csdn.net/shuzui1985/article/details/8188993
https://code.google.com/p/tesseract-ocr/
http://blog.csdn.net/firehood_/article/details/8433077
http://blog.csdn.net/marvinhong/article/details/8459591
用tesseract進行簡單的驗證碼識別是可行的,但是其預設的識別檔案效果並不理想,所以需要針對你識別的目標專門進行訓練,然後使用訓練結果進行識別,識別率會大大提高的。
1,linux下安裝tesseract
下載tesseract-ocr:https://tesseract-ocr.googlecode.com/files/tesseract-ocr-3.02.02.tar.gz
下載leptonica(tesseract依賴於它):http://www.leptonica.com/source/leptonica-1.70.tar.gz
下載eng語言識別檔案:https://tesseract-ocr.googlecode.com/files/tesseract-ocr-3.02.eng.tar.gz
先安裝leptonica:
$gunzip leptonica-1.70.tar.gz
$tar xvf leptonica-1.70.tar
$./configure
$make
$sudo make install
再安裝tesseract-ocr:
$gunzip leptonica-1.70.tar.gz
$tar xvf leptonica-1.70.tar
$./autogen.sh
$./configure
$make
$sudo make install最後將tesseract-ocr-3.02.eng.tar.gz拷貝到/usr/local/share/tessdata下:
#cp  tesseract-ocr-3.02.eng.tar.gz /usr/local/share/tessdata
#cd /usr/local/share/tessdata
#gunzip tesseract-ocr-3.02.eng.tar.gz
#tar xvf tesseract-ocr-3.02.eng.tar
#mv tesseract-ocr/tessdata/*  .
找一張圖片來看看識別結果:
$tesseract 1.bmp out -l eng -psm 7這裡out為輸出識別的結果檔案,會自動加上字尾.txt,-l指定識別的字型檔案,這裡是eng英文數字,對應/usr/local/share/tessdata/eng.traineddata,-psm表示單行文字識別(還有很多型別,具體看幫助吧),可以看到識別的結果很不理想。
2,訓練tesseract-ocr
由於訓練的軟體要求使用tif格式的檔案,但是我安裝的linux版本不支援tif的識別,只支援bmp圖片,所以先安裝一個windows版本的tesseract-ocr,而且我的系統中發現3.0.2版本的在mftraining這一步要出錯,所以採用了3.0.1版本的,下載地址:http://tesseract-ocr.googlecode.com/files/tesseract-ocr-3.01-win32-portable.zip
這個下載下來之後,不需要安裝,直接解壓就可以使用,不過要在系統PATH變數中增加路徑,還要增加環境變數TESSDATA_PREFIX,這個環境變數是tesseract的解壓路徑,但後面一定要加上“\”。
訓練步驟:
1,準備一些需要識別的目標圖片,應該能夠覆蓋所有需要識別的字元
2,然後轉化為tif格式,可以使用imagemagick的convert命令
3,合併多個tif檔案為一個,這裡需要用到一個軟體:
http://jaist.dl.sourceforge.net/project/vietocr/jTessBoxEditor/jTessBoxEditor-1.0.zip
解壓之後執行:jTessBoxEditor.jar
4,開啟“Tools->Merge TIFF...”,選擇多個tif檔案,儲存為name.tif,所有下面的“name”,就是你所取的識別引擎檔案的名字,可以改成你自己的。
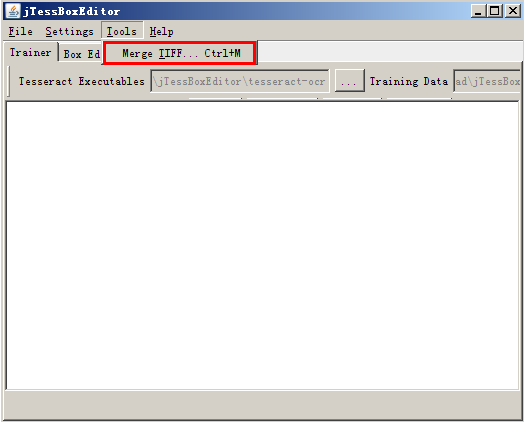
5,Make Box Files。在namt.tif所在的目錄下開啟一個命令列,輸入:
tesseract.exe name.tif name batch.nochop makebox來生成一個box檔案,該檔案記錄了tesseract識別出來的每一個字和其位置座標。
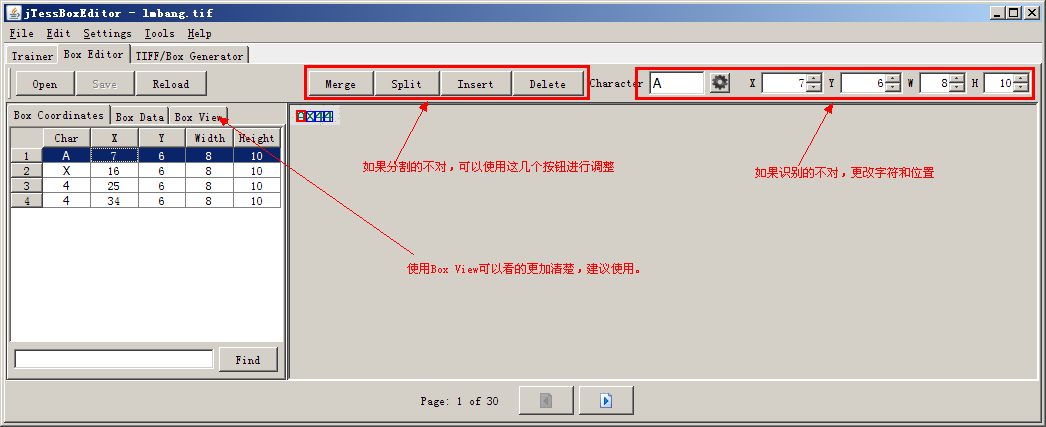
6,使用jTessBoxEditor開啟name.tif檔案,需要記住的是第2步生成的name.box要和這個name.tif檔案同在一個目錄下。逐個校正文字,後儲存。
7,Run Tesseract for Training。輸入命令:
tesseract.exe name.tif name nobatch box.train8,Compute the Character Set。輸入命令:
unicharset_extractor.exe name.box9,新建檔案“font_properties”,並且輸入文字 :
name 0 0 0 0 0大致意思就是說name這個語言的字型為普通字型。
並執行命令:
mftraining.exe -F font_properties -U unicharset name.tr我使用3.0.2版本就是執行這一步時有問題,所以改成3.0.1版本的。
10,Clustering。輸入命令:
cntraining.exe name.tr11,此時,在目錄下應該生成若干個檔案了,把unicharset, inttemp, normproto, pfftable這四個檔案加上字首“name.”。然後輸入命令:
combine_tessdata.exe name.會顯示一個結果如:
Combining tessdata files
TessdataManager combined tesseract data files.
Offset for type 0 is -1
Offset for type 1 is 108
Offset for type 2 is -1
Offset for type 3 is 1660
Offset for type 4 is 327545
Offset for type 5 is 327781
Offset for type 6 is -1
Offset for type 7 is -1
Offset for type 8 is -1
Offset for type 9 is -1
Offset for type 10 is -1
Offset for type 11 is -1
Offset for type 12 is –1
必須確定的是第2、4、5、6行的資料不是-1,那麼一個新的字典就算生成了。
此時目錄下“name.traineddata”的檔案拷貝到tesseract程式目錄下的“tessdata”目錄。
以後就可以使用該該字典來識別了,例如:
tesseract.exe test.jpg out –l name -psm 7將生成的檔案name.traineddata拷貝到linux相應的目錄下,一樣可以使用,整個訓練過程最麻煩的就是使用jTessBoxEditor進行文字的校正,需要非常耐心,這樣識別結果就會大大提高。