
ubuntu18.04利用Caddy外掛filemanager搭建檔案伺服器
不管在公司還是自己家中,搭建一套內網檔案系統還是可以帶來很大便利的。之前使用httpd、nginx等web伺服器都可以輕鬆做到,不過現在,Caddy + filemanager外掛可以做得更好。
一、Caddy簡介
Caddy是一個go語言開發的web伺服器,以開箱即用、自動支援HTTPS著稱。
官網有句話是:“Other web servers were designed for the Web, but Caddy was designed for humans, with today’s Web in mind.”
基本特性
預設支援HTTP/2,使用 Let’s Encrypt 可以全自動變成全站HTTPS,無需任何配置(可配置自己CA證書);
多核支援;
完全支援IPv6;
功能外掛化,可以自己輕鬆開發外掛;
支援WebSockets;
支援自動把md轉成 HTML;
簡單的log日誌配置;
二進位制部署,無依賴;
反向代理,管理多個站點;
更多詳細特性描述,請移步:Caddy Web Server Features;
二、filemanager外掛
filemanager是基於瀏覽器中介軟體的擴充套件。它提供了指定目錄的檔案管理介面,可用於上傳、刪除、預覽和重新命名該目錄中的檔案。配合caddy進行簡單配置即可搭建介面友好的檔案伺服器。
基本特性
可以下載;
可以上傳;
可以刪除;
可以重新命名;
可以進行使用者許可權管理;
可以預覽視訊和圖片;
還可以針對大檔案進行一些timeout設定;
三、安裝、配置、執行
1、安裝
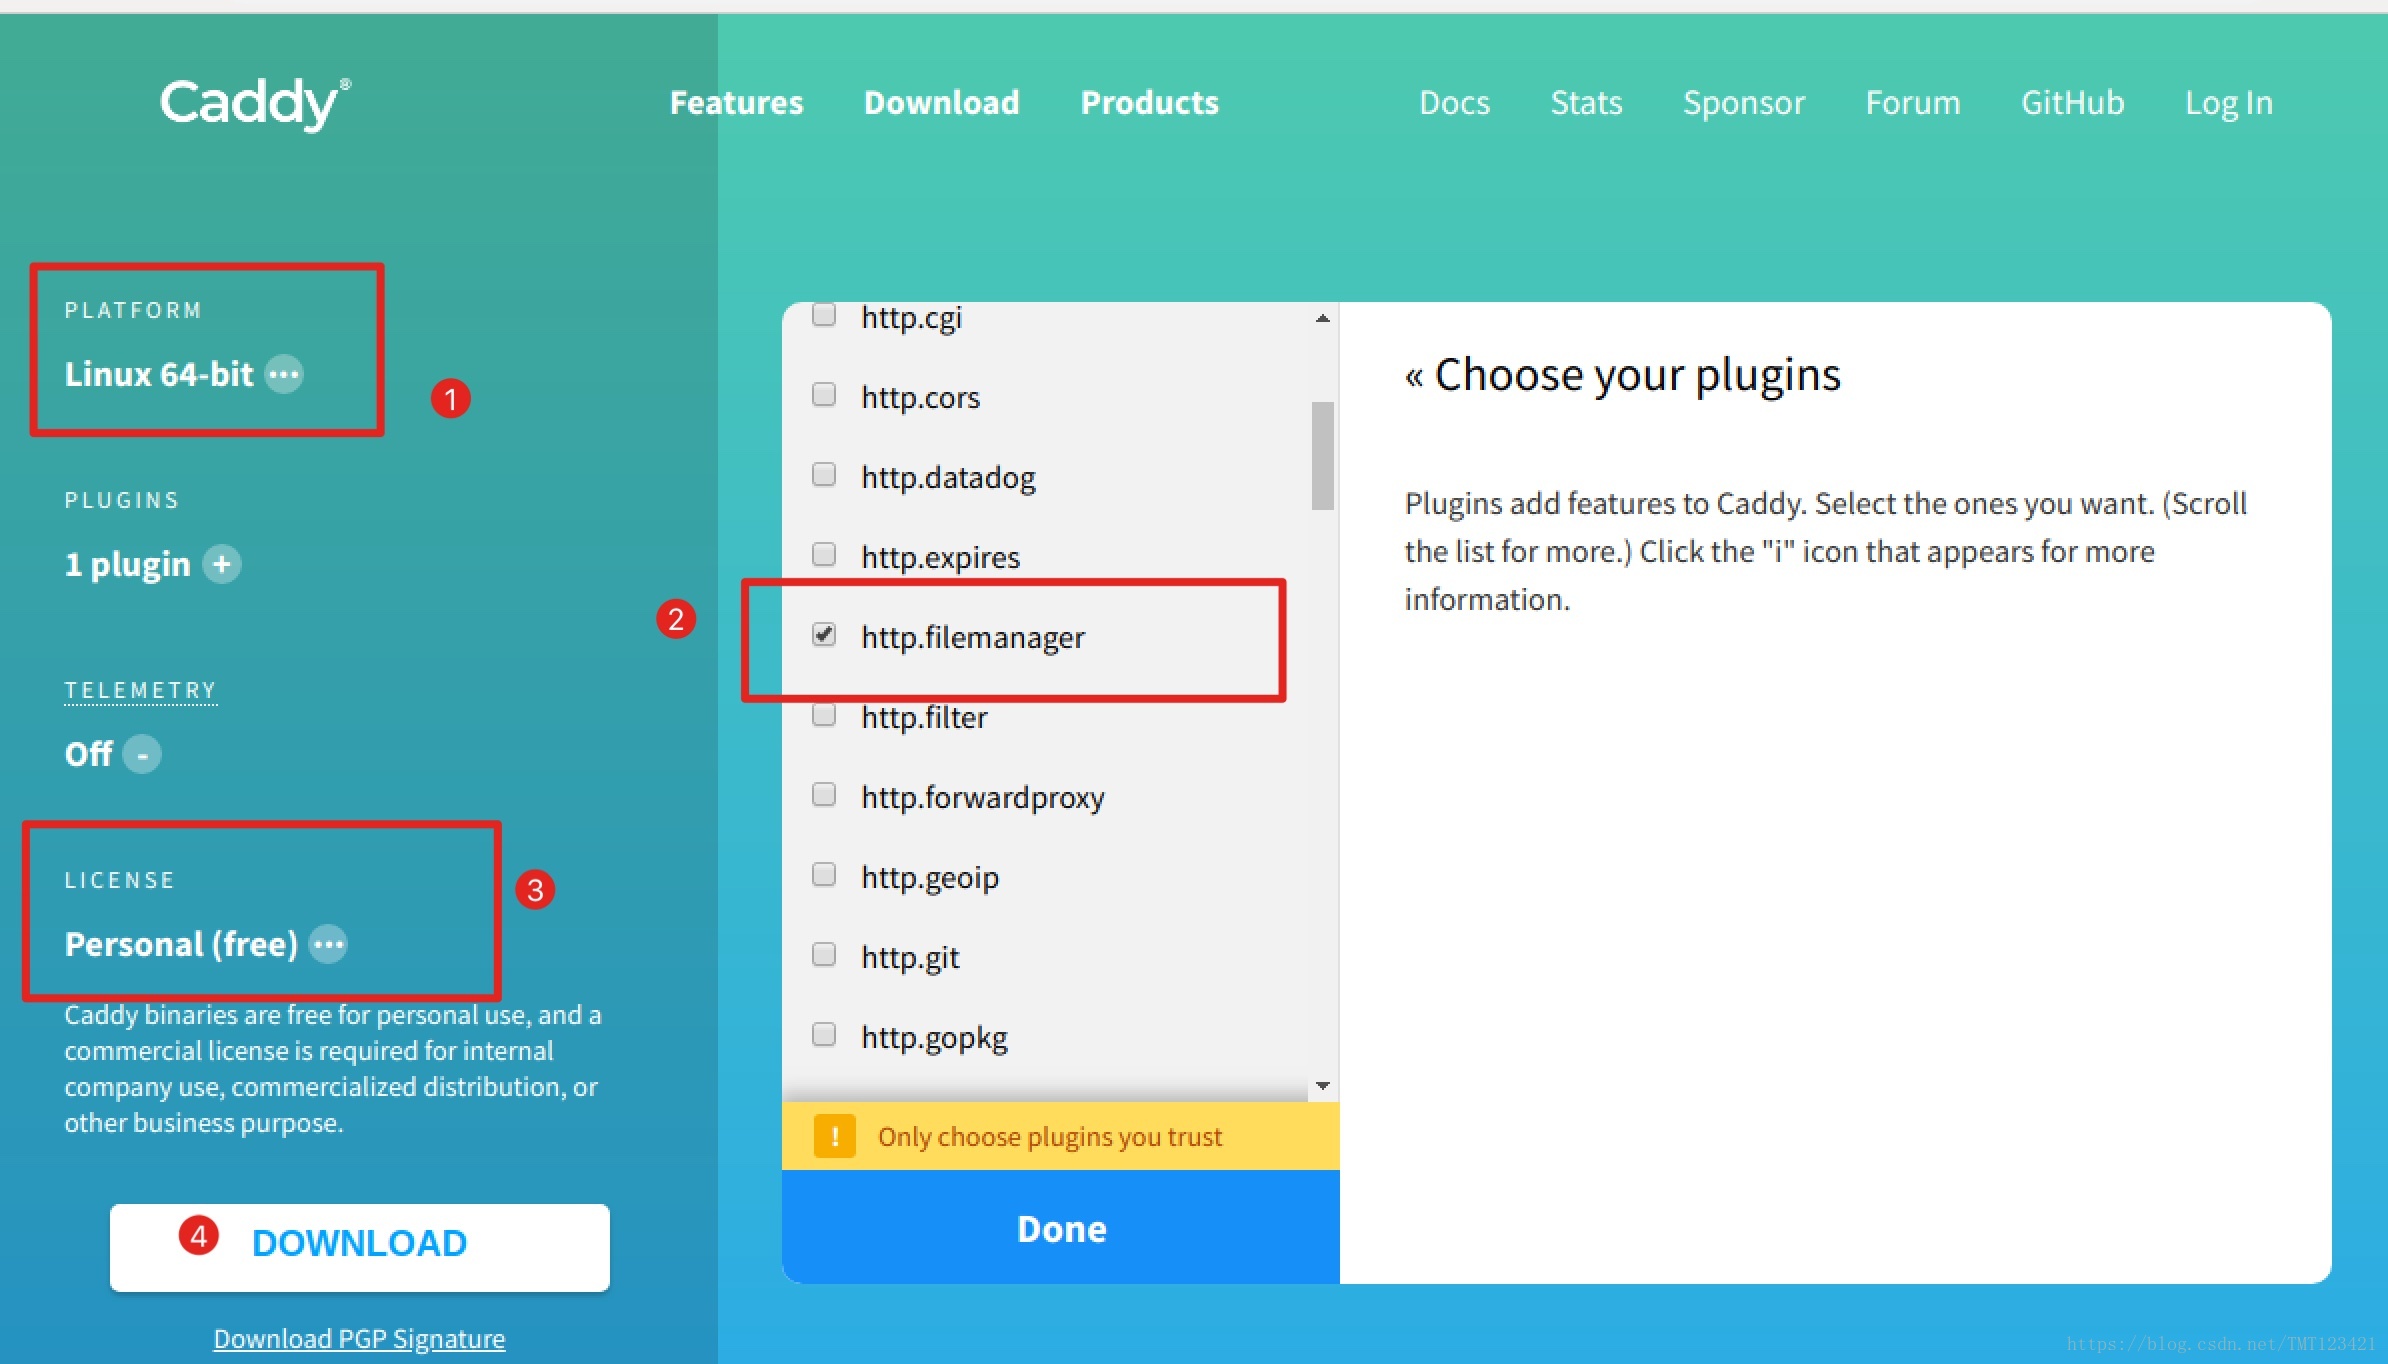
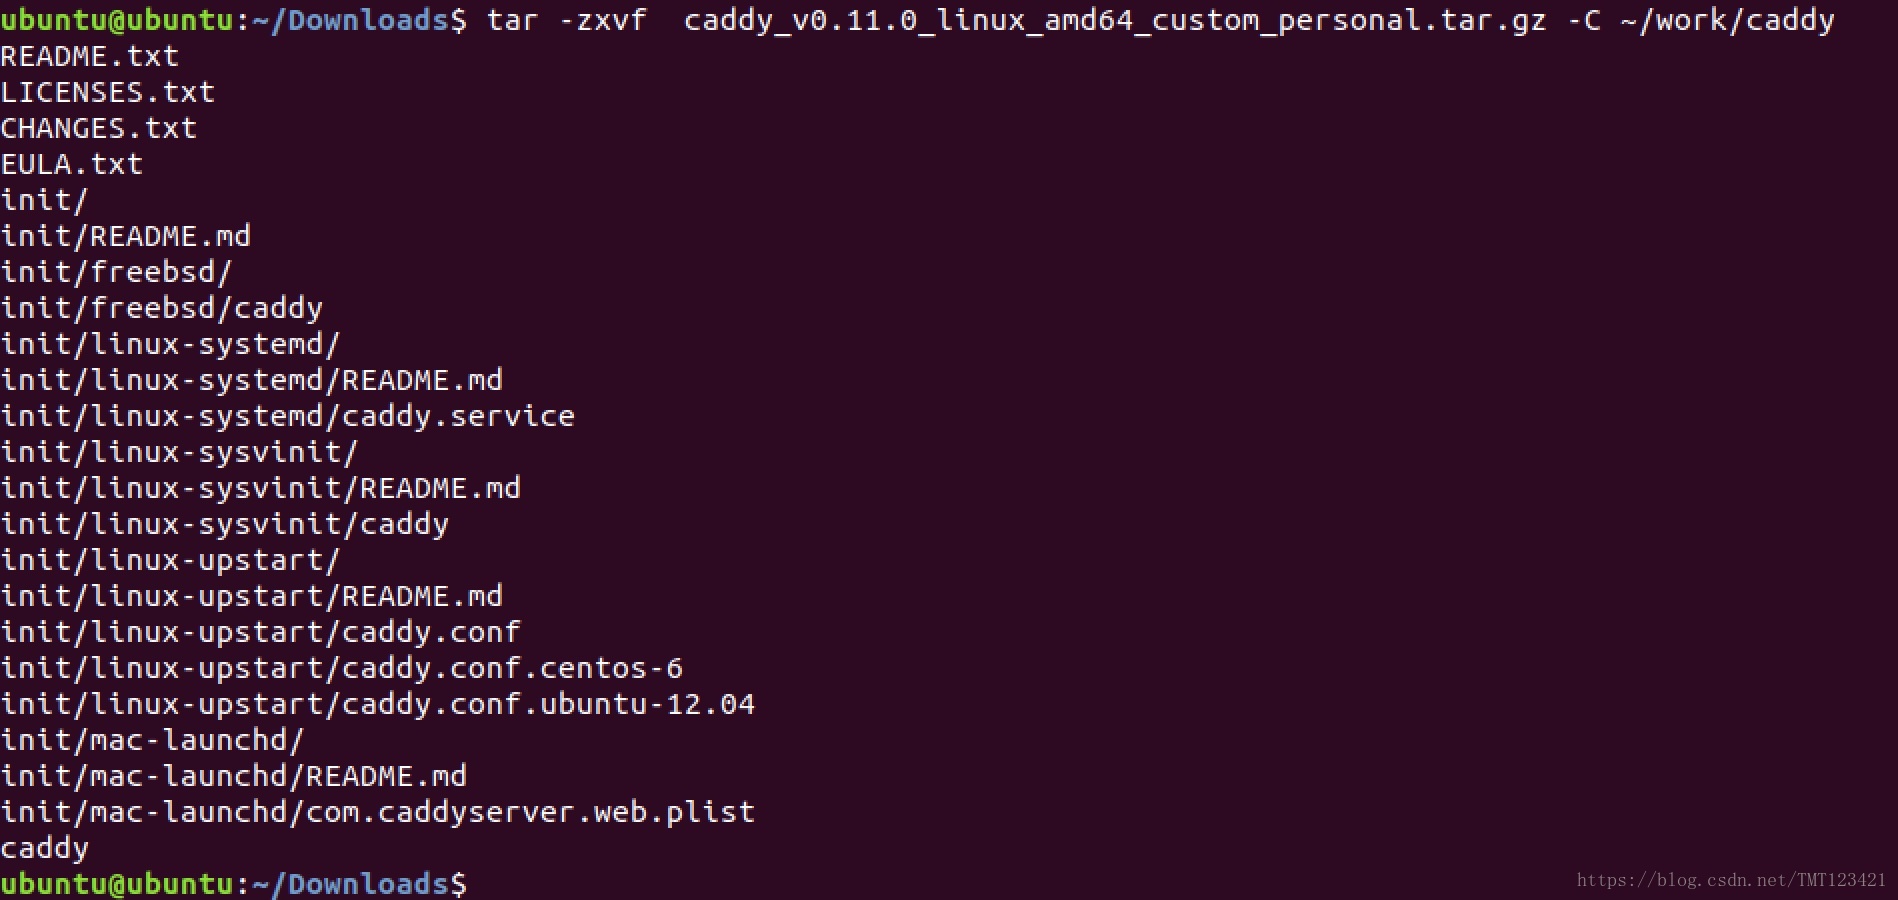
到官網下載包含fliemanager的二進位制檔案
解壓到指定目錄
保留二進位制程式caddy,其餘項移動到新建的 bak 資料夾
2、配置
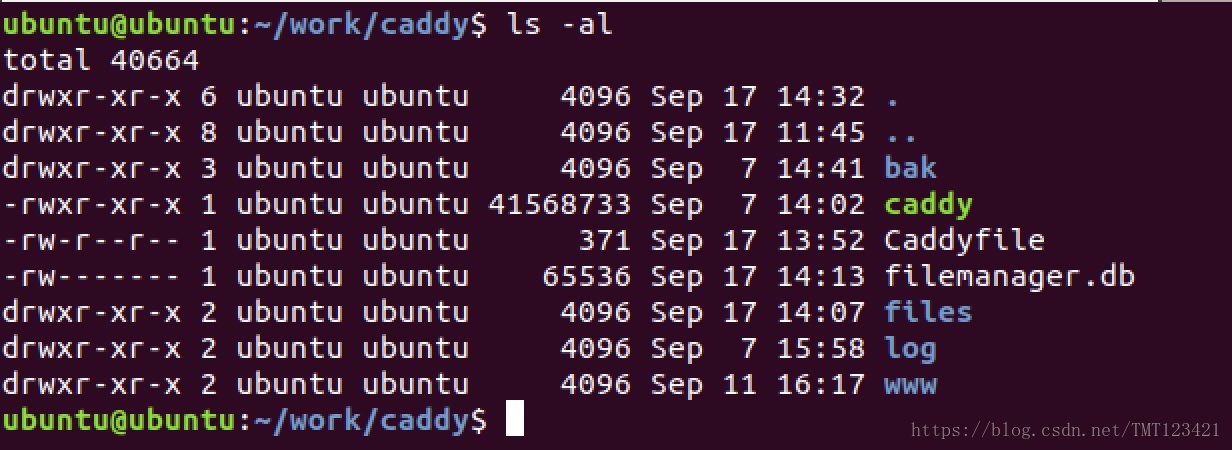
建立專用檔案和資料夾
files - 檔案伺服器根目錄;
www - Caddy的web檔案存放目錄;
log - Caddy執行日誌;
filemanager.db - 儲存設定的資料庫的路徑;
Caddyfile - Caddy配置檔案;
caddy配置檔案簡介
# 基本格式如下: mysite.com { root /www/mysite.com gzip log ../access.log } mysite2.com { root /www/sub.mysite.com gzip log ../access.log } localhost:8080, https://site.com, http://mysite.com { ... }內容太多,詳見:Caddy線上文件
filemanager配置檔案詳解
filemanager [url] [scope] { database path no_auth recaptcha_key key recaptcha_secret secret alternative_recaptcha locale [en|jp|...] allow_commands [true|false] allow_edit [true|false] allow_new [true|false] allow_publish [true|false] commands cmd1 cmd2... css path }- url is the URL path where you will access File Browser. Defaults to
/. - database is the path for the database where the settings will be stored.
- no_auth disables the authentication. This should be enabled if you will use another login method (such as
basicauth). - recaptcha_key and recaptcha_secret are the Site Key and Secret Key used to enable ReCaptcha on login.
- alternative_recaptcha replaces
https://www.google.comtohttps://recaptcha.netin ReCaptcha handling and serving, especially useful in China. See gh-filebrowser#366 for details. Defaults tofalse.
The following options are mere defaults: they will only be used as the default options for new users. After creating a user, its settings should be changed through the Web UI. Although, when using
no_authoption, the following will define the user permissions.- scope is the path, relative or absolute, to the directory you want to browse in. Defaults to
./. - locale is the default language for new users.
de- Germanen- Englishes- Spanishfr- Frenchit- Italianja- Japanesepl- Polishpt- Portuguesept-br- Portuguese (Brasil)ru- Romanianzh-cn- Chinese (Simplified)zh-tw- Chinese (Traditional)
- allow_commands is the default value for allow commands option.
- allow_edit is the default value for allow edit option.
- allow_new is the default value for allow new option.
- allow_publish is the default value for allow publish option.
- commands are the default available commands.
- css is the path for a file with a custom stylesheet.
- url is the URL path where you will access File Browser. Defaults to
我的配置檔案
# cat Caddyfile

192.168.0.190:2015 {
log /home/ubuntu/work/caddy/log/caddy.log
filemanager / ./files {
    database        /home/ubuntu/work/caddy/filemanager.db
    show            /home/ubuntu/work/caddy/files
    #no_auth
    locale          zh-cn
    allow_new       true
    allow_edit      false
    allow_commands  true
    allow_publish   true
}
}
3、執行
$ ./caddy -conf Caddyfile
Activating privacy features... done.
http://192.168.0.190:2015
WARNING: File descriptor limit 1024 is too low for production servers. At least 8192 is recommended. Fix with "ulimit -n 8192".
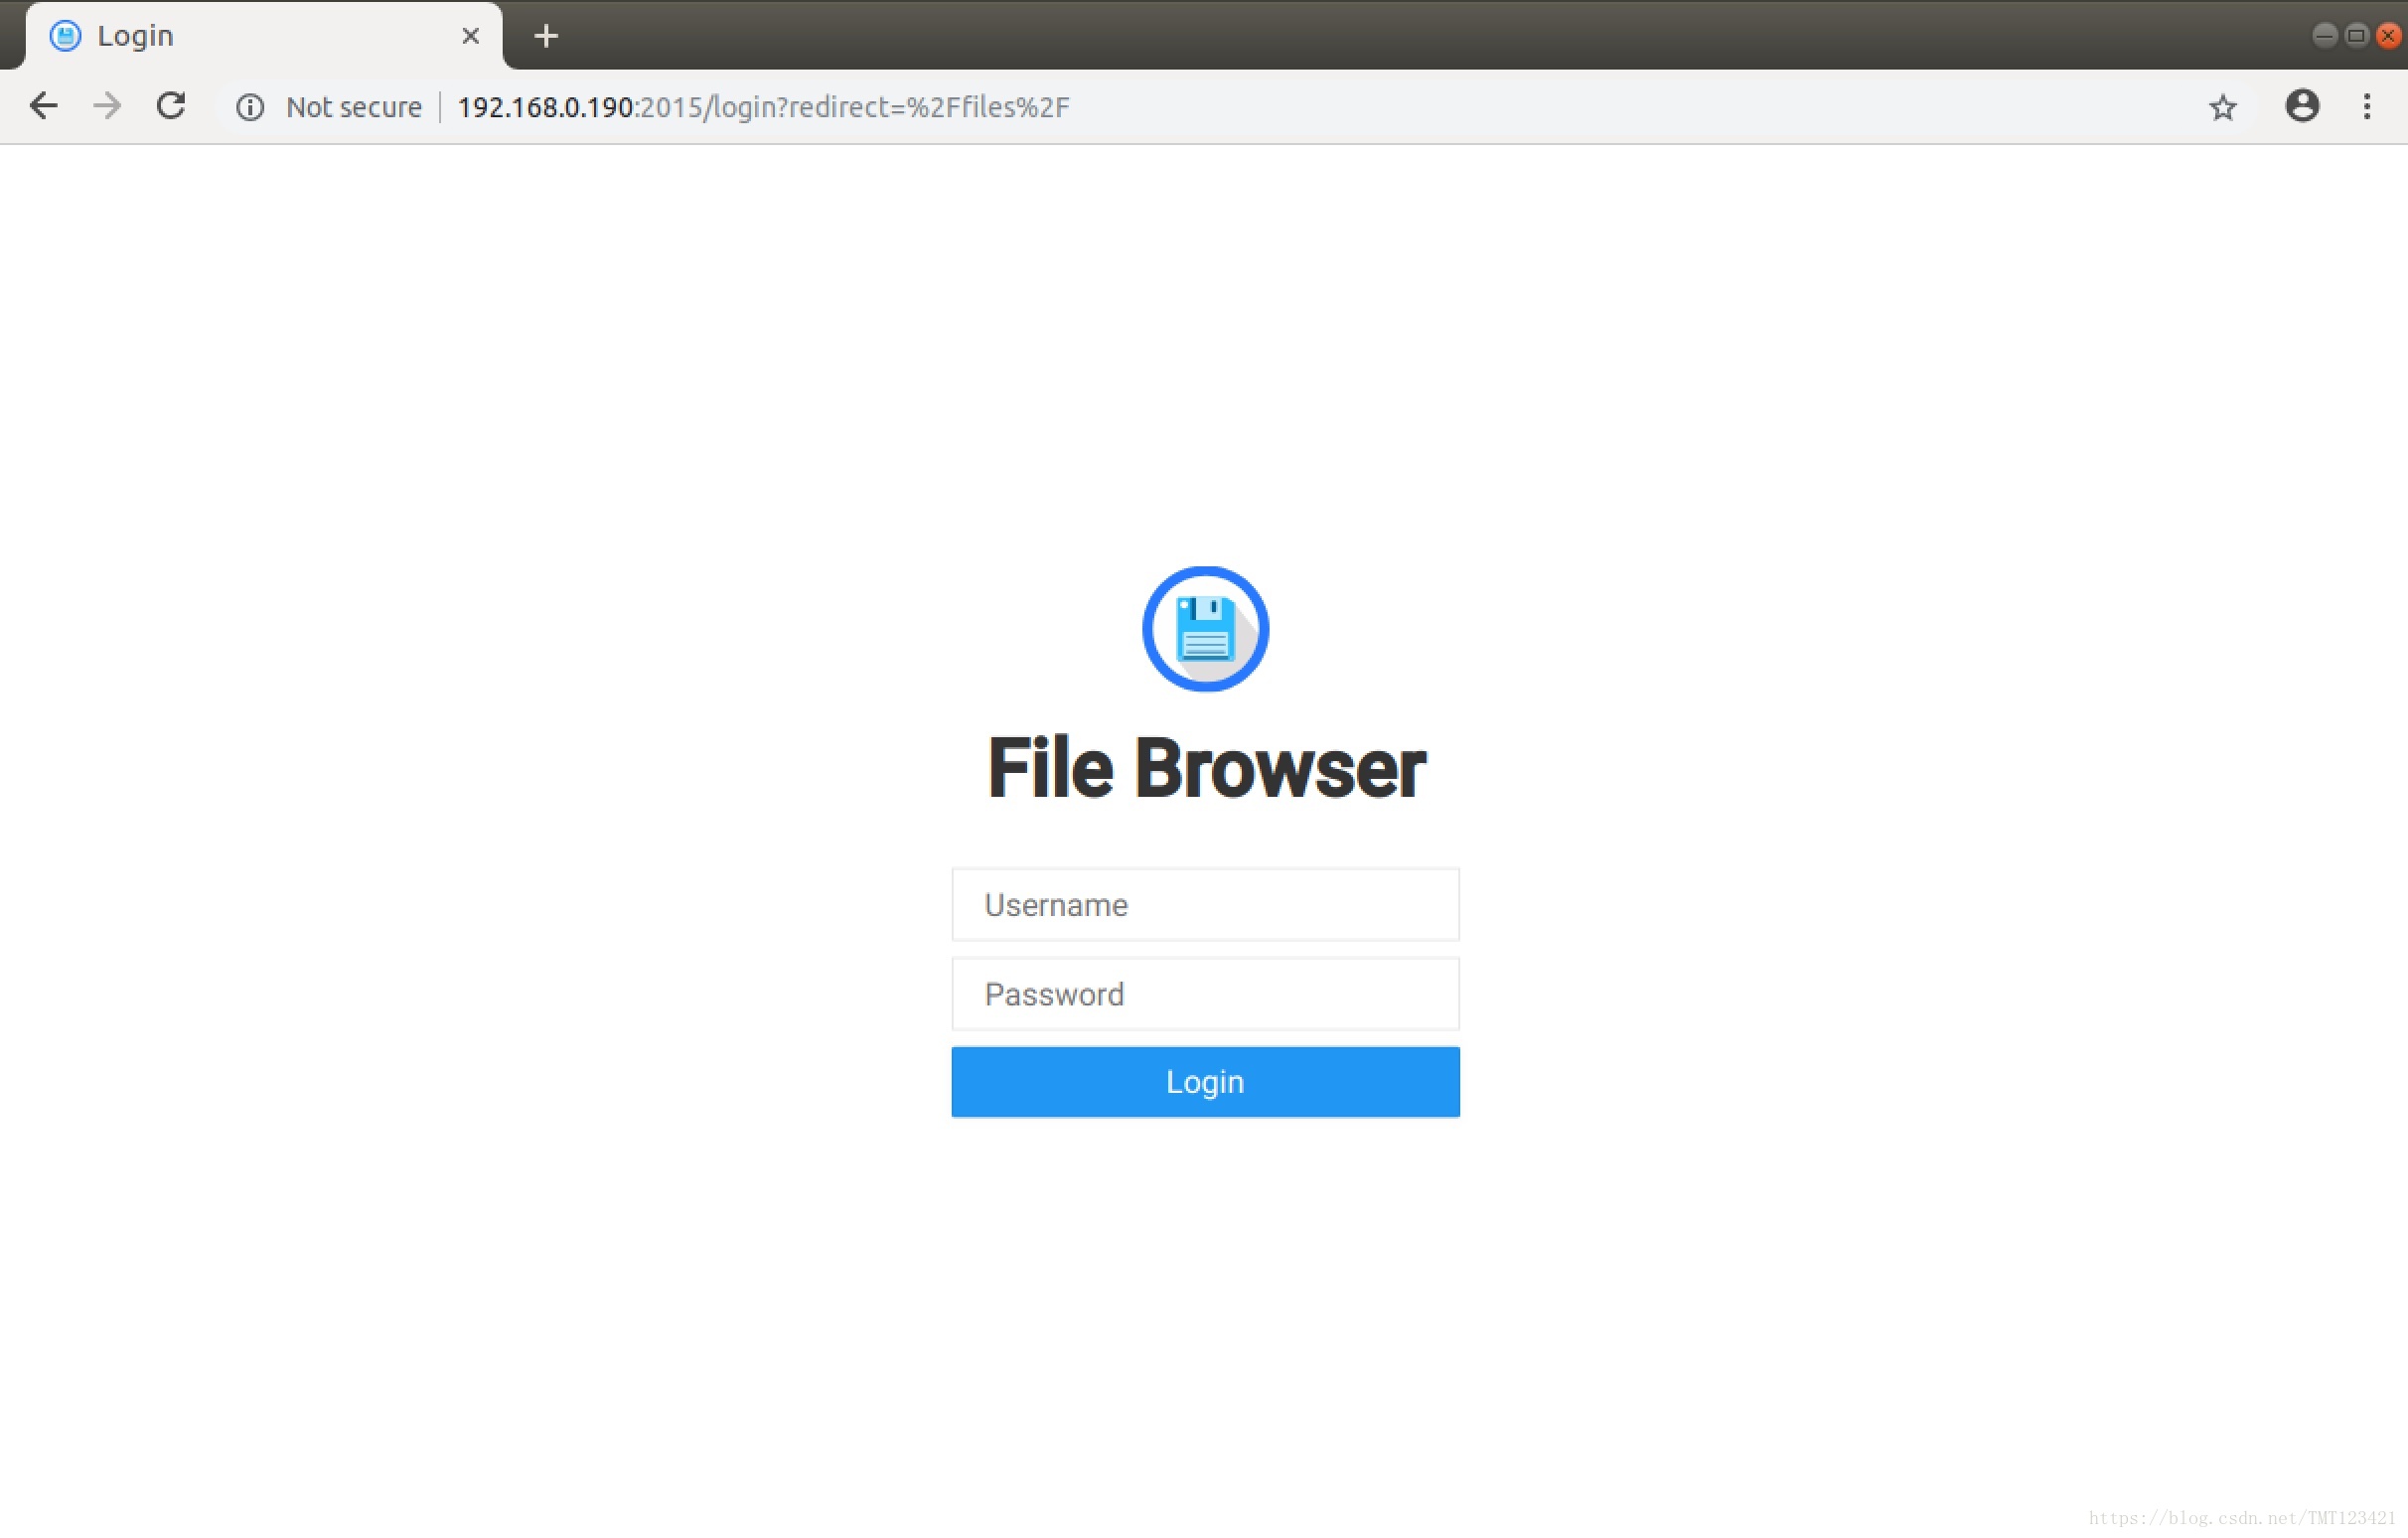
4、訪問
登陸(預設賬號:admin 預設密碼:admin)
主介面
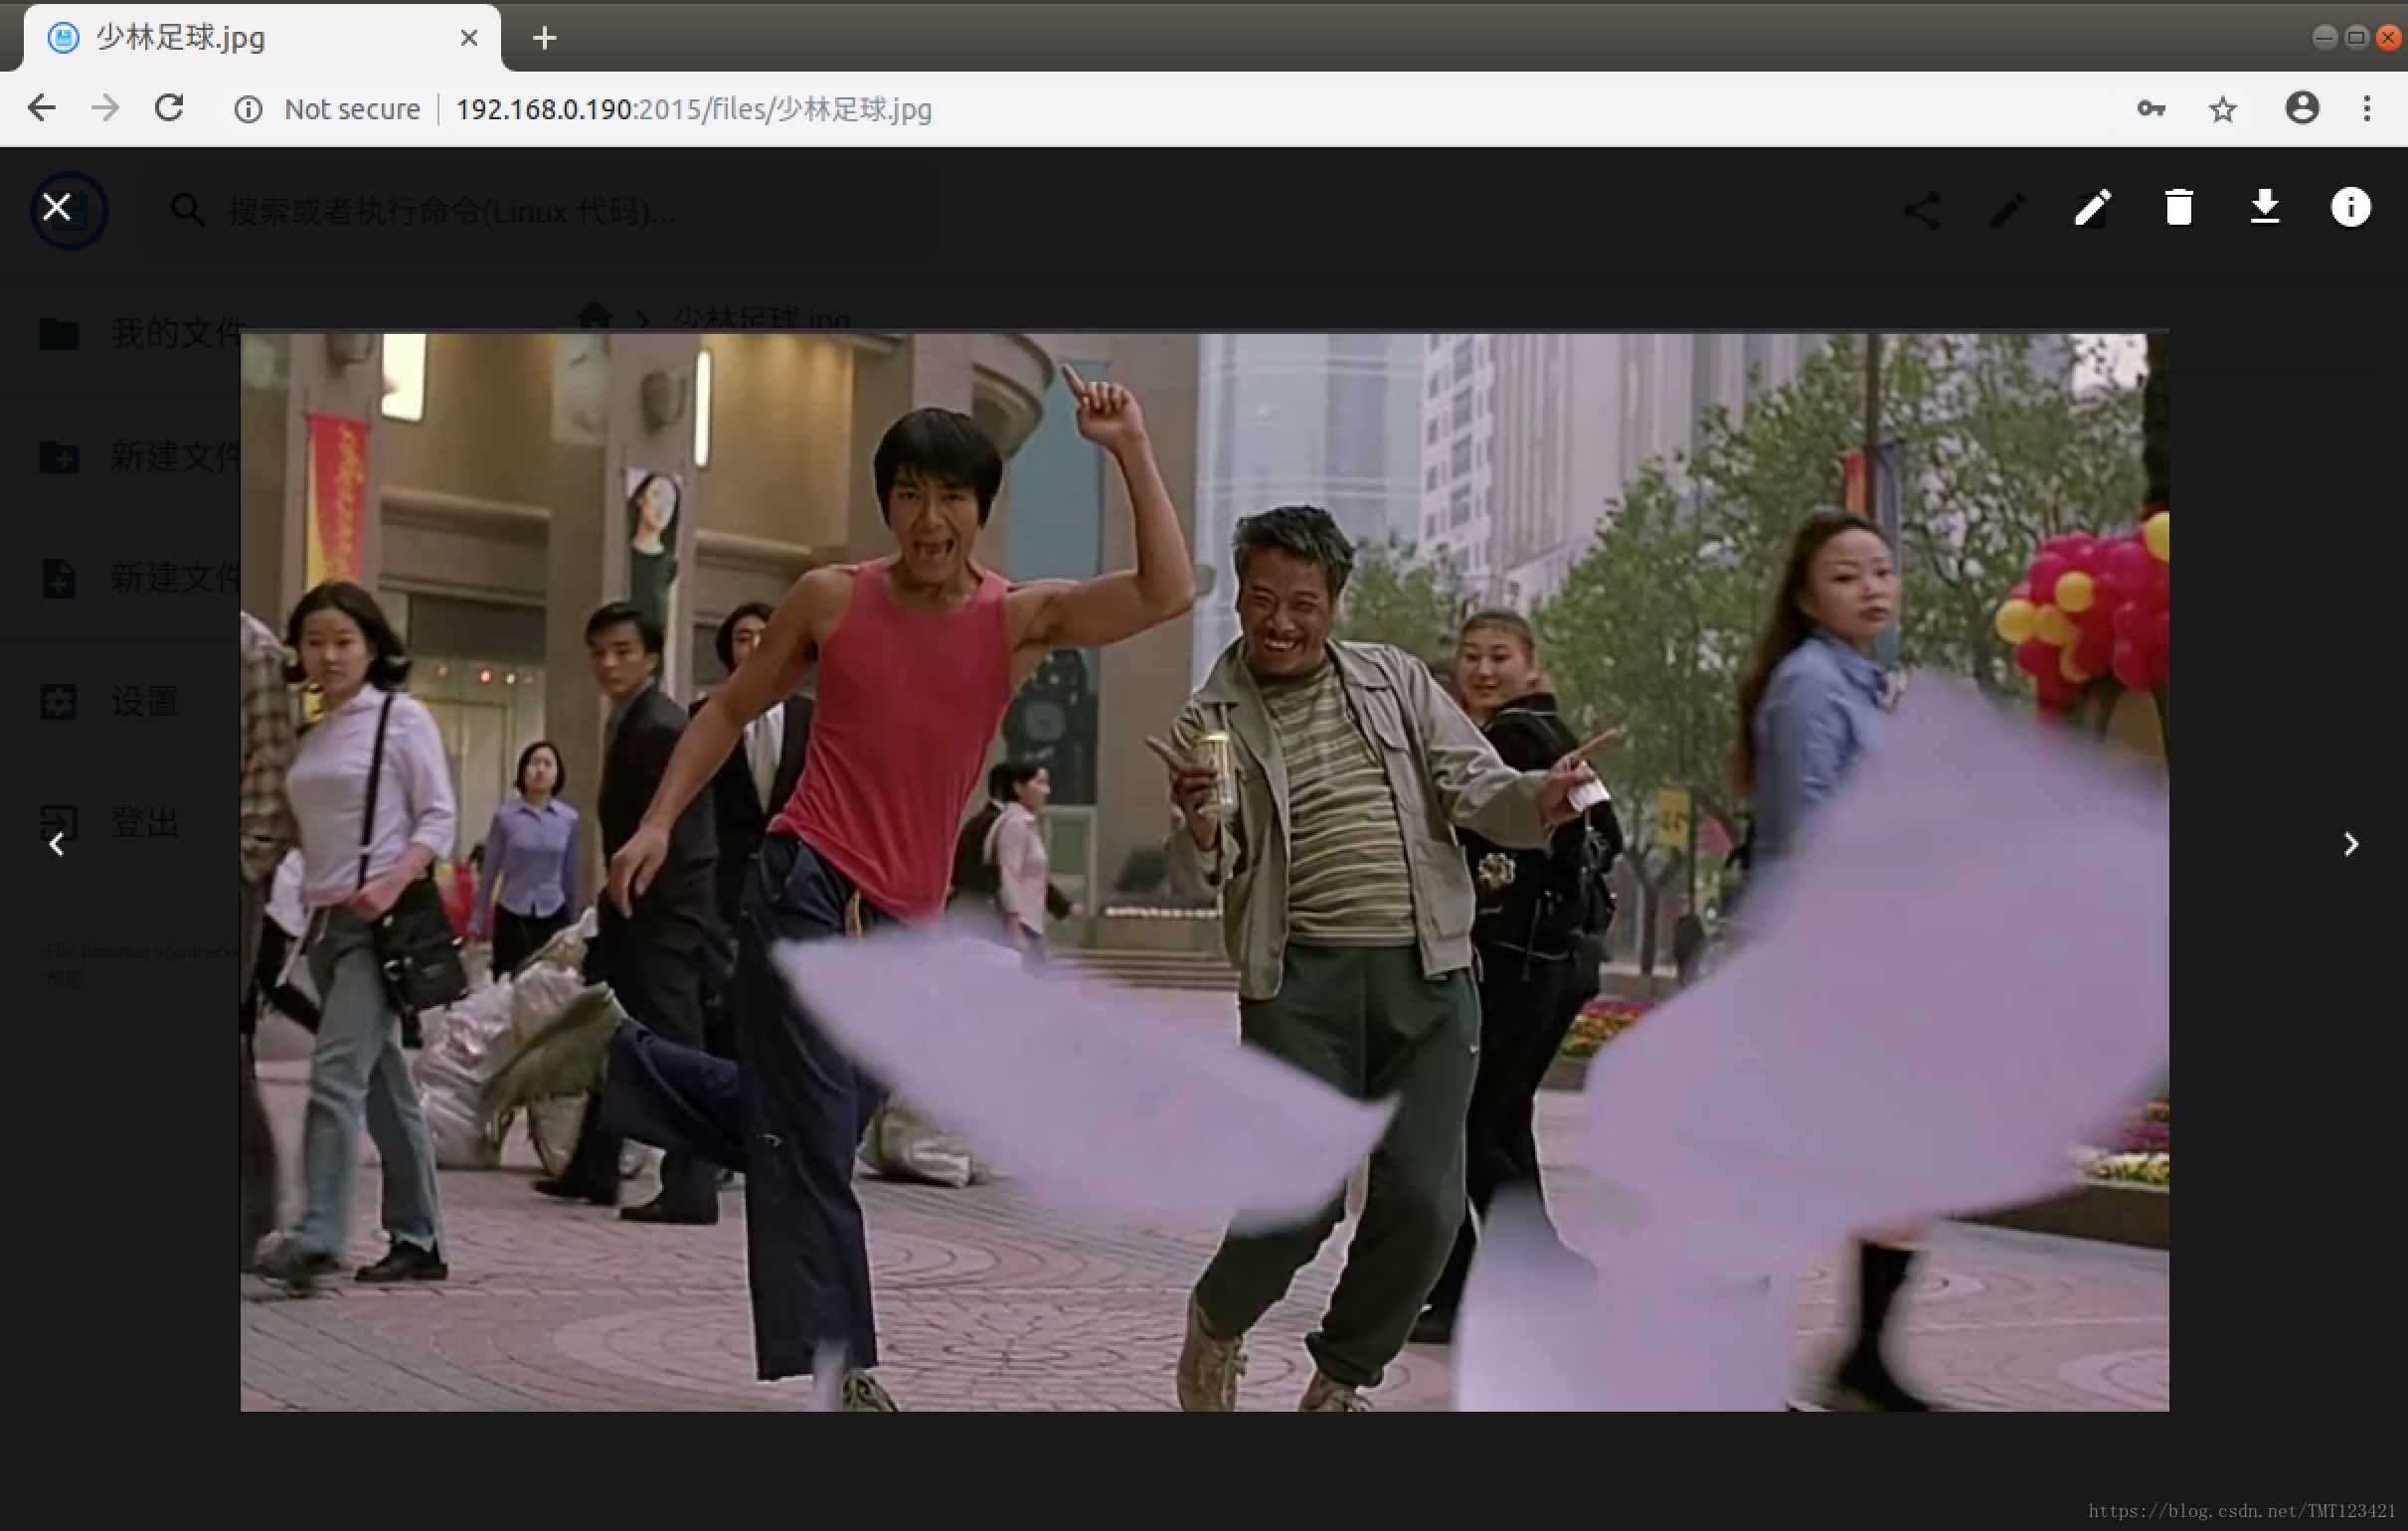
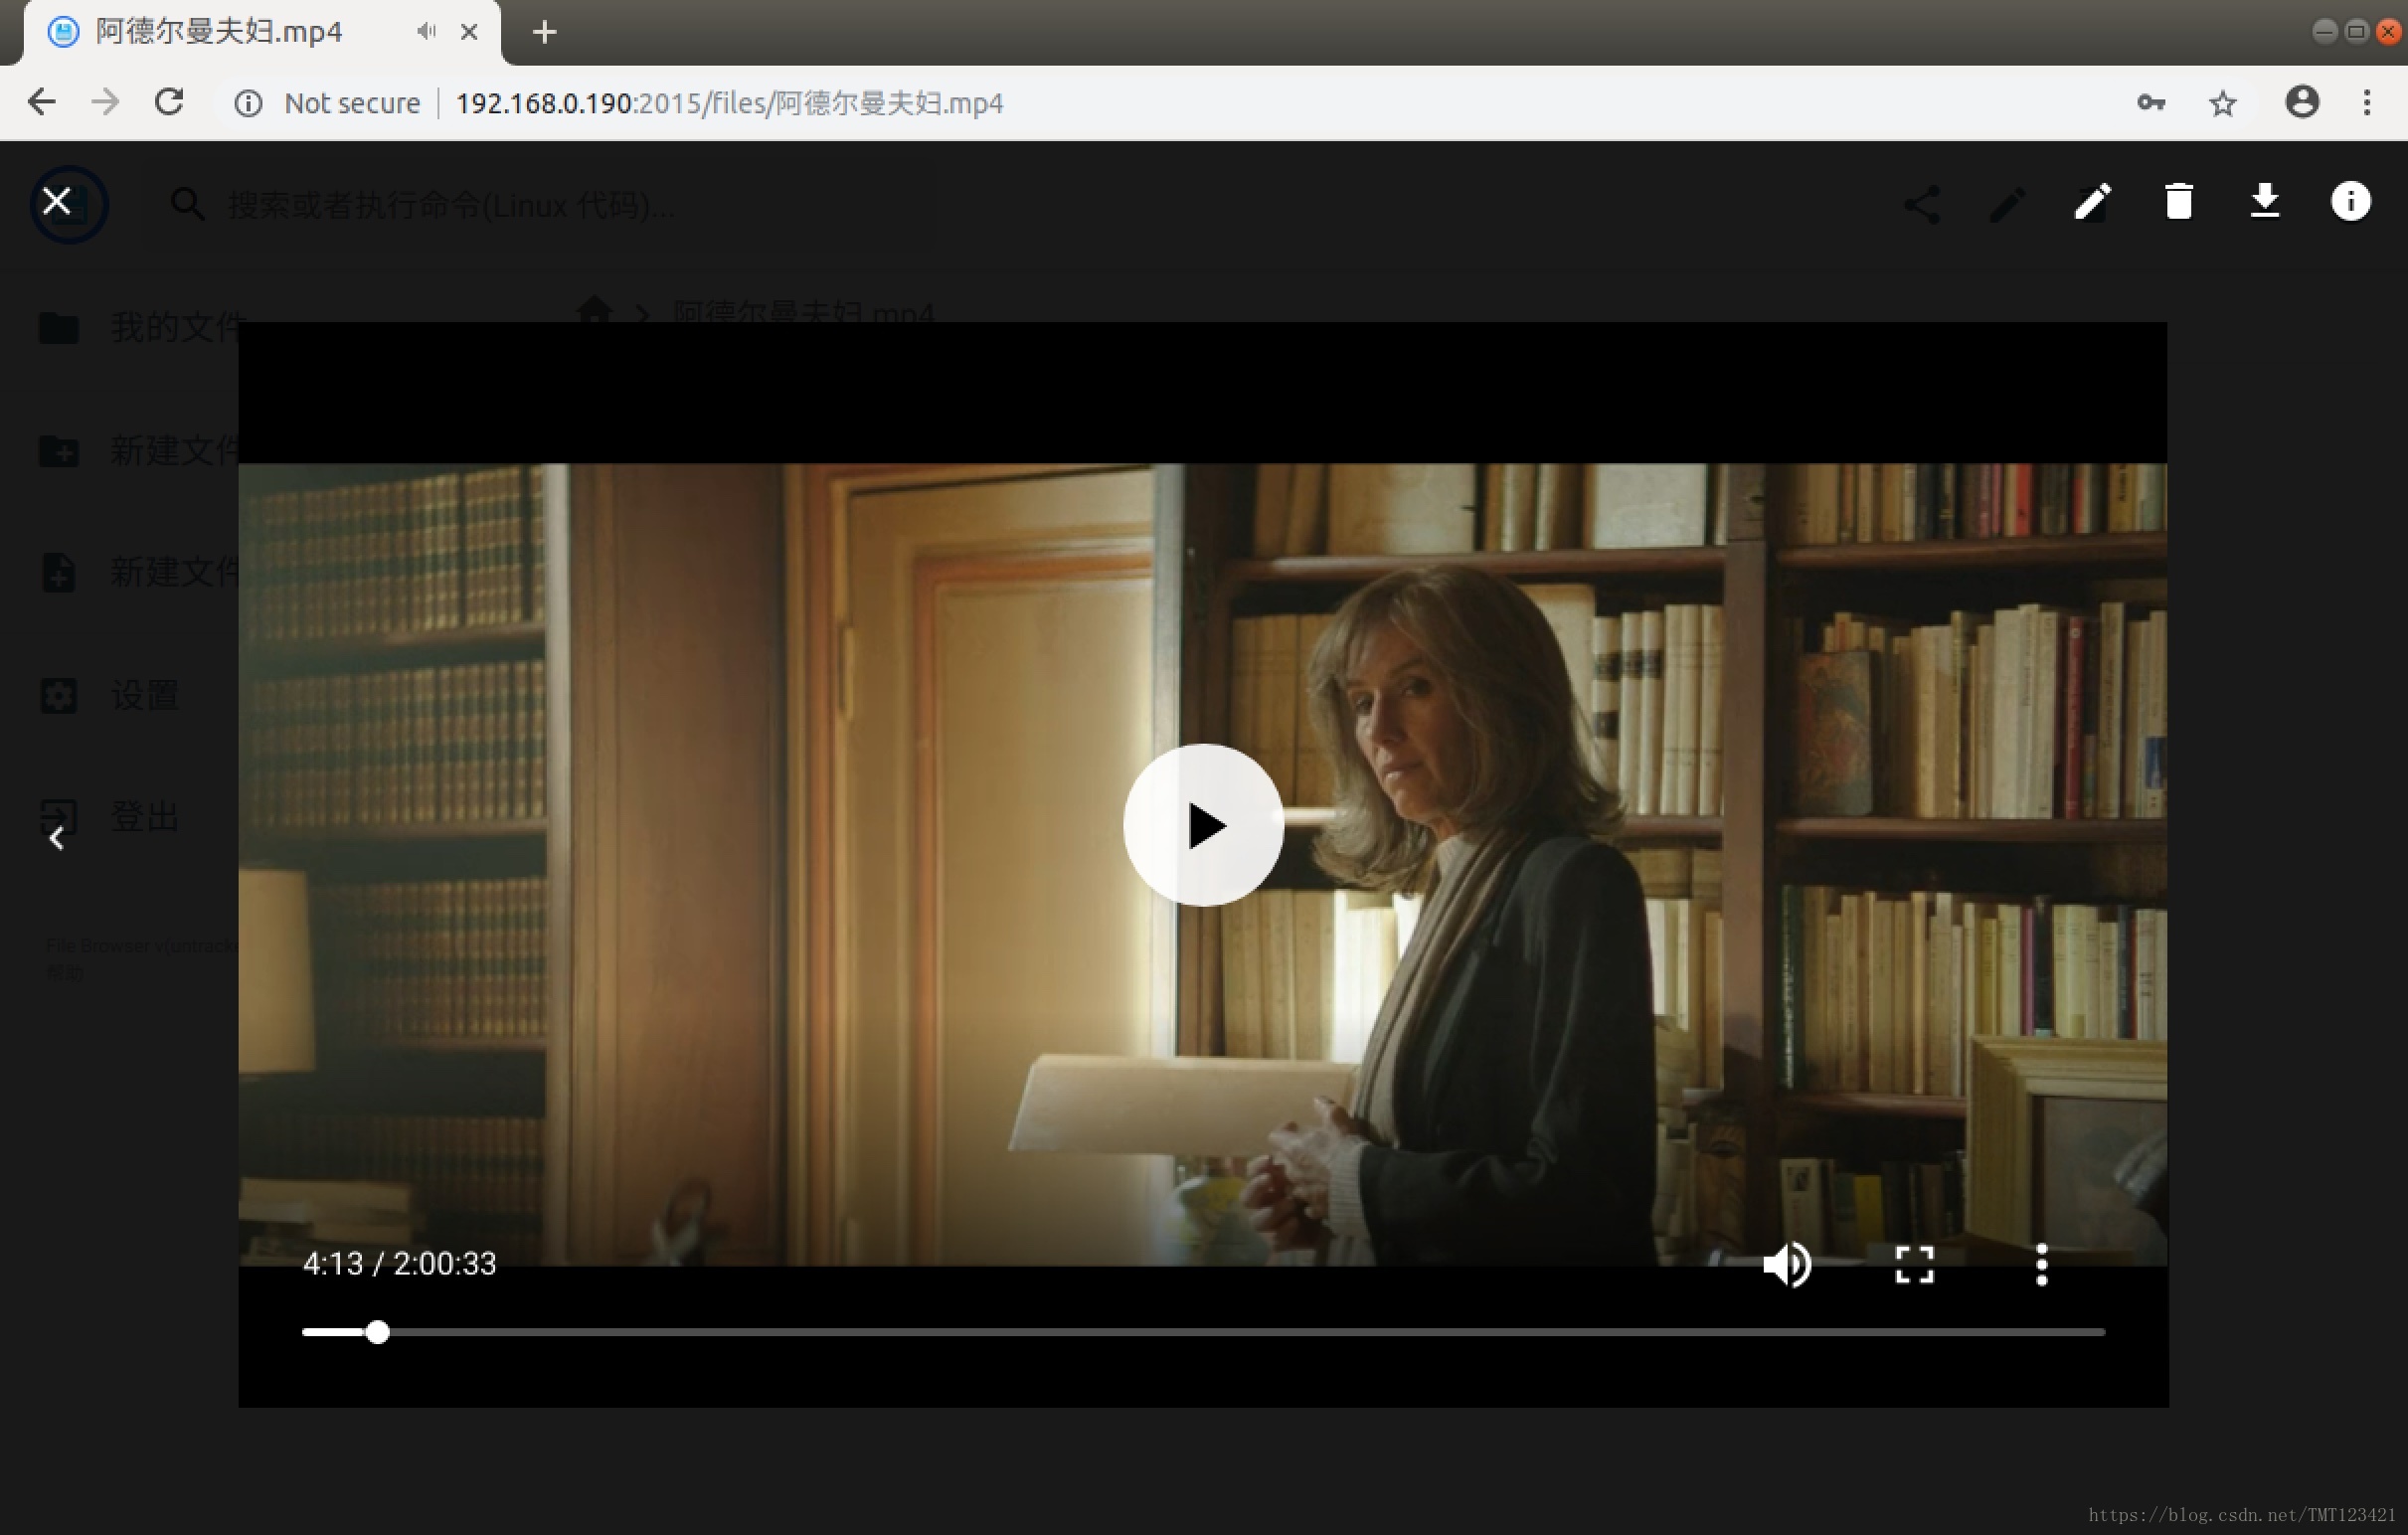
- 可以預覽圖片視訊;
- 可以執行預設命令;
- 可以通過工具欄執行上傳、下載、移動、複製、分享、刪除、重新命名、新建、檢視詳細資訊等操作;
- 可以通過設定選單進行語言設定、修改密碼、樣式設定、命令選擇、使用者管理、使用者許可權設定等操作;
- 完美適配移動裝置訪問;

—— 2018-09-17 ——