配置多個Git賬號(windows 10)
一、為什麼要配置多個Git賬號
一般情況下,我們都是一臺電腦配置一個Git賬號,使用如下命令:
git config --golbal user.name "XXX"
git config --golbal user.email "[email protected]"
本人電腦上已經配置GitHub的,在GitCoding上有另外一個git賬號,將程式碼釋出到GitCoding上報錯403 (Forbidden),因此需要配置多個git賬號。
二、配置多個git賬號
步驟一、移除Git全域性配置
1.右鍵【Git Bash Here】開啟Git命令列
2.輸入命令:git config --list檢視全域性配置,如下圖:
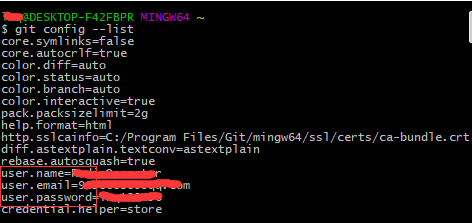
3.使用如下命令移除name、email、password等配置
# 移除全域性配置賬戶
git config --global --unset user.name
#檢視全域性使用者名稱
git config --global user.name
# 移除全域性配置郵箱
git config --global --unset user.email
# 檢視全域性郵箱
git config --global user.email
# 移除全域性密碼
git config --global --unset user.password
# 檢視全域性密碼
git config --global user.password
步驟二、生成並在GitHub上部署SSH KEY
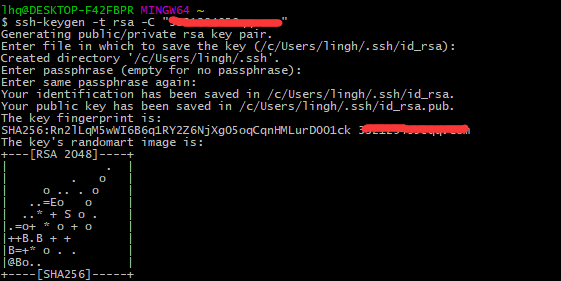
1.右鍵【Git Bash Here】進入【Git Bash】,輸入以下命令生成user1的SSH KEY:
ssh-keygen -t rsa -C "[email protected]"
如下截圖:
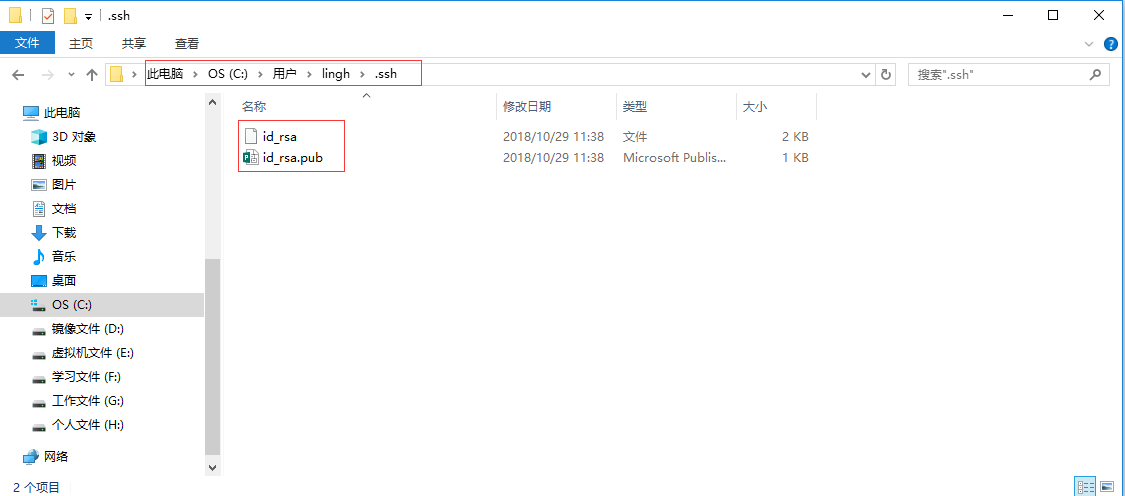
2.進入當前使用者的.ssh目錄檢視,生成id_rsa私鑰檔案和id_rsa.pub公鑰檔案,如下截圖:
3.使用者user1登入GitHub,進入【Settings】-【SSH and GPG keys】,如下截圖:
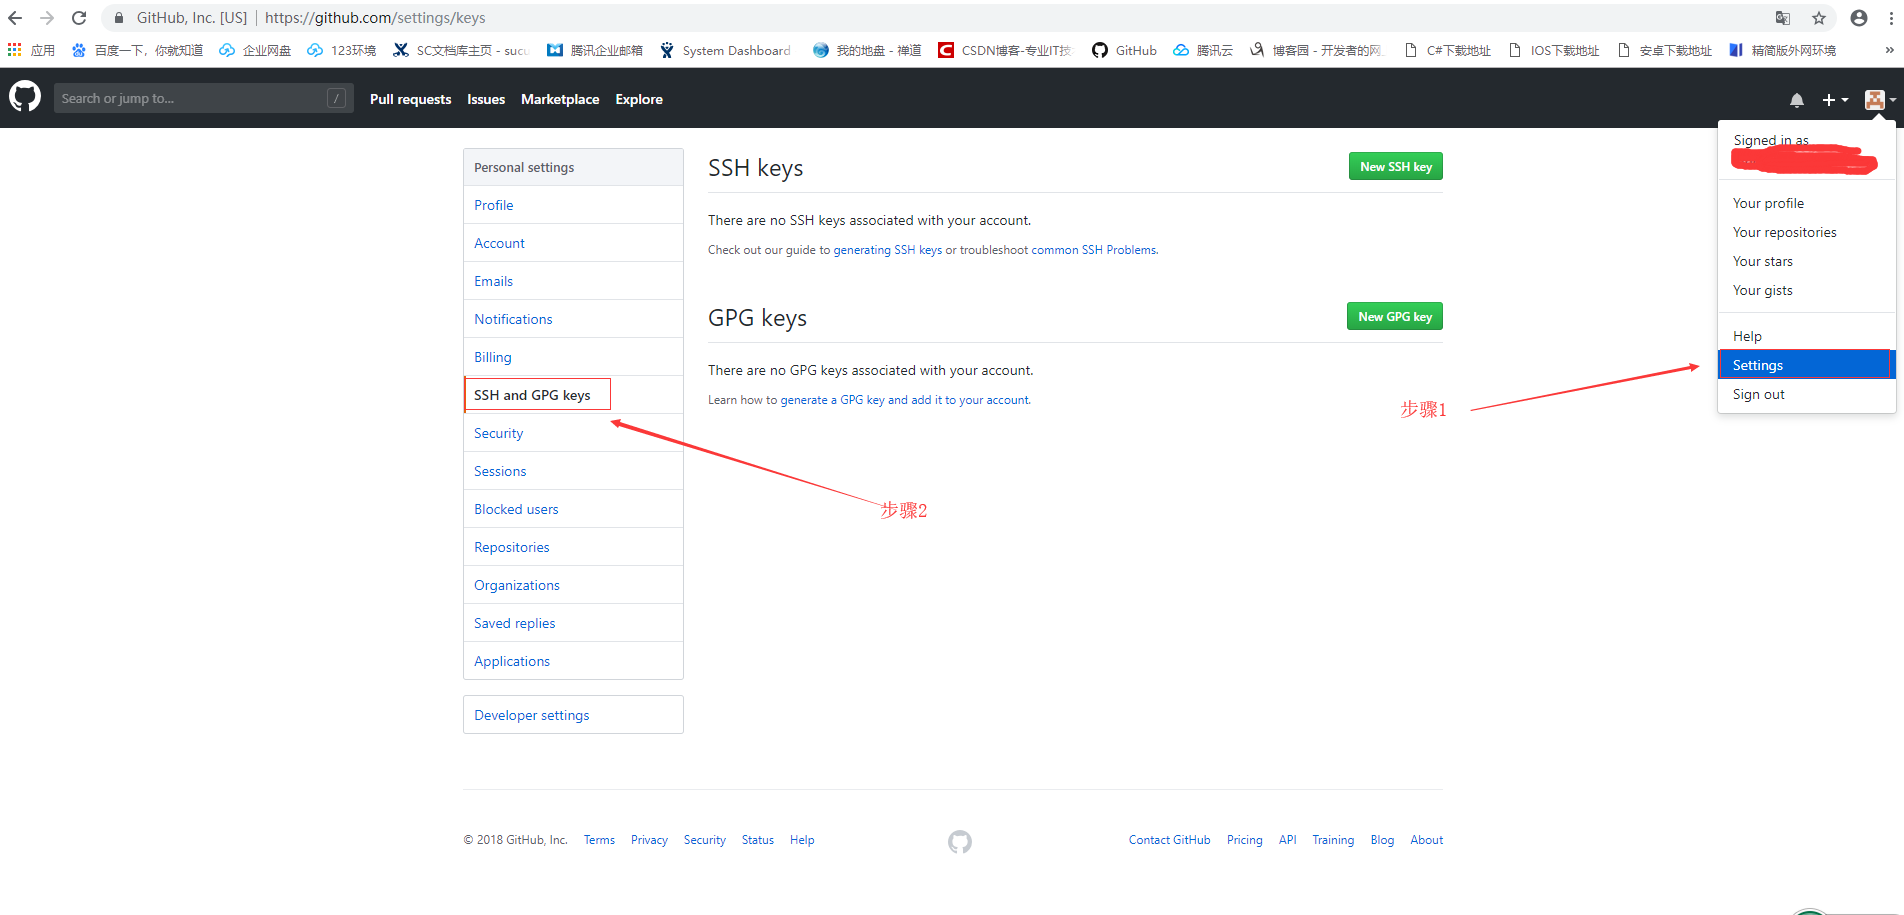
4.點選【New SSH key】按鈕,進入新建SSH key頁面,進入如下圖設定:
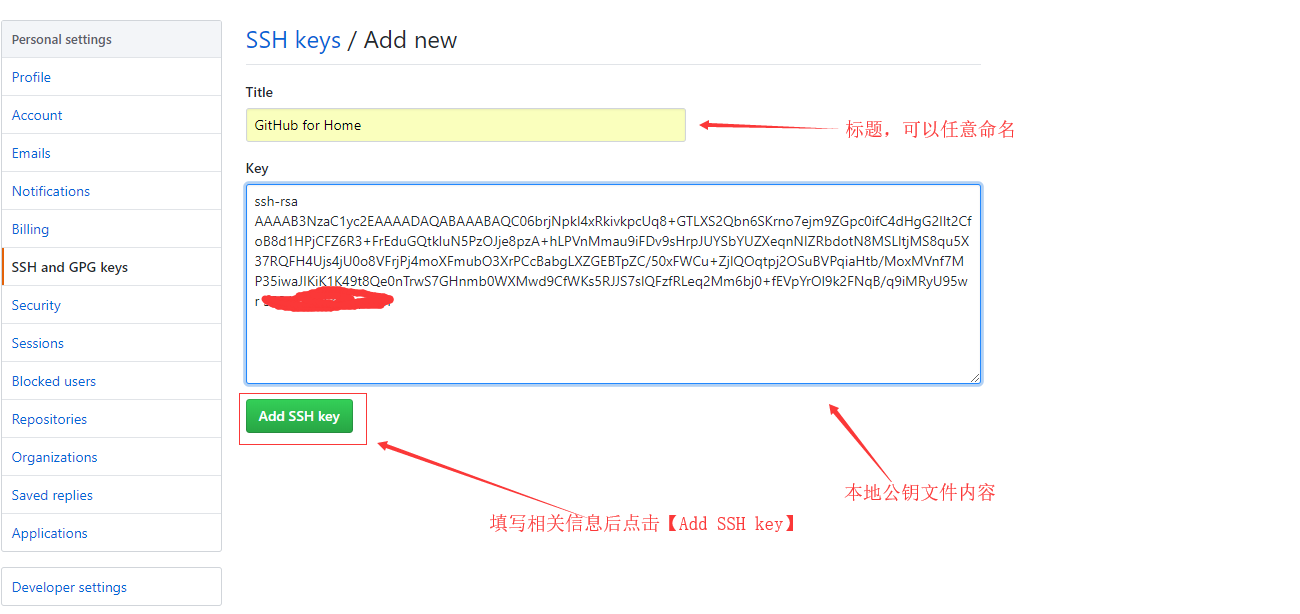
4.新增完成後在【Git Bash】中輸入以下命令測試該使用者的SSH金鑰是否生效:
ssh -T

步驟三、生成並在GitCoding上部署SSH KEY
1.右鍵【Git Bash Here】進入【Git Bash】,輸入以下命令生成user2的SSH KEY:
ssh-keygen -t rsa -f ~/.ssh/id_rsa2 -C "[email protected]"
如下截圖:
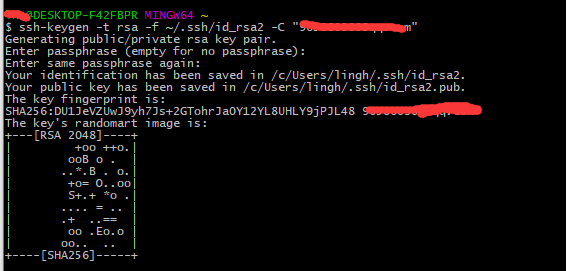
2.進入當前使用者的.ssh目錄檢視,生成id_rsa私鑰檔案和id_rsa.pub公鑰檔案,如下截圖:
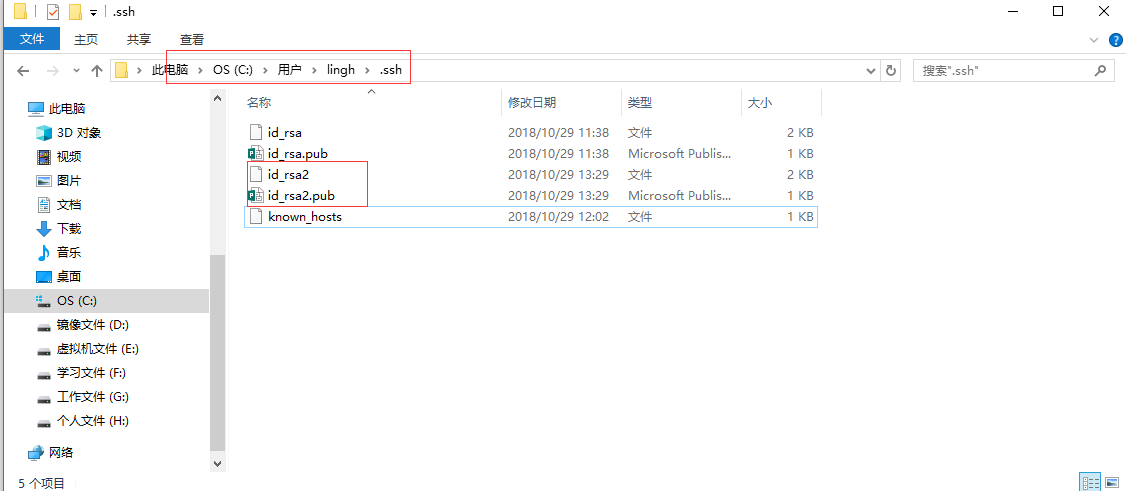
3.使用者user2登入GitCoding,進入【個人設定】-【SSH公鑰】,如下截圖:
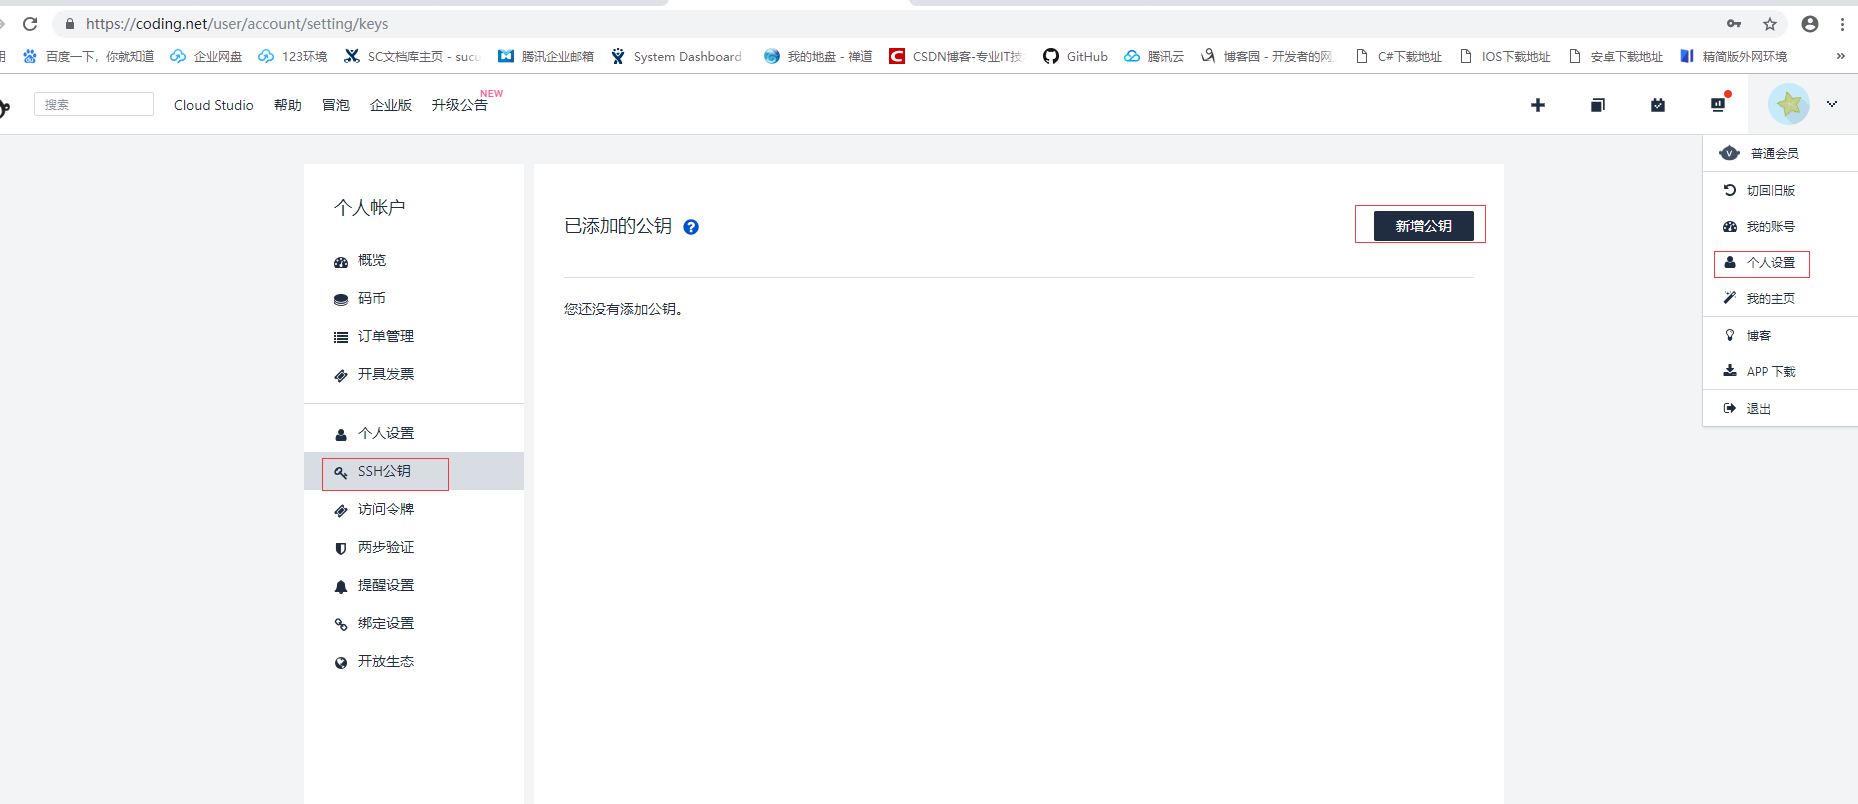
4.點選【新增公鑰】按鈕,進入新建SSH key頁面,進入如下圖設定:
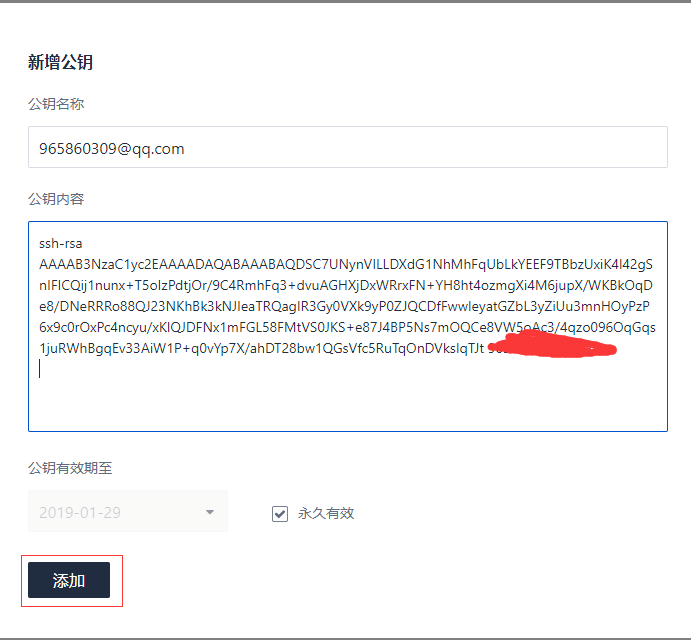
5.新增完成後在【Git Bash】中輸入以下命令測試該使用者的SSH金鑰是否生效:
ssh -T [email protected] -i ~/.ssh/id_rsa2

也可以使用ssh agent新增金鑰後進行測試。因為系統預設只讀取id_rsa,為了讓ssh識別新的私鑰,可以使用ssh-agent手動新增私鑰:
ssh-agent bash
ssh-add ~/.ssh/id_rsa2
注:該方法僅限當前視窗有效,開啟新的視窗則ssh連線失敗。
步驟四、配置config檔案
1.在.ssh目錄下建立一個config文字檔案,每個賬號配置一個Host節點。主要配置項說明:
Host      主機別名
HostName  伺服器真實地址
IdentityFile  私鑰檔案路徑
PreferredAuthentications  認證方式
User  使用者名稱
配置檔案內容:
# 配置user1
Host user1.github.com
HostName github.com
IdentityFile C:\\Users\\lingh\\.ssh\\id_rsa
PreferredAuthentications publickey
User user1

# 配置user2
Host user2.github.com
HostName github.com
IdentityFile C:\\Users\\lingh\\.ssh\\id_rsa2
PreferredAuthentications publickey
User user2
2.終端測試SSH Key是否生效
ssh -T [email protected]
ssh -T [email protected]
三、配置使用者名稱和郵箱
為各倉庫單獨配置使用者名稱和郵箱
git config user.name "user1"
git config user.email "[email protected]"
如果原先使用HTTPS通訊,則需要修改遠端倉庫地址
git remote rm origin
git remote add origin [email protected]:xxx/xxxxx.git
