
使用 exlipse搭建sprngboot專案(1 hello world)
1 eclipe安裝sts外掛
(當前使用的eclipse版本 version=4.7.3
)
help -> Eclipse Marketplace

等待外掛安裝完成,
2 新建專案

next之後,填寫專案名稱,如果是第一次構建專案,可以按照預設的來,然後看下構建出來的專案結構

然後next ,選擇所需的支援,這裡只選擇web, 由於是通過maven下載的,選得越多,下載時間越長,可以抽個空閒時間,下載

然後選擇finish即可 ,等待相關jar包的下載
構建完成的專案結構如下

構建出來的專案有3個檔案時比較重要的, 對應上圖的箭頭指示部分
其中 pom.xml是maven專案做版本管理的,需要什麼jar包,直接在裡面新增
按照上面步驟構建的專案,內容如下:
<?xml version="1.0" encoding="UTF-8"?>
<project xmlns="http://maven.apache.org/POM/4.0.0" xmlns:xsi="http://www.w3.org/2001/XMLSchema-instance"
	xsi:schemaLocation="http://maven.apache.org/POM/4.0.0 http://maven.apache.org/xsd/maven-4.0.0.xsd">
	<modelVersion>4.0.0</modelVersion>

	<groupId>com.example</groupId>
	<artifactId>demo</artifactId>
	<version>0.0.1-SNAPSHOT</version>
	<packaging>jar</packaging>

	<name>demo</name>
	<description>Demo project for Spring Boot</description>

	<parent>
		<groupId>org.springframework.boot</groupId>
		<artifactId>spring-boot-starter-parent</artifactId>
		<version>2.0.6.RELEASE</version>
		<relativePath/> <!-- lookup parent from repository -->
	</parent>

	<properties>
		<project.build.sourceEncoding>UTF-8</project.build.sourceEncoding>
		<project.reporting.outputEncoding>UTF-8</project.reporting.outputEncoding>
		<java.version>1.8</java.version>
	</properties>

	<dependencies>
		<dependency>
			<groupId>org.springframework.boot</groupId>
			<artifactId>spring-boot-starter-web</artifactId>
		</dependency>

		<dependency>
			<groupId>org.springframework.boot</groupId>
			<artifactId>spring-boot-starter-test</artifactId>
			<scope>test</scope>
		</dependency>
	</dependencies>

	<build>
		<plugins>
			<plugin>
				<groupId>org.springframework.boot</groupId>
				<artifactId>spring-boot-maven-plugin</artifactId>
			</plugin>
		</plugins>
	</build>


</project>
application.properties 是springboot 預設的配置檔案地址,可以將配置檔案寫到裡面去 ,預設為空
DemoApplication.java 是程式的入口,名稱生成的策略就是 專案名+Application ,專案名就是你在構建專案時填寫的;這個類是最重要的,
預設內容如下
package com.example.demo;

import org.springframework.boot.SpringApplication;
import org.springframework.boot.autoconfigure.SpringBootApplication;

@SpringBootApplication
public class DemoApplication {

	public static void main(String[] args) {
		SpringApplication.run(DemoApplication.class, args);
	}
}
3 啟動解析
3.1註解
首先來看下這個啟動類,只有一個註解,一個main方法,
首先裡看這個註解 @SpringBootApplication, 直接檢視其原始碼, 由於是maven專案,會自動下載原始碼,這個很方便
@Target(ElementType.TYPE)
@Retention(RetentionPolicy.RUNTIME)
@Documented
@Inherited
@SpringBootConfiguration
@EnableAutoConfiguration
@ComponentScan(excludeFilters = {
		@Filter(type = FilterType.CUSTOM, classes = TypeExcludeFilter.class),
		@Filter(type = FilterType.CUSTOM, classes = AutoConfigurationExcludeFilter.class) })
public @interface SpringBootApplication {

...
}
可以看到這個註解被其它幾個註解所修飾,相當於是 springboot使用這個註解,達到同時使用其它幾個註解
其中,上面4個註解,是java.lang.annotation 包下的,是所有註解都要有的

詳細一點的說明(均來自java API)
public @interface Documented
指示某一型別的註釋將通過 javadoc 和類似的預設工具進行文件化。應使用此型別來註釋這些型別的宣告:其註釋會影響由其客戶端註釋的元素的使用。如果型別宣告是用 Documented 來註釋的,則其註釋將成為註釋元素的公共 API 的一部分。
public @interface Inherited
指示註釋型別被自動繼承。如果在註釋型別宣告中存在 Inherited 元註釋,並且使用者在某一類宣告中查詢該註釋型別,同時該類宣告中沒有此型別的註釋,則將在該類的超類中自動查詢該註釋型別。此過程會重複進行,直到找到此型別的註釋或到達了該類層次結構的頂層 (Object) 為止。如果沒有超類具有該型別的註釋,則查詢將指示當前類沒有這樣的註釋。
注意,如果使用註釋型別註釋類以外的任何事物,此元註釋型別都是無效的。還要注意,此元註釋僅促成從超類繼承註釋;對已實現介面的註釋無效。
public @interface Retention
指示註釋型別的註釋要保留多久。如果註釋型別宣告中不存在 Retention 註釋,則保留策略預設為 RetentionPolicy.CLASS。
只有元註釋型別直接用於註釋時,Target 元註釋才有效。如果元註釋型別用作另一種註釋型別的成員,則無效。
public @interface Target
指示註釋型別所適用的程式元素的種類。如果註釋型別宣告中不存在 Target 元註釋,則宣告的型別可以用在任一程式元素上。如果存在這樣的元註釋,則編譯器強制實施指定的使用限制。 例如,此元註釋指示該宣告型別是其自身,即元註釋型別。它只能用在註釋型別宣告上:
    @Target(ElementType.ANNOTATION_TYPE)
    public @interface MetaAnnotationType {
        ...
    }
下面的3個註釋
@SpringBootConfiguration 原始碼
@Target(ElementType.TYPE)
@Retention(RetentionPolicy.RUNTIME)
@Documented
@Configuration
public @interface SpringBootConfiguration {

}
其實就相當於和 @configuratiion的功能一樣,使用該註解之後,可以將這個類看做是 一個配置檔案
例如
@Configuration
public class MyConfig {
    @Bean
    public MyService getUserService(){
        UserService userService = new UserService();
        userService.setUserDAO(null);
        return userService;
    }

    @Bean
    public MyDAO getUserDAO(){
        return new UserDAO();
    }
}
等價於xml的配置 ,
<beans>
    <bean id = "MyService" class="com.shj.MyService">
        <property name="userDAO" ref = "userDAO"></property>
    </bean>
    <bean id = "MyDAO" class="com.shj.MyDAO"></bean>
</beans>
@ComponentScan
相當於配置自動掃描
等價於spring的配置檔案中的
<context:component-scan>@EnableAutoConfiguration
@Target(ElementType.TYPE)
@Retention(RetentionPolicy.RUNTIME)
@Documented
@Inherited
@AutoConfigurationPackage
@Import(AutoConfigurationImportSelector.class)
public @interface EnableAutoConfiguration {

	String ENABLED_OVERRIDE_PROPERTY = "spring.boot.enableautoconfiguration";

	/**
	 * Exclude specific auto-configuration classes such that they will never be applied.
	 * @return the classes to exclude
	 */
	Class<?>[] exclude() default {};

	/**
	 * Exclude specific auto-configuration class names such that they will never be
	 * applied.
	 * @return the class names to exclude
	 * @since 1.3.0
	 */
	String[] excludeName() default {};

}
檢視文件中的文件說明,可以發現 這個註解的作用是 允許spring程式上下文的自動配置
可以幫助SpringBoot應用將所有符合條件的@Configuration配置都載入到當前SpringBoot建立並使用的IoC容器。
3.2 類解析
public static void main(String[] args) {
		SpringApplication.run(DemoApplication.class, args);
	}
檢視run()
public static ConfigurableApplicationContext run(Class<?> primarySource,
			String... args) {
		return run(new Class<?>[] { primarySource }, args);
	}
再檢視返回時呼叫的run()
	public static ConfigurableApplicationContext run(Class<?>[] primarySources,
			String[] args) {
		return new SpringApplication(primarySources).run(args);
	}
可以看到, 首先例項化了一個SpringApplication ,然後執行run()
首先來檢視例項化的過程
public SpringApplication(Class<?>... primarySources) {
		this(null, primarySources);
	}
真正呼叫的是這個
	@SuppressWarnings({ "unchecked", "rawtypes" })
	public SpringApplication(ResourceLoader resourceLoader, Class<?>... primarySources) {
		this.resourceLoader = resourceLoader;
		Assert.notNull(primarySources, "PrimarySources must not be null");
		this.primarySources = new LinkedHashSet<>(Arrays.asList(primarySources));
		this.webApplicationType = WebApplicationType.deduceFromClasspath();
		setInitializers((Collection) getSpringFactoriesInstances(
				ApplicationContextInitializer.class));
		setListeners((Collection) getSpringFactoriesInstances(ApplicationListener.class));
		this.mainApplicationClass = deduceMainApplicationClass();
	}
一共進行的操作有 :
判斷專案型別
    static WebApplicationType deduceFromClasspath() {
        if (ClassUtils.isPresent(WEBFLUX_INDICATOR_CLASS, null)
                && !ClassUtils.isPresent(WEBMVC_INDICATOR_CLASS, null)
                && !ClassUtils.isPresent(JERSEY_INDICATOR_CLASS, null)) {
            return WebApplicationType.REACTIVE;
        }
        for (String className : SERVLET_INDICATOR_CLASSES) {
            if (!ClassUtils.isPresent(className, null)) {
                return WebApplicationType.NONE;
            }
        }
        return WebApplicationType.SERVLET;
    }
其中, 常量的定義
	private static final String[] SERVLET_INDICATOR_CLASSES = { "javax.servlet.Servlet",
			"org.springframework.web.context.ConfigurableWebApplicationContext" };

	private static final String WEBMVC_INDICATOR_CLASS = "org.springframework."
			+ "web.servlet.DispatcherServlet";

	private static final String WEBFLUX_INDICATOR_CLASS = "org."
			+ "springframework.web.reactive.DispatcherHandler";

	private static final String JERSEY_INDICATOR_CLASS = "org.glassfish.jersey.servlet.ServletContainer";

	private static final String SERVLET_APPLICATION_CONTEXT_CLASS = "org.springframework.web.context.WebApplicationContext";

	private static final String REACTIVE_APPLICATION_CONTEXT_CLASS = "org.springframework.boot.web.reactive.context.ReactiveWebApplicationContext";
可能會出現三種結果:
1 WebApplicationType.REACTIVE - 當類路徑中存在REACTIVE_WEB_ENVIRONMENT_CLASS並且不存在MVC_WEB_ENVIRONMENT_CLASS時
2 WebApplicationType.NONE - 也就是非Web型應用(Standard型),此時類路徑中不包含WEB_ENVIRONMENT_CLASSES中定義的任何一個類時
3 WebApplicationType.SERVLET - 類路徑中包含了WEB_ENVIRONMENT_CLASSES中定義的所有型別時
設定初始化器(Initializer)
	setInitializers((Collection) getSpringFactoriesInstances(
				ApplicationContextInitializer.class));
檢視程式碼
	private <T> Collection<T> getSpringFactoriesInstances(Class<T> type) {
		return getSpringFactoriesInstances(type, new Class<?>[] {});
	}
private <T> Collection<T> getSpringFactoriesInstances(Class<T> type,
Class<?>[] parameterTypes, Object... args) {
ClassLoader classLoader = Thread.currentThread().getContextClassLoader();
// Use names and ensure unique to protect against duplicates
//避免重複的元素
Set<String> names = new LinkedHashSet<>(
SpringFactoriesLoader.loadFactoryNames(type, classLoader));
//根據names進行例項化
List<T> instances = createSpringFactoriesInstances(type, parameterTypes,
classLoader, args, names);
//排序例項化後的物件
AnnotationAwareOrderComparator.sort(instances);
return instances;
}//根據完全限定名載入
public static List<String> loadFactoryNames(Class<?> factoryClass, @Nullable ClassLoader classLoader) {
String factoryClassName = factoryClass.getName();
return loadSpringFactories(classLoader).getOrDefault(factoryClassName, Collections.emptyList());
}
private <T> List<T> createSpringFactoriesInstances(Class<T> type,
			Class<?>[] parameterTypes, ClassLoader classLoader, Object[] args,
			Set<String> names) {
		List<T> instances = new ArrayList<>(names.size());
		for (String name : names) {
			try {
				Class<?> instanceClass = ClassUtils.forName(name, classLoader);
				Assert.isAssignable(type, instanceClass);
				Constructor<?> constructor = instanceClass
						.getDeclaredConstructor(parameterTypes);
				T instance = (T) BeanUtils.instantiateClass(constructor, args);
				instances.add(instance);
			}
			catch (Throwable ex) {
				throw new IllegalArgumentException(
						"Cannot instantiate " + type + " : " + name, ex);
			}
		}
		return instances;
	}
	public void setInitializers(
			Collection<? extends ApplicationContextInitializer<?>> initializers) {
		this.initializers = new ArrayList<>();
		this.initializers.addAll(initializers);
	}

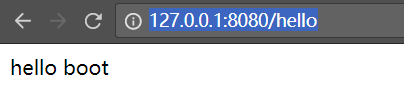
專案啟動很快,然後會發現沒什麼要顯示的,可以做個簡單的網頁 輸出點內容
package com.example.demo.web;

import org.springframework.web.bind.annotation.RequestMapping;
import org.springframework.web.bind.annotation.RestController;

@RestController
public class HelloController {

	@RequestMapping("/hello")
 public String index() {
	 return "hello boot";
 }


}
重啟專案,然後訪問: http://127.0.0.1:8080/hello
有的小夥伴程式碼寫得一樣, 會訪問不到,

這個的原因就是: 目錄結構不對
這個很重要 ,可以參考官方推薦的專案結構:
