
Ubuntu18.04LTS下基於 Anaconda3 安裝和編譯 Caffe-GPU
這篇部落格為在Ubuntu18.04上基於 Anaconda3 安裝編譯 Caffe-GPU的詳細教程中第三步。由於教程之詳細,放在一篇部落格中影響閱讀體驗,所以按照安裝順序分為了三個部分,具體每一部分點開連結即可訪問。
一、Ubuntu18.04下Anaconda3的安裝與配置
二、Ubuntu18.04下安裝Cudnn9.0和Cuda7.0
三、Ubuntu18.04下基於 Anaconda3 安裝和編譯 Caffe-GPU
文章目錄
在終端輸入
sudo apt install caffe-cuda
1. 基本依賴庫的安裝
sudo apt-get install libprotobuf-dev libleveldb-dev libsnappy-dev libopencv-dev
sudo apt-get install libhdf5-serial-dev protobuf-compiler
sudo apt-get install - 安裝截圖如下:

2. 配置
2.1. Clone原始碼
首先我們要從GitHub的遠端下載caffe的原始碼
git clone https://github.com/BVLC/caffe.git

2.2. 配置Makefile.config檔案
cd caffe
sudo cp Makefile.config.example Makefile.config
sudo vim Makefile.config
vim編輯器中,在命令列輸入set number ,回車,可以顯示行號。
將第5行註釋去除
USE_CUDNN:= 1

OPENCV_VERSION := 3

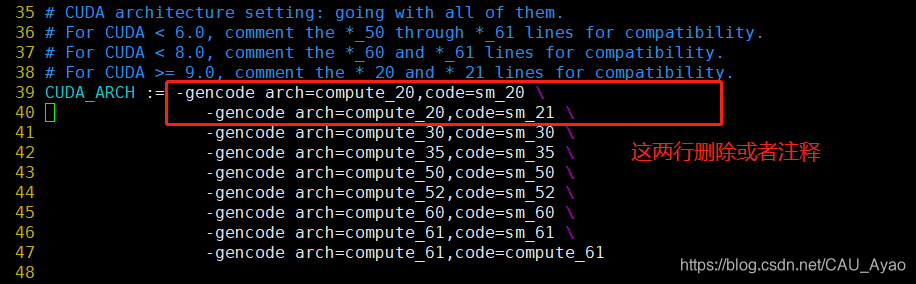
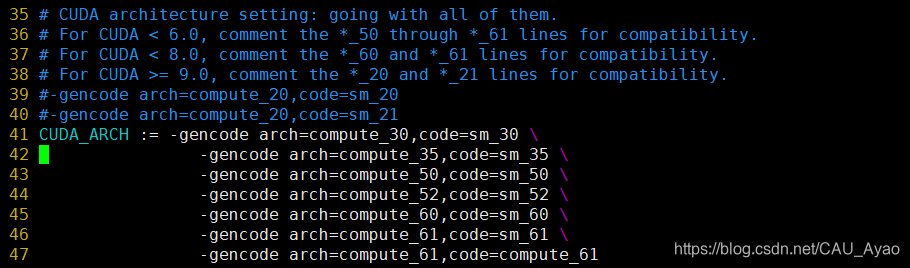
將第37和38行註釋或者刪除.
修改前:
修改後:
將第53行BLAS:= atlas登出,換成BLAS := open.

將Python2環境登出,換成Anaconda3下的Python環境.
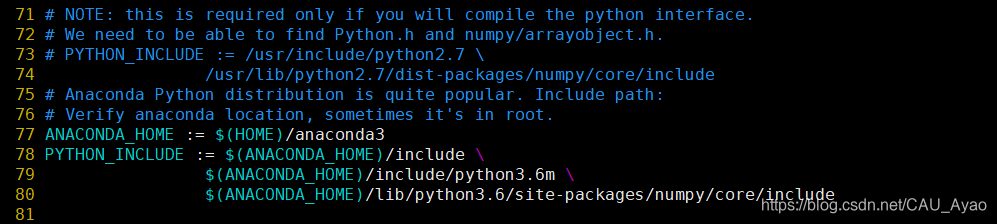
對這句取消註釋:
PYTHON_LIBRARIES := boost_python3 python3.6m
將PYTHON_LIB:= /usr/lib註釋
取消PYTHON_LIB:= $(ANACONDA_HOME)/lib的註釋

若要使用python來編寫layer,則將#WITH_PYTHON_LAYER := 1取消註釋.

將# Whatever else you find you need goes here.下面的程式碼修改
INCLUDE_DIRS := $(PYTHON_INCLUDE) /usr/local/include
LIBRARY_DIRS := $(PYTHON_LIB) /usr/local/lib /usr/lib
修改為:
INCLUDE_DIRS := $(PYTHON_INCLUDE) /usr/local/include /usr/include/hdf5/serial
LIBRARY_DIRS := $(PYTHON_LIB) /usr/local/lib /usr/lib /usr/lib/x86_64-linux-gnu /usr/lib/x86_64-linux-gnu/hdf5/serial
vim命令列中輸入:wq,可以儲存並退出。
2.3. 配置Makefile檔案
在終端輸入:
sudo vim Makefile
做如下修改:
PYTHON_LIBRARIES ?= boost_python python2.7
修改為:
PYTHON_LIBRARIES ?= boost_python-py36 python3.6m
NVCCFLAGS +=-ccbin=$(CXX) -Xcompiler-fPIC $(COMMON_FLAGS)
修改為:
NVCCFLAGS += -D_FORCE_INLINES -ccbin=$(CXX) -Xcompiler -fPIC $(COMMON_FLAGS)
如圖所示:

3. Caffe原始碼中安裝Python的必要項
在終端輸入:
cd /home/li.guangyao/Programming/caffe/python
pip install --upgrade python-dateutil
for req in $(cat requirements.txt); do pip install $req; done
此步可能會出現以下錯誤(如果沒出現請忽略此步):
pandas 0.22.0 has requirement python-dateutil>=2, but you'll have python-dateutil 1.5 which is incompatible.
matplotlib 2.1.2 has requirement python-dateutil>=2.1, but you'll have python-dateutil 1.5 which is incompatible.
jupyter-client 5.2.2 has requirement python-dateutil>=2.1, but you'll have python-dateutil 1.5 which is incompatible.
bokeh 0.12.13 has requirement python-dateutil>=2.1, but you'll have python-dateutil 1.5 which is incompatible.
anaconda-client 1.6.9 has requirement python-dateutil>=2.6.1, but you'll have python-dateutil 1.5 which is incompatible.
解決辦法見:錯誤:pandas 0.23.3 has requirement python-dateutil>=2.5.0, but you’ll have python-dateutil 1.5解決方法
4. 編譯
進入caffe的根目錄下
cd /home/li.guangyao/Programming/caffe
sudo make clean
sudo make all -j16 		//-j16表示使用16核處理器執行當前指令
繼續在終端執行:
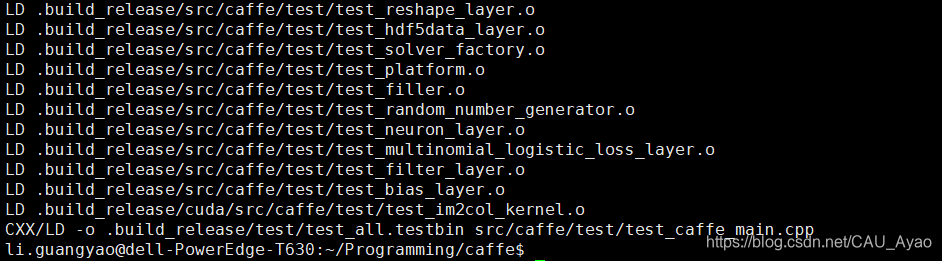
sudo make test -j16 //最好加上sudo防止有些檔案的訪問許可權不夠
繼續在終端執行:
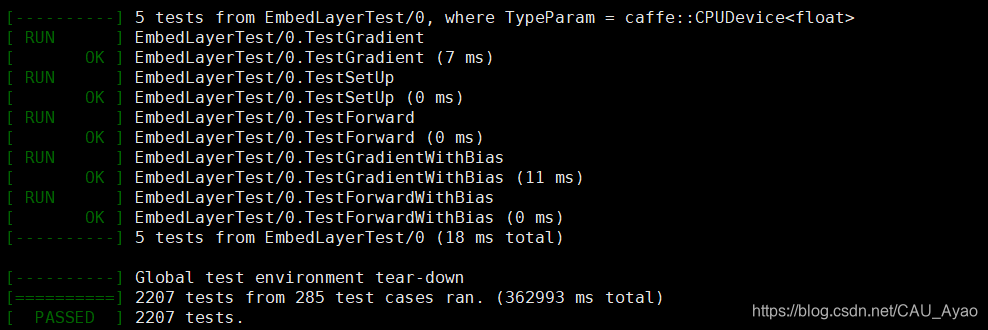
sudo make runtest -j16 //最好加上sudo防止有些檔案的訪問許可權不夠
此步可能會出現以下錯誤(如果沒出現請忽略此步):
.build_release/tools/caffe
.build_release/tools/caffe: error while loading shared libraries: libhdf5_hl.so.100: cannot open shared object file: No such file or directory
Makefile:545: recipe for target 'runtest' failed
make: *** [runtest] Error 127
解決辦法見:完美解決錯誤:libhdf5_hl.so.100(XXX): cannot open shared object file: No such file or directory,Error127
繼續在終端執行:
sudo make pycaffe -j16 //配置pycaffe
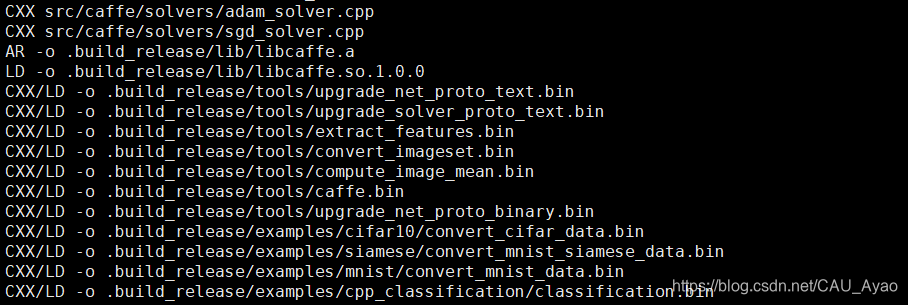
結果如圖:

在終端執行:
vim ~/.bashrc
在最後加入以下程式碼:
export PYTHONPATH=~/Programming/caffe/python:$PYTHONPATH

5. 驗證測試
在終端輸入Python,進行測試.
在命令列輸入:
import caffe
回車。
此步可能出現以下錯誤(如果不報錯,請忽略此步)
Traceback (most recent call last):
  File "<stdin>", line 1, in <module>
  File "/home/li.guangyao/Programming/caffe/python/caffe/__init__.py", line 1, in <module>
    from .pycaffe import Net, SGDSolver, NesterovSolver, AdaGradSolver, RMSPropSolver, AdaDeltaSolver, AdamSolver, NCCL, Timer
  File "/home/li.guangyao/Programming/caffe/python/caffe/pycaffe.py", line 13, in <module>
    from ._caffe import Net, SGDSolver, NesterovSolver, AdaGradSolver, \
ImportError: /home/li.guangyao/Programming/caffe/python/caffe/_caffe.so: undefined symbol: _ZN5boost6python6detail11init_moduleER11PyModuleDefPFvvE
解決方法見:

Congratulations!Caffe-GPU編譯成功!
如需檢視上一步,請點選:
第二步:Ubuntu18.04下安裝Cudnn9.0和Cuda7.0