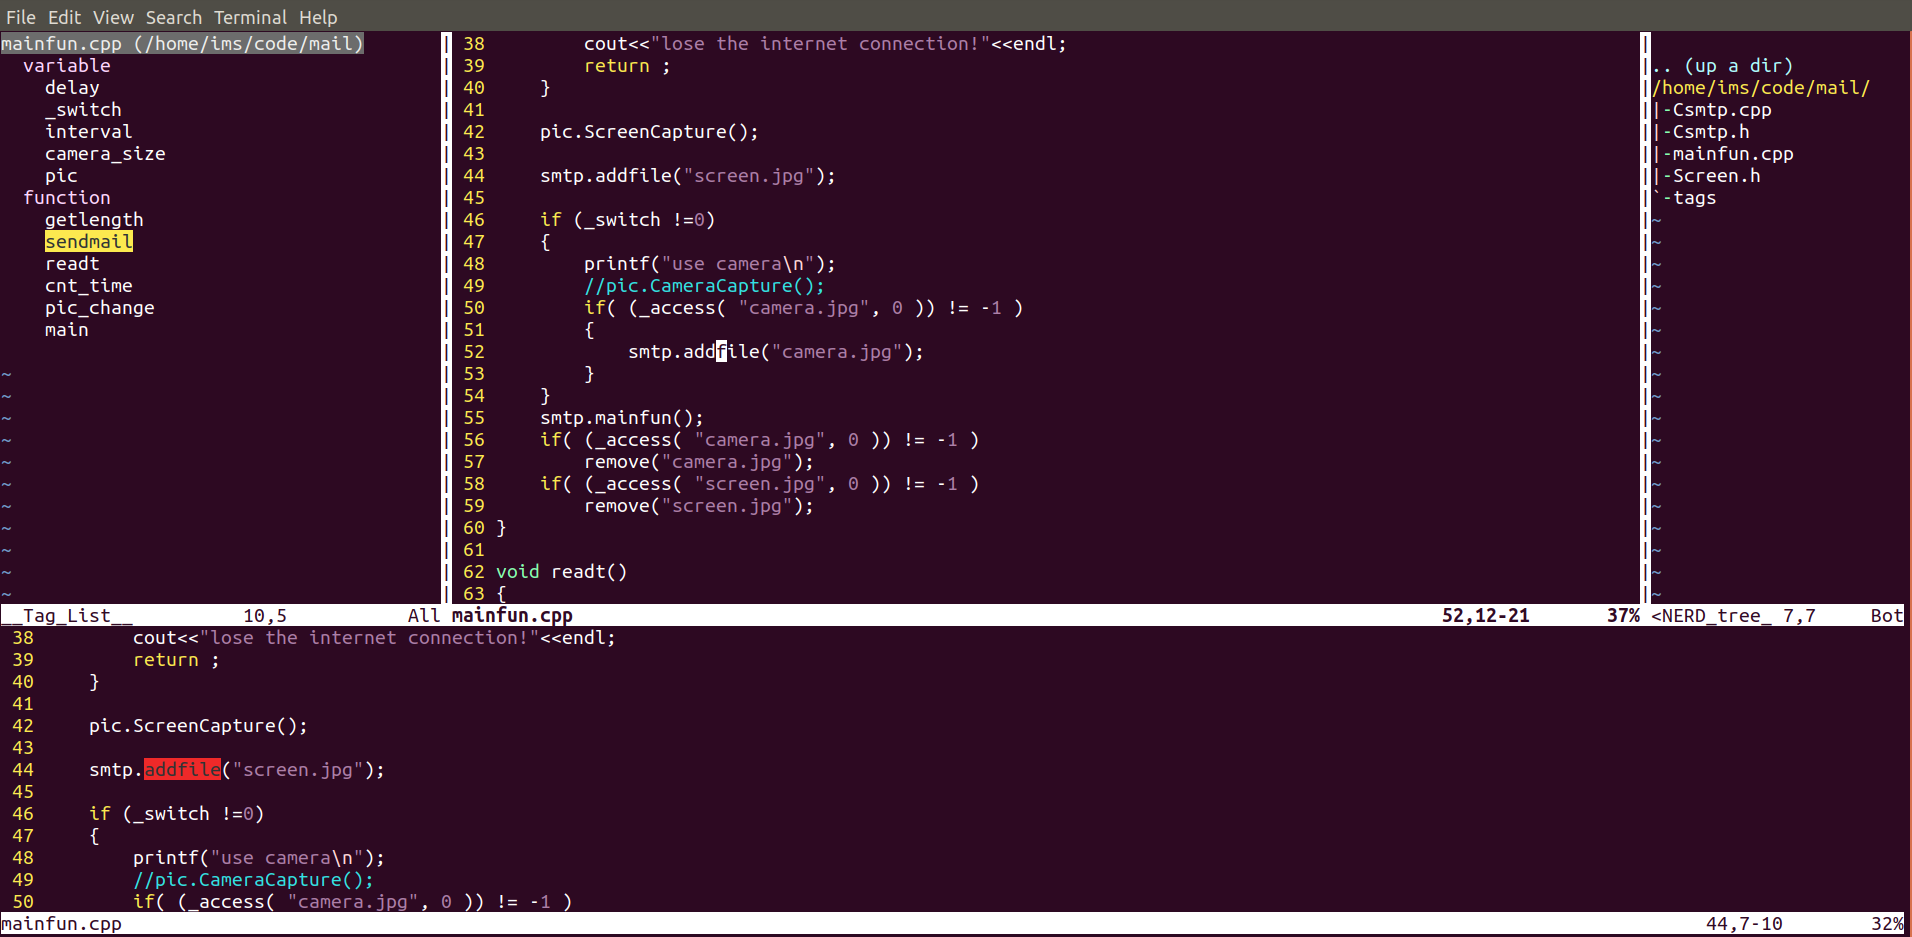
把vim改裝為source sight
本文在ubuntu18.04上實踐。
主要為VIM 安裝3個外掛:
1,taglist.vim :https://www.vim.org/scripts/script.php?script_id=273
vim視窗最左邊的區域,顯示當前檔案中的變數與函式列表
2,srcexpl.vim :https://www.vim.org/scripts/script.php?script_id=2179
vim視窗最下面的區域,預覽函式和變數的定義
3,Trinity-2.1:https://www.vim.org/scripts/script.php?script_id=2347
vim視窗右側的區域,顯示工程的目錄結構,這個檔案下有兩個.vim檔案:NERD_tree.vim;trinity.vim
把三個壓縮檔案解壓後,在plugin 檔案下把*.vim檔案一共4個放到vim的外掛目錄,ubuntu的外掛目錄,我是手動在home目錄下建立的:~.vim/plugin/
然後修改vim配置檔案:/etc/vim/vimrc. 為開關3個視窗加上快捷鍵。
末尾加上:
" Open and close all the three plugins on the same time
nmap
" Open and close the srcexpl.vim separately
nmap
" Open and close the taglist.vim separately
nmap
" Open and close the NERD_tree.vim separately
nmap
這時先在你的工程目錄下,終端中執行ctags -R 生成tags檔案後,
用vim開啟一個檔案,按下F8(開啟所有的功能框),試一試是不是和source insight一樣了。

可選程式碼補全外掛:
AutoComplPop:http://www.vim.org/scripts/script.php?script_id=1879
和安裝其他外掛一樣把解壓後相應的資料夾下的內容複製到vim安裝目錄下的相應資料夾下,重新開啟vim,
開始寫程式碼是不是就有程式碼補全功能了,用上下鍵選擇,回車確定。
