
仿微信提醒對話方塊 SPAlertController
阿新 • • 發佈:2018-11-09
SPAlertController框架結合了系統、微信、微博的提醒對話方塊各自的優點。使用時與系統高度相仿,展示時與微信微博高度一致。
SPAlertController各種樣式的效果圖展示:
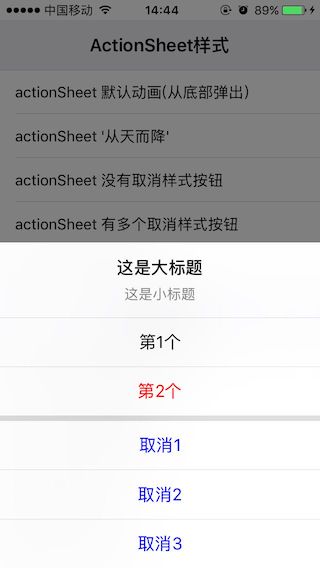
1、ActionSheet樣式

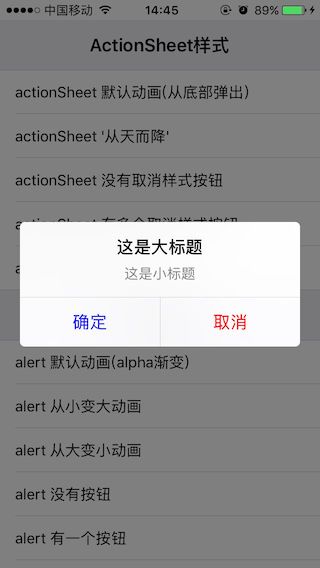
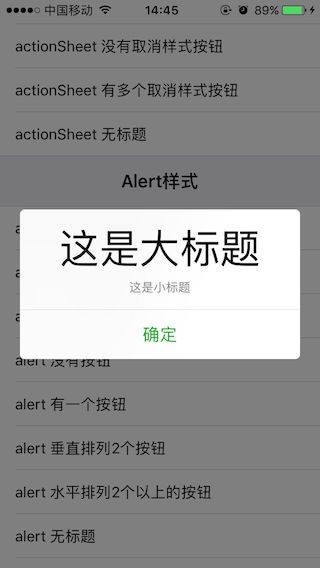
2、Alert樣式
3、自定義檢視
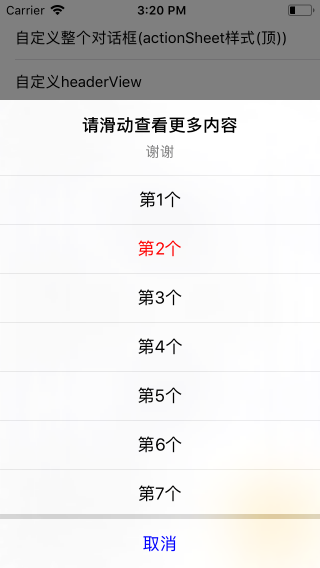
自定義headerView和footerView

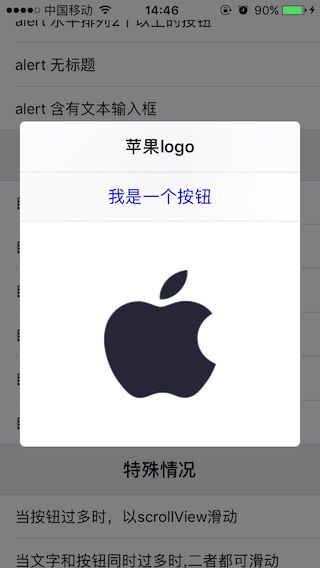
4、特殊情況
當按鈕過多時,以scrollView滑動
如何使用:
- 第一步:建立SPAlertController
SPAlertController *alertController = [SPAlertController alertControllerWithTitle:@"這是大標題" message:@"這是小標題" preferredStyle:SPAlertControllerStyleActionSheet animationType:SPAlertAnimationTypeDefault];

說明:
preferredStyle是提醒對話方塊的彈出樣式,SPAlertControllerStyleActionSheet是從底部或者頂部彈出(頂部還是底部取決於animationType),SPAlertControllerStyleAlert從中間彈出,animationType是動畫型別,有從底部往上彈出動畫,從頂部往下彈出動畫,從中間漸變彈出動畫,縮放彈出動畫等
- 第二步:建立action
SPAlertAction *actionOK = [SPAlertAction actionWithTitle:@"OK" style:SPAlertActionStyleDefault handler:^(SPAlertAction * _Nonnull action) {

    }];

說明:
方法引數中的style是action的樣式,這裡跟系統的一致,共有SPAlertActionStyleDefault、SPAlertActionStyleCancel(取消)、SPAlertActionStyleDestructive(預設紅色)這3種樣式,跟系統不一樣的是,SPAlertController可以自定義action的相關屬性,如文字顏色、字型等;
block塊:當點選action的時候回撥
- 第三步:新增action
[alertController addAction:actionOK];
- 第四步:modal出alertController
[self presentViewController:alertController animated:YES completion:nil];
以上這就是最基本的四步操作,當然你可以中間再設定alertController的屬性或者action的屬性,至於具體哪些屬性幹什麼,示例程式中有非常詳細的註釋.
還可以做什麼?
- 新增文字輸入框
[alertController addTextFieldWithConfigurationHandler:^(UITextField * _Nonnull textField) {
        // 這個block只會回撥一次,因此可以在這裡自由定製textFiled,如設定textField的相關屬性,設定代理,新增addTarget,監聽通知等
}];
- 自定義整個彈出檢視
MyView *myView = [MyView shareMyView];

SPAlertController *alertController = [SPAlertController alertControllerWithTitle:@"這是大標題" message:@"這是小標題" preferredStyle:SPAlertControllerStyleAlert animationType:SPAlertAnimationTypeAlpha customView:myView];
[self presentViewController:alertController animated:YES completion:nil];

說明:
自定義整個彈出檢視時,新增action或textField沒有任何作用,因為已經自定義了整個檢視,自帶的內部佈局將不起作用
- 自定義headerView
MyHeaderView *myHeaderView = [[MyHeaderView alloc] initWithFrame:CGRectMake(0, 0, 0, 200)];
SPAlertController *alertController = [SPAlertController alertControllerWithPreferredStyle:SPAlertControllerStyleAlert animationType:SPAlertAnimationTypeDefault customHeaderView:myHeaderView];
SPAlertAction *action1 = [SPAlertAction actionWithTitle:@"第1個" style:SPAlertActionStyleDefault handler:^(SPAlertAction * _Nonnull action) {
     NSLog(@"點選了第1個");
}];

SPAlertAction *action2 = [SPAlertAction actionWithTitle:@"第2個" style:SPAlertActionStyleDestructive handler:^(SPAlertAction * _Nonnull action) {
    NSLog(@"點選了第2個");
}];
[alertController addAction:action1];
[alertController addAction:action2];
[self presentViewController:alertController animated:YES completion:nil];

說明:
為什麼要自定義headerView?有這樣的的需求嗎?答案是肯定的,因為SPAlertController自帶的headerView只能顯示文字且居中,如果想往裡面新增圖片則自帶的就不管用了,這時便可以在外界自定義好一個headerView,建立時當引數傳進去,SPAlertController便會幫你顯示在對話方塊的頂部
- 自定義centerView
MyCenterView *centerView = [[MyCenterView alloc] initWithFrame:CGRectMake(0, 0, 0, 200)];

SPAlertController *alertController = [SPAlertController alertControllerWithTitle:@"這是大標題" message:@"這是小標題" preferredStyle:SPAlertControllerStyleAlert animationType:SPAlertAnimationTypeDefault customCenterView:centerView];

SPAlertAction *action1 = [SPAlertAction actionWithTitle:@"第1個" style:SPAlertActionStyleDefault handler:^(SPAlertAction * _Nonnull action) {
    NSLog(@"點選了第1個");
}];
// 設定第1個action的顏色
action1.titleColor = [UIColor blueColor];

// SPAlertActionStyleDestructive預設文字為紅色(可修改)
SPAlertAction *action2 = [SPAlertAction actionWithTitle:@"第2個" style:SPAlertActionStyleDestructive handler:^(SPAlertAction * _Nonnull action) {
    NSLog(@"點選了第2個");
}];
// 設定第2個action的顏色
action2.titleColor = [UIColor redColor];
[alertController addAction:action1];
[alertController addAction:action2];
[self presentViewController:alertController animated:YES completion:nil];

說明:
有時看見過這樣的對話方塊,頂部是一個title,最底部有2個action,中間是一個tableView;這裡自定義centerView就是解決這個需求。

先記作n = maxNumberOfActionHorizontalArrangementForAlert;(maxNumberOfActionHorizontalArrangementForAlert是本框架的一個屬性:最大水平排列個數);

當自定義centerView時,如果是SPAlertControllerStyleAlert樣式,action的個數最多隻能是n個,超過n個將不顯示,只顯示最前面n個新增的;如果是SPAlertControllerStyleActionSheet樣式,只有取消(SPAlertActionStyleCancel)樣式才會顯示,其餘樣式的action均不會顯示
- 自定義footerView
MyFooterView *footerView = [MyFooterView shareMyFooterView];
    SPAlertController *alertController = [SPAlertController alertControllerWithTitle:@"蘋果logo" message:nil preferredStyle:SPAlertControllerStyleAlert animationType:SPAlertAnimationTypeDefault customFooterView:footerView];
    SPAlertAction *action2 = [SPAlertAction actionWithTitle:@"我是一個按鈕" style:SPAlertActionStyleCancel handler:^(SPAlertAction * _Nonnull action) {
        NSLog(@"點選了 我是一個按鈕");
    }];
[alertController addAction:action2];
[self presentViewController:alertController animated:YES completion:nil];
- 講一下對話方塊的寬高 :
- SPAlertControllerStyleAlert樣式下對話方塊的預設寬度恆為螢幕 寬-40,高度最大為螢幕高-40,如果想設定對話方塊的寬度以及修改最大高度,可以通過調整maxMarginForAlert屬性來設定,高度上只要沒有超出最大高度,會自適應內容.
- SPAlertControllerStyleActionSheet樣式下對話方塊的預設寬度 恆為螢幕寬,高度最大為螢幕高,外界無法通過任何屬性修改寬度,最大高度可通過maxTopMarginForActionSheet屬性來修改,高度上只要沒超出最大高度,會自適應內容.
- 關於自定義的view的寬高如何讓給定?
當自定義view時,如果寬度小於等於0,或者大於等於對話方塊的寬度,內部會自動處理為等寬於對話方塊,除此之外,自定義view的高度在對話方塊最大高度範圍內的情況下:自定義view的大小是多大,顯示出來就是多大;從這裡也可以看出,如果自定義view時想用對話方塊的預設寬度,寬度設定為0或者足夠大就行了. 稍微要注意的是假如你採用的是自動佈局/xib/storyboard,寬度設定為0可能會有約束警告.