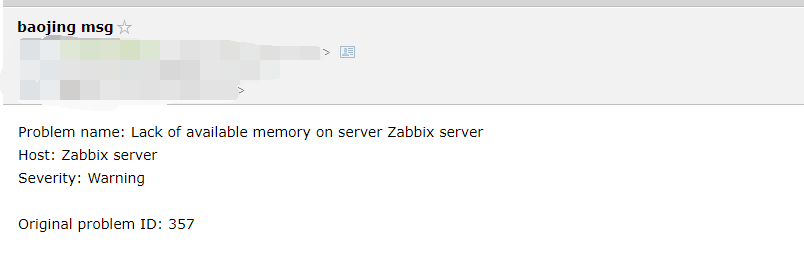
zabbix實現自定義監控
實現自定義監控項例項


1.建立主機組 2.建立主機 3.建立監控項 1.到需要監控的主機的agent中新增自定義的監控專案 cd /etc/zabbix/zabbix_agentd.d vi userparameter_mysql.conf UserParameter=監控專案名稱,shell命名 UserParameter=mysql.ping,HOME=/var/lib/zabbix mysqladmin ping | grep -c alive systemctl restart zabbix-agent 2命令配置步驟.到zabbix server的主機上進行除錯 zabbix_get -s 192.168.11.134 -k mysql.ping [[email protected] ~]# zabbix_get -s 192.168.11.134 -k mysql.ping sh: mysqladmin: 未找到命令 0 由此可以看出可以正常執行命令 同時返回的結果是一個字串 這個命令執行的結果型別在建立觸發器的時候十分有用
儀表盤配置步驟:
1.建立自定義監控項

資訊型別的選擇 需要根據shell命令執行的具體結果來確定 不能隨便填寫
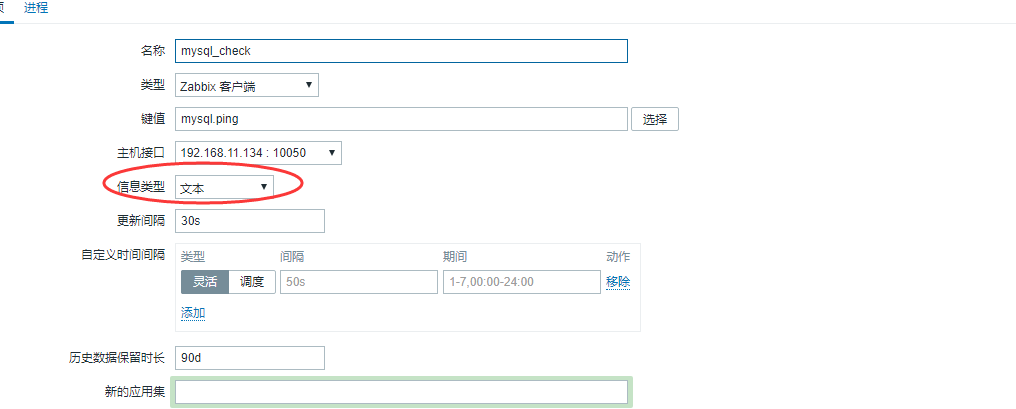
2.根據自定義監控項建立觸發器
表示式就是對獲取對應監控項的值進行一些處理 根據處理後的值來判斷是否進行告警操作


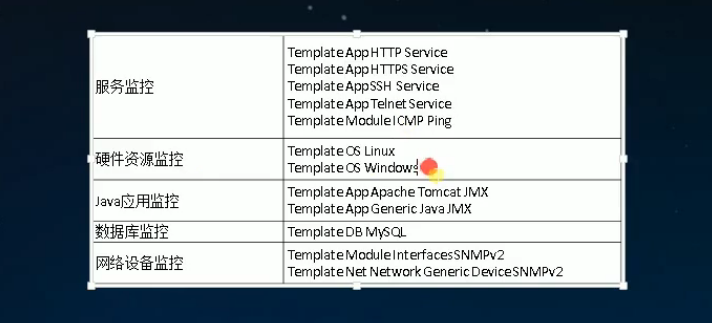
zabbix內建監控模板
zabbix實現指令碼傳送告警郵件
zabbix-server 伺服器系統配置

[[email protected] ~]# yum -y install mail #如有mail命令則不用安裝 [View Code[email protected] ~]# vim /etc/mail.rc # Display the recipients of messages sent by the user himself in # header summaries. set showto # Automatically check for new messages at each prompt, but avoid polling # of IMAP servers or maildir folders. set newmail=nopoll # If threaded mode is activated, automatically collapse thread. set autocollapse # Hide some header fields which are uninteresting for most human readers. ignore received in-reply-to message-id references ignore mime-version content-transfer-encoding # Only include selected header fields when forwarding messages. fwdretain subject date from to # For Linux and BSD, this should be set. set from=[email protected] #傳送的郵件地址 set smtp=smtp.sina.com #外部smtp伺服器的地址 set smtp-auth-user=[email protected] #外部smtp伺服器認證的使用者名稱 set smtp-auth-password=123456 #外部smtp伺服器認證的使用者密碼(如用163或qq郵箱則為授權碼) set smtp-auth=login #郵件認證的方式 [[email protected] ~]# echo "郵件正文"|mail -s "郵件主題" 收件人地址 #傳送郵件測試命令 [[email protected] ~]# echo "hello world aaaaa" |mail -s "aaaaa" 2228@163.com [[email protected] ~]# echo "hello world aaaaa" |mail -s "aaaaa" 1272@qq.com 傳送郵件的標題為test 被伺服器垃圾郵件遮蔽
傳送郵件指令碼的實現

[[email protected] ~]# yum -y install dos2unix
[[email protected] ~]# vim /usr/lib/zabbix/alertscripts/mail.sh
#!/bin/bash
# use mailx to send mail
# 20141127 carl 1st
# PATH
file=/tmp/zabbix_mail.txt
echo "$3" > $file
dos2unix -k $file
/bin/mail -s "$2" $1 < $file
# echo "$3" | mail -s "$2" $1
#注:使用dos2unix工具是為解決zabbix傳送郵件出現亂碼和收到的郵件是*.bin的情況
#$3 是前端定義的郵件內容,$2是前端定義的主題,$1是前端定義的收件人
[[email protected] alertscripts]# chmod 777 mail.sh
[[email protected] alertscripts]# chown zabbix.zabbix mail.sh

mail.sh必須存放在/usr/lib/zabbix/alertscripts/目錄下
shell版本

[[email protected] alertscripts]# pwd

/usr/lib/zabbix/alertscripts

[[email protected] alertscripts]# cat mail_qq.py

#!/usr/bin/python

#coding:utf-8

import smtplib

from email.mime.text import MIMEText

import sys

mail_user = '[email protected]'

mail_pass = 'xxxxxxxxxxx'


def send_mail(to_list,subject,content):

me = "zabbix 監控告警平臺"+"<"+mail_user+">"

msg = MIMEText(content, 'plain', 'utf-8')

msg['Subject'] = subject

msg['From'] = me

msg['to'] = to_list

try:

s = smtplib.SMTP_SSL("smtp.qq.com", 465)

s.login(mail_user,mail_pass)

s.sendmail(me,to_list,msg.as_string())

s.close()

return True

except Exception,e:

print str(e)

return False

if __name__ == "__main__":

send_mail(sys.argv[1], sys.argv[2], sys.argv[3])

mail_user為郵箱地址,mail_pass為郵箱服務商提供的客戶端授權碼,獲得授權碼的方式也可以參考百度,要說明的是目前網易郵箱客戶端授權碼支援自定義,qq郵箱客戶端授權碼不支援自定義,需要生成、這裡也附上使用163郵箱的指令碼

[[email protected] alertscripts]# cat mail_163.py

#!/usr/bin/python

#coding:utf-8

import smtplib

from email.mime.text import MIMEText

import sys

mail_user = '[email protected]'

mail_pass = 'xxxxxxxxxx'


def send_mail(to_list,subject,content):

me = "zabbix 監控告警平臺"+"<"+mail_user+">"

msg = MIMEText(content, 'plain', 'utf-8')

msg['Subject'] = subject

msg['From'] = me

msg['to'] = to_list

try:

s = smtplib.SMTP("smtp.163.com", 25)

s.login(mail_user,mail_pass)

s.sendmail(me,to_list,msg.as_string())

s.close()

return True

except Exception,e:

print str(e)

return False

if __name__ == "__main__":

send_mail(sys.argv[1], sys.argv[2], sys.argv[3])

指令碼編寫完成之後需要為指令碼新增執行許可權

[[email protected]bbix alertscripts]# chmod +x mail_qq.py

3、測試

命令列測試指令碼能否成功執行

[[email protected] alertscripts]# ./mail_qq.py [email protected] "測試" 'test'

測試引數為三個,分別為收件人郵箱地址,郵件標題,郵件內容

測試的時候如果出現錯誤提示缺少smtplib,解決方法為使用pip進行安裝:pip install smtplib
python指令碼
zabbix web控制檯配置
1.新增報警媒介型別


#!/bin/bash
#echo "this is zabbix msg" |mail -s "bbbbbbbbb" 127@qq.com

echo $1 > /tmp/user
echo $2 > /tmp/zhuti
echo $3 > /tmp/neirong

file=/tmp/zabbix_mail.txt
echo "$3" > $file
dos2unix -k $file
/bin/mail -s "$2" $1 < $file
sendmail
向sendmail指令碼傳遞三個巨集變數引數
1.{ALERT.SENDTO} 表示接收郵件的賬號
2.{ALERT.SUBJECT} 表示傳送郵件的標題
3.{ALERT.MESSAGE} 表示傳送郵件的內容

2.新增動作
1.新增一個動作的觸發條件
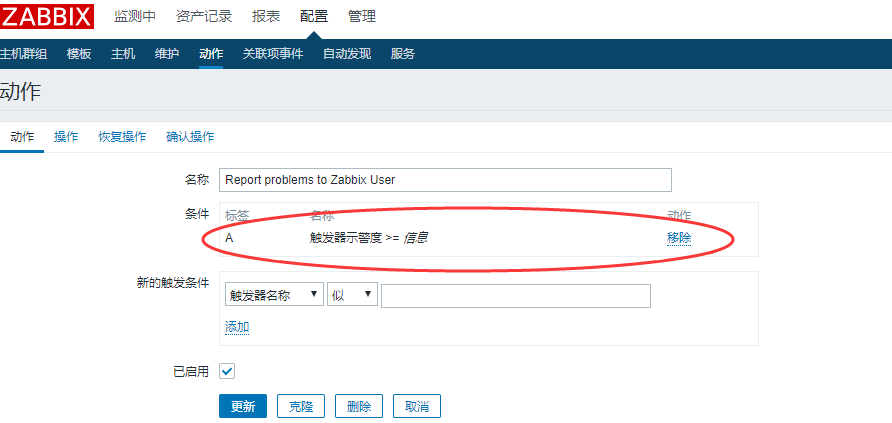
2.新增操作的詳細步驟
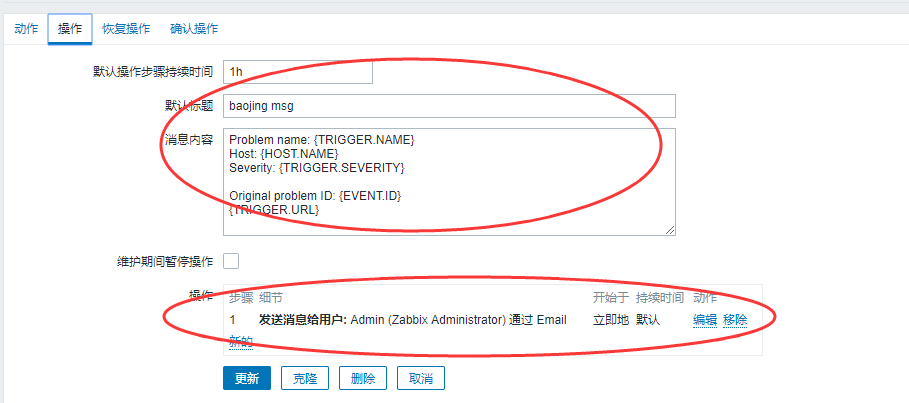
zabbix內建的巨集變數:
預設標題: 主機 {HOSTNAME} 在 {EVENT.DATE} {EVENT.TIME} 發生故障 {TRIGGER.NAME} {ITEM.VALUE}
告警主機:{HOSTNAME}
告警時間:{EVENT.DATE} {EVENT.TIME}
告警等級:{TRIGGER.SEVERITY}
告警資訊: {TRIGGER.NAME}
告警專案:{TRIGGER.KEY}
問題詳情:{ITEM.NAME}:{ITEM.VALUE}
當前狀態:{TRIGGER.STATUS}:{ITEM.VALUE}
事件ID:{EVENT.ID}
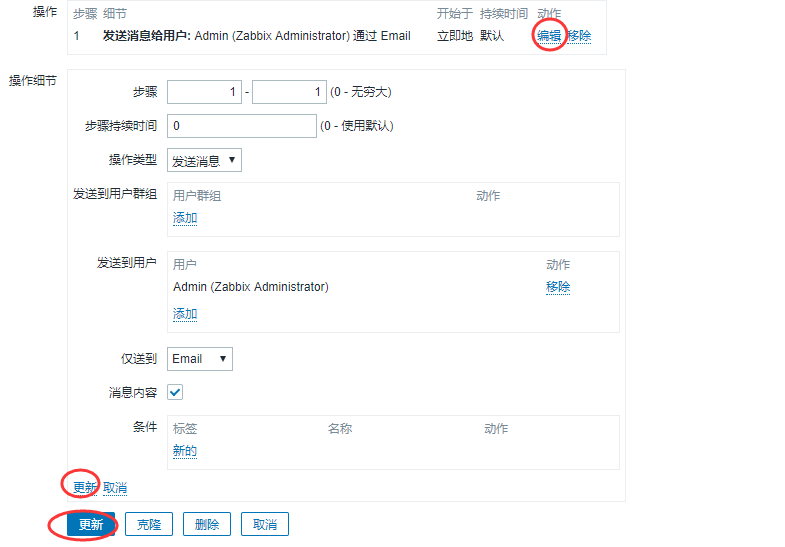
3.設定使用者Admin的郵箱 用來接收報警資訊郵件

4.修改觸發器表示式觸發報警傳送郵件


