SpringBoot2.0系列--07--熱部署
阿新 • • 發佈:2018-11-11
SpringBoot2.0系列–07–熱部署
文章目錄
前言
JDK出11了,SpringBoot出2.0了,還沒有系統的學習過,剛好最近專案中有使用到,就把一些關鍵的東西列出來,避免忘記
SpringBoot2.0系列–00–目錄
介紹
每次修改的時候都要重新編譯,其實是比較麻煩的,SpringBoot自帶一個熱部署外掛。
我們可以直接使用。
總流程
- 先開啟idea支援該熱部署的方式的功能
- 在專案中新增熱部署依賴(pom)
- 在專案中新增熱部署外掛(pom)
- 按照之前的執行方式即可
具體操作
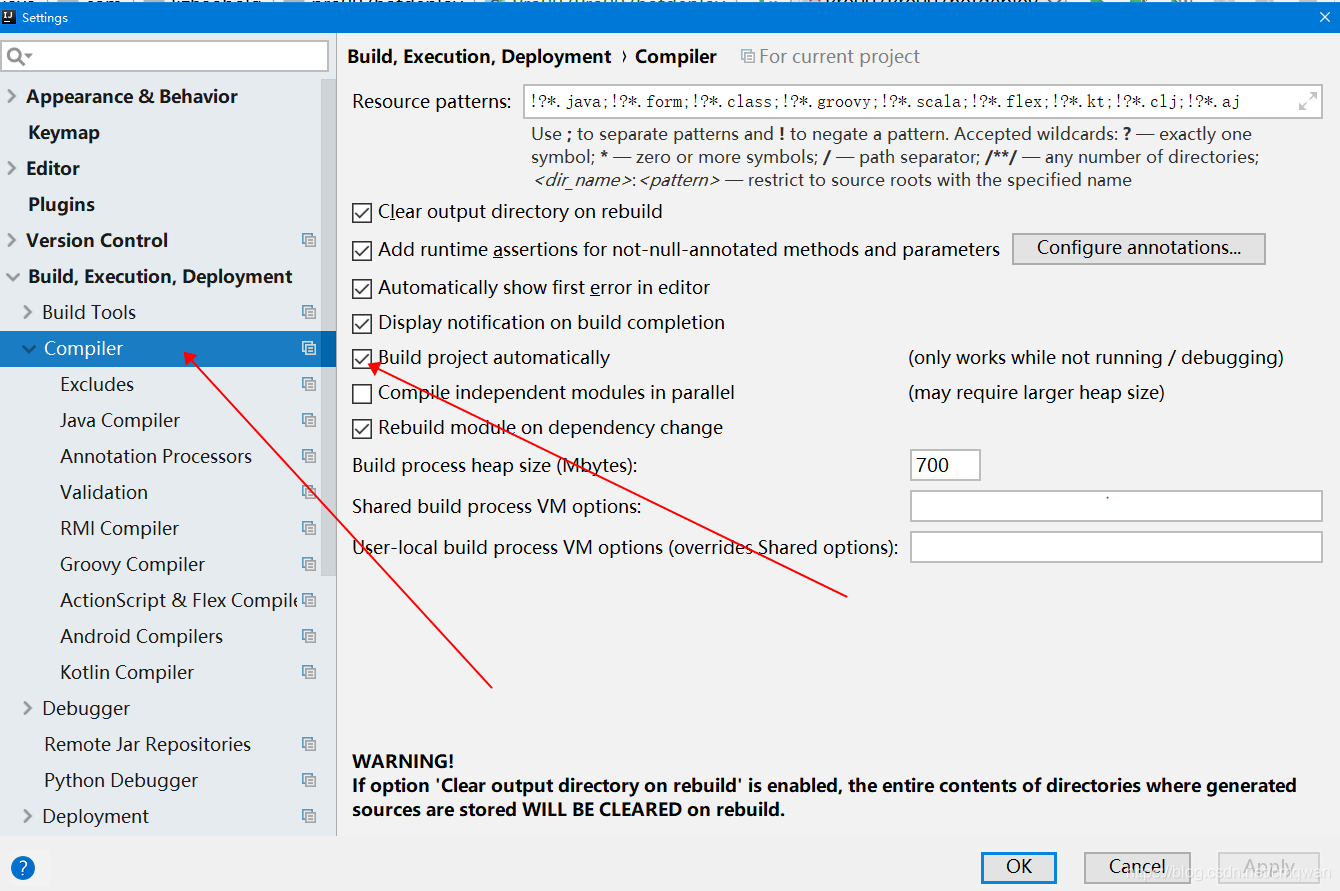
- 先開啟idea支援該熱部署的方式的功能
“File” -> “Settings” -> “Build,Execution,Deplyment” -> “Compiler”,選中打勾 “Build project automatically” 。

組合鍵:“Shift+Ctrl+Alt+/” ,選擇 “Registry” ,選中打勾 “compiler.automake.allow.when.app.running” 。
“Shift+Ctrl+Alt+/” 是為了開啟Maintenance功能的快捷鍵,如果不是這個快捷鍵,可以找下這個功能


- 在專案中新增熱部署依賴(pom)
   <dependencies>
        <!-- 熱部署 -->
        <dependency>
            <groupId>org.springframework.boot</groupId>
            <artifactId>spring-boot-devtools</artifactId>
            <optional>true</optional>
        </dependency>

    </dependencies>
- 在專案中新增熱部署外掛(pom)
<build>
        <plugins>
            <plugin>
                <groupId>org.springframework.boot</groupId> <artifactId>spring-boot-maven-plugin</artifactId>
                <configuration>
                    <fork>true</fork>
                </configuration>
            </plugin>
        </plugins>
    </build>
- 按照之前的執行方式即可
聯絡方式
專案程式碼路徑碼雲:https://gitee.com/lizhaoandroid/Springboot-Learning-lz
聯絡方式:QQ3060507060
檢視下一篇或者其他文章,可點選目錄或者專欄檢視
