UNISON+inotify資料的雙向實時同步
UNISON安裝部署手冊
作業系統:SUSE12
安裝包:inotify-tools-3.13.tar.gz ocaml-4.02.0.tar.gz unison-2.48.4.tar.gz
主機:FH-UMP-PORTAL1 192.168.1.181
FH-UMP-PORTAL2 192.168.1.182
登入使用者/密碼:root/123456
配置檔案:/root/.unison/default.prf
Unison雙向同步基本原理是:假如有A B兩個資料夾,A資料夾把自己的改動同步到B,B資料夾也把自己的改動同步到A,最後A B兩資料夾的內容相同,是AB資料夾的合集。
Unison雙向同步的一個缺點是,對於一個檔案在兩個同步資料夾中都被修改時,unison是不會去同步的,因為unison無法判斷以那個為準。
一、安裝前的準備
1. 檢視空間大小
# df -h
2. 建立目錄
#mkdir /opt/unison
3. 上傳安裝包到指定目錄
二、解壓及安裝
4. 解壓、編譯、安裝
(1) 對於ocaml-4.02.0.tar.gz(Linux下通過原始碼包編譯安裝Unison時,需要用到Objective Caml compiler)
解壓:#tar zxfv ocaml-4.02.0.tar.gz
進入解壓目錄:#cd ocaml-4.02.0
配置:#./configure
編譯:#make world opt
安裝:#make install
(2) 安裝unison-2.48.4.tar.gz
解壓:#tar zxvf unison-2.48.4.tar.gz

進入解壓目錄:#cd src/
編譯:#make UISTYLE=text
安裝:#make install
5. 有安裝資訊說明安裝成功

三、配置雙機ssh 信任 (免密登入)
6. 在FH-UMP-PORTAL1上建立key並配置PORTAL2的信任
(1) 獲取金鑰對
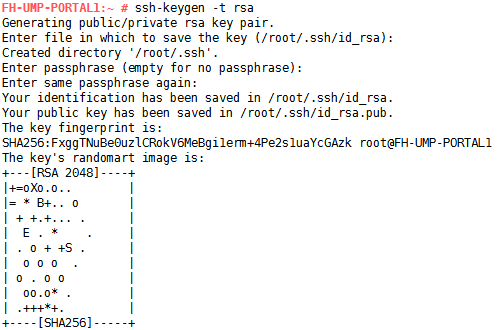
# ssh-keygen -t rsa

(2)將公鑰新增到authorized_keys檔案中,並修改許可權

(3)使用rsync 遠端同步將金鑰傳到PORTAL2

7. 同樣的,在FH-UMP-PORTAL2上建立key並配置PORTAL1的信任
#ssh-keygen -t rsa
#cat /root/.ssh/id_rsa.pub >> /root/.ssh/authorized_keys
#chmod 700 ~/.ssh/
#chmod 600 ~/.ssh/authorized_keys
#rsync -avz /root/.ssh/authorized_keys [email protected]:/root/.ssh/authorized_keys
注:配置結束後,在兩臺機器上分別ssh對方IP,能無密碼登入則表示配置成功。
如:

四、Unison的配置與使用
8. Unison的使用方法

(1) 本地使用
使用方法:
#unison 111 222 #同步本地的111和222資料夾
(2) unison遠端使用
使用方法:
# unison <本地目錄> ssh://remotehostname(IP)/<遠端目錄的絕對路徑>
例如:
# unison /home/AAA ssh://[email protected](ip)//DB/path/BBB
表示將本機的目錄/home/AAA和遠端主機的/DB/path/BBB進行同步。一般的,需要兩臺機能ssh連線。
注意: 在主機和目錄間又多加了一個 "/"
9. Unison的相關配置
修改unison配置文件(以共享/opt目錄為例):
#cd /root/.unison
#vim default.prf
| # Unison preferences file root = /opt root = ssh://192.168.1.182//opt #force = #ignore = batch = true #repeat = 1 #retry = 3 #owner = true #group = true #perms = -1 #fastcheck = false #rsync = false #sshargs = -C #xferbycopying = true log = true logfile = /root/.unison/unison.log |
PORTAL2:
#vim /root/.unison/default.prf
| # Unison preferences file root = /opt root = ssh://192.168.1.181//opt #force = #ignore = batch = true #repeat = 1 #retry = 3 #owner = true #group = true #perms = -1 #fastcheck = false #rsync = false #sshargs = -C #xferbycopying = true log = true logfile = /root/.unison/unison.log |
相關注解如下:
1.兩個root表示需要同步的資料夾。
2.force表示以本地的資料夾為標準,將該目錄同步到遠端,開啟後則變成單項同步
3.ignore = Path表示忽略某個目錄,即同步時不同步它。
4. batch=true 表示全自動模式,接受並執行預設動作
5.log = true表示在終端輸出執行資訊。
6.logfile則指定了同時將輸出寫入log檔案。
7.owner = true //保持同步過來的檔案屬主
8.group = true //保持同步過來的檔案組資訊
9.perms = -1 //保持同步過來的檔案讀寫許可權
10.repeat = 1 //間隔1秒後,開始新的一次同步檢查
11.retry = 3 //失敗重試
12.sshargs = -C //使用ssh的壓縮傳輸方式
fastcheck true 表示同步時僅通過檔案的建立時間來比較,如果選項為false,Unison則將比較兩地檔案的內容。
auto //接受預設的動作,然後等待使用者確認是否執行。
ignore xxx //增加 xxx 到忽略列表中 :經測試此引數不能用。
ignorecase [true|false|default] //是否忽略檔名大小寫
follow xxx //是否支援對符號連線指向內容的同步
xferbycopying = true
immutable xxx //不變目錄,掃描時可以忽略
silent //安靜模式
times=true //同步修改時間
path xxx 引數 //只同步 -path 引數指定的子目錄以及檔案,而非整個目錄,-path 可以多次出現。
confirmbigdel=false//預設值為true,表示當需要同步的兩個目錄一個為空時,unison將停止,這裡設定為false,即便為空unison也不會停止運轉
10. 測試(手動推)
(對於unison),在PORTAl1中有變化,則執行unison後PORTAL2就會發生對應的變化,例如:PORTAL1:
| #mkdir /opt/dir1 #ll
|
而此時的PORTAL2是沒有dir1檔案的
執行命令同步:
PORTAL1:
| #unison |
PORTAL2:
| #ll
|
則會出現dir1檔案,說明同步成功。
注:unison只會同步變動的一方,所以在生產環境中不能輕易改動PORTAL2中的內容。
PORTAl2只在PORTAL1出故障的時候啟用,所以必須保證同步是正確的,且及時。
五、定時或定期執行同步
如果想要定期執行,則通過crontab計劃任務來實現,例如通過以下方式設定每5分鐘執行一次。
#crontab -e
* * * * * /usr/local/bin/unison
使計劃任務生效 需要重啟 crond服務
[[email protected] ~]# service crond restart
六、安裝inotify實時監控
11. 檢視系統是否支援inotify

說明支援。
12. 安裝inotify
#cd /opt
#tar zxvf inotify-tools-3.13.tar.gz
#cd inotify-tools-3.13/
#./configure
#make && make install
13. 編寫inotify實時監控指令碼
#cd /tmp
#cd ..
#vim inotify.sh
| #!/bin/bash UNISON=`ps -ef |grep -v grep|grep -c inotifywait` if [ ${UNISON} -lt 1 ] then user2="unison" ip2="FH-UMP-PORTAL2" src2="/opt" dst2="/opt" /usr/local/bin/inotifywait -mrq -e create,delete,modify,move $src1 | while read line do #/root/bin/unison -batch $src2 ssh://[email protected]$ip2//$dst2 /root/bin/unison echo -n "$line " >> /opt/inotify/inotify$(date +%u).log echo ` date +%F %T " " -f1-4` >> /opt/inotify/inotify$(date +%u).log done fi
|
#chmod +x inotify.sh


