
React Native嵌入到現有原生應用
如果你正準備從頭開始製作一個新的應用,那麼React Native會是個非常好的選擇。但如果你只想給現有的原生應用中新增一兩個檢視或是業務流程,React Native也同樣不在話下。只需簡單幾步,你就可以給原有應用加上新的基於React Native的特性、畫面和檢視等。
1.核心概念
這裡把React Native元件植入到Android應用中有如下幾個主要步驟:
- 首先要了解你要植入的React Native元件。
- 在Android專案根目錄中使用npm來安裝
react-native,這樣同時會建立一個node_modules/的目錄。 - 建立js檔案,編寫React Native元件的js程式碼。
- 在
build.gradle檔案中新增com.facebook.react:react-native:+,以及一個指向node_nodules/目錄中的react-native預編譯庫的maven路徑。 - 建立一個React Native專屬的
Activity(可混合使用),在其中再建立ReactRootView。 - 生成對應
bundle檔案,啟動React Native的Packager服務,執行應用。 - 接下來可自由發揮,新增更多的React Native元件。
- 在真機上執行、除錯(這裡需要先更新
bundle檔案)。 - 打包。
2.開發環境準備
此處可參考我寫的另一篇文章
3.新增JS程式碼管理
- 在專案的根目錄執行以下命令:
$ npm init
$ npm install --save react react-native
$ curl -o .flowconfig https://raw.githubusercontent.com/facebook/react-native/master/.flowconfig此時可在Android專案根目錄下看到如下檔案/資料夾:node_modules/、package.json
- 開啟
package.json檔案,在scripts屬性下新增如下欄位:
"start": "node node_modules/react-native/local-cli/cli.js start"
- 在根目錄下新建js資料夾(存放React Native相關元件),index.android.js(RN啟動檔案)。
主要啟動程式碼如下:
/**
 * Sample React Native App
 * https://github.com/facebook/react-native
 * @flow
 */
import {AppRegistry} from 'react-native';
import AwesomeProject from './js/AwesomeProject'
//註冊(只要一遍)
AppRegistry.registerComponent('AwesomeProject', () => AwesomeProject);
4.新增App開發準備操作
- 在你app的
build.gradle檔案內新增React Native相關依賴:
compile 'com.facebook.react:react-native:+' // From node_modules.
- 在你工程
build.gradle檔案內新增本地React Nativemaven庫:
allprojects {
    repositories {
        jcenter()
        maven {
            // All of React Native (JS, Android binaries) is installed from npm
            url "$rootDir/node_modules/react-native/android"
        }
    }
}
注意事項:這裡的url路徑要寫對,否則將出現如下錯誤:
“Failed to resolve: com.facebook.react:react-native:0.x.x” errors after running Gradle sync in Android Studio.
AndroidManifest.xml清單檔案配置
- 如果你需要訪問React Native的DevSettingsActivity,則需要註冊
<activity android:name="com.facebook.react.devsupport.DevSettingsActivity" />
- 如果你需要訪問React Native的DevSettingsActivity,則需要註冊
5.準備工作搞定:接下來新增原生程式碼
- 純React Native頁面主要程式碼(底部有完整程式碼地址)
package com.itingchunyu.reactnative.view;

import android.os.Bundle;
import android.support.v7.app.AppCompatActivity;
import android.support.v7.appcompat.BuildConfig;
import android.view.KeyEvent;

import com.facebook.react.ReactInstanceManager;
import com.facebook.react.ReactRootView;
import com.facebook.react.common.LifecycleState;
import com.facebook.react.modules.core.DefaultHardwareBackBtnHandler;
import com.facebook.react.shell.MainReactPackage;

/**
 * Created by liyanxi on 2016/12/13.
 * Copyright (c) [email protected] All rights reserved.
 */

public class MyReactActivity extends AppCompatActivity implements DefaultHardwareBackBtnHandler {

    private ReactRootView mReactRootView;
    private ReactInstanceManager mReactInstanceManager;

    @Override
    protected void onCreate(Bundle savedInstanceState) {
        super.onCreate(savedInstanceState);

        mReactRootView = new ReactRootView(this);
        mReactInstanceManager = ReactInstanceManager.builder()
                .setApplication(getApplication())
                .setBundleAssetName("index.android.bundle") //可遠端地址
                .setJSMainModuleName("index.android")//根目錄下index.android.js檔案
                .addPackage(new MainReactPackage())//如果為true,則會啟用諸如JS重新載入和除錯之類的開發人員選項.反之打包
                .setUseDeveloperSupport(true)
                .setInitialLifecycleState(LifecycleState.RESUMED)
                .build();
                //'AwesomeProject'==>index.android.js 頁面內註冊名稱,可根據自己隨意調整
        mReactRootView.startReactApplication(mReactInstanceManager, "AwesomeProject", null);
        setContentView(mReactRootView);
    }

    @Override
    protected void onPause() {
        super.onPause();

        if (mReactInstanceManager != null) {
            mReactInstanceManager.onHostPause(this);
        }
    }

    @Override
    protected void onResume() {
        super.onResume();

        if (mReactInstanceManager != null) {
            mReactInstanceManager.onHostResume(this, this);
        }
    }

    @Override
    protected void onDestroy() {
        super.onDestroy();

        if (mReactInstanceManager != null) {
            mReactInstanceManager.onHostDestroy(this);
        }
    }

    @Override
    public boolean onKeyUp(int keyCode, KeyEvent event) {
        if (keyCode == KeyEvent.KEYCODE_MENU && mReactInstanceManager != null) {
            mReactInstanceManager.showDevOptionsDialog();
            return true;
        }
        return super.onKeyUp(keyCode, event);
    }

    @Override
    public void invokeDefaultOnBackPressed() {
        super.onBackPressed();
    }
}- 原生和RN混合頁面主要程式碼(底部有完整程式碼地址):
package com.itingchunyu.reactnative.view;

import android.os.Bundle;
import android.support.annotation.Nullable;
import android.support.v7.app.AppCompatActivity;
import android.support.v7.appcompat.BuildConfig;
import android.widget.LinearLayout;

import com.facebook.react.ReactInstanceManager;
import com.facebook.react.ReactRootView;
import com.facebook.react.common.LifecycleState;
import com.facebook.react.shell.MainReactPackage;
import com.itingchunyu.reactnative.R;

/**
 * Created by liyanxi on 2016/12/13.
 * Copyright (c) [email protected] All rights reserved.
 */

public class HybridActivity extends AppCompatActivity {

    private ReactRootView mReactRootView;
    private ReactInstanceManager mReactInstanceManager;

    private LinearLayout layoutReactContainer;

    @Override
    protected void onCreate(@Nullable Bundle savedInstanceState) {
        super.onCreate(savedInstanceState);

        setContentView(R.layout.activity_second);

        mReactRootView = new ReactRootView(this);
        mReactInstanceManager = ReactInstanceManager.builder()
                .setApplication(getApplication())
                .setBundleAssetName("index.android.bundle")
                .setJSMainModuleName("index.android")
                .addPackage(new MainReactPackage())
                //如果為true,則會啟用諸如JS重新載入和除錯之類的開發人員選項.反之打包
                .setUseDeveloperSupport(true)
                .setInitialLifecycleState(LifecycleState.RESUMED)
                .build();
        mReactRootView.startReactApplication(mReactInstanceManager, "AwesomeProject", null);

        layoutReactContainer= (LinearLayout) findViewById(R.id.layout_react);

        layoutReactContainer.addView(mReactRootView);
    }
}
6.配置許可權保證開發過程中紅屏錯誤能正確展示
如果您的應用程式指定的Android API等級為23或更高,請確定您已為開發版本啟用了重疊許可權。您可以使用“設定”進行檢查。 canDrawOverlays(this);.這在開發版本中是必需的,因為反應本地開發錯誤必須顯示在所有其他視窗之上。由於在API級別23中引入了新的許可權系統,使用者需要批准它。這可以通過將下面的程式碼新增到onCreate()方法中的Activity檔案來實現。 OVERLAY_PERMISSION_REQ_CODE是類的一個欄位,它負責將結果傳遞迴Activity。
if (Build.VERSION.SDK_INT >= Build.VERSION_CODES.M) {
    if (!Settings.canDrawOverlays(this)) {
        Intent intent = new Intent(Settings.ACTION_MANAGE_OVERLAY_PERMISSION,
                                   Uri.parse("package:" + getPackageName()));
        startActivityForResult(intent, OVERLAY_PERMISSION_REQ_CODE);
    }
}
最後,必須覆蓋onActivityResult() 方法(如下面的程式碼所示)來處理一致性UX的許可權接受或拒絕的情況。
@Override
protected void onActivityResult(int requestCode, int resultCode, Intent data) {
if (requestCode == OVERLAY_PERMISSION_REQ_CODE) {
if (Build.VERSION.SDK_INT >= Build.VERSION_CODES.M) {
if (!Settings.canDrawOverlays(this)) {
// SYSTEM_ALERT_WINDOW permission not granted...
}
}
}
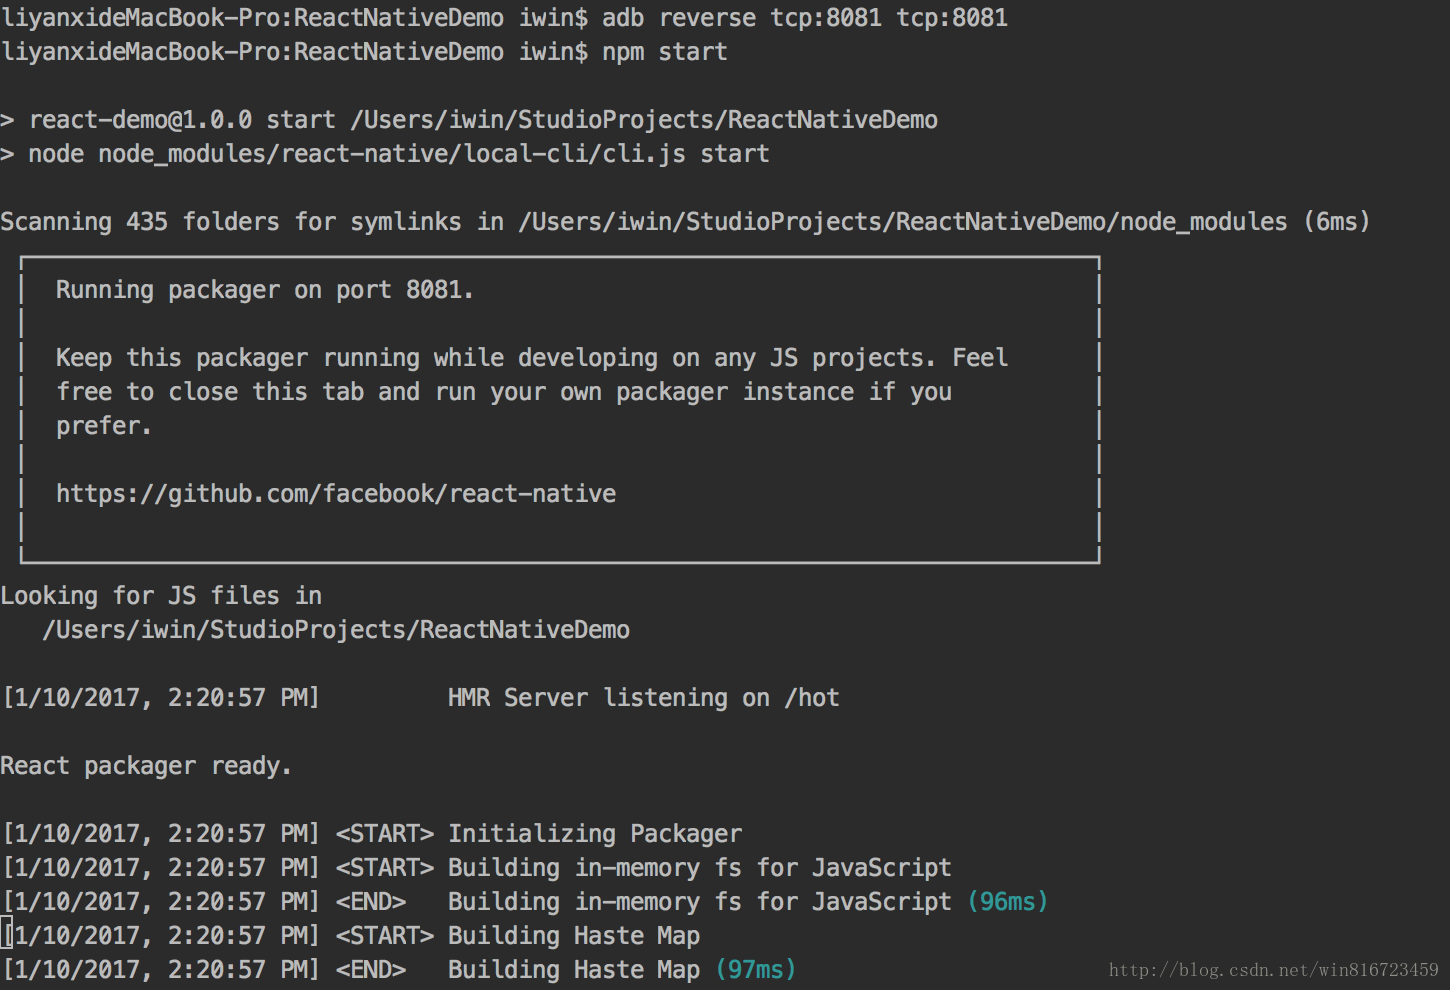
}7.應用飛起來
- 啟動伺服器
React packager
$npm start(配合package.json檔案
start)
或者
$react-native start
- 啟動App應用(看效果)
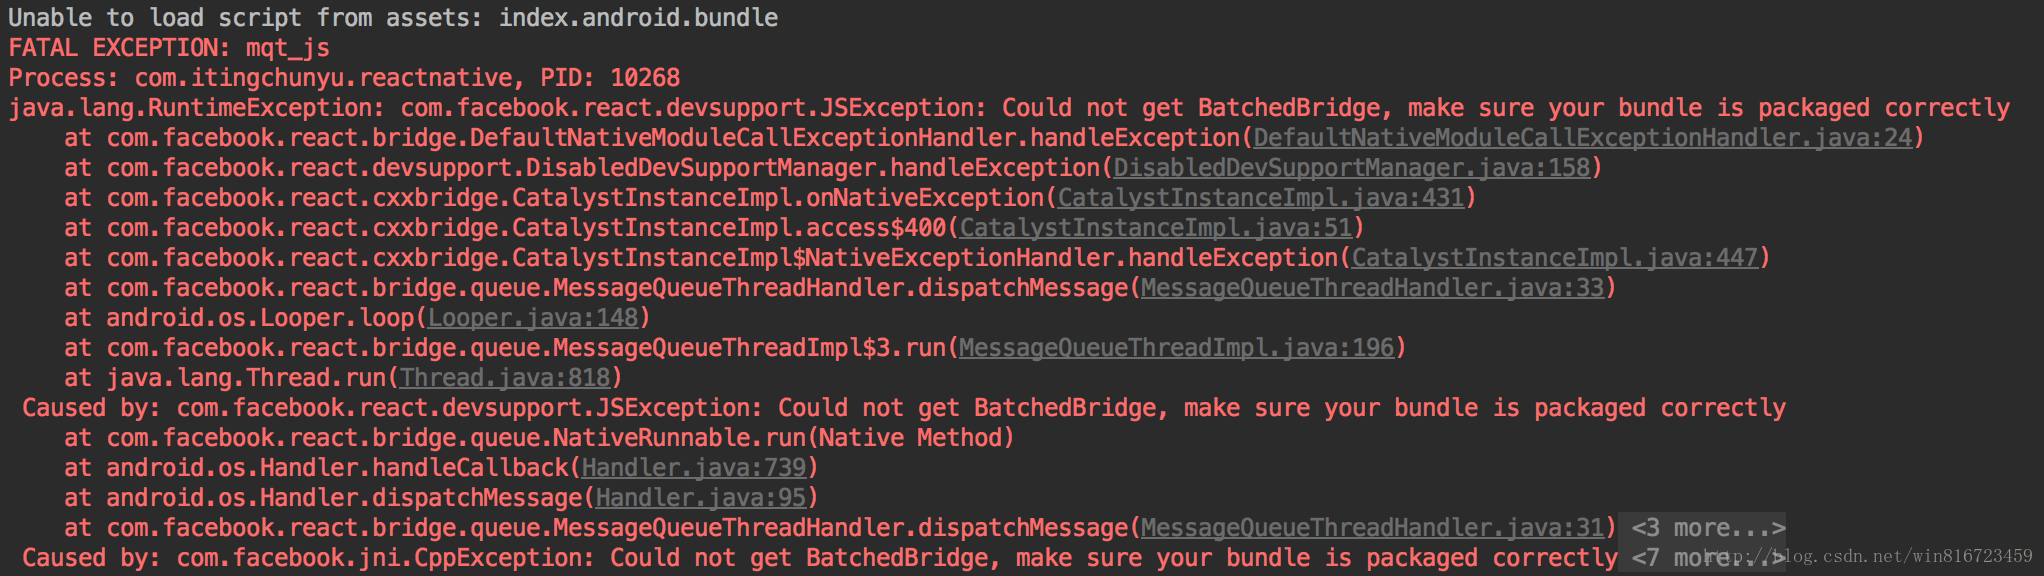
除錯過程踩過的坑
啟動ReactNative相關Activity頁面崩潰
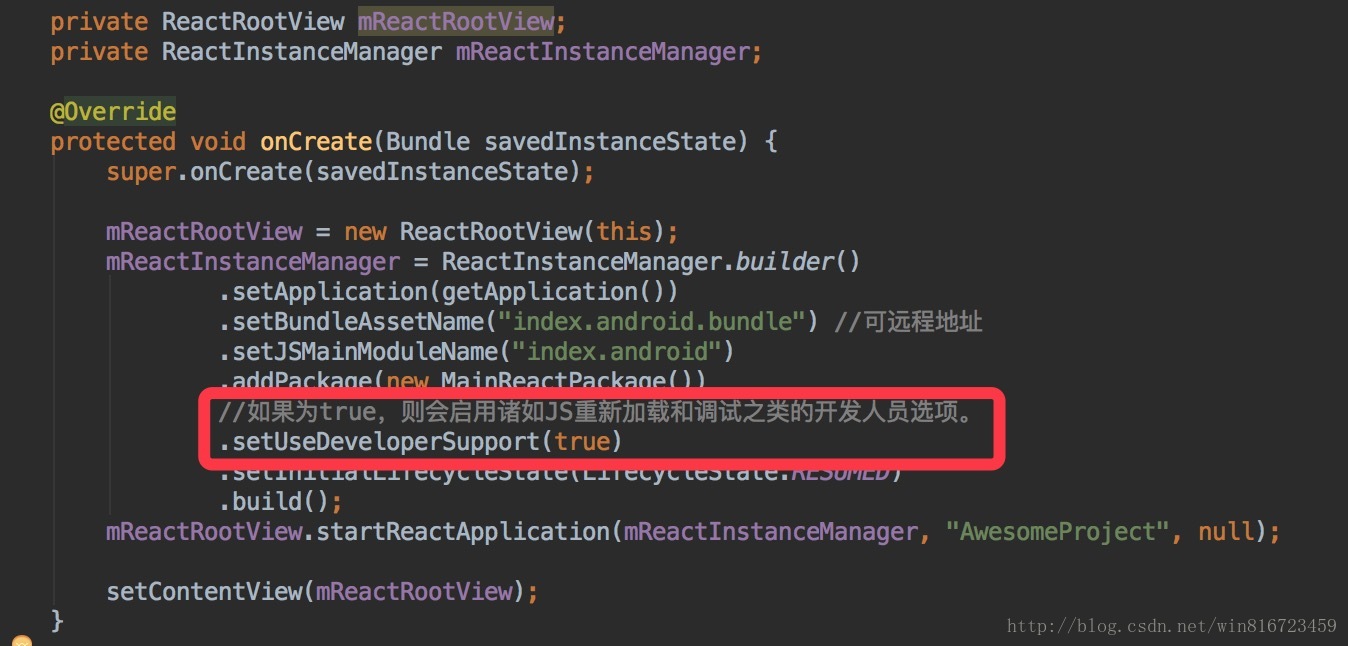
解決方案看程式碼截圖:
此處紅框內需要注意開發除錯過程需要設定為true動態載入,false涉及到靜態bundle檔案,下面打包會單獨講。
8.在Android Studio中打包apk
你也可以使用Android Studio來打包!You can use Android Studio to create your release builds too! It’s as easy as creating release builds of your previously-existing native Android app. There’s just one additional step, which you’ll have to do before every release build. You need to execute the following to create a React Native bundle, which’ll be included with your native Android app:
react-native bundle --platform android --dev false --entry-file ./index.android.js --bundle-output ./app/src/main/assets/index.android.bundle --assets-dest ./app/src/main/res/上面主要意思是說在打包前不可避免的操作如下:
1.在根目錄下執行上述命令,生成
React Native Activity頁面bundle檔案,此處注意路徑不要寫錯(這裡是在./app/src/main/assets/目錄下生成對應index.android.bundle檔案)2.遠端bundle檔案(用於動態更新,這裡暫不詳解)