kubernetes認證和serviceaccount
阿新 • • 發佈:2018-11-13
Service Account 為 Pod 提供必要的身份認證。所有的 kubernetes 叢集中賬戶分為兩類,Kubernetes 管理的 serviceaccount(服務賬戶) 和 useraccount(使用者賬戶)。

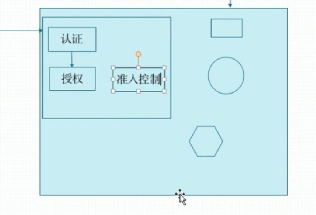
kubectl 如果需要訪問 apiserver 需要經過 認證,授權,准入控制 三關。
kubectl 客戶端請求的時候首先需要進行認證,認證通過後再進行授權檢查,因有些增刪等某些操作需要級聯到其他資源或者環境,這時候就需要准入控制來檢查級聯環境是否有授權許可權了。
獲取所有的 api version
[[email protected] ~]# kubectl api-versions
admissionregistration.k8s.io/v1beta1
apiextensions.k8s.io/v1beta1
apiregistration.k8s.io/v1
apiregistration.k8s.io/v1beta1
apps/v1
apps/v1beta1
apps/v1beta2
authentication.k8s.io/v1
authentication.k8s.io/v1beta1
authorization.k8s.io/v1
authorization.k8s.io/v1beta1
autoscaling/v1
autoscaling/v2beta1
batch/v1
batch/v1beta1
certificates.k8s.io/v1beta1
events.k8s.io/v1beta1
extensions/v1beta1
networking.k8s.io/v1
policy/v1beta1
rbac.authorization.k8s.io/v1
rbac.authorization.k8s.io/v1beta1
scheduling.k8s.io/v1beta1
storage.k8s.io/v1
storage.k8s.io/v1beta1
v1
使用 curl 訪問 apiservice
從上面可知,所有客戶端訪問 apiserver都需要經過驗證,因而我們在伺服器上面也配置了驗證資訊:
# 使用 kubectl 命令的使用者家目錄下有 .kube/config 檔案,上面有 client-certificate-data 和  client-key-data 認證資訊。
cat .kube/config
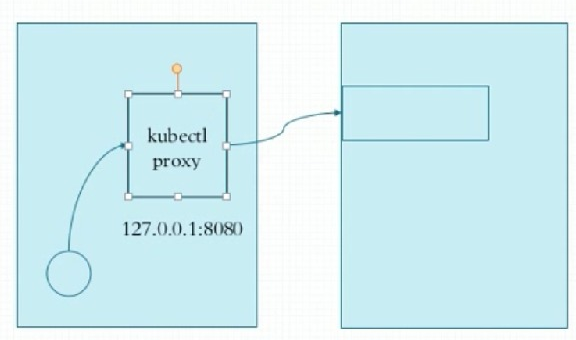
啟用本地轉發埠,代理訪問 apiserver

# 因為訪問 apiserver 需要認證,但是在命令列中很難進行驗證,我們可以通過代理的方式,對 apiserver 進行訪問
kubectl proxy --port=8080

# 另起一個視窗
# 獲取所有的 namespace
curl http://localhost:8080/api/v1/namespaces

# 獲取 kube-system 下所有的 deployments
curl http://localhost:8080/apis/apps/v1/namespaces/kube-system/deployments/
建立服務賬戶
mkdir ~/sa
cd sa/
kubectl create serviceaccount admin

# 檢視,新增了一個 secrets
kubectl get sa 或 kubectl get secret

[[email protected] ~]$ kubectl describe sa admin
Name:                admin
Namespace:           default
Labels:              <none>
Annotations:         <none>
Image pull secrets:  <none>                      # 可以在這裡配置私有 registry 需要的驗證資訊
Mountable secrets:   admin-token-h2nhw
Tokens:              admin-token-h2nhw
Events:              <none>

# 建立一個 pod 使用 admin 的 serviceaccount
vi pod-sa-demo.yaml
apiVersion: v1
kind: Pod
metadata:
  name: pod-sa-demo
  namespace: default
  labels:
    app: myapp
    tier: frontend
  annotations:
    klvchen.com/created-by: "cluster admin"
spec:
  containers:
  - name: myapp
    image: ikubernetes/myapp:v1
    ports:
    - name: http
      containerPort: 80
  serviceAccountName: admin

kubectl apply -f pod-sa-demo.yaml

# 檢視
kubectl describe pods pod-sa-demo
# 檢視當前的使用者認證
kubectl config view

# 以 root 使用者執行
cd /etc/kubernetes/pki

# 配置 root 使用 kubectl 許可權
mkdir ~/.kube
cp /etc/kubernetes/admin.conf /root/.kube/config

# 建立新的金鑰
(umask 077; openssl genrsa -out klvchen.key 2048)

# 建立證書請求,/CN 指定的是使用者名稱
openssl req -new -key klvchen.key -out klvchen.csr -subj "/CN=klvchen"

# 建立證書
openssl x509 -req -in klvchen.csr -CA ./ca.crt -CAkey ./ca.key -CAcreateserial -out klvchen.crt -days 365

# 檢視證書
openssl x509 -in klvchen.crt -text -noout

# 在kubeconfig配置檔案中設定一個使用者項
kubectl config set-credentials klvchen --client-certificate=./klvchen.crt --client-key=./klvchen.key --embed-certs=true

kubectl config set-context [email protected] --cluster=kubernetes --user=klvchen

kubectl config view

# 切換使用者
kubectl config use-context [email protected]

# 此使用者沒有許可權檢視資源
kubectl get pods

# 切換回管理員賬號
kubectl config use-context [email protected]

# 建立一個新的 kubectl 配置檔案
kubectl config set-cluster mycluster --kubeconfig=/tmp/test.conf --server="https://192.168.0.205:6443" --certificate-authority=/etc/kubernetes/pki/ca.crt --embed-certs=true

kubectl config view --kubeconfig=/tmp/test.conf 