
Android Vector曲折的相容之路
分享一下我老師大神的人工智慧教程!零基礎,通俗易懂!http://blog.csdn.net/jiangjunshow
也歡迎大家轉載本篇文章。分享知識,造福人民,實現我們中華民族偉大復興!
Android Vector曲折的相容之路
兩年前寫書的時候,就在研究Android L提出的Vector,可研究下來發現,完全不具備相容性,相信這也是它沒有被廣泛使用的一個原因,經過Google的不懈努力,現在Vector終於迎來了它的春天。
在文章後面,會給出本文的Demo和效果圖,並開源在Github
Vector Drawable
Android 5.0釋出的時候,Google提供了Vector的支援。Vector Drawable相對於普通的Drawable來說,有以下幾個好處:
- Vector影象可以自動進行適配,不需要通過解析度來設定不同的圖片
- Vector影象可以大幅減少影象的體積,同樣一張圖,用Vector來實現,可能只有PNG的幾十分之一
- 使用簡單,很多設計工具,都可以直接匯出SVG影象,從而轉換成Vector影象
- 功能強大,不用寫很多程式碼就可以實現非常複雜的動畫
- 成熟、穩定,前端已經非常廣泛的進行使用了
Vector影象剛釋出的時候,是隻支援Android 5.0+的,對於Android pre-L的系統來說,並不能使用,所以,可以說那時候的Vector並沒有什麼卵用。不過自從AppCompat 23.2之後,Google對p-View的Android系統也進行了相容,也就是說,Vector可以使用於Android 2.1以上的所有系統,只需要引用com.android.support:appcompat-v7:23.2.0以上的版本就可以了,這時候,Vector應該算是迎來了它的春天。
如何獲得Vector影象
概念
首先,需要講解兩個概念——SVG和Vector。
SVG,即Scalable Vector Graphics 向量圖,這種影象格式在前端中已經使用的非常廣泛了,詳見WIKI:https://en.wikipedia.org/wiki/Scalable_Vector_Graphics
Vector,在Android中指的是Vector Drawable,也就是Android中的向量圖,詳見:https://developer.android.com/reference/android/graphics/drawable/VectorDrawable.html
因此,可以說Vector就是Android中的SVG實現,因為Android中的Vector並不是支援全部的SVG語法,也沒有必要,因為完整的SVG語法是非常複雜的,但已經支援的SVG語法已經夠用了,特別是Path語法,幾乎是Android中Vector的標配,詳細可以參考:http://www.w3.org/TR/SVG/paths.html
Vector語法簡介
Android以一種簡化的方式對SVG進行了相容,這種方式就是通過使用它的Path標籤,通過Path標籤,幾乎可以實現SVG中的其它所有標籤,雖然可能會複雜一點,但這些東西都是可以通過工具來完成的,所以,不用擔心寫起來會很複雜。
Path指令解析如下所示:
支援的指令:
- M = moveto(M X,Y) :將畫筆移動到指定的座標位置
- L = lineto(L X,Y) :畫直線到指定的座標位置
- H = horizontal lineto(H X):畫水平線到指定的X座標位置
- V = vertical lineto(V Y):畫垂直線到指定的Y座標位置
- C = curveto(C X1,Y1,X2,Y2,ENDX,ENDY):三次貝賽曲線
- S = smooth curveto(S X2,Y2,ENDX,ENDY)
- Q = quadratic Belzier curve(Q X,Y,ENDX,ENDY):二次貝賽曲線
- T = smooth quadratic Belzier curveto(T ENDX,ENDY):對映
- A = elliptical Arc(A RX,RY,XROTATION,FLAG1,FLAG2,X,Y):弧線
- Z = closepath():關閉路徑
使用原則:
- 座標軸為以(0,0)為中心,X軸水平向右,Y軸水平向下
- 所有指令大小寫均可。大寫絕對定位,參照全域性座標系;小寫相對定位,參照父容器座標系
- 指令和資料間的空格可以省略
- 同一指令出現多次可以只用一個
注意,’M’處理時,只是移動了畫筆, 沒有畫任何東西。 它也可以在後面給出上同時繪製不連續線。
關於這些語法,開發者需要的並不是全部精通,而是能夠看懂即可,其它的都可以交給工具來實現。
從PNG到SVG
- 設計師
要從一般使用的PNG影象轉換到SVG影象,對於設計師來說,並不是一件難事,因為大部分的設計工具(PS、Illustrator等等)都支援匯出各種格式的影象,如PNG、JPG,當然,也包括SVG,因此,設計師可以完全按照原有的方式進行設計,只是最後匯出的時候,選擇SVG即可。
- 程式設計師
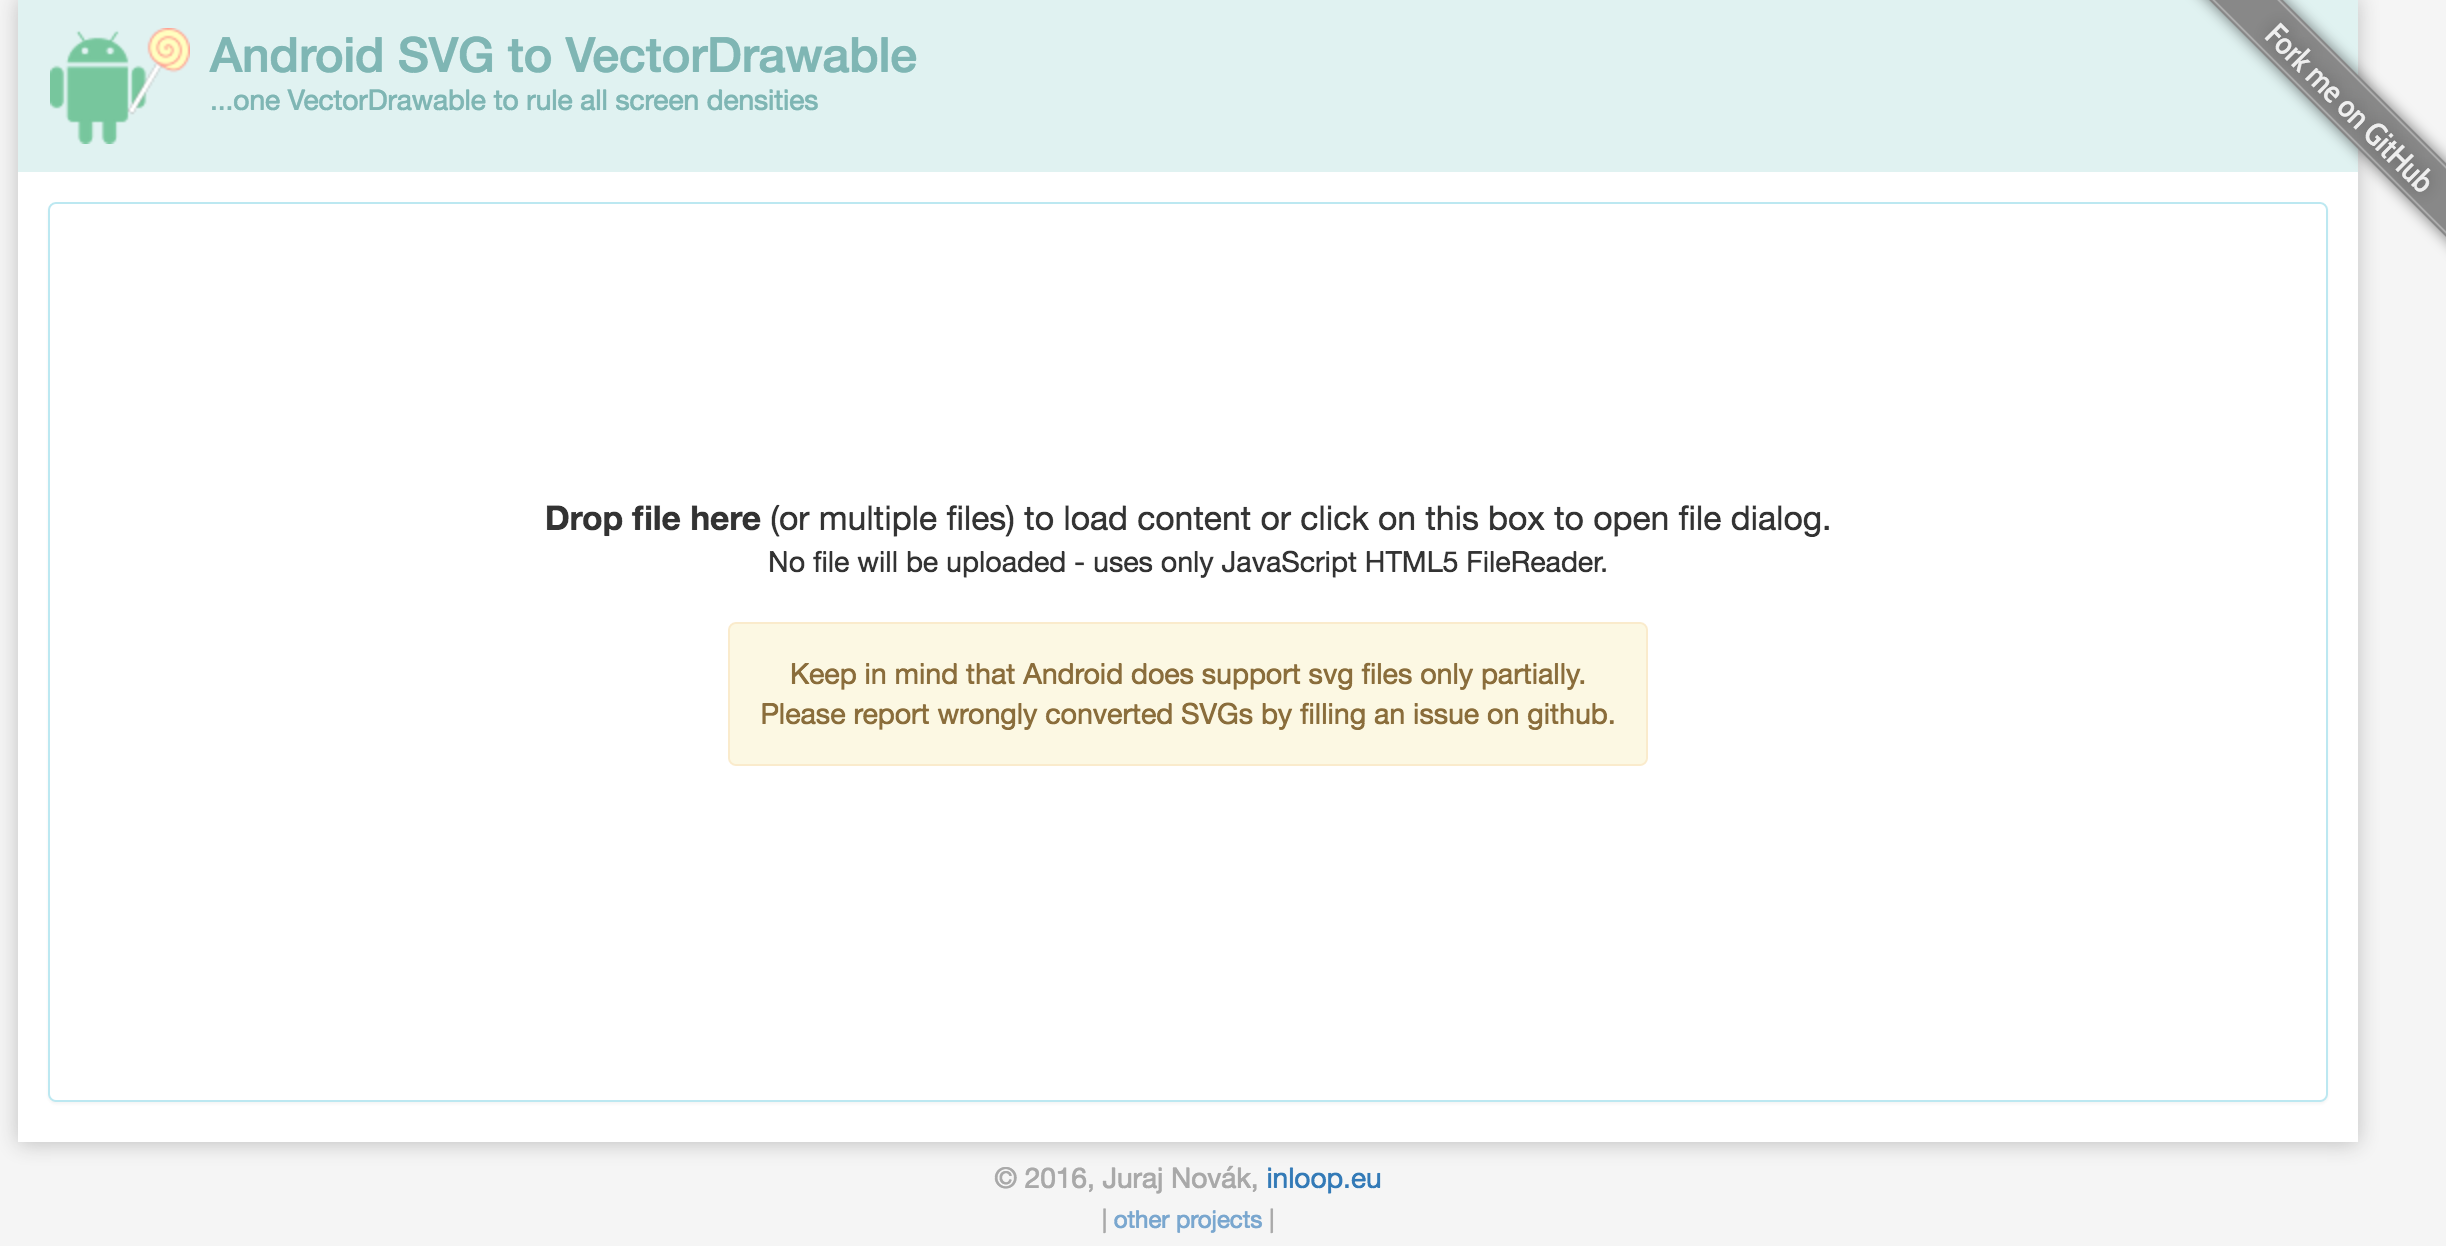
不要求開發者都去學習使用這些設計工具,開發者可以利用一些工具,自己轉換一些比較基礎的影象,http://inloop.github.io/svg2android/ 就是這樣一個非常牛逼的網站,可以線上將普通影象轉換為Android Vector Drawable。如圖所示:
或者,還可以使用SVG的編輯器來進行SVG影象的編寫,例如http://editor.method.ac/
使用Android Studio
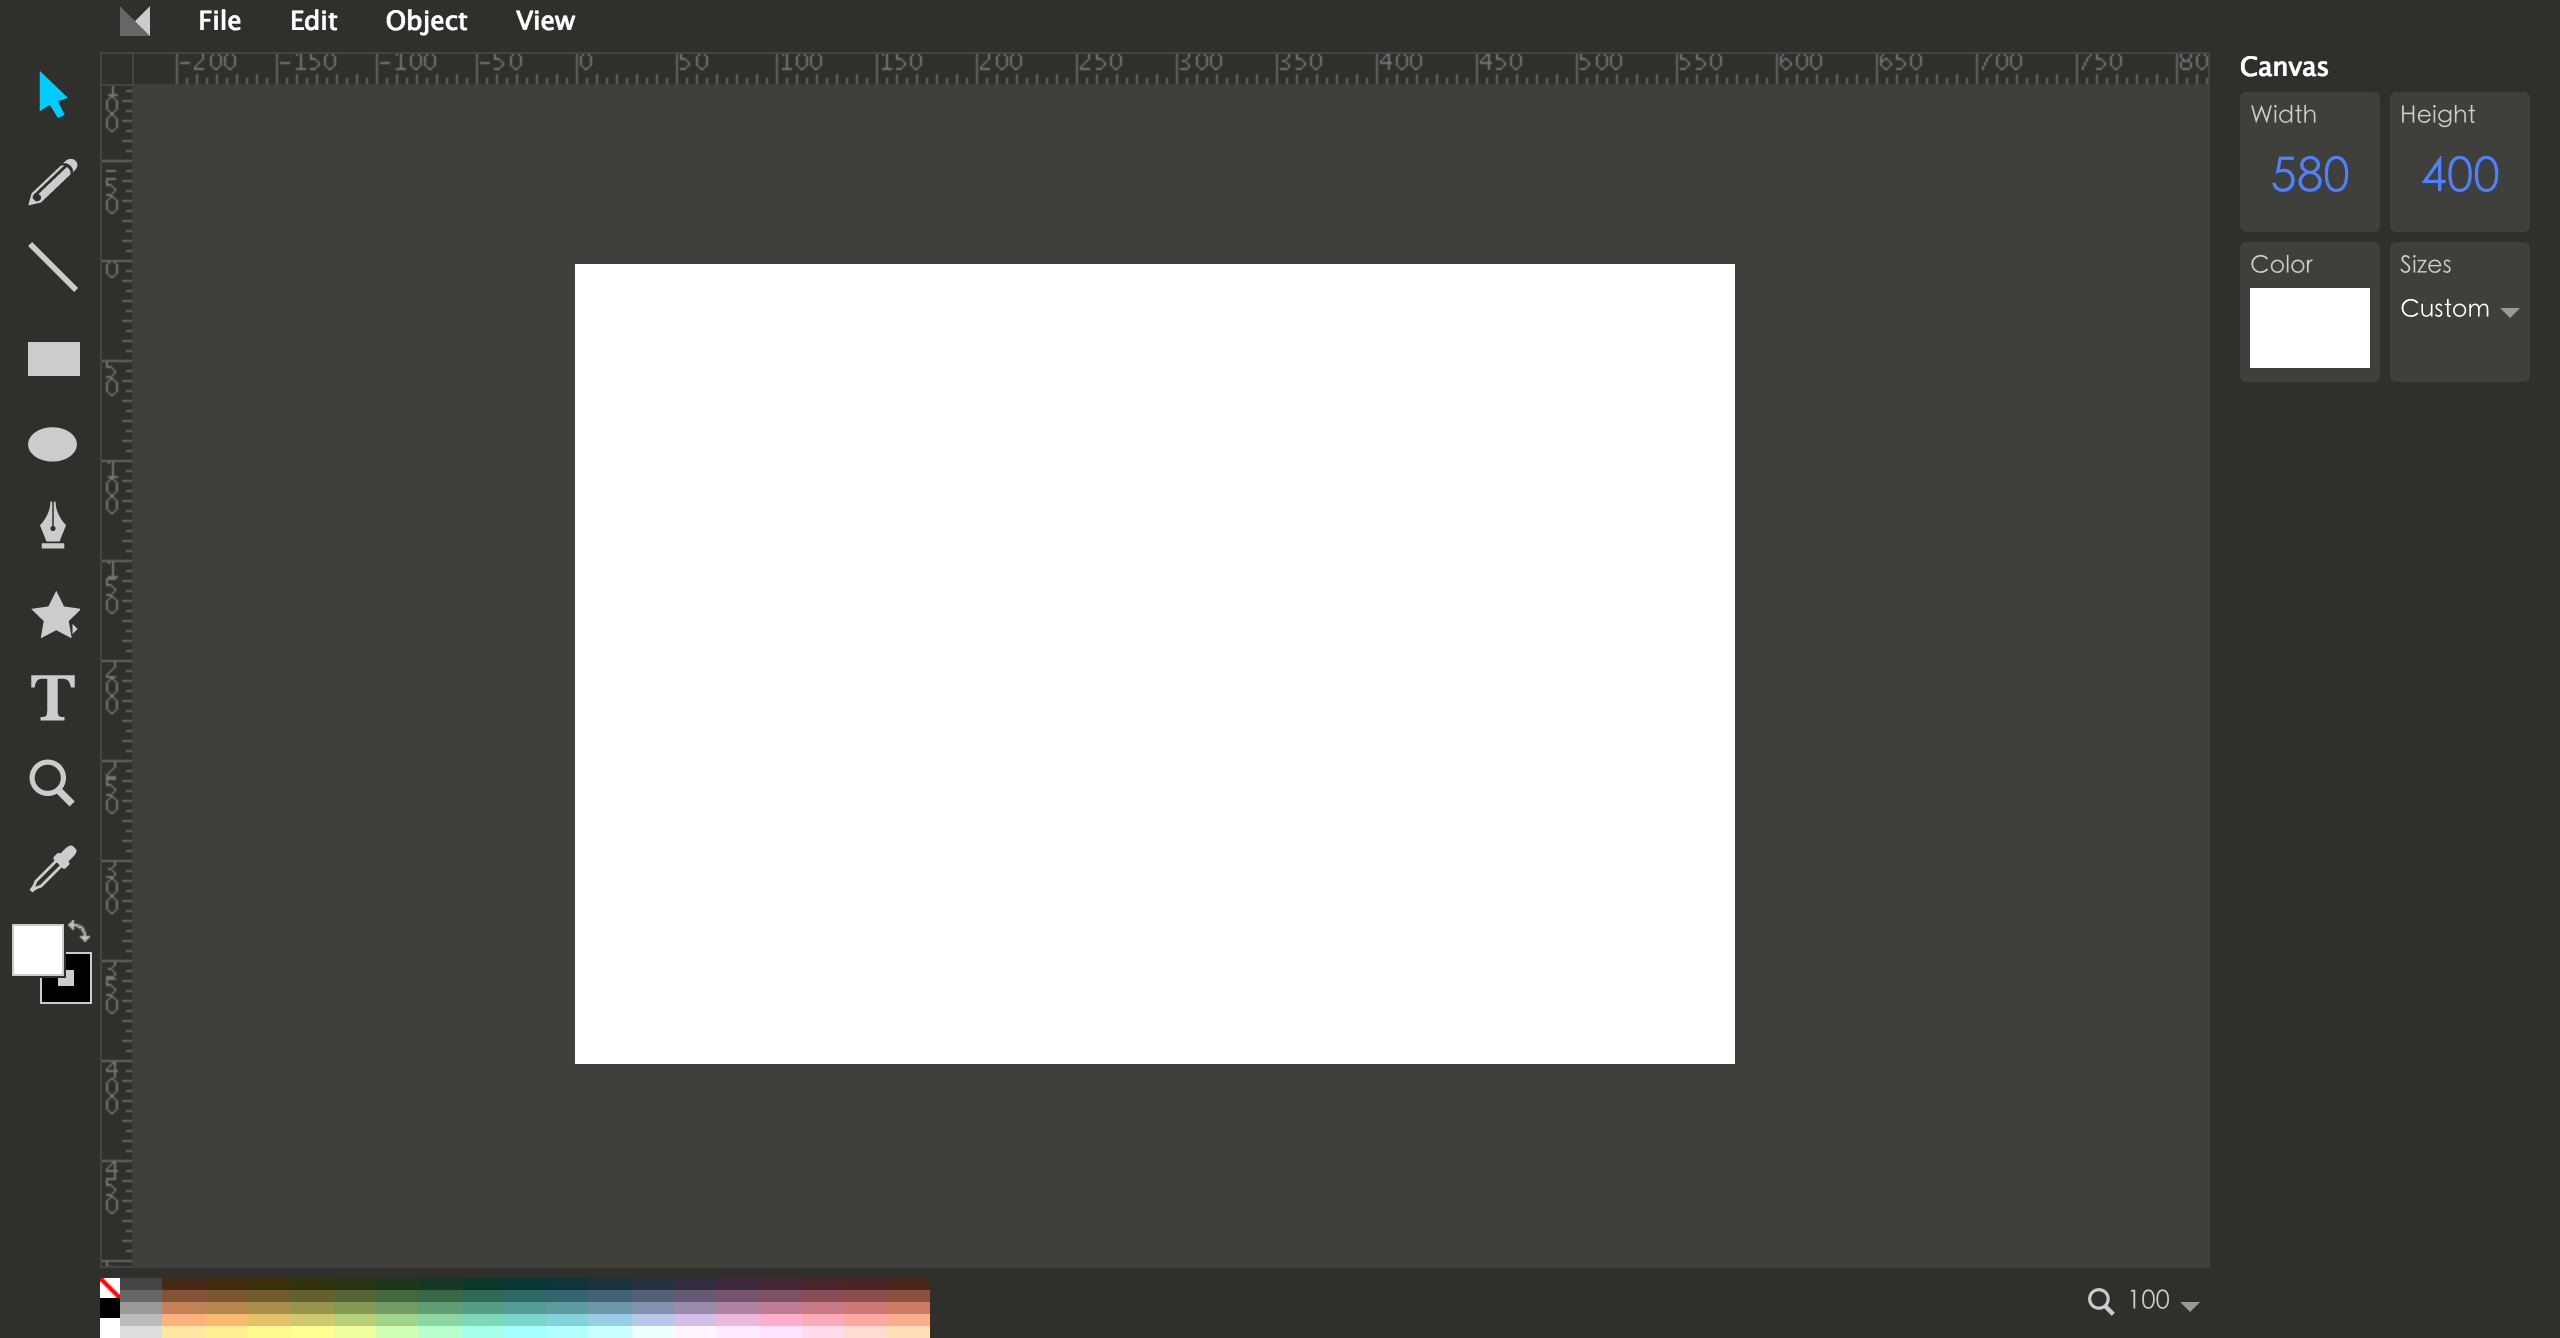
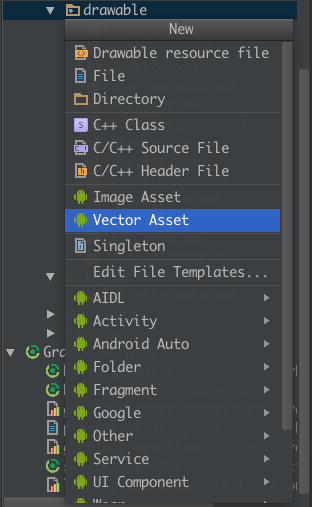
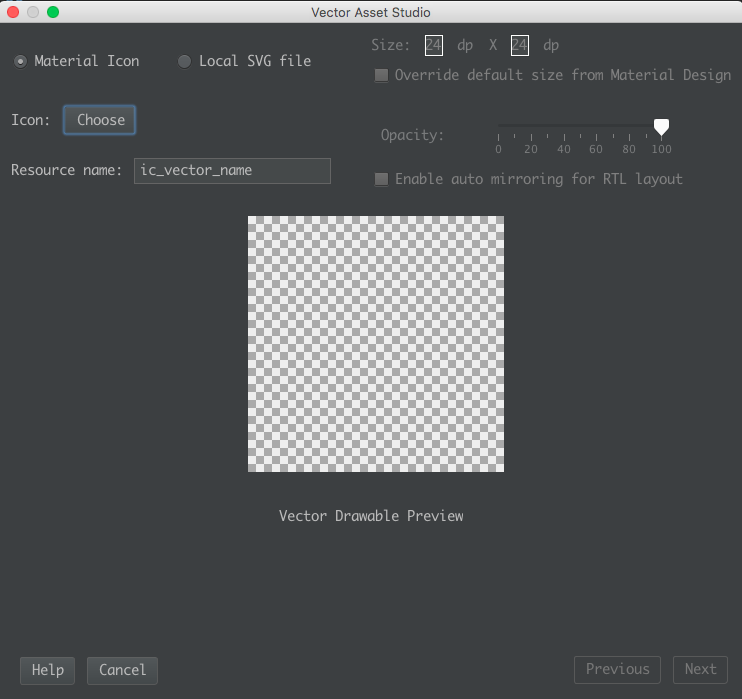
利用Android Studio的Vector Asset,可以非常方便的建立Vector影象,甚至可以直接通過本地的SVG影象來生成Vector影象,如圖所示:
進去之後,就可以生成Vector影象,如圖所示:
Google的相容之路
只相容L+
Vector是在Android L中提出來的新概念,所以在剛開始的時候是隻相容L+的。
Gradle Plugin 1.5的相容
從Gradle Plugin 1.5開始,Google支援了一種相容方式,即在Android L之上,使用Vector,而在L之下,則使用Gradle將Vector生成PNG影象。
Android gradle plugin 1.5釋出以後,加入了一個跟VectorDrawable有關的新功能。Android build tools 提供了另外一種解決相容性的方案,如果編譯的版本是5.0之前的版本,那麼build tools 會把VectorDrawable生成對應的png圖片,這樣在5.0以下的版本則使用的是生成的png圖,而在5.0以上的版本中則使用VectorDrawable.在build.gradle新增generatedDensities配置,可以配置生成的png圖片的密度。
AppCompat23.2的相容
從AppCompat23.2開始,Google開始支援在低版本上使用Vector。
靜態Vector影象
我們有很多方法能夠得到這些Vector,那麼如何使用它們呢,Android 5.0以上的使用就不講了,不太具有普遍代表性,我們從pre-L版本的相容開始做起。
pre-L版本相容
VectorDrawableCompat依賴於AAPT的一些功能,它能保持最近向量圖使用的新增的屬性ID,以便他們可以被pre-L版本之前的引用。
在Android 5.0之前使用Vector,需要aapt來對資源進行一些處理,這一過程可以在aapt的配置中進行設定,如果沒有啟用這樣一個flag,那麼在5.0以下的裝置上執行就會發生android.content.res.Resources$NotFoundException。
首先,你需要在專案的build.gradle指令碼中,增加對Vector相容性的支援,程式碼如下所示:
使用Gradle Plugin 2.0以上:
android { defaultConfig { vectorDrawables.useSupportLibrary = true }}
- 1
- 2
- 3
- 4
- 5
- 6
使用Gradle Plugin 2.0以下,Gradle Plugin 1.5以上:
android { defaultConfig { // Stops the Gradle plugin’s automatic rasterization of vectors generatedDensities = [] } // Flag to tell aapt to keep the attribute ids around aaptOptions { additionalParameters "--no-version-vectors" }}
- 1
- 2
- 3
- 4
- 5
- 6
- 7
- 8
- 9
- 10
像前面提到的,這種相容方式實際上是先關閉AAPT對pre-L版本使用Vector的妥協,即在L版本以上,使用Vector,而在pre-L版本上,使用Gradle生成相應的PNG圖片,generatedDensities這個陣列,實際上就是要生成PNG的圖片解析度的陣列,使用appcompat後就不需要這樣了。
當然,最重要的還是新增appcompat的支援:
compile 'com.android.support:appcompat-v7:23.4.0'
- 1
同時,確保你使用的是AppCompatActivity而不是普通的Activity。
Vector影象
一個基本的Vector影象,實際上也是一個xml檔案,如下所示:
<vector xmlns:android="http://schemas.android.com/apk/res/android" android:width="200dp" android:height="200dp" android:viewportHeight="500" android:viewportWidth="500"> <path android:name="square" android:fillColor="#000000" android:pathData="M100,100 L400,100 L400,400 L100,400 z"/></vector>
- 1
- 2
- 3
- 4
- 5
- 6
- 7
- 8
- 9
- 10
- 11
- 12
顯示如圖所示:
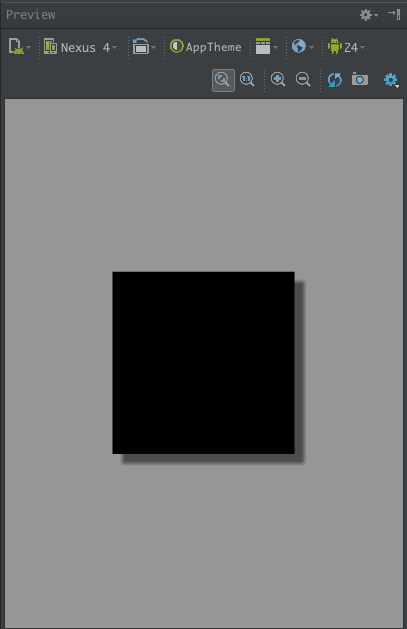
這裡需要解釋下這裡的幾個標籤:
- android:width \ android:height:定義圖片的寬高
- android:viewportHeight \ android:viewportWidth:定義影象被劃分的比例大小,例如例子中的500,即把200dp大小的影象劃分成500份,後面Path標籤中的座標,就全部使用的是這裡劃分後的座標系統。
這樣做有一個非常好的作用,就是將影象大小與影象分離,後面可以隨意修改影象大小,而不需要修改PathData中的座標。
- android:fillColor:PathData中的這些屬性就不詳細講了,與Canvas繪圖的屬性基本類似。
在控制元件中使用
有了靜態的Vector影象,就可以在控制元件中使用了。
可以發現,這裡我們使用的都是普通的ImageView,好像並不是AppcomatImageView,這是因為使用了Appcomat後,系統會自動把ImageView轉換為AppcomatImageView。
ImageView\ImageButton
對於ImageView這樣的控制元件,要相容Vector影象,只需要將之前的android:src屬性,換成app:srcCompat即可,示例程式碼如下所示:
<ImageView android:id="@+id/iv" android:layout_width="wrap_content" android:layout_height="wrap_content" app:srcCompat="@drawable/vector_image"/>
- 1
- 2
- 3
- 4
- 5
在程式碼中設定的話,程式碼如下所示:
ImageView iv = (ImageView) findViewById(R.id.iv);iv.setImageResource(R.drawable.vector_image);
- 1
- 2
setBackgroundResource也是可以設定Vector的API
Button
Button並不能直接使用app:srcCompat來使用Vector影象,需要通過Selector來進行使用,首先,建立兩個影象,用於Selector的兩個狀態,程式碼如下所示:
selector1.xml
<vector xmlns:android="http://schemas.android.com/apk/res/android" android:width="24dp" android:height="24dp" android:viewportHeight="24.0" android:viewportWidth="24.0"> <path android:fillColor="#FF000000" android:pathData="M14.59,8L12,10.59 9.41,8 8,9.41 10.59,12 8,14.59 9.41,16 12,13.41 14.59,16 16,14.59 13.41,12 16,9.41 14.59,8zM12,2C6.47,2 2,6.47 2,12s4.47,10 10,10 10,-4.47 10,-10S17.53,2 12,2zM12,20c-4.41,0 -8,-3.59 -8,-8s3.59,-8 8,-8 8,3.59 8,8 -3.59,8 -8,8z"/></vector>
- 1
- 2
- 3
- 4
- 5
- 6
- 7
- 8
- 9
- 10
selector2.xml
<vector xmlns:android="http://schemas.android.com/apk/res/android" android:width="24dp" android:height="24dp" android:viewportHeight="24.0" android:viewportWidth="24.0"> <path android:fillColor="#FF000000" android:pathData="M11,15h2v2h-2zM11,7h2v6h-2zM11.99,2C6.47,2 2,6.48 2,12s4.47,10 9.99,10C17.52,22 22,17.52 22,12S17.52,2 11.99,2zM12,20c-4.42,0 -8,-3.58 -8,-8s3.58,-8 8,-8 8,3.58 8,8 -3.58,8 -8,8z"/></vector>
- 1
- 2
- 3
- 4
- 5
- 6
- 7
- 8
- 9
- 10
selector.xml
<?xml version="1.0" encoding="utf-8"?><selector xmlns:android="http://schemas.android.com/apk/res/android"> <item android:drawable="@drawable/selector1" android:state_pressed="true"/> <item android:drawable="@drawable/selector2"/></selector>
- 1
- 2
- 3
- 4
- 5
非常簡單,只是把普通的Selector中的影象換成了Vector影象而已,接下來,在Button中使用這個Selector即可:
<Button android:id="@+id/btn" android:layout_width="70dp" android:layout_height="70dp" android:background="@drawable/selector"/>
- 1
- 2
- 3
- 4
- 5
然後執行,如果你認為可以執行,那就是太天真了,都說了是相容,怎麼能沒有坑呢,這裡就是一個坑……
這個坑實際上是有歷史淵源的,Google的一位開發者在部落格中寫到:
First up, this functionality was originally released in 23.2.0, but then we found some memory usage and Configuration updating issues so we it removed in 23.3.0. In 23.4.0 (technically a fix release) we’ve re-added the same functionality but behind a flag which you need to manually enable.
實際上,他們的這個改動,就影響了類似DrawableContainers(DrawableContainers which reference other drawables resources which contain only a vector resource)這樣的類,它的一個典型,就是Selector(StateListDrawable也是)。這個開發者在文中提到的flag,就是下面的這段程式碼,放在Activity的前面就可以了:
static { AppCompatDelegate.setCompatVectorFromResourcesEnabled(true);}
- 1
- 2
- 3
開啟這個flag後,你就可以正常使用Selector這樣的DrawableContainers了。同時,你還開啟了類似android:drawableLeft這樣的compound drawable的使用許可權,以及RadioButton的使用許可權,以及ImageView’s src屬性。
RadioButton
RadioButton的Button同樣可以定義,程式碼如下所示:
<RadioButton android:layout_width="50dp" android:layout_height="50dp" android:button="@drawable/selector"/>
- 1
- 2
- 3
- 4
動態Vector基礎
動態Vector才是Android Vector Drawable的精髓所在
動態的Vector需要通過animated-vector標籤來進行實現,它就像一個粘合劑,將控制元件與Vector影象粘合在了一起,一個基礎的animated-vector程式碼如下所示:
<animated-vector xmlns:android="http://schemas.android.com/apk/res/android" android:drawable="@drawable/XXXXX1"> <target android:name="left" android:animation="@animator/XXXXX2"/></animated-vector>
- 1
- 2
- 3
- 4
- 5
- 6
- 7
- 8
- 9
實際上這裡面只有兩個重點是需要關注的,XXXXX1和XXXXX2。一個具體的示例如下所示:
<animated-vector xmlns:android="http://schemas.android.com/apk/res/android" android:drawable="@drawable/ic_arrow"> <target android:name="left" android:animation="@animator/anim_left"/> <target android:name="right" android:animation="@animator/anim_right"/></animated-vector>
- 1
- 2
- 3
- 4
- 5
- 6
- 7
- 8
- 9
- 10
- 11
- 12
- 13
這裡表示目標影象是drawable/ic_arrow,對left、right分別使用了anim_left、anim_right動畫。這裡的name屬性,就是在靜態Vector影象中group或者path標籤的name屬性。
animated-vector標籤在現在的Android Studio中實際上是會報錯的,但這個並不影響編譯和執行,屬於Android Studio的Bug。
目標影象
XXXXX1是目標Vector影象,也就是靜態的Vector影象,例如:
<vector xmlns:android="http://schemas.android.com/apk/res/android" android:width="120dp" android:height="120dp" android:viewportHeight="24.0" android:viewportWidth="24.0"> <group android:name="left"> <path android:fillColor="#FF000000" android:pathData="M9.01,14L2,14v2h7.01v3L13,15l-3.99,-4v3"/> </group> <group android:name="right"> <path android:fillColor="#FF000000" android:pathData="M14.99,13v-3L22,10L22,8h-7.01L14.99,5L11,9l3.99,4"/> </group></vector>
- 1
- 2
- 3
- 4
- 5
- 6
- 7
- 8
- 9
- 10
- 11
- 12
- 13
- 14
- 15
- 16
- 17
- 18
- 19
可以發現,這裡的Vector影象比之前我們看見的要多了一個group標籤。group標籤的作用有兩個:
- 對Path進行分組,由於我們後面需要針對Path進行動畫,所以可以讓具有同樣動畫效果的Path在同一個Group中
- 拓展動畫效果,單個的path標籤是沒有translateX和translateY屬性的,因此無法使用屬性動畫來控制path translateY,而group標籤是有的,所以我們需要先將相關的path標籤元素包裹在一個個的group標籤中.
動畫效果
XXXXX2實際上就是模板要實現的動畫,動畫效果實際上就是基礎的屬性動畫,例如:
anim_left.xml
<objectAnimator xmlns:android="http://schemas.android.com/apk/res/android" android:duration="1000" android:interpolator="@android:interpolator/anticipate_overshoot" android:propertyName="translateX" android:repeatCount="infinite" android:repeatMode="reverse" android:valueFrom="0" android:valueTo="-10" android:valueType="floatType"/>
- 1
- 2
- 3
- 4
- 5
- 6
- 7
- 8
- 9
- 10
- 11
anim_right.xml
<objectAnimator xmlns:android="http://schemas.android.com/apk/res/android" android:duration="1000" android:interpolator="@android:interpolator/anticipate_overshoot" android:propertyName="translateX" android:repeatCount="infinite" android:repeatMode="reverse" android:valueFrom="0" android:valueTo="10" android:valueType="floatType"/>
- 1
- 2
- 3
- 4
- 5
- 6
- 7
- 8
- 9
- 10
- 11
在程式碼中使用
ImageView imageView = (ImageView) findViewById(R.id.iv);AnimatedVectorDrawableCompat animatedVectorDrawableCompat = AnimatedVectorDrawableCompat.create( this, R.drawable.square_anim);imageView.setImageDrawable(animatedVectorDrawableCompat);((Animatable) imageView.getDrawable()).start();
- 1
- 2
- 3
- 4
- 5
- 6
動態Vector相容性問題
向下相容問題
一說到相容,就不得不提到坑,幾乎所有的為了相容而做的改動,都會留下一些不可填滿的坑,動態Vector動畫也不例外,雖然Google已經對Vector影象進行了Android 2.1以上的相容,但對於動態Vector動畫,還是有很多限制的,例如:
- Path Morphing,即路徑變換動畫,在Android pre-L版本下是無法使用的。
- Path Interpolation,即路徑插值器,在Android pre-L版本只能使用系統的插值器,不能自定義。
- Path Animation,即路徑動畫,這個一般使用貝塞爾曲線來代替,所以沒有太大影響。
向上相容問題
除了在低版本上的相容性問題,在L版本以上,也存在相容性問題,即繼承了AppCompatActivity的介面,如果直接設定ImageView的srcCompat,那麼Path Morphing動畫是無法生效的,因為預設的AppCompatActivity已經預設使用ImageViewCompat給轉換了,但是AnimatedVectorDrawableCompat是不支援Path Morphing動畫的,所以,在AppCompatActivity介面裡面就無效了。
解決辦法很簡單,即使用程式碼來給ImageView新增動畫:
ImageView imageView = (ImageView) view;AnimatedVectorDrawable morphing = (AnimatedVectorDrawable) getDrawable(morphing);imageView.setImageDrawable(morphing);if (morphing != null) { morphing.start();}
- 1
- 2
- 3
- 4
- 5
- 6
注意不要使用AnimatedVectorDrawableCompat即可。
抽取string相容問題
開發者有時候為了程式碼簡潔可能會把Vector影象中的pathData放到string.xml中,然後在Vector影象中引用string。
但這種方式如果通過生成png來相容5.0以下機型的話,會報pathData錯誤,編譯器不會去讀取string.xml,只能把pathData寫到Vector影象中,動畫檔案中也是一樣,這也是為了相容做出的犧牲嗎,不得而知。
其它相容問題
其它非常奇怪、詭異、不能理解的相容性問題,只能通過版本資料夾的方式來進行相容了,例如drawable-v21和drawable,分別建立兩個檔名相同的資源在兩個資料夾下,這樣在21以上版本,會使用drawable-v21的資源,而其它會使用drawable下的資源。
動態Vector進階
用好ObjectAnimator
所謂Vector動畫進階,實際上就是在利用ObjectAnimator的一些屬性,特別是trimPathStart、trimPathEnd這兩個針對Vector的屬性(要注意pathData屬性不相容pre-L)。
這兩個屬性的官方文件如下所示:
android:trimPathStartThe fraction of the path to trim from the start, in the range from 0 to 1.android:trimPathEndThe fraction of the path to trim from the end, in the range from 0 to 1.android:trimPathOffsetShift trim region (allows showed region to include the start and end), in the range from 0 to 1.
- 1
- 2
- 3
- 4
- 5
- 6
其實很簡單,就是一個影象的擷取,設定一個比例即可,即當前繪製多少比例的影象,其餘部分不繪製,Start和End分別就是從PathData的Start和End開始算,大家參考幾個例子就能理解了。
理解Path Morph
Path Morph動畫是Vector動畫的一個高階使用,說到底,也就是兩個PathData的轉換,但是這種轉換並不是隨心所欲的,對於兩個PathData,它們能進行Path Morph的前提是,它們具有相同個數的關鍵點,即兩個路徑的變換,只是關鍵點的座標變化,掌握了這一個基本原理,實現Path Morph就非常容易了。
學習Vector
在Github上我開源了一個Vector的動畫Demo庫,地址如下所示:
https://github.com/xuyisheng/VectorDemo
這個Demo分為兩部分,一部分是可以相容Android pre-L版本和L+版本的Vector動畫,另一部分(通過Actionbar的按鈕切換)是隻能相容L+的Vector動畫。
每個Vector動畫,基本都包含四部分內容,即:
- Vector:影象資源
- Animated-vector:動畫、影象粘合劑
- ObjectAnimator:動畫資源
- 程式碼:啟動動畫
每個Vector動畫通過這四個部分去進行分析,就非常清晰了。
這裡展示下Demo的效果圖:
Vector效能問題
有讀者在文章後面留言,詢問VectorDrawable的效能問題,這裡解釋一下。
- Bitmap的繪製效率並不一定會比Vector高,它們有一定的平衡點,當Vector比較簡單時,其效率是一定比Bitmap高的,所以,為了保證Vector的高效率,Vector需要更加簡單,PathData更加標準、精簡,當Vector影象變得非常複雜時,就需要使用Bitmap來代替了
- Vector適用於ICON、Button、ImageView的圖示等小的ICON,或者是需要的動畫效果,由於Bitmap在GPU中有快取功能,而Vector並沒有,所以Vector影象不能做頻繁的重繪
- Vector影象過於複雜時,不僅僅要注意繪製效率,初始化效率也是需要考慮的重要因素
- SVG載入速度會快於PNG,但渲染速度會慢於PNG,畢竟PNG有硬體加速,但平均下來,載入速度的提升彌補了繪製的速度缺陷。
Google的這個視訊中,已經對Vector的效率問題做了解釋,可以參考下:
https://www.youtube.com/watch?v=wlFVIIstKmA&feature=youtu.be&t=6m3s
參考
https://medium.com/@shemag8/animated-vector-drawable-e4d7743d372c#.3vkt12j20
https://github.com/jpuderer/AnimatedButton
給我老師的人工智慧教程打call!http://blog.csdn.net/jiangjunshow
