從零打造線上網盤系統之Struts2框架核心功能全解析
歡迎瀏覽Java工程師SSH教程從零打造線上網盤系統系列教程,本系列教程將會使用SSH(Struts2+Spring+Hibernate)打造一個線上網盤系統,本系列教程是從零開始,所以會詳細以及著重地闡述SSH三個框架的基礎知識,第四部分將會進入專案實戰,如果您已經對SSH框架有所掌握,那麼可以直接瀏覽第四章,原始碼均提供在GitHub/ssh-network-hard-disk上供大家參閱
我相信你在使用任何一個MVC框架的時候都會接觸到以下功能,你必須要會使用這些功能才能夠在Struts2中熟練的解決大多數問題
本篇目標
- 接收引數
- 引數校驗
- 資料轉換
- 響應資料
- 上傳下載
- 異常處理
- 國際化支援
接收引數 示例原始碼下載
Struts2接收引數有三種方式,
- Servlet API
- getter和Setter方法
- 模型驅動
Servlet API
    @Action(value = "register")
    public void register() {
        ActionContext context = ActionContext.getContext();
        HttpServletRequest httpServletRequest = (HttpServletRequest) context.get(StrutsStatics.HTTP_REQUEST);
        String username = httpServletRequest.getParameter("username");
        String password = httpServletRequest.getParameter("password");
        System.out.println("username:" + username + "    password:" + password);
    }
getter和Setter方法
    private String username;

    private String password;

    public String getUsername() {
        return username;
    }

    public void setUsername(String username) {
        this.username = username;
    }

    public String getPassword() {
        return password;
    }

    public void setPassword(String password) {
        this.password = password;
    }

    @Action(value = "register")
    public void register() {
        System.out.println("username:" + username + "    password:" + password);
    }
當然你也可以使用JavaBean進行接收引數,類似下面這樣,前端傳遞的name屬性需要有些變動,name屬性需要改成xxxx.xxx與屬性名一致
<form action="register.action" method="get">
    <input name="user.username" type="text">
    <input name="user.password" type="text">
    <input type="submit">
</form>
private User user;
public User getUser() {
return user;
}
public void setUser(User user) {
this.user = user;
}
@Action(value = "register")
public void register() {
System.out.println("username:" + user.getUsername() + " password:" + user.getPassword());
}模型驅動
@ParentPackage("default")
public class RegisterAction implements ModelDriven<User> {
private User user = new User();
@Override
public User getModel() {
return user;
}
@Action(value = "register")
public void register() {
System.out.println("username:" + user.getUsername() + " password:" + user.getPassword());
}
}
引數校驗 示例原始碼下載
對於前端傳遞的引數來講,存在太多不穩定性,所以對於引數的校驗是必不可少的,對於校驗來說大體上分為兩種,一種是前端校驗,一種是後端校驗,前端校驗的方法在這裡就不再累述,這裡僅僅講述Struts2如何使用Validation校驗框架
獲取引數
  private String username;
  private String password;
  getter and setter......
在Action同級目錄增加
<!DOCTYPE validators PUBLIC
        "-//Apache Struts//XWork Validator 1.0.2//EN"
        "http://struts.apache.org/dtds/xwork-validator-1.0.2.dtd">

<validators>
    <!-- 要對哪個屬性進行驗證 -->
    <field name="username">
        <!-- 驗證規則 -->
        <field-validator type="requiredstring">
            <!-- 違反規則的提示 -->
            <message>使用者名稱不能為null!</message>
        </field-validator>
    </field>
    <field name="password">
        <field-validator type="requiredstring">
            <message>密碼不能為null</message>
        </field-validator>
    </field>

</validators>
核心Action(這裡可以看到如果校驗正確跳轉 "/success.jsp",如果校驗失敗錯誤資訊輸出在"/form.jsp")
    @Override
    @Action(value = "register", results = {
            @Result(name = SUCCESS, location = "/success.jsp"),
            @Result(name = INPUT,location = "/form.jsp")
    })
    public String execute() throws Exception {
        System.out.println("username"+username+"password:"+password);
        return SUCCESS;
    }
下載本小節原始碼訪問http://localhost:8080/form.jsp
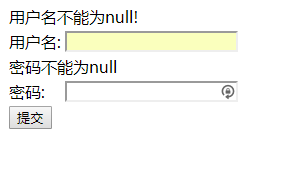
資料轉換 示例原始碼下載
WEB系統都是基於網頁形式的,接收到的資訊都是字串,Java又是強型別的語言,所以必須需要一個轉換的過程.而Struts2的型別轉換是基於OGNL表示式的,只需要將表單中的name屬性根據OGNL規則命名就能轉換成相應的Java型別,通常情況下哦我們無需建立自己的型別轉換器,Struts2的內建轉換器完全能幫助我們完成任務

例如我們有下面一個需求(包含Integer,Date,陣列的轉換)

我們該怎麼辦呢?不不不~~~~我們什麼都不用做正常編寫Action就行了,Struts2會自動幫我們進行轉換
public class RegisterAction extends ActionSupport implements ModelDriven<User> {

    private User user = new User();

    @Override
    public User getModel() {
        return user;
    }
    @Override
    @Action(value = "register", results = {
            @Result(name = SUCCESS, location = "/success.jsp")
    })
    public String execute() throws Exception {
        System.out.println(user.toString());
        return SUCCESS;
    }
}

好吧,真的沒什麼挑戰力,下面我們要自己實現轉換器了
例如:我們需要將字串"自行車,1033,100"轉換為Java的Product物件
自定義轉換器
public class StringToProductTypeConverter extends DefaultTypeConverter {

    @Override
    public Object convertValue(Map context, Object value, Class toType) {
        if (toType == Product.class) {
            String[] params = (String[]) value;
            Product product = new Product();
            String[] productValues = params[0].split(",");
            product.setProductName(productValues[0].trim());
            product.setPrice(Float.parseFloat(productValues[1].trim()));
            product.setCount(Integer.parseInt(productValues[2].trim()));
            return product;
        } else if (toType == String.class) {
            Product product = (Product) value;
            return product.toString();
        }
        return null;
    }

}
配置全域性轉換器(在WEB-INF\classes目錄新建xwork-conversion.properties)
com.jimisun.action.Product=com.jimisun.action.StringToProductTypeConverter在Action中接收(不要使用模型驅動方式接收引數,接收不到)
public class ProductAction extends ActionSupport {

    private Product product;

    public Product getProduct() {
        return product;
    }

    public void setProduct(Product product) {
        this.product = product;
    }

    @Override
    @Action(value = "register", results = {
            @Result(name = SUCCESS, location = "/success.jsp")
    })
    public String execute() throws Exception {
        System.out.println(product.toString());
        return SUCCESS;
    }
}
響應資料 示例原始碼下載
我們一直都沒有探討一個問題,那就是Struts2的結果的響應.對於任何一個程式而言,最重要的莫過於輸入和輸出,當我們瞭解了Struts2接收引數後,現在我們一起來看一看Struts2如何響應引數吧
- Servlet API存取值
- 屬性值存取值
- 值棧Set方法存取值
- 值棧Push方法存取值
Servlet API存取值
    ActionContext context = ActionContext.getContext();
    HttpServletRequest request  = (HttpServletRequest) context.get(StrutsStatics.HTTP_REQUEST);
    request.setAttribute("requestValue","requestValue");
<%--從Servlet API的Request域物件中取值--%>
Request取值:<s:property value="#request.requestValue"/>屬性值存取值
private User user = new User("jimisun", "jimisun");<%--獲取屬性值--%>
簡單屬性取值:<s:property value="user.username"/>那麼對於複雜的屬性存取值我們可以這樣,例如List
private List<User> list = new ArrayList<>();
  User user1 = new User("list1","list1");
  User user2 = new User("list2","list2");
  list.add(user1);
  list.add(user2);
<%--獲取屬性List值--%>
list屬性取值:
<br>
<s:iterator value="list" var="user">
<s:property value="#user.username"/>
<s:property value="#user.password"/>
<br/>
</s:iterator>值棧Set方法存取值
 ActionContext context = ActionContext.getContext();
 ValueStack valueStack = context.getValueStack();
 valueStack.set("valueStackDemo", "valueStackDemoSet");
<%--值棧Set方法取值--%>
值棧set取值:<s:property value="valueStackDemo"/>值棧Push方法存取值
 ActionContext context = ActionContext.getContext();
 ValueStack valueStack = context.getValueStack();
 valueStack.push("valueStackPush");
<%--值棧Push方法取值--%>
值棧push取值:<s:property value="[0].top"/>OK,現在對於Struts2的幾種資料的響應方式我們大概已經知道了,現在我們來看一看這幾種儲存資料方式在值棧中的結構,在本小節原始碼中執行專案直接訪問http://localhost:8080/outputdate.action即可
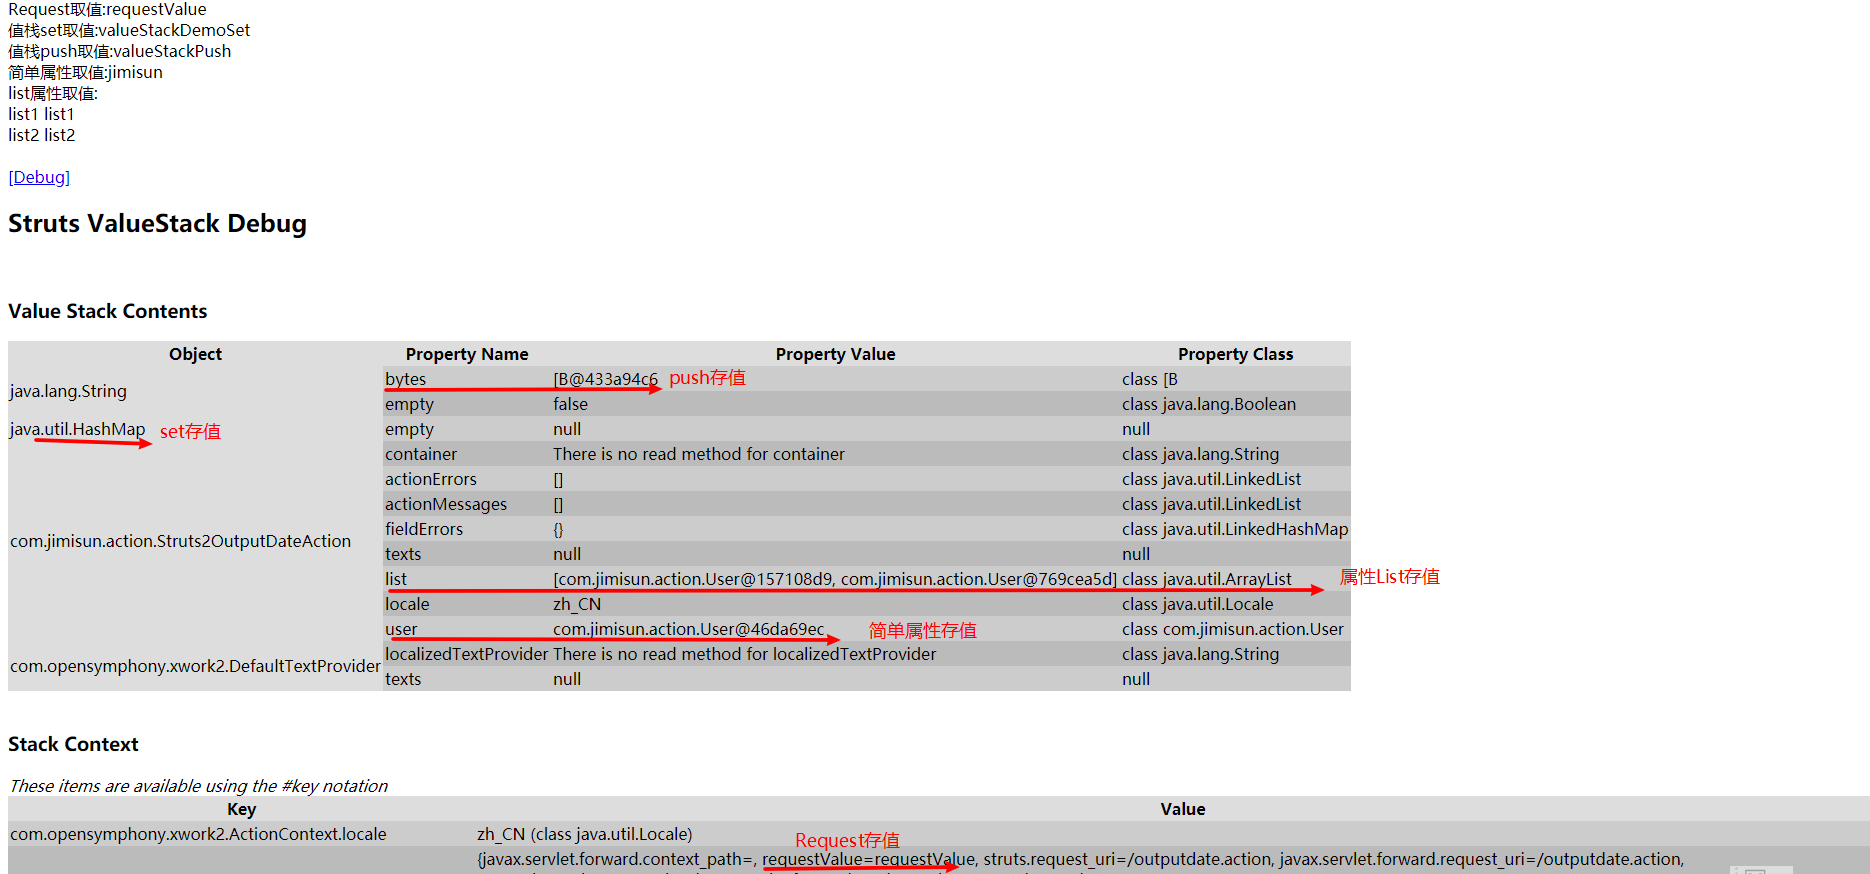
注意點:使用OGNL表示式訪問"根"物件中的物件及屬性時,不需要前面加"#"號
檔案上傳 示例原始碼下載
對於檔案上傳功能Struts2並沒有提出自己的解決方案,但是Struts2為檔案上傳提供了統一的介面,開發人員在使用上傳檔案的元件時,並不需要知道太多的細節就可以輕鬆使用他們,Struts2目前支援三種上傳檔案元件Commons-FileUpload,cos,pell,例如我們使用Commons-FileUpload為例來快速學習檔案上傳功能
commons-fileupload依賴(已經內建,無須再次新增)
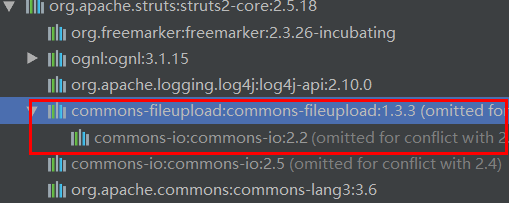
struts.properties相關配置
struts.multipart.parser=jakarta
struts.multipart.maxSize=2097152
核心上傳程式碼
    @Action(value = "UploadAction", params = {"uploadPath", "D:/"}, results = {
            @Result(name = "success", location = "/result.jsp")
    })
    public String execute() throws Exception {
        String fn = "";
        if (filename.equals("")) {
            fn = uploadPath + uploadFileName;
        } else {
            fn = uploadPath + filename;
        }

        if (new File(fn).exists()) {
            result = "該檔案已經存在!";
        } else {
            FileOutputStream fileOutputStream = new FileOutputStream(fn);
            InputStream inputStream = new FileInputStream(upload);
            byte[] buffer = new byte[8192];
            int count = 0;
            while ((count = inputStream.read(buffer)) > 0) {
                fileOutputStream.write(buffer, 0, count);
            }
            fileOutputStream.close();
            inputStream.close();
            result = "檔案上傳成功!";
        }
        return "success";
    }
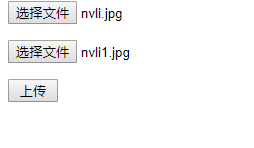
下面我們再進行展示同時上傳多個檔案的示例,對於同時上傳多個檔案,我們僅僅需要做一點改變即可,即接收值的屬性改成陣列或者List集合
    private File[] upload;
    private String[] uploadFileName;
@Action(value = "UploadAction", params = {"uploadPath", "D:/"}, results = {
@Result(name = "success", location = "/result.jsp")
})
public String execute() throws Exception {
for (int i = 0; i < uploadFileName.length; i++) {
String fn = uploadPath + uploadFileName[i];
FileOutputStream fileOutputStream = new FileOutputStream(fn);
InputStream inputStream = new FileInputStream(upload[i]);
byte[] buffer = new byte[8192];
int count = 0;
while ((count = inputStream.read(buffer)) > 0) {
fileOutputStream.write(buffer, 0, count);
}
fileOutputStream.close();
inputStream.close();
}
result = "檔案上傳成功!";
return "success";
}
我們瞭解了檔案上傳那麼現在我們再來一起看一下檔案的下載,再Struts2中提供了一種使用Stream下載檔案的方式,類似於檔案和瀏覽器的一個"代理",通過這個"代理"我們就能控制某某下載檔案,如下是一個Download的Action
public InputStream getFileInputStream() {
        // 以及檔案的mime型別以及建立流
        ServletContext context = ServletActionContext.getServletContext();
        contentType = context.getMimeType(context.getRealPath(filePath + "/" + fileName));
        setContentType(contentType);
        return context.getResourceAsStream(filePath + "/" + fileName);
    }

    @Override
    @Action(value = "download", params = {"filePath", "/file"}, results = {
            @Result(name = SUCCESS, type = "stream",
                    params = {"contentType", "${contentType}", "inputName", "fileInputStream", "contentDisposition", "attachment;filename=\"${fileName}\""})
    })
    public String execute() throws Exception {
        return SUCCESS;
    }
異常處理 示例原始碼下載
異常處理是任何成熟的MVC框架必備的功能,在Struts2中提供了異常的攔截器,我們可以在struts.xml檔案中進行配置異常,以靈活的方式處理異常
配置全域性異常
    <package name="default" extends="struts-default" namespace="/">
        <global-results>
            <result name="exception">/error.jsp</result>
        </global-results>

        <global-exception-mappings>
            <exception-mapping exception="java.sql.SQLException" result="exception"></exception-mapping>
        </global-exception-mappings>

        ...
    </package>
模擬異常
@ParentPackage("default")
public class ExceptionAction extends ActionSupport {


    @Override
    @Action(value = "testerror", results = {
            @Result(name = SUCCESS, location = "/success.jsp")
    })
    public String execute() throws Exception {
        if ("a".equals("a")) {
            throw new SQLException("SQL錯誤!!!");
        }
        return SUCCESS;
    }
}
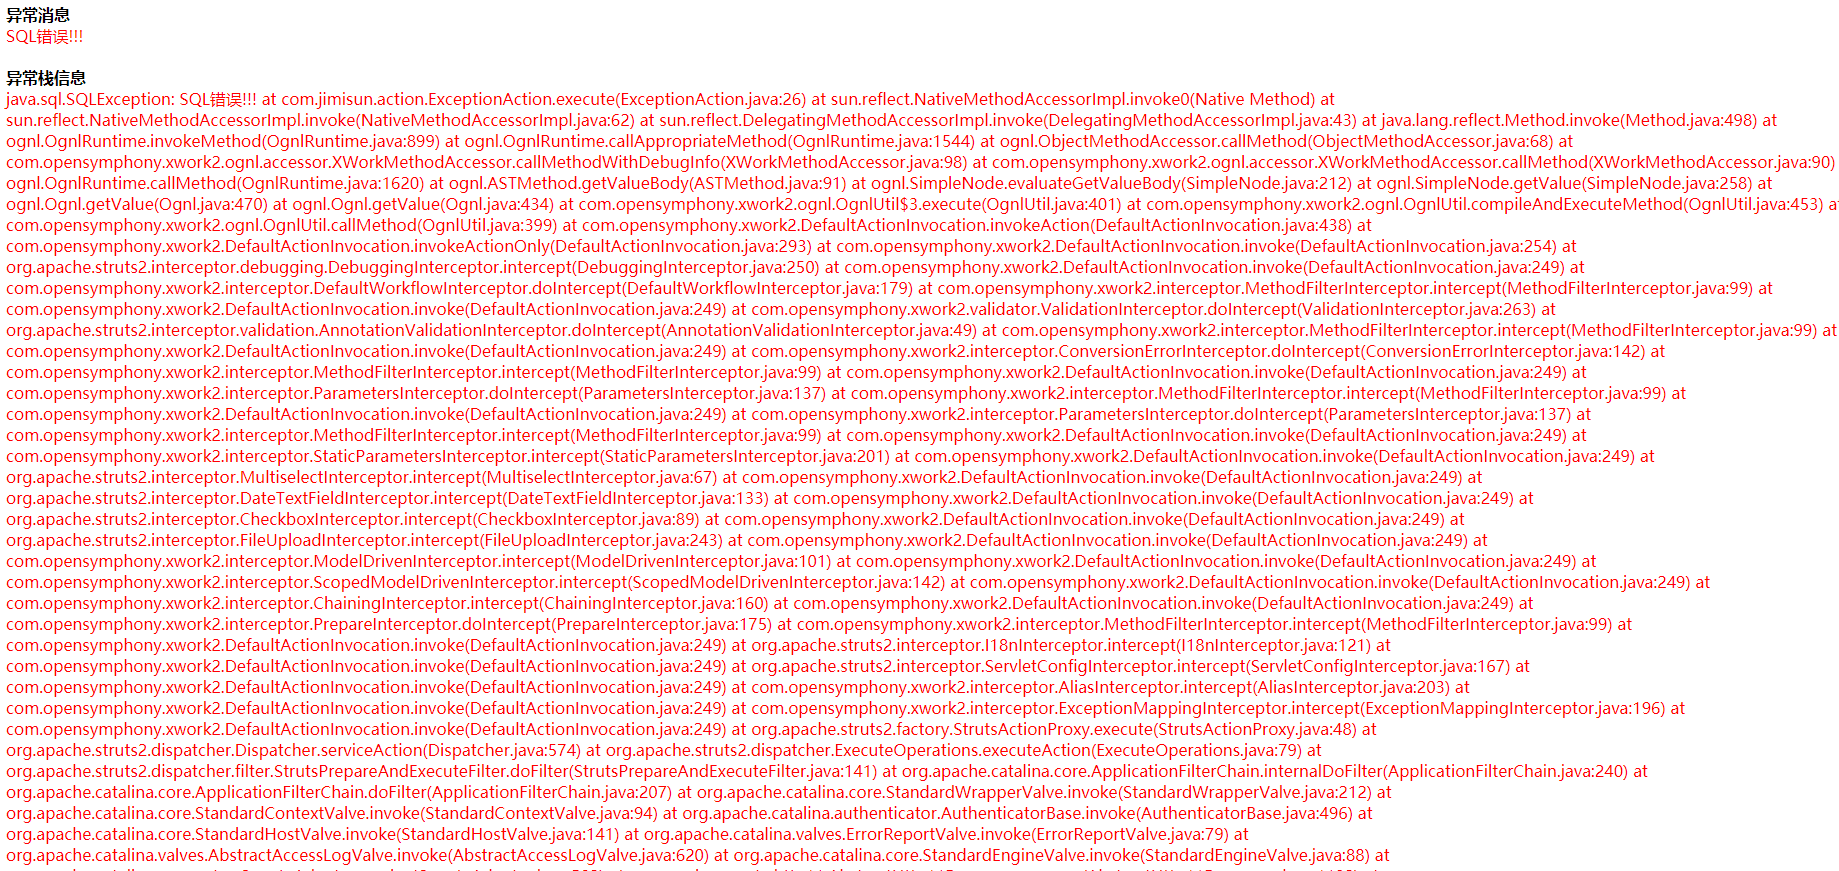
當發生異常後就會跳轉到所配置的error.jsp頁面
國際化支援 示例原始碼下載
Struts2的國際化支援是建立在Java對國際化的支援之上的,對Java的國際化支援進行了封裝,下面我們來針對一段優美的詩,我們我們將會展示中文和英文兩種頁面給訪問者
我那美麗的女孩
我的摯愛
無論夢裡夢外
去去來來擡頭眺望雲端
高不可攀
低頭憶你容顏
溫柔絢爛
配置Struts2全域性資原始檔(使用下面兩種方式都可以)
在struts.properties中配置
struts.custom.i18n.resources=Resource
在struts.xml中配置
<constant name="struts.custom.i18n.resources" value="Resource"/>建立兩個資原始檔(中文和英文)
Resource_en_US.properties
welcome = hello,{0}
content = My beautiful girl, my love, my dream, my dream, my dream, my dream, my dream
Resource_zh_CN.properties
welcome = 你好,{0}
content = 我那美麗的女孩 我的摯愛 無論夢裡夢外 去去來來 擡頭眺望雲端 高不可攀 低頭憶你容顏 溫柔絢爛
在Action中使用
public class BeautifulGirlAction extends ActionSupport {

    private String username;
    private String content;
    private String welcome;

    @Override
    @Action(value = "girl", results = {
            @Result(name = SUCCESS, location = "/success.jsp")
    })
    public String execute() throws Exception {
        welcome = getText("welcome", new String[]{username});
        content = getText("content");
        return SUCCESS;
    }
    ...
}
通過下載本小節示例原始碼訪問http://localhost:8080/form.jsp

本章總結
在WEB應用中常見的功能是很多的,很多場景下Struts2都為我們提供了響應的解決方案,本章敘述中在下主要講述了Struts2的常見的功能的基本使用,即只有廣度而沒有深度,更為深度的學習還希望小夥伴們查閱相關資料,例如OGNL表示式等...
