
微信小程式+SpringBoot+mybatis+MySQL實現簡單的登入
阿新 • • 發佈:2018-11-19
微信小程式+SpringBoot+mybatis+MySQL實現簡單的登入
當下微信小程式和springboot都是比較火的。今天我們來用springboot和微信小程式來實現簡單的登入。
1.首先來完成微信小程式端,新建一個微信小程式。
如果不會的可以檢視我的上一篇文章開發微信小程式簡易教程
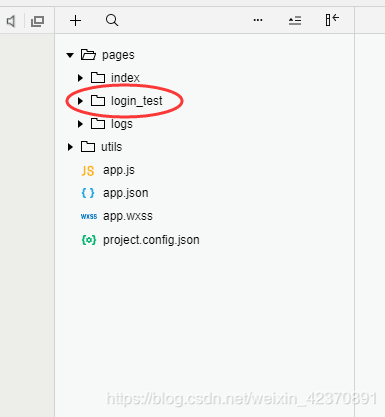
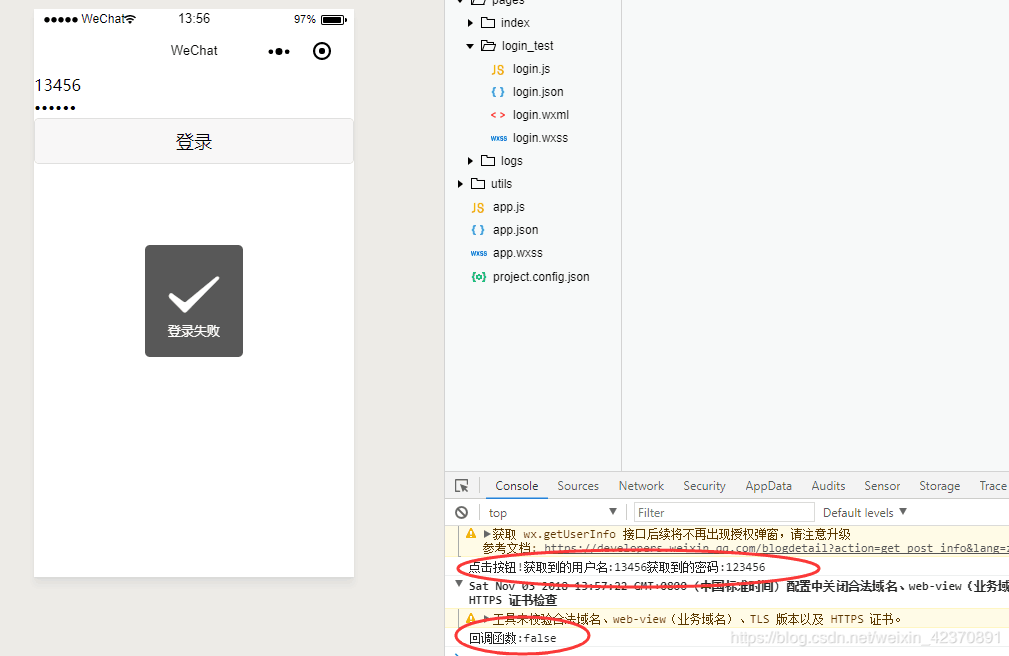
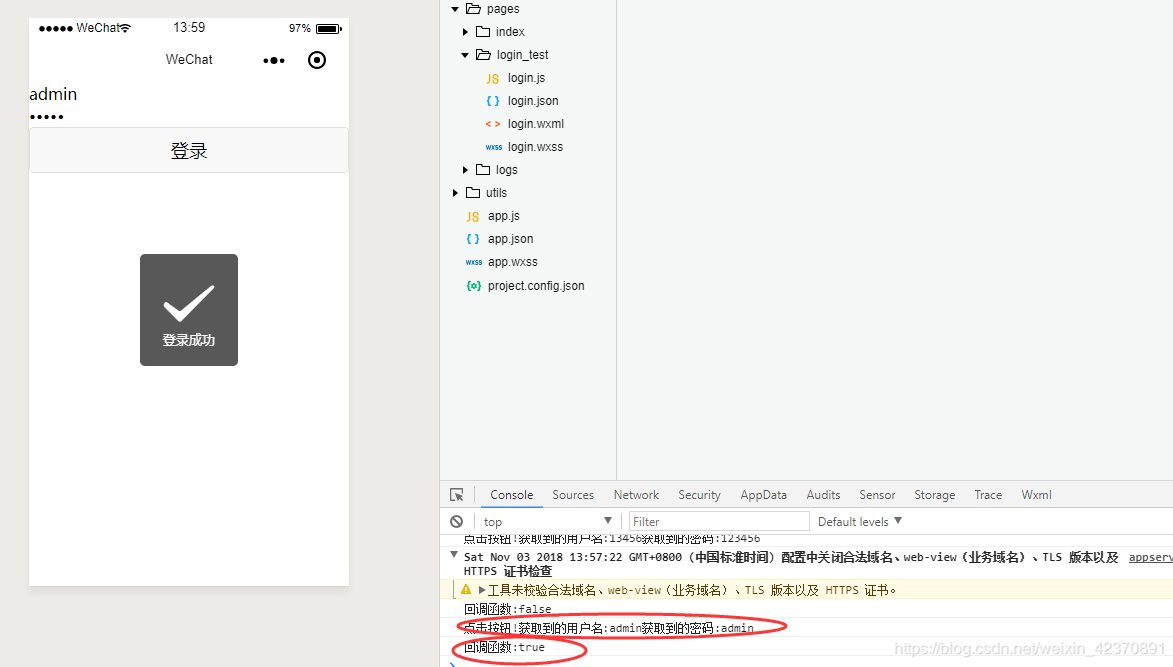
2.我們在pages目錄下新建一個login_test目錄
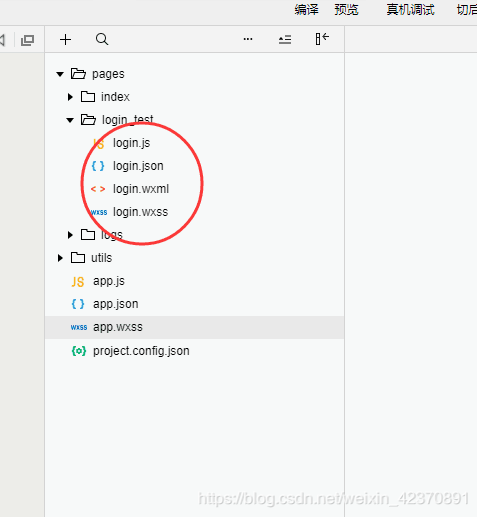
3.在login_test目錄下新建一個名為login的Page。這樣就會自動生成如下圖幾個檔案
4.我們開啟app.json檔案,將"pages/login_test/login"這句話放到前面,目的是我們一開啟就能看到這個,設定為首頁。
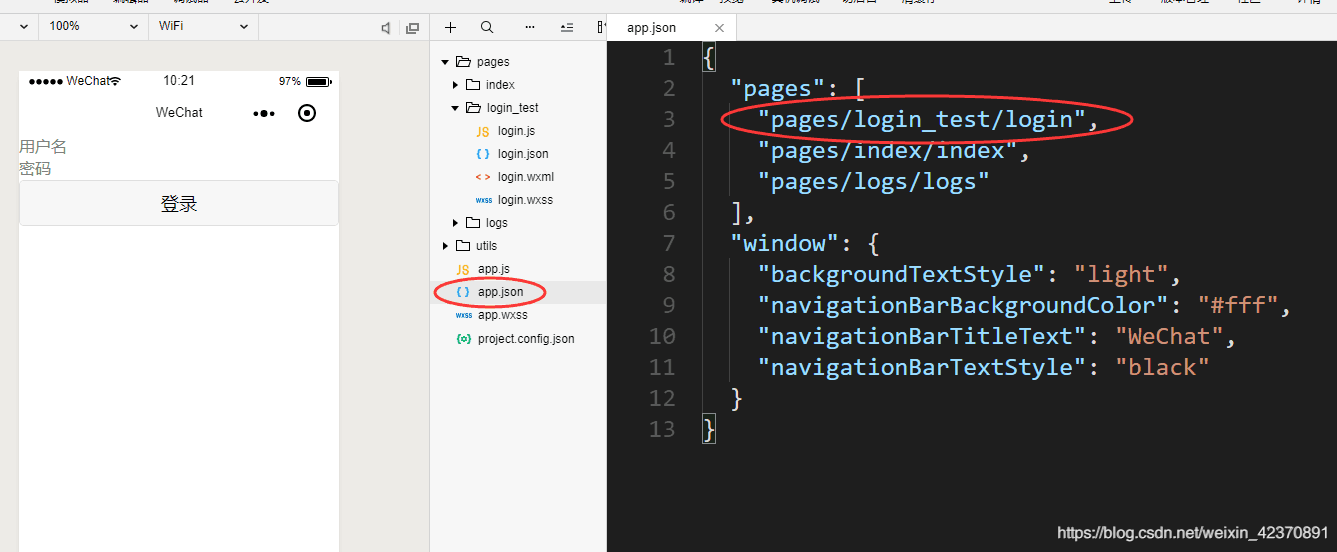
我們每在pages裡新建一個都會在app.json裡自動生成一個配置。
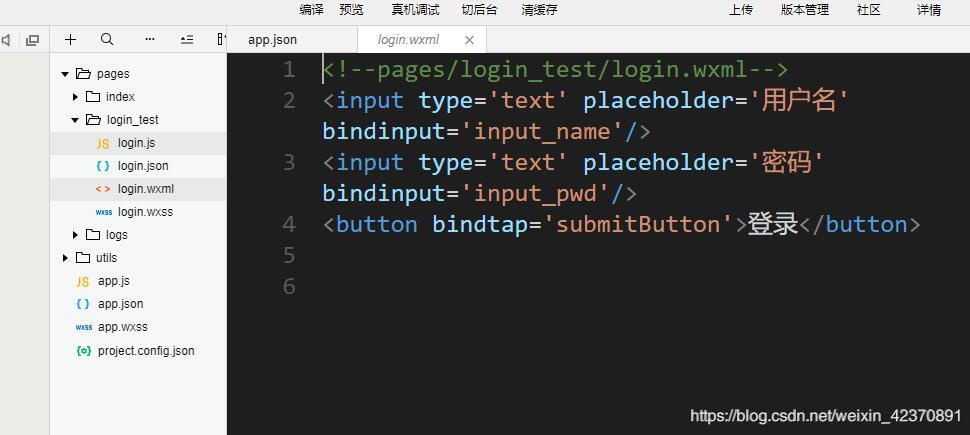
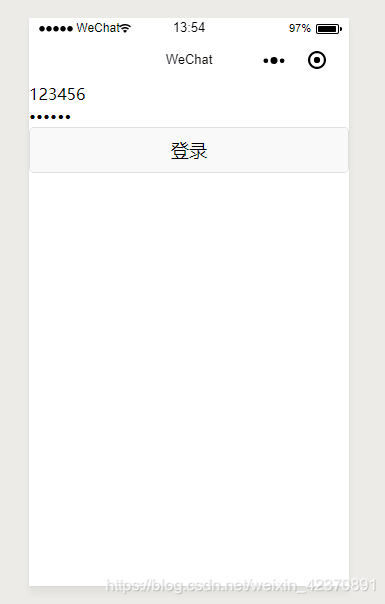
5.開啟login.wxml檔案編寫頁面
6.接下來我們在login.js裡面寫邏輯了
// pages/login_test/login.js
Page({

    /**
     * 頁面的初始資料
     */
    data: {
        username:'',
        password:''
    },
  input_name:function(e){
        this.setData({
          username:e.detail.value
        })
    },
    input_pwd: function (e) {
        this.setData({
          password: e.detail.value
        })
    },
    submitButton:function(){
      console.log("點選按鈕!" + "獲取到的使用者名稱:" + this.data.username + "獲取到的密碼:" + this.data.password)
        var that = this;

        wx.request({
          url: 'http://localhost:8080/login',
            method:'POST',
            header:{'content-type':'application/x-www-form-urlencoded'},
            data:{
              'username': that.data.username,
              'password': that.data.password
            },
            success:function(res){
                console.log("回撥函式:"+res.data)
                var resData = res.data;
                if(resData == true){
                    wx.showToast({
                        title: '登入成功',
                        duration:2000
                    })
                }else{
                    wx.showToast({
                        title: '登入失敗',
                        duration:2000
                    })
                }
            }

        })


    },


    /**
     * 生命週期函式--監聽頁面載入
     */
    onLoad: function (options) {

    },

    /**
     * 生命週期函式--監聽頁面初次渲染完成
     */
    onReady: function () {

    },

    /**
     * 生命週期函式--監聽頁面顯示
     */
    onShow: function () {

    },

    /**
     * 生命週期函式--監聽頁面隱藏
     */
    onHide: function () {

    },

    /**
     * 生命週期函式--監聽頁面解除安裝
     */
    onUnload: function () {

    },

    /**
     * 頁面相關事件處理函式--監聽使用者下拉動作
     */
    onPullDownRefresh: function () {

    },

    /**
     * 頁面上拉觸底事件的處理函式
     */
    onReachBottom: function () {

    },

    /**
     * 使用者點選右上角分享
     */
    onShareAppMessage: function () {

    }
})
7.編寫好,這樣微信端就算完成了。
接下來我們編寫後臺
首先我們建一個數據庫表
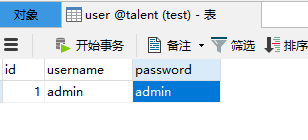
賬號和密碼分別為admin,admin
8.建立一個springboot專案。
利用mybatis逆向工程生成對應的檔案。
不會mybatis逆向工程的看我之前的文章Mybatis逆向工程建立方法
9.Controller類
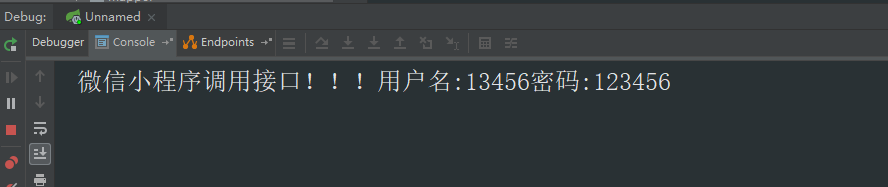
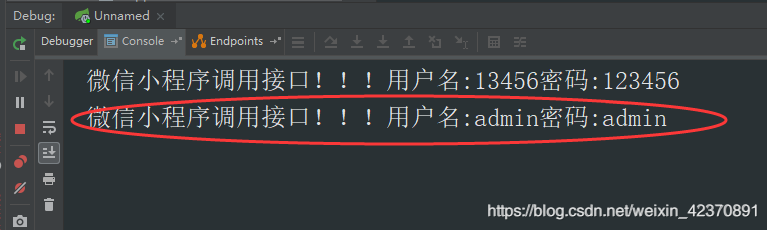
package com.springboot.controller;

import com.springboot.service.UserService;
import org.springframework.beans.factory.annotation.Autowired;
import org.springframework.web.bind.annotation.RequestMapping;
import org.springframework.web.bind.annotation.RestController;


/**
 * Created by Administrator on 2018\9\8 0008.
 */
@RestController
public class UserController {

    @Autowired
    private UserService userService;


    @RequestMapping("/login")
        public  boolean login (String username, String password){
        System.out.println ( "微信小程式呼叫介面!!!使用者名稱:" + username + "密碼:" + password );
        boolean login = userService.login ( username, password );
        if (login) {
            return true;
        }
        return false;
    }
}
10.Service類
package com.springboot.service;

public interface UserService {
    boolean login(String username,String password);
}
11.實現Service類
package com.springboot.service;

import com.springboot.dao.UserEntityMapper;
import com.springboot.dao.entity.UserEntity;
import org.springframework.beans.factory.annotation.Autowired;
import org.springframework.stereotype.Service;

@Service
public class UserServiceImpl implements UserService{
    @Autowired
    private UserEntityMapper userEntityMapper;
    @Override
    public boolean login(String username,String password){
        UserEntity userEntity = new UserEntity ();
        userEntity.setUsername ( username );
        userEntity.setPassword ( password );

        UserEntity user = userEntityMapper.selectUser ( userEntity );
        if (user != null){
            return true;
        }
        return false;
    }

}
12.Mapper類
UserEntity selectUser(UserEntity userEntity);
13.Mapper.xml
 <select id="selectUser" parameterType="com.springboot.dao.entity.UserEntity" resultMap="BaseResultMap">
    select * from user where username=#{username} and password=#{password}
  </select>
14.這樣就都寫完啦。執行一下程式
在微信端輸入賬號密碼,我們先輸入一個錯的。賬號123456密碼123456
執行結果:
我們輸入正確的賬號密碼,賬號admin,密碼admin
執行如下
大功告成!!!