Zabbix通過percona監控Mysql
阿新 • • 發佈:2018-11-19
1、安裝percona-zabbix-templates
[[email protected] ~]# rpm -ivh percona-zabbix-templates-1.1.8-1.noarch.rpm
2、配置zabbix agent
[[email protected] scripts]# cd /var/lib/zabbix/percona/templates/
[[email protected] templates]# ls
userparameter_percona_mysql.conf
zabbix_agent_template_percona_mysql_server_ht_2.0.9-sver1.1.8.xml
[ 3、zabbix agent配置mysql連線
[[email protected] ~]# cd /var/lib/zabbix/percona/scripts/ [[email protected] scripts]# ls ##sh的指令碼是監控獲取MySQL狀態的,php檔案是配置連線資料庫使用者名稱密碼的 get_mysql_stats_wrapper.sh ss_get_mysql_stats.php [[email protected] scripts]# vim ss_get_mysql_stats.php.cnf ##建立 .cnf 檔案指定Mysql使用者名稱和密碼 <?php $mysql_user = 'root'; $mysql_pass = 'westos'; [[email protected] scripts]# ls get_mysql_stats_wrapper.sh ss_get_mysql_stats.php ss_get_mysql_stats.php.cnf [[email protected] templates]# systemctl restart zabbix-agent
4、測試指令碼
注意:測試完必須刪除/tmp/localhost-mysql_cacti_stats.txt , 否則會因為許可權問題報錯(root、zabbix)
[[email protected] ~]# /var/lib/zabbix/percona/scripts/get_mysql_stats_wrapper.sh gg    ##驗證,返回數字
0
[[email protected] ~]# cd /tmp/
[[email protected] tmp]# rm -fr localhost-mysql_cacti_stats.txt
5、配置Mysql slave監控
- 配置訪問mysql的基本引數:
[[email protected] tmp]# cd /var/lib/zabbix/
[[email protected] zabbix]# vim .my.cnf
[mysql]
host=localhost
user=zabbix
password=westos
socket=/var/lib/mysql/mysql.sock

[mysqladmin]
host=localhost
user=zabbix
password=westos
socket=/var/lib/mysql/mysql.sock

[client]
user=root
password=westos
- 在mysql slave的agent裡面需要check下看是否生效:
[[email protected] zabbix]# sudo -u zabbix -H /var/lib/zabbix/percona/scripts/get_mysql_stats_wrapper.sh running-slave
0
[[email protected] zabbix]# ls /tmp/       ##確保無".txt"檔案
systemd-private-c1ddf0ad51564235bd754efafcac49bd-httpd.service-tCBDey
systemd-private-c1ddf0ad51564235bd754efafcac49bd-mariadb.service-jcGip9
[[email protected] zabbix]# systemctl restart zabbix-agent
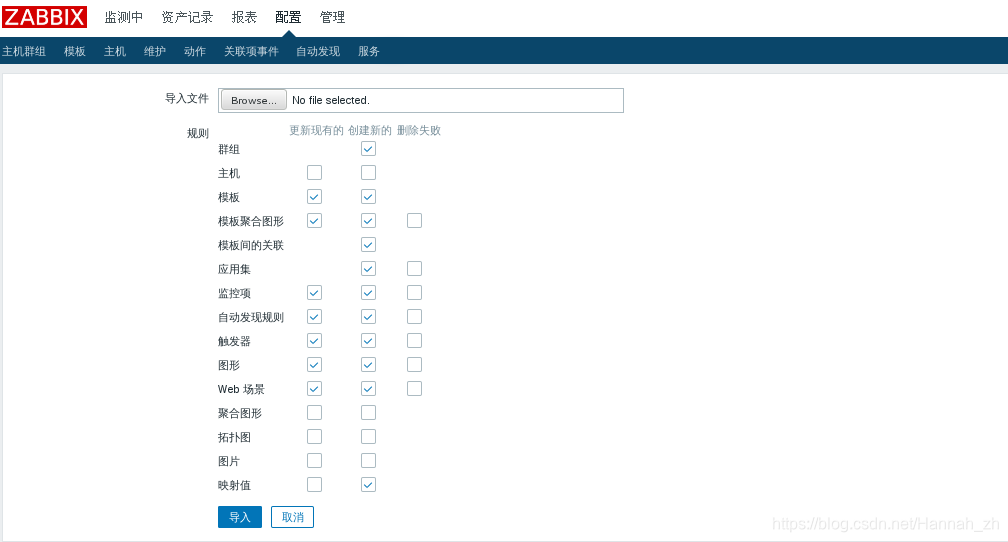
7、匯入模板(配置—>模板—>匯入)
- 選擇模板並匯入


- 成功匯入模板

- 新增模板


- 檢視模板(191項監控項)

