企業—Nginx基礎搭建
Red Hat Enterprise Linux 7.5下Nginx安裝
一、簡介
Nginx("engine x")是一款是由俄羅斯的程式設計師 Igor Sysoev 所開發高效能的Web和 反向代理 伺服器,也是一個 IMAP/POP3/SMTP 代理伺服器。在高連線併發的情況下,Nginx 是 Apache 伺服器不錯的替代品。
Nginx 特點
Nginx 做為 HTTP 伺服器,有以下幾項基本特性:
-
處理靜態檔案,索引檔案以及自動索引;開啟檔案描述符緩衝.
-
無快取的反向代理加速,簡單的負載均衡和容錯.
-
FastCGI,簡單的負載均衡和容錯.
-
模組化的結構。包括 gzipping, byte ranges, chunked responses,以及 SSI-filter 等 filter。如果由 FastCGI 或其它代理伺服器處理單頁中存在的多個 SSI,則這項處理可以並行執行,而不需要相互等待。
-
支援 SSL 和 TLSSNI.
Nginx 的工作方式
Nginx 是以多程序的方式來工作的,當然 Nginx 也是支援多執行緒的方式的,只是我們主流的方式還是多程序的方式,也是 Nginx 的預設方式。
Nginx 在啟動後,會有一個 master 程序和多個 worker 程序。master 程序主要用來管理 worker 程序,包含:接收來自外界的訊號,向各 worker 程序傳送訊號,監控 worker 程序的執行狀態,當 worker 程序退出後(異常情況下),會自動重新啟動新的 worker 程序。而基本的網路事件,則是放在 worker 程序中來處理了。多個 worker 程序之間是對等的,他們同等競爭來自客戶端的請求,各程序互相之間是獨立的。一個請求,只可能在一個 worker 程序中處理,一個 worker 程序,不可能處理其它程序的請求。worker 程序的個數是可以設定的,一般我們會設定與機器cpu核數一致,這裡面的原因與 Nginx 的程序模型以及事件處理模型是分不開的。
Nginx 的程序模型
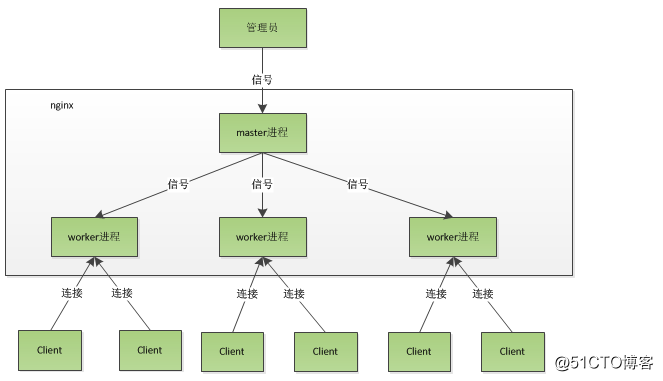
我們前面有提到,worker 程序之間是平等的,每個程序,處理請求的機會也是一樣的。當我們提供 80 埠的 http 服務時,一個連線請求過來,每個程序都有可能處理這個連線,怎麼做到的呢?首先,每個worker程序都是從master程序fork 過來,在 master 程序裡面,先建立好需要 listen 的 socket(listenfd)之後,然後再 fork 出多個 worker 程序。所有 worker 程序的 listenfd 會在新連線到來時變得可讀,為保證只有一個程序處理該連線,所有 worker 程序在註冊 listenfd 讀事件前搶 accept_mutex,搶到互斥鎖的那個程序註冊 listenfd 讀事件,在讀事件裡呼叫 accept 接受該連線。當一個 worker 程序在 accept 這個連線之後,就開始讀取請求,解析請求,處理請求,產生資料後,再返回給客戶端,最後才斷開連線,這樣一個完整的請求就是這樣的了。我們可以看到,一個 請求,完全由 worker 程序來處理,而且只在一個 worker 程序中處理。
為什麼 Nginx 採用非同步非阻塞的方式來處理呢
首先,請求過來,要建立連線,然後再接收資料,接收資料後,再發送資料。具體到系統底層,就是讀寫事件,而當讀寫事件沒有準備好時,必然不可操作,如果不 用非阻塞的方式來呼叫,那就得阻塞呼叫了,事件沒有準備好,那就只能等了,等事件準備好了,再繼續。阻塞呼叫會進入核心等待,cpu 就會讓出去給別人用了,對單執行緒的 worker 來說,顯然不合適,當網路事件越多時,大家都在等待呢,cpu 空閒下來沒人用,cpu利用率自然上不去了,更別談高併發了。
非阻塞就是,事件沒有準備好,馬上返回 EAGAIN,告訴你,事件還沒準備好呢,你過一會,再來檢查一下事件,直到事件準備好了為止,在這期間,你就可以先去做其它事情,然後再來看看事件好了沒。阻塞呼叫會進入核心等待,cpu 就會讓出去給別人用了,對單執行緒的 worker 來說,顯然不合適,當網路事件越多時,大家都在等待呢,cpu 空閒下來沒人用,cpu利用率自然上不去了,更別談高併發了。
優點
Nginx 可以在大多數 UnixLinux OS 上編譯執行,並有 Windows 移植版。 Nginx 的1.4.0穩定版已經於2013年4月24日釋出,一般情況下,對於新建站點,建議使用最新穩定版作為生產版本,已有站點的升級急迫性不高
Nginx 是一個很強大的高效能Web和反向代理伺服器,它具有很多非常優越的特性:
在連線高併發的情況下,Nginx是Apache伺服器不錯的替代品:Nginx在美國是做虛擬主機生意的老闆們經常選擇的軟體平臺之一。能夠支援高達 50,000 個併發連線數的響應,感謝Nginx為我們選擇了 epoll and kqueue作為開發模型。
二、準備
1、環境
系統平臺:Red Hat Enterprise Linux Server release 7.5
核心版本:3.10.0-514.el7.x86_64
2、安裝編譯工具和庫檔案
yum -y install make zlib zlib-devel gcc-c++ libtool openssl openssl-devel
3、安裝pcre
PCRE 作用是讓 Ngnix 支援 Rewrite 功能。
檢視是否安裝pcre
# pcre-config --version

上述表明已安裝。
若未安裝,參照以下步驟:
1)下載
地址:https://sourceforge.net/projects/pcre/files/pcre/
2)解壓安裝包:
# tar zxvf pcre-8.35.tar.gz
3)編譯安裝
# cd pcre-8.35
# ./configure
# make && make install
三、安裝
1、下載 nginx 安裝包
下載完成以後,放在windows桌面,直接拖進linux系統中
2、解壓
# tar zxvf nginx-1.6.2.tar.gz
首先,在解壓之前需要增加許可權 chmod +x nginx-1.6.2.tar.gz
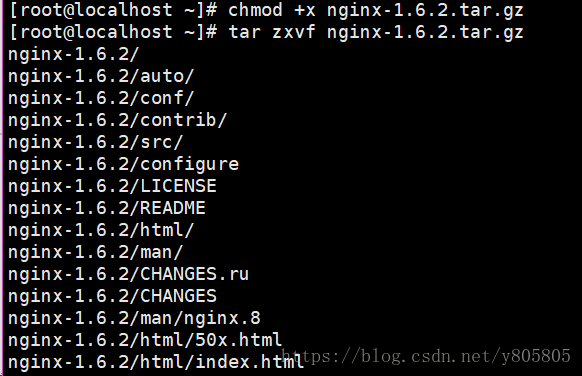
類似於這樣的包,篇幅有限,截圖不太多

3、編譯
./configure --prefix=/usr/local/nginx --with-http_ssl_module --with-http_stub_status_module

4、安裝
[[email protected] nginx-1.6.2]# make && make install

5、測試
檢視nginx版本
# /usr/local/nginx/sbin/nginx -v

顯示版本資訊,證明已安裝成功
1、建立使用者
建立 Nginx 執行使用的使用者 ruready:
# /usr/sbin/groupadd ruready
# /usr/sbin/useradd -g ruready ruready
2、配置nginx.conf
# vi /usr/local/nginx/conf/nginx.conf
user ruready ruready;
worker_processes 2;
error_log /usr/local/nginx/logs/error.log crit; # 日誌位置和日誌級別
pid /usr/local/nginx/logs/nginx.pid;
#Specifies the value for maximum file descriptors that can be opened by this process.
worker_rlimit_nofile 65535;
events {
use epoll;
worker_connections 65535;
}
http {
include mime.types;
default_type application/octet-stream;
log_format main '$remote_addr - $remote_user [$time_local] "$request" '
'$status $body_bytes_sent "$http_referer" '
'"$http_user_agent" "$http_x_forwarded_for"';
access_log /usr/local/nginx/logs/access.log main;
sendfile on;
tcp_nopush on;
keepalive_timeout 60;
gzip on;
gzip_min_length 1k;
gzip_buffers 4 16k;
gzip_http_version 1.0;
gzip_comp_level 2;
gzip_types text/plain application/x-javascript text/css application/xml;
gzip_vary on;
# 下面是server虛擬主機的配置
server {
listen 80;#監聽埠
server_name localhost;#域名
charset utf-8;
access_log /usr/local/nginx/logs/host.access.log main;
location / {
root html;
index index.html index.htm;
}
error_page 404 /404.html;
# redirect server error pages to the static page /50x.html
error_page 500 502 503 504 /50x.html;
location = /50x.html {
root html;
}
# proxy the PHP scripts to Apache listening on 127.0.0.1:80
#location ~ \.php$ {
# proxy_pass http://127.0.0.1;
#}
# pass the PHP scripts to FastCGI server listening on 127.0.0.1:9000
location ~ \.php$ {
root html;
fastcgi_pass 127.0.0.1:9000;
fastcgi_index index.php;
fastcgi_param SCRIPT_FILENAME /scripts$fastcgi_script_name;
include fastcgi_params;
}
# deny access to .htaccess files, if Apache's document root
# concurs with nginx's one
#
#location ~ /\.ht {
# deny all;
#}
}
# another virtual host using mix of IP-, name-, and port-based configuration
#
#server {
# listen 8000;
# listen somename:8080;
# server_name somename alias another.alias;
# location / {
# root html;
# index index.html index.htm;
# }
#}
# HTTPS server
#
#server {
# listen 443 ssl;
# server_name localhost;
# ssl_certificate cert.pem;
# ssl_certificate_key cert.key;
# ssl_session_cache shared:SSL:1m;
# ssl_session_timeout 5m;
# ssl_ciphers HIGH:!aNULL:!MD5;
# ssl_prefer_server_ciphers on;
# location / {
# root html;
# index index.html index.htm;
# }
#}
}
3、檢查配置檔案ngnix.conf的正確性
# /usr/local/nginx/sbin/nginx -t

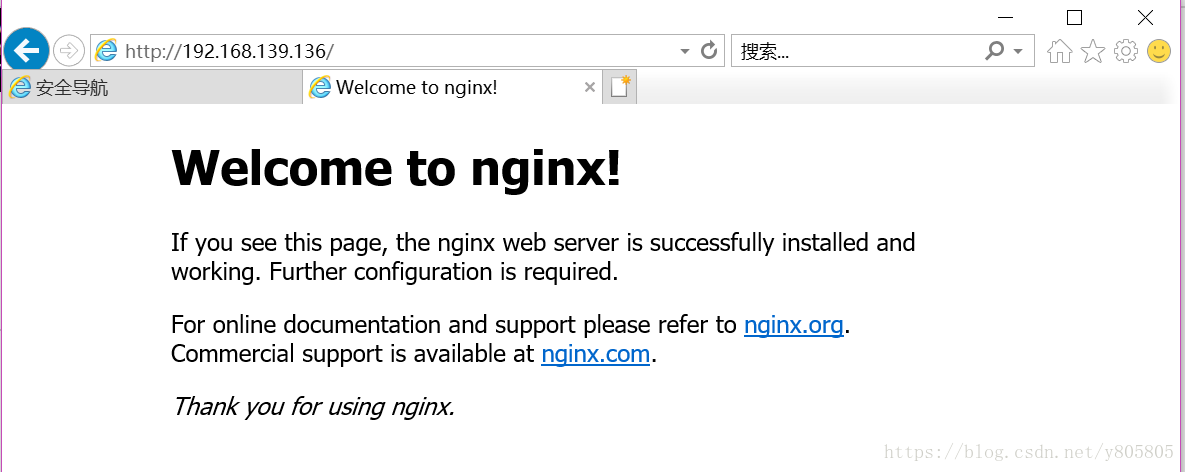
2、訪問測試