
gitlab介紹及使用
一、gitlab介紹
GitLab 是一個用於倉庫管理系統的開源專案,使用Git作為程式碼管理工具,並在此基礎上搭建起來的web服務。GitLab由烏克蘭程式設計師DmitriyZaporozhets和ValerySizov開發,它由Ruby寫成。後來,一些部分用Go語言重寫,現今並在國內外大中型網際網路公司廣泛使用。
git、gitlab、GitHub的簡單區別
git 是一種基於命令的版本控制系統,全命令操作,沒有視覺化介面
gitlab 是一個基於git實現的線上程式碼倉庫軟體,提供web視覺化管理介面,通常用於企業團隊內部協作開發
github 是一個基於git實現的線上程式碼託管倉庫,亦提供視覺化管理介面,同時免費賬戶和提供付費賬戶,提供開放和私有的倉庫,大部分的開源專案都選擇github作為程式碼託管倉庫
二、gitlab相關命令
gitlab-ctl start #啟動全部服務
gitlab-ctl restart#重啟全部服務
gitlab-ctl stop #停止全部服務
gitlab-ctl status #檢視服務狀態
gitlab-ctl reconfigure #使配置檔案生效
gitlab-ctl show-config #驗證配置檔案
gitlab-ctl uninstall #刪除gitlab(保留資料)
gitlab-ctl cleanse #刪除所有資料,從新開始
gitlab-ctl tail <service name>檢視服務的日誌
gitlab-ctl tail nginx  #如檢視gitlab下nginx日誌
gitlab-rails console  #進入控制檯
三、gitlab常用元件
nginx:靜態Web伺服器
gitlab-shell:用於處理Git命令和修改authorized keys列表,gitlab是以Git為底層的,操作實際上最後就是呼叫gitlab-shell命令進行處理。
gitlab-workhorse:輕量級的反向代理伺服器
logrotate:日誌檔案管理工具
postgresql:資料庫
redis:快取資料庫
sidekiq:用於在後臺執行佇列任務(非同步執行)
unicorn:GitLab Rails應用是託管在這個伺服器上面的
檢視服務狀態:gitlab-ctl status,可以看到gitlab的依賴元件

四、gitlab安裝目錄
以下是gitlab常用的預設安裝目錄
gitlab元件日誌路徑:/var/log/gitlab
gitlab配置路徑:/etc/gitlab/ 路徑下有gitlab.rb配置檔案
應用程式碼和元件依賴程式:/opt/gitlab
各個元件儲存路徑: /var/opt/gitlab/
倉庫預設儲存路徑 /var/opt/gitlab/git-data/repositories
版本檔案備份路徑:/var/opt/gitlab/backups/
五、配置GitLab中的SSH key
1、檢視是否已有SSH key
(1)桌面右鍵點選彈出,點選Git Bash進入命令列介面

(2)cat ~/.ssh/id_rsa.pub檢視SSH祕鑰是否存在,可以看到初次沒有生成過

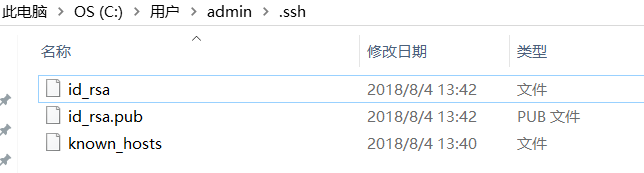
(3)生成過刪除,重新生成,找到C:\Users\admin\.ssh,admin是當前使用者名稱,刪除以下檔案
2、生成SSH 金鑰
ssh-keygen -t rsa -C "[email protected]"如下圖,一路回車即可生成,會在C:\Users\admin\.ssh下生成基於rsa的公鑰與私鑰對
3、 新增SSH key到gitlab
(1)檢視公鑰並複製
cat ~/.ssh/id_rsa.pub    #檢視公鑰,自己手動複製
cat ~/.ssh/id_rsa.pub | clip #或者直接複製到剪貼簿
(2)登入gitlab,最右邊下拉,點選“Settings”去User Setting頁面

(3)點選左邊的SSH Keys去新增

(4)把剛才複製的SSH Keys貼上進去,點選Add key,新增即可

(5)新增成功如下,點選remove可以移除

(6)ssh -T [email protected]"gitlab伺服器地址",測試是否配置成功,成功如下

六、備份與恢復
可參看https://docs.gitlab.com/omnibus/settings/backups.html#creating-an-application-backup
1、備份應用
預設備份路徑:/var/opt/gitlab/backups,備份格式:EPOCH_YYYY_MM_DD_GitLab_version_gitlab_backup.tar
如備份檔案:1542603058_2018_11_19_11.4-ce_gitlab_backup.tar
需要git使用者許可權
sudo chown git.git /var/opt/gitlab/backups/1542603058_2018_11_19_11.4-ce_gitlab_backup.tar如果自定義備份路徑,編輯/etc/gitlab/gitlab.rb,指定備份路徑,完後執行gitlab-ctl reconfigure重新載入配置
gitlab_rails['backup_path'] = '/mnt/backups' 備份路徑,自己指定
gitlab_rails['backup_keep_time'] = 604800  #每次備份保留時間,預設7天,可以省略
手動備份,生成 一次備份
sudo gitlab-rake gitlab:backup:create定時備份:cron -e新增定時,儲存,重啟定時服務/etc/init.d/crond restart
#週二到週六每天凌晨2點備份
0 0 2 ? * 2-6 gitlab-rake gitlab:backup:create
2、備份配置
gitlab配置預設在etc/gitlab,需要備份gitlab.rb和gitlab-secrets.json,為了方便,備份etc/gitlab資料夾即可
sudo crontab -e -u root 新增定時,儲存,重啟定時服務/etc/init.d/crond restart
#週二到週六每天凌晨2點備份,設定許可權0077,壓縮/etc/gitlab到/secret/gitlab/backups下,備份路徑自定義
0 0 2 ? * 2-6  umask 0077; tar cfz /secret/gitlab/backups/$(date "+etc-gitlab-\%s.tgz") -C / etc/gitlab
3、恢復
可參看https://docs.gitlab.com/ce/raketasks/backup_restore.html#restore-for-omnibus-installations
停止與連線 資料庫有關的程序
sudo gitlab-ctl stop unicorn
sudo gitlab-ctl stop sidekiq
# Verify是否停止
sudo gitlab-ctl status
backup後邊指定恢復的時間戳、版本
# This command will overwrite the contents of your GitLab database!
sudo gitlab-rake gitlab:backup:restore BACKUP=1542603058_2018_11_19_11.4-ce
如果有必要恢復配置,gitlab.rb和gitlab-secrets.json,把備份的tar包恢復到/etc/gitlab路徑下即可
重啟並檢查服務
sudo gitlab-ctl restart  #重啟服務
sudo gitlab-rake gitlab:check SANITIZE=true #檢查恢復情況
七、gitlab-ci可持續整合
1、gitlab-ci簡述
gitlab-ci全稱gitlab continuous integration,就是可持續整合的意思。從gitlab8.0版本開始,GitLab-ci完全整合到GitLab本身中,並且預設情況下在所有專案上都啟用,不用可以禁用掉(禁用見2共享runner中)。
若將gitlab-ci.yml檔案新增到倉庫的根目錄,並將專案配置gitlab Runner使用,則每次commit或push都會觸發CI pipeline。gitlab-ci.yml檔案告訴GitLab runner怎麼做。預設情況下,它執行一個pipeline ,有三個stage:
build,test,deploy。沒必要三stage都使用,沒有用到的stage可以被忽略。
2、GitLab-Runner型別介紹
詳情可參考https://docs.gitlab.com.cn/ee/ci/runners/README.html
runner有三種類型:Shared, specific and group Runners
(1)共享runner:Shared runner適用於多個相似專案,其思想是:與其為每個專案分配一個特定runner,大部分時候這些runner事空閒的,即每個專案的runner一般不會同同時工作,不如讓單個或少數Shared runner處理多個專案。shared runner使用公平佇列處理作業,與使用FIFO的特定runner相比,可以防止專案建立數百個作業,佔用所有可用shared runner的資源。
從GitLab 8.2開始,預設啟用shared runners,無需手動開啟,但是也可以在每個gitlab專案下的Settings ➔ CI/CD頁面,通過“Disable shared Runners”按鈕禁用。擁有管理員許可權的使用者可以註冊且只能註冊一個shared runner例項。

(2)特定runner:specific runner適用於特定要求的作業或者有特殊需求的專案。如果一個作業具有某些特定要求,您可以在中心設定特定的Runner,而不是所有Runner都如此。例如,如果你要部署某個特定專案,可以去Settings ➔ CI/CD頁面獲得令牌(上圖中畫紅線處)為該專案設定一個specific runner。specific runner使用FIFO佇列處理作業。
(3)組runner:group Runners適用於一組中有多個專案並且希望組內所有專案都訪問一組Runner的情況。group Runners使用FIFO佇列處理作業。可以去Settings ➔ CI/CD頁面,點選Group CI/CD setting(即上圖中右下角藍字),進入下頁,獲取token

3、安裝GitLab-Runner
詳情可參考https://docs.gitlab.com/runner/install/
方式一
1、新增GitLab官方yum源
# For RHEL/CentOS/Fedora
 curl -L https://packages.gitlab.com/install/repositories/runner/gitlab-runner/script.rpm.sh | sudo bash
2、安裝最新版本runner
 # For RHEL/CentOS/Fedora,yum預設安裝最新版本
 sudo yum install gitlab-runner
或者
# for RPM based systems #RPM安裝指定版本,列出所有包含重複的版本,降序顯示
 yum list gitlab-runner --showduplicates | sort -r
#如安裝10.0.0-1
sudo yum install gitlab-runner-10.0.0-1
方式二
(1)下載
sudo wget -O /usr/local/bin/gitlab-runner https://gitlab-runner-downloads.s3.amazonaws.com/latest/binaries/gitlab-runner-linux-amd64(2)新增可執行許可權
sudo chmod +x /usr/local/bin/gitlab-runner(3)建立GitLab CI 使用者
sudo useradd --comment 'GitLab Runner' --create-home gitlab-runner --shell /bin/bash(4)安裝gitlab-runner服務
 #安裝到/home/gitlab-runner下
 sudo gitlab-runner install --user=gitlab-runner --working-directory=/home/gitlab-runner
4、runner註冊到CI
詳情可參考https://docs.gitlab.com/runner/register/index.html
-
runner註冊命令:
sudo gitlab-runner register -
鍵入GitLab的URL:
Please enter the gitlab-ci coordinator URL (e.g. https://gitlab.com ) https://192.168.1.74:8080 #gitlab地址 -
鍵入Runner註冊的token:
Please enter the gitlab-ci token for this runner xxx #進入runner的token憑證 -
鍵入Runner的描述, 之後也可以GitLab’s 視覺化介面中更改
Please enter the gitlab-ci description for this runner [hostame] my-runner #runner的描述 -
鍵入Runner的標籤, 之後也可以GitLab’s 視覺化介面中更改
Please enter the gitlab-ci tags for this runner (comma separated): my-tag #runner標籤,相當於名字,用於指定哪個runner執行作業 -
鍵入執行Runner executor的方式
 Please enter the executor: ssh, docker+machine, docker-ssh+machine, kubernetes, docker, parallels, virtualbox, docker-ssh, shell:
 shell   #選擇執行runner的executor方式,這裡沒有使用docker等其他的,選shell
5、配置gitlab-ci.yml
詳情可以參考https://docs.gitlab.com.cn/ee/ci/yaml/README.html
從從GitLab7.12版本,GitLab CI使用YAML檔案(.gitlab-ci.yml專案配置),它放在倉庫的根目錄,定義如何構建專案
Pipeline:一次 Pipeline 其實相當於一次構建任務,裡面可以包含多個流程,如安裝依賴、執行測試、編譯、部署測試伺服器、部署生產伺服器等流程
jobs:Jobs 表示構建工作,表示某個 Stage 裡面執行的工作。我們可以在 Stages 裡面定義多個 Jobs,這些 Jobs 會有以下特點:相同 Stage 中的 Jobs 會並行執行,相同 Stage 中的 Jobs 都執行成功時,該 Stage 才會成功;如果任何一個 Job 失敗,那麼該 Stage 失敗,即該構建任務 (Pipeline) 失敗
Stages:Stages表示構建階段,說白了就是上面提到的流程。我們可以在一次 Pipeline 中定義多個 Stages,這些 Stages 會有以下特點:所有 Stages 會按照順序執行,即當一個 Stage 完成後,下一個 Stage 才會開始;只有當所有 Stages 完成後,該構建任務 (Pipeline) 才會成功;如果任何一個 Stage 失敗,那麼後面的 Stages 不會執行,該構建任務 (Pipeline) 失敗
# 定義 stages, stages 關鍵字來定義 Pipeline 中的各個構建階段
stages:
  - build
  - test
  - deploy
# 定義 job,可多個
job 1:
  stage: build  #stage指定構建階段
  script: make build dependencies #script是每個job執行的任務

job 2:
  stage: build
  script: make build artifacts

job 3:
  stage: test
  script: make test

job 4:
  stage: deploy
  script: make deploy
新增gitlab-ci.yml
去專案根目錄下,點選 "Set up CI/CD"去配置gitlab-ci.yml

如下就可以配置了,配置完提交

6、啟動gitlab-runner
sudo gitlab-runner start #啟動gitlab-runner7、檢視pipeline工作狀態
去專案根路徑下,點選“CI/CD》Pipelines”檢視狀態

如下可以看到pipeline工作狀態

失敗後,找到問題後,也可以點選右邊的“Run Pipeline” 重新執行

參考:https://docs.gitlab.com.cn/ee/ssh/README.html
參考:https://docs.gitlab.com.cn/ee/ci/quick_start/README.html
參考:https://docs.gitlab.com.cn/ee/ci/README.html