spring-boot整合1:起步
阿新 • • 發佈:2018-11-20
Why spring-boot?

1.配置spring-boot依賴
<?xml version="1.0" encoding="UTF-8"?>
<project xmlns="http://maven.apache.org/POM/4.0.0"
         xmlns:xsi="http://www.w3.org/2001/XMLSchema-instance"
         xsi:schemaLocation="http://maven.apache.org/POM/4.0.0 http://maven.apache.org/xsd/maven-4.0.0.xsd">
    <modelVersion>4.0.0</modelVersion>

    <groupId>com.zhya</groupId>
    <artifactId>zhya-monocase-framework</artifactId>
    <version>1.0</version>

    <properties>
        <mapper.version>3.4.0</mapper.version>
        <maven.compile.source>1.8</maven.compile.source>
        <maven.compile.target>1.8</maven.compile.target>
    </properties>

    <!--parent中設定spring-boot版本號-->
    <parent>
        <groupId>org.springframework.boot</groupId>
        <artifactId>spring-boot-starter-parent</artifactId>
        <version>2.0.0.RELEASE</version>
        <relativePath/>
    </parent>

    <dependencies>
        <!--spring boot web 開啟web功能,啟動時將直接執行web容器-->
        <dependency>
            <groupId>org.springframework.boot</groupId>
            <artifactId>spring-boot-starter-web</artifactId>
        </dependency>
    </dependencies>
</project>
2.啟動類
package com.zhya;

import org.springframework.boot.SpringApplication;
import org.springframework.boot.autoconfigure.SpringBootApplication;

/**
 * 啟動類
 *
 * @Author zhangyang
 * @Date 下午 8:23 2018/11/20 0020
 **/
@SpringBootApplication
public class MonocaseFrameworkApplication {
    public static void main(String[] args) {
        SpringApplication.run(MonocaseFrameworkApplication.class, args);
        System.out.println("-------MonocaseFrameworkApplication started-------");
    }
}
3.配置檔案
application.yml
spring:
  application:
    name: monocase-framework # 應用名稱
  jackson:
    date-format: yyyy-MM-dd HH:mm:ss # 日期格式


server:
  port: 8090 # 埠
4.rest介面
package com.zhya.controller;

import com.zhya.entity.SysUser;
import org.springframework.web.bind.annotation.GetMapping;
import org.springframework.web.bind.annotation.PathVariable;
import org.springframework.web.bind.annotation.RequestMapping;
import org.springframework.web.bind.annotation.RestController;

import java.util.Date;

/**
 * 系統使用者controller
 *
 * @Author zhangyang
 * @Date 下午 8:31 2018/11/20 0020
 **/
@RestController
@RequestMapping("sysuser")
public class SysUserController {

    /**
     * 獲取單個系統使用者
     *
     * @Author zhangyang
     * @Date 下午 8:31 2018/11/20 0020
     **/
    @GetMapping("/{id}")
    public SysUser test(@PathVariable String id) {
        // FIXME for testing
        return new SysUser(id, "zhya", new Date(), new Date());
    }

}
5.執行&測試
啟動

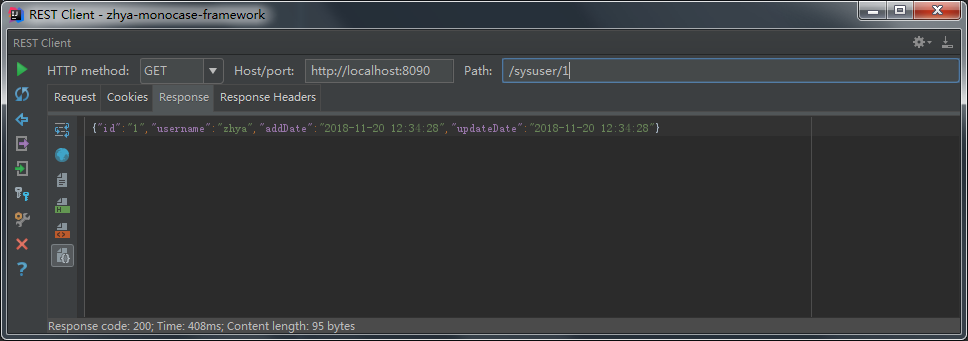
訪問介面

