
Spring進階篇
阿新 • • 發佈:2018-11-20
spring中如何配置c3p0連線池
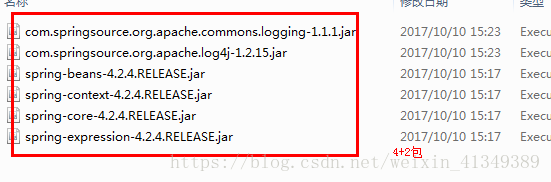
- 導包
4+2 包+c3p0包(spring的依賴包中)+資料庫驅動.jar
- 準備db.properties
jdbc.driverClass=com.mysql.jdbc.Driver
jdbc.jdbcUrl=jdbc:mysql:///crm
jdbc.user=root
jdbc.password=root
- spring配置中載入db.properties檔案資訊
<context:property-placeholder location="classpath:db.properties" />
- c3p0配置中引用讀取到的db.properties
使用${key}引用讀到的配置
<?xml version="1.0" encoding="UTF-8"?>
<beans xmlns:xsi="http://www.w3.org/2001/XMLSchema-instance" xmlns="http://www.springframework.org/schema/beans" xmlns:context="http://www.springframework.org/schema/context" xsi:schemaLocation="http://www.springframework.org/schema/beans http://www.springframework.org/schema/beans/spring-beans-4.2.xsd http://www.springframework.org/schema/context http://www.springframework.org/schema/context/spring-context-4.2.xsd ">

	   <!-- 讀取外部properties檔案
	   			1.引入Context約束
	   			2.使用property-placeholder元素完成properties檔案引入
	    -->
	    <context:property-placeholder location="classpath:db.properties" />
	   <!-- 使用${key}引用讀取到的properties -->
	   <bean name="dataSource" class="com.mchange.v2.c3p0.ComboPooledDataSource" >
	   		<property name="driverClass" value="${jdbc.driverClass}" ></property>
	   		<property name="jdbcUrl" value="${jdbc.jdbcUrl}" ></property>
	   		<property name="user" value="${jdbc.user}" ></property>
	   		<property name="password" value="${jdbc.password}" ></property>
	   </bean>
	   <!-- 引入其他xml配置 -->
	   <import resource="cn/itcast/c_annotation/annotation.xml"/>
</beans>
Spel表示式如何使用
介紹:SPEL Spring Expression Language 的縮寫. spring表示式語言.
可以在spring配置中使用.用於方便的引用其他Bean的屬性

spring中註冊Bean註解
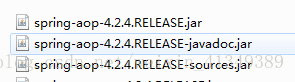
- 匯入所依賴的包
4+2包+spring-aop包
- 開啟註解註冊Bean開關
<context:component-scan base-package="cn.itcast"></context:component-scan>
- 基本註解
類名上
@component 把該類註冊成bean,
@Controller 用於標識web層,
@Service 用於標識service層,
@Repository 用於標識dao層,
4個註解都是一樣的功能,用於表示不同的層
@scope(“值”):singleton單例(預設),prototype多例,action配置時必須是多例的
方法上
@PostConstruct 初始化方法
@PreDestroy銷燬方法
- 注入註解
註解沒有集合陣列型別注入
值型別注入
屬性上@value(“值”),通過反射直接對成員變數賦值(不走set方法)
set方法上@value(“值”),呼叫set方法賦值
物件型別注入,也可以加在set方法上,與值型別注入區別相同
物件屬性上@Autowired,自動裝配->自動從容器查詢相同型別的物件,並注入到屬性中。注意:如果找到多個型別匹配的物件將丟擲異常
@Autowired @Qualifier(“car2”),多個型別相同的物件時,可以通過@Qualifier具體指定注入哪一個
@Resource(name=“car1”) 指定匹配物件
在xml中引入其他xml配置

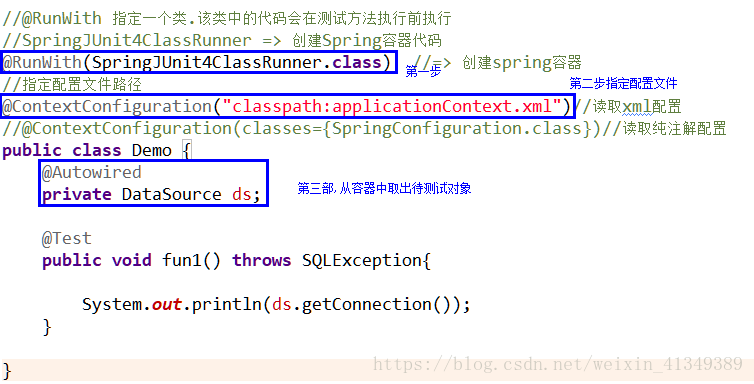
spring整合junit測試
4+2包+spring-aop包+spring-text包+junit4包
spring完全使用註解開發,目前比較火的springboot底層的一些自動配置機制,如果你去翻程式碼的話,還是依賴於這樣spring原註解。
概述:自建一個類作為配置檔案,相當於applicationContext,類中使用註解完成配置檔案的配置。
@Configuration 標誌該類是spring中的xml配置檔案
@ComponentScan("cn.itcast") 開啟bean註解開關
@Import({類.class,類.class}) 引入其他配置檔案,可以引入多個

@PropertySource
1.在類上註解,要載入的檔案@PropertySource("classpath:db.properties")
2.配合第一步,將properties檔案讀取

@Bean
	public static PropertySourcesPlaceholderConfigurer getPropertySourcesPlaceholderConfigurer() {
		return new PropertySourcesPlaceholderConfigurer();
	}

	3.宣告對應屬性,使用@value("${jdbc.driverClass}")註解為宣告的屬性注入值
	@Value("${jdbc.driverClass}")
	private String driverClass;
	@Value("${jdbc.jdbcUrl}")
	private String jdbcUrl;
	@Value("${jdbc.user}")
	private String user;
	@Value("${jdbc.password}")
	private String password;


	@Bean(name="dataSource")
	將註解所在的方法返回值交給容器管理,該物件再容器中的bean的name為dataSource