
元件基礎——Vue.js
1. 基本例項
    <div id="components-demo">
        <button-counter></button-counter>
    </div>
    <script>
        Vue.component('button-counter', {
            data: function () {
                return {
                    count: 0
                }
            },
            template: '<button v-on:click="count++">You clicked me {{ count }} times.</button>'
        })
        new Vue({ el: '#components-demo' })
    </script>
程式碼結構:Vue.component建立一個名為“button-counter”的元件,元件內必有函式data(函式內return一個物件),template元件結構;在使用的時候,建立的元件名就是該元件標籤;元件是全域性建立的,跟new Vue沒有關係;
因為元件是可複用的 Vue 例項,所以它們與 new Vue 接收相同的選項,例如 data、computed、watch、methods 以及生命週期鉤子等。僅有的例外是像 el這樣根例項特有的選項
2. 元件的複用
    <div id="components-demo">
        <button-counter></button-counter>
        <button-counter></button-counter>
        <button-counter></button-counter>
    </div>
    <script>
        Vue.component('button-counter', {
            data: function () {
                return {
                    count: 0
                }
            },
            template: '<button v-on:click="count++">You clicked me {{ count }} times.</button>'
        })
        new Vue({ el: '#components-demo' })
    </script>
![]()
注意當點選按鈕時,每個元件都會各自獨立維護它的 count。因為你每用一次元件,就會有一個它的新例項被建立。
(2)data值必須是一個函式
一個元件的 data 選項必須是一個函式,因此每個例項可以維護一份被返回物件的獨立的拷貝
data: function () {
  return {
    count: 0
  }
}
如果 Vue 沒有這條規則,被建立的例項都指向一個地址,之間會相互影響,Vue會報錯提示The "data" option should be a function
3. 元件的組織
通常一個應用會以一棵巢狀的元件樹

例如,你可能會有頁頭、側邊欄、內容區等元件,每個元件又包含了其它的像導航連結、博文之類的元件。
這裡有兩種元件的註冊型別:全域性註冊和區域性註冊。至此,我們的元件都只是通過 Vue.component 全域性註冊的:
全域性註冊的元件:可以用在該元件被註冊之後的任何 (通過 new Vue) 新建立的 Vue 根例項,也包括該元件樹中的所有子元件的模板中
4. 通過prop向子元件傳遞資料
一個元件預設可以擁有任意數量的 prop,任何值都可以傳遞給任何 prop;
用一個 props存放該元件的所有prop;
訪問prop中的值,就像訪問data中的資料一樣;
傳遞資料就像自定義特性一樣,傳遞進去,下面程式碼中元件<blog-post>中的title屬性就是自定義的,而該屬性的值就是要傳遞進去的值;
    <div id="components-demo">
        <blog-post title="My journey with Vue"></blog-post>
        <blog-post title="Blogging with Vue"></blog-post>
        <blog-post title="Why Vue is so fun"></blog-post>
    </div>
    <script>
        Vue.component('blog-post', {
            props: ['title'],
            template: '<h3>{{ title }}</h3>'
        })
        new Vue({ el: '#components-demo' })
    </script>
結果:
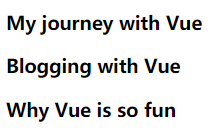
程式碼結構:元件中props存放所有的prop,該例子中只有一個prop即title;
template是元件的結構,可以使用title屬性;
元件標籤blog-post中,title是屬性的值,將傳入的元件中,進行渲染顯示
(2)用 v-bind 來動態傳遞 prop
    <div id="components-demo">
        <blog-post v-for="post in posts" v-bind:key="post.id" v-bind:title="post.title" v-bind:id="post.id"></blog-post>
    </div>
    <script>
        Vue.component('blog-post', {
            props: ['title', 'id'],
            template: '<h3>{{id}}、{{ title }}</h3>'
        })
        new Vue({
            el: '#components-demo',
            data: {
                posts: [
                    { id: 1, title: 'My journey with Vue' },
                    { id: 2, title: 'Blogging with Vue' },
                    { id: 3, title: 'Why Vue is so fun' }
                ]
            }
        })
    </script>
程式碼結構:元件標籤中用了v-for迴圈,用了item in items語法,迴圈的值來自data的posts,v-bind綁定了key,key是保留屬性,key的值是post.id是用來區別key的,讓key唯一;title和id是繫結值,要傳遞的值。
在Vue.component中props內有兩個prop,即title和id,在template中可以使用這個兩個值,前提是這兩個要傳遞進來。
在Vue物件中,data中有posts陣列,包含了三個物件。
結果:

5. 單個根元素
元件的功能越來越多,要新增的prop也越來越多,這樣元件就越來越複雜,是時候重構一下這個 <blog-post> 元件了,讓它變成接受一個單獨的 post的prop
    <div id="components-demo">
        <blog-post v-for="post in posts" v-bind:key="post.title" v-bind:post="post"></blog-post>
    </div>
    <script>
        Vue.component('blog-post', {
            props: ['post'],
            template: `
              <div class="blog-post">
                <h3>{{ post.title }}</h3>
                <div v-html="post.content"></div>
              </div>
            `
        })
        new Vue({
            el: '#components-demo',
            data: {
                posts: [
                    { title: 1, content: 'My journey with Vue' },
                    { title: 2, content: 'Blogging with Vue' },
                    { title: 3, content: 'Why Vue is so fun' }
                ]
            }
        })
    </script>
程式碼結構:元件標籤使用v-for迴圈遍歷了data中的posts的每一項,將每一項即post傳遞給元件,所以元件標籤中v-bind:post將post物件{title:,content:}傳遞給了元件中;元件結構中的使用post.title 和post.content就可以顯示。
這樣,不論何時為 post 物件新增一個新的屬性,它都會自動地在 <blog-post> 內可用。
結果:

注意:這裡用到了根標籤v-html,應該是div標籤的html結構,此處的div的html只有內容post.content
注意:示例中使用了 JavaScript 的模板字串來讓多行的模板更易讀。在 IE 下並沒有被支援,所以在經過 Babel 或 TypeScript 之類的工具)編譯的情況下,請使用折行轉義字元取而代之。
6. 通過事件向父級元件傳送訊息(系統內建方法:$emit)
下面的程式碼並沒有通過事件給父級元件傳送訊息,需要注意的是:“通過事件”是指元件結構中的標籤(比如例項中:div class,h3,button,div v-html)在他們身上繫結事件,“向父級元件”:父級元件是元件標籤中<blog-post>監聽繫結的事件
    <div id="blog-posts-events-demo">
        <div :style="{ fontSize: postFontSize + 'em' }">
            <blog-post v-for="post in posts" v-bind:key="post.id" v-bind:post="post"></blog-post>
        </div>
    </div>
    <script>
        Vue.component('blog-post', {
            props: ['post'],
            template: `
          <div class="blog-post">
            <h3>{{ post.title }}</h3>
            <button>
              Enlarge text
            </button>
            <div v-html="post.content"></div>
          </div>
        `
        })
        new Vue({
            el: '#blog-posts-events-demo',
            data: {
                posts: [{title:"今日頭條",content:"啦啦啦啦"}],
                postFontSize: 1
            }
        })
    </script>
點選按鈕使文字變大:
    <div id="blog-posts-events-demo">
        <div :style="{ fontSize: postFontSize + 'em' }">
            <blog-post v-for="post in posts" v-bind:key="post.id" v-bind:post="post" v-on:enlarge-text="postFontSize += 0.1"></blog-post>
        </div>
    </div>
    <script>
        Vue.component('blog-post', {
            props: ['post'],
            template: `
          <div class="blog-post">
            <h3>{{ post.title }}</h3>
            <button v-on:click="$emit('enlarge-text')">
              Enlarge text
            </button>
            <div v-html="post.content"></div>
          </div>
        `
        })
        new Vue({
            el: '#blog-posts-events-demo',
            data: {
                posts: [{title:"今日頭條",content:"啦啦啦啦"}],
                postFontSize: 1
            }
        })
</script程式碼結構:元件標籤的子級button中監聽了click事件,系統內建方法$emit將enlarge-text事件和click事件繫結在一起,enlarge-text事件是自定義事件;元件標籤blog-post(對於button來說就是父級元件)中監聽enlarge-text事件,enlarge-text事件對應一個函式
結果:當點選button按鈕時,就相當於觸發了父級元件上的方法,而該方法正是讓元件文字變大的。

注意:呼叫方法改變的變數,作用在div的style上。
(2)使用事件丟擲一個值
$emit(事件名字,值):$emit的第二個引數可以是一個值,我們需要用$event接收這個值
比如:元件中的button標籤中:
<button v-on:click="$emit('enlarge-text', 0.1)">
  Enlarge text
</button>
元件標籤<blog-post>中:$event = 0.1
<blog-post
  ...
  v-on:enlarge-text="postFontSize += $event"
></blog-post>
上述是內聯的方式寫的方法,如果是在methods中寫方法,在元件標準blog-post中寫方法名,那麼這個值0.1,應該作為方法的第一個引數傳入進來:
<blog-post
  ...
  v-on:enlarge-text="onEnlargeText" 此處是一個方法名
></blog-post>

methods: {
  onEnlargeText: function (enlargeAmount) { //enlargeAmount就是0.1的形參
    this.postFontSize += enlargeAmount
  }
}
(3)在元件上使用v-model
自定義事件也可以用於建立支援 v-model 的自定義輸入元件
注意:
<input v-model="searchText"> 等價於 ===
<input v-bind:value="searchText" v-on:input="searchText = $event.target.value">當用在元件上時,v-model 則會這樣:
<custom-input
  v-bind:value="searchText"
  v-on:input="searchText = $event"
></custom-input>
元件上使用v-model,用input舉例:必須滿足
- 將其
value特性繫結到一個名叫value的 prop 上 - 在其
input事件被觸發時,將新的值通過自定義的input事件丟擲
正確程式碼:
    <div id="blog-posts-events-demo">
        <custom-input v-model="searchText"></custom-input>
        <span>{{searchText}}</span>
    </div>
    <script>
        Vue.component('custom-input', {
            props: ['value'],
            template: `
              <input
                v-bind:value="value"
                v-on:input="$emit('input', $event.target.value)"
              >
            `
          })
        new Vue({
            el: '#blog-posts-events-demo',
            data: {
                searchText: ''
            },

        })
    </script>
結果:
![]()
程式碼結構分析:template內必須只有input標籤,不然會報錯;在vue中接收input的value值,而不是在元件中接收,span標籤就是接收input的value值的;
2018.11.7對v-model深度理解:

v-model接收data資料中的textcontent屬性值,再將該值傳遞給元件時,可以用任意變數接收,即上圖兩個紅色框。
template內的結構要唯一
7. 通過插槽分發內容:<slot>元素
     元件的樣式
     <style>
        .demo-alert-box{
            height: 40px;
            background-color: red;
            line-height: 40px;
            padding: 10px;
        }
    </style>

    <div id="demo">
        <alert-box>
            Something bad happened.
        </alert-box>
    </div>
    <script>
        Vue.component('alert-box', {
            template: `
              <div class="demo-alert-box">
                <strong>Error!</strong>
                <slot></slot>
              </div>
            `
        })
        new Vue({
            el: '#demo',
        })
    </script>
結果:

8. 動態元件
        .tab-button {
            padding: 6px 10px;
            border-top-left-radius: 3px;
            border-top-right-radius: 3px;
            border: 1px solid #ccc;
            cursor: pointer;
            background: #f0f0f0;
            margin-bottom: -1px;
            margin-right: -1px;
        }

        .tab-button:hover {
            background: #e0e0e0;
        }

        .tab-button.active {
            background: #e0e0e0;
        }

        .tab {
            border: 1px solid #ccc;
            padding: 10px;
        }
<div id="demo" class="demo">
<button v-for="tab in tabs" v-bind:key="tab" v-bind:class="['tab-button', { active: currentTab === tab }]"
v-on:click="currentTab = tab">{{ tab }}</button>
<component v-bind:is="currentTabComponent" class="tab"></component>
</div>
<script>
Vue.component('tab-home', {
template: '<div>Home component</div>'
})
Vue.component('tab-posts', {
template: '<div>Posts component</div>'
})
Vue.component('tab-archive', {
template: '<div>Archive component</div>'
})
new Vue({
el: '#demo',
data: {
currentTab: 'Home',
tabs: ['Home', 'Posts', 'Archive']
},
computed: {
currentTabComponent: function () {
return 'tab-' + this.currentTab.toLowerCase()
}
}
})
</script>
重點是component上的is屬性,is對應是元件的名字,即component上的is是某個元件名,就會載入該元件,此處的is繫結一個方法,該方法返回值與currentTab屬性有關,當然返回值也應該是元件名字;而currentTab屬性值由button標籤click事件決定,v-for迴圈給每個button標籤都繫結click事件,只有當點選某個button的時候,觸發click事件,currentTab會被最新的tab值替代。
這樣就實現了button按鈕點選而改變currentTab值,從而改變component的is值。
深度理解:
當然,也可以用內聯方式,is = currentTab (其實就是:currentTab ++這樣的情況)
需要注意的是這種切換思想
    <div id="demo" class="demo">
        <button v-for="tab in tabs" v-bind:key="tab" v-bind:class="['tab-button',
         { active: currentTab === tab }]" v-on:click="currentTab = tab">{{ tab }}</button>
        <component v-bind:is="currentTab" class="tab"></component>
    </div>
    <script>
        Vue.component('tab-home', {
            template: '<div>Home component</div>'
        })
        Vue.component('tab-posts', {
            template: '<div>Posts component</div>'
        })
        Vue.component('tab-archive', {
            template: '<div>Archive component</div>'
        })

        new Vue({
            el: '#demo',
            data: {
                currentTab: 'tab-home',
                tabs: ['tab-home', 'tab-posts', 'tab-archive']
            }
        })
    </script>
(2)is屬性其他用法(解析dom模板)
有些 HTML 元素,諸如 <ul>、<ol>、<table> 和 <select>,對於哪些元素可以出現在其內部是有嚴格限制的。而有些元素,諸如 <li>、<tr> 和 <option>,只能出現在其它某些特定的元素內部。
如果將元件直接寫在上述標籤內部,將無法渲染:
<table>
  <blog-post-row></blog-post-row>
</table>
正確的做法:is屬性引入元件
<table>
  <tr is="blog-post-row"></tr>
</table>
例子:寫一個表格
    <div id="app">
        <table>
            <tbody>
                <tr is="tab1"></tr>
                <tr is="tab2"></tr>
            </tbody>
        </table>
    </div>
    <script>
        Vue.component('tab1',{
            template: `<tr>
                    <td>name</td>
                    <td>age</td>
                    <td>dream</td>
                </tr>
            `
        })
        Vue.component('tab2', {
            template: `<tr>
                    <td>yuzhu</td>
                    <td>22</td>
                    <td>senior engineer</td>
                </tr>`
        })
        var vm = new Vue({
            el: '#app',
        })
    </script>
結果:

注意標籤結構:

怎麼不是表格的形式了???